Feature Purpose:
Allowing event organizers to add and customize the header section of the website.
Working with this Feature:
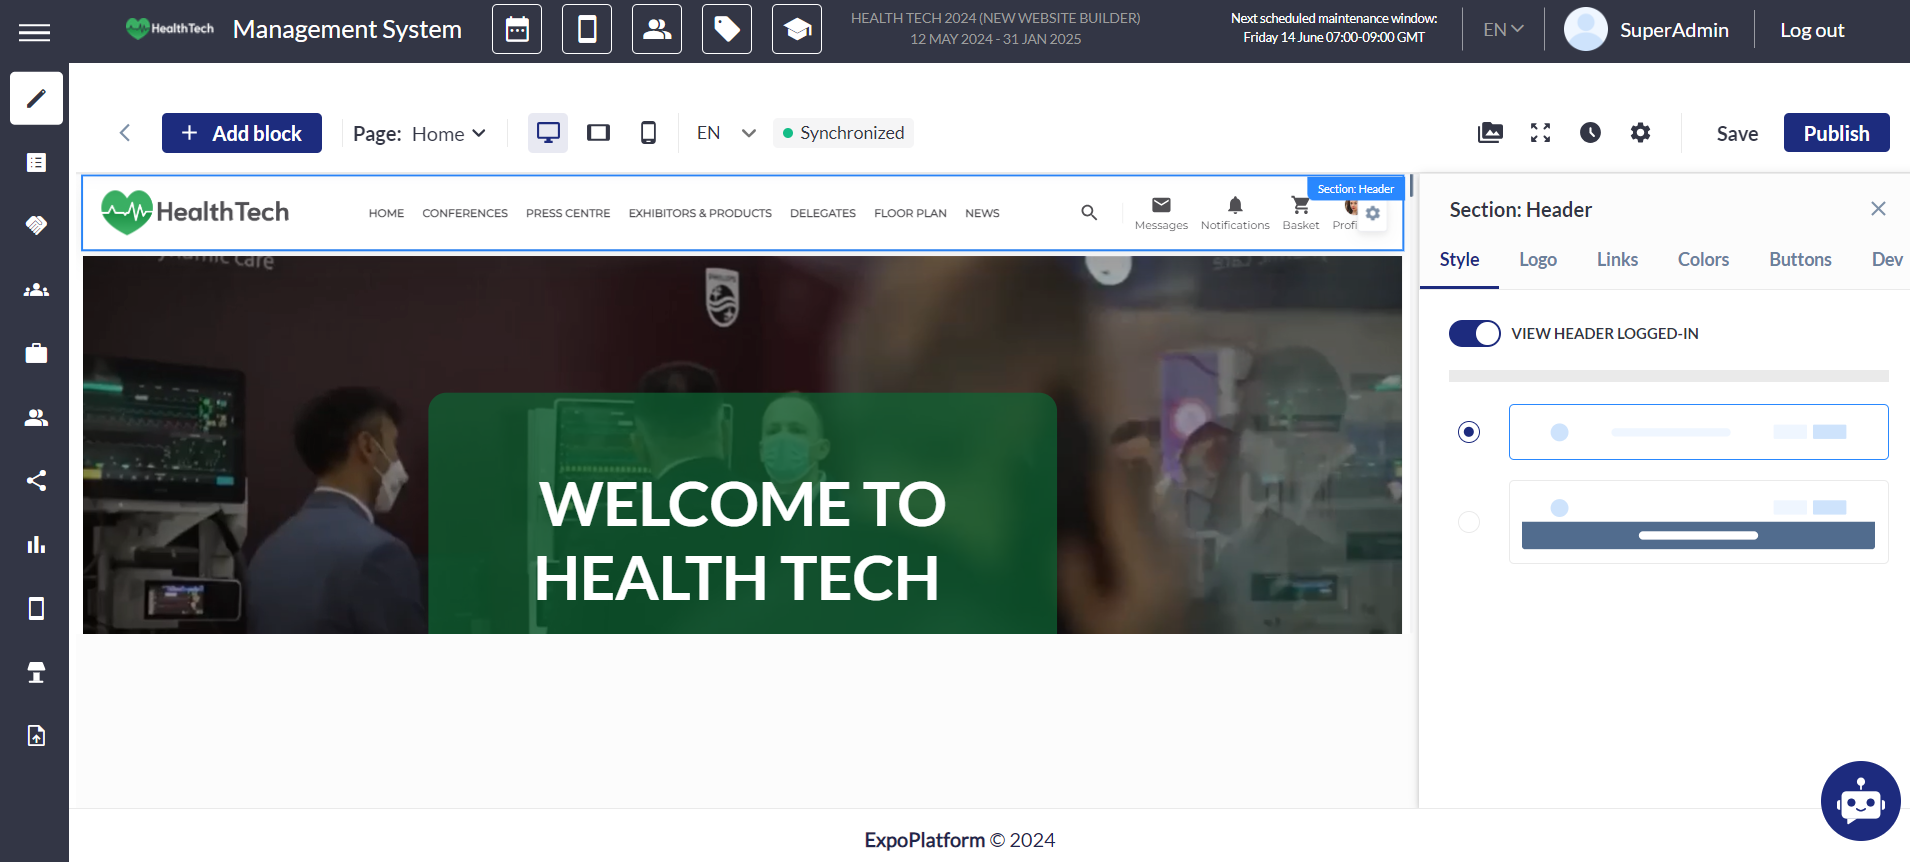
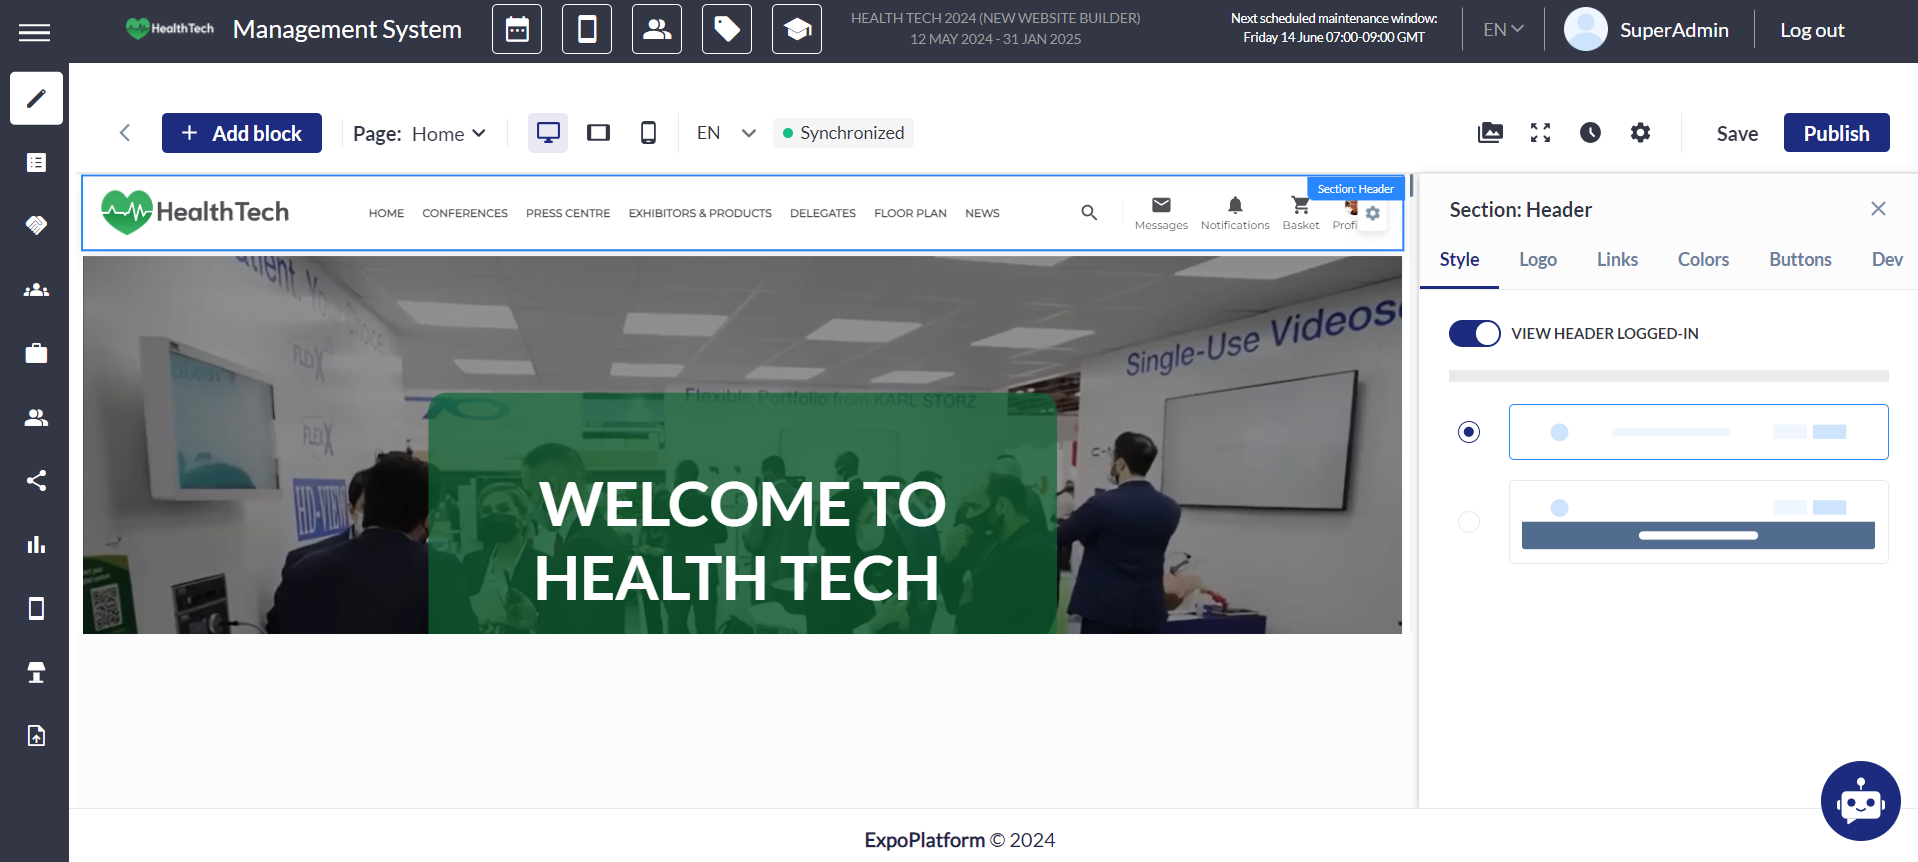
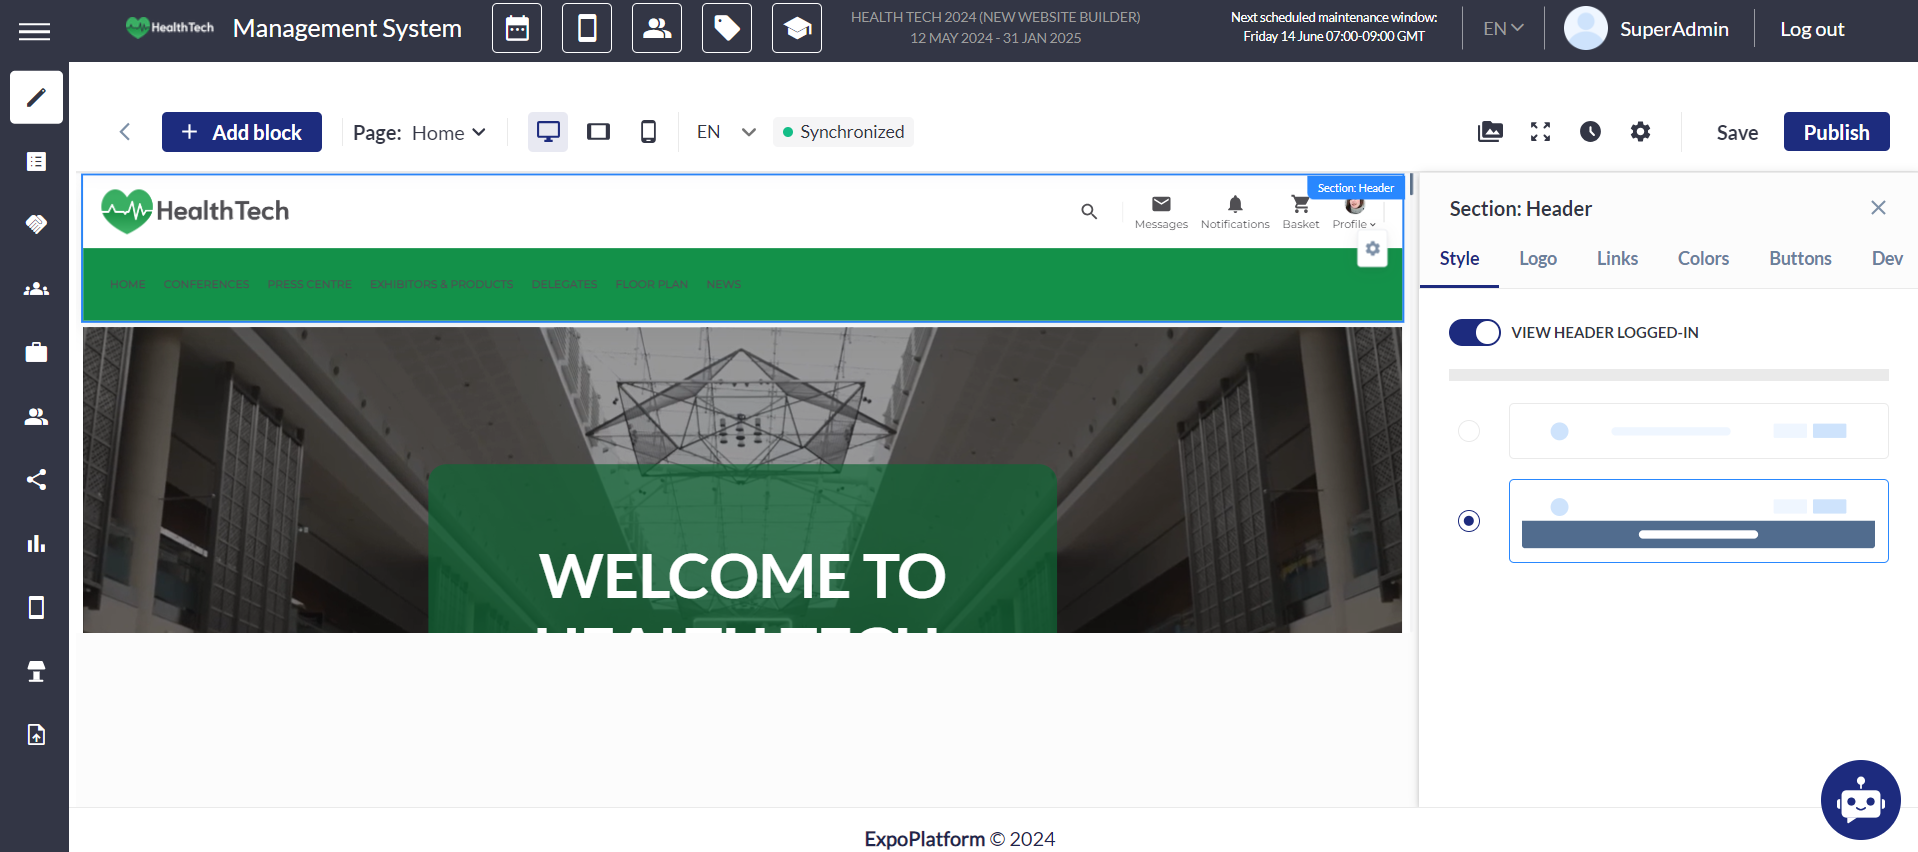
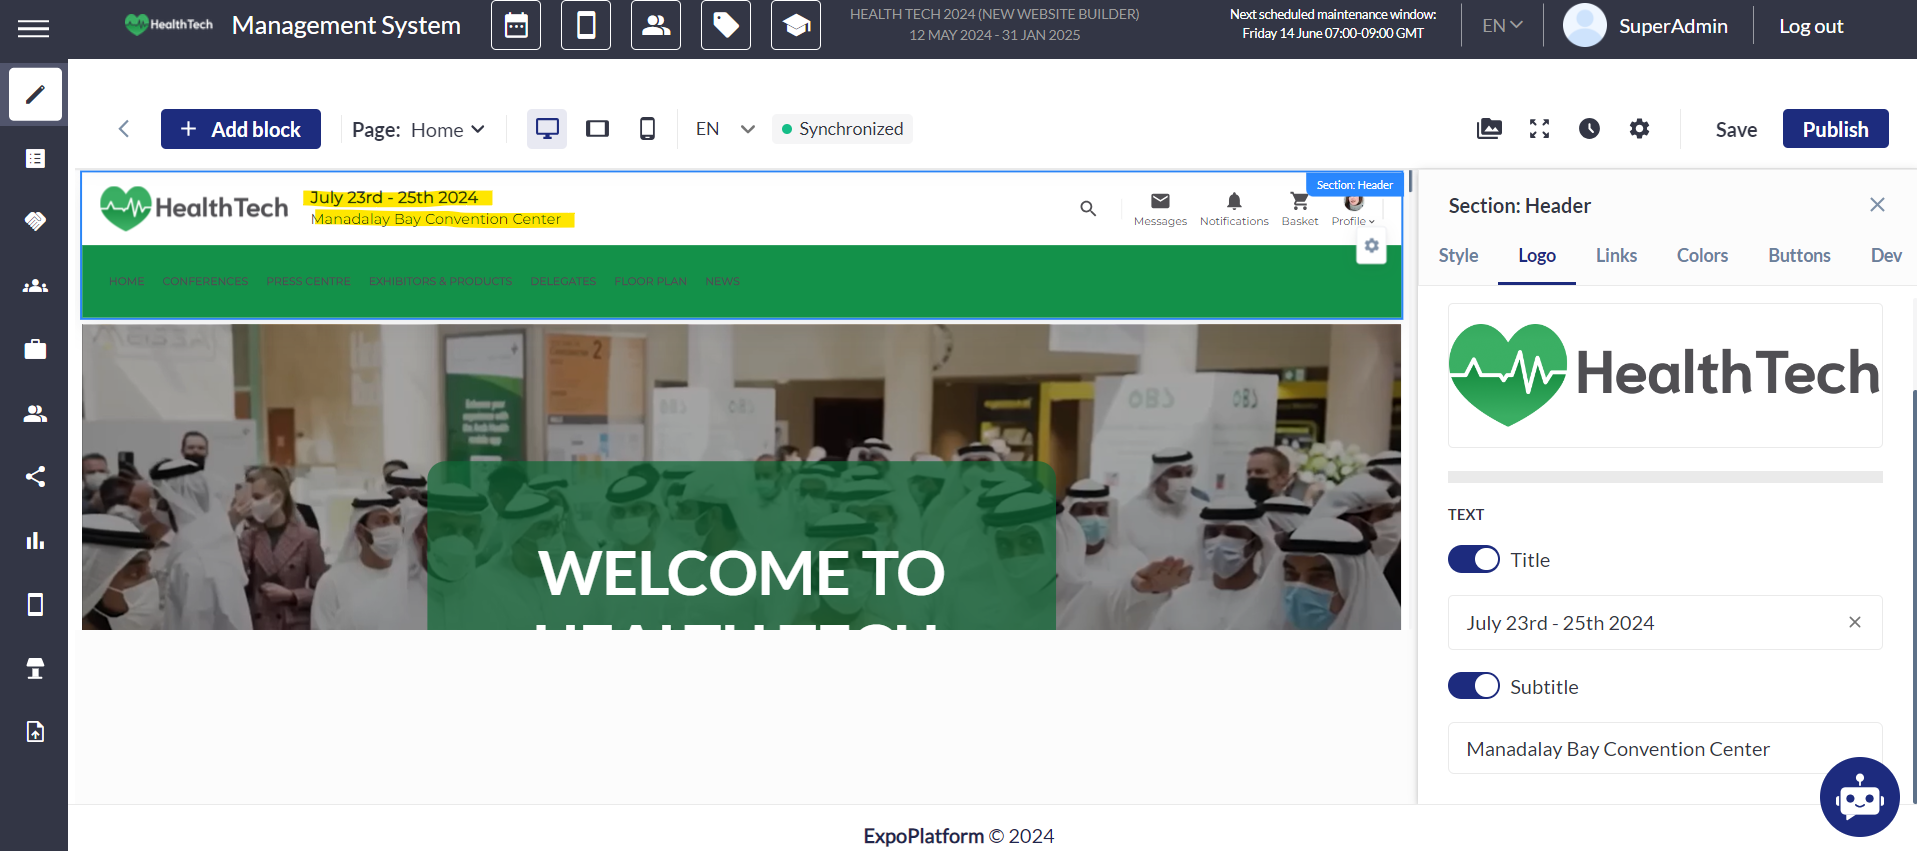
Our website builder's Header feature empowers event planners to tailor the header section of their site. Upon clicking anywhere within the header block, a settings button materializes. Upon selecting this button, all header settings manifest in a sidebar on the right. As the header customization sidebar emerges, the website screen undergoes proportional scaling. The screenshot below shows the header section and its settings:
The Header settings have the following options:
Style
Currently, there are two styles available: single-line and double-line. Additional styles will be introduced in the future.
Single-line style:
-
Navigation links that are added to the nav bar such as Home or Exhibitor list are on the same line as system navigation buttons like Sign In (pre-login) and Messages (post-login)
Double-line style:
-
Navigation links that are added to the nav bar such as Home or Exhibitor list are on their own line, further down on the page
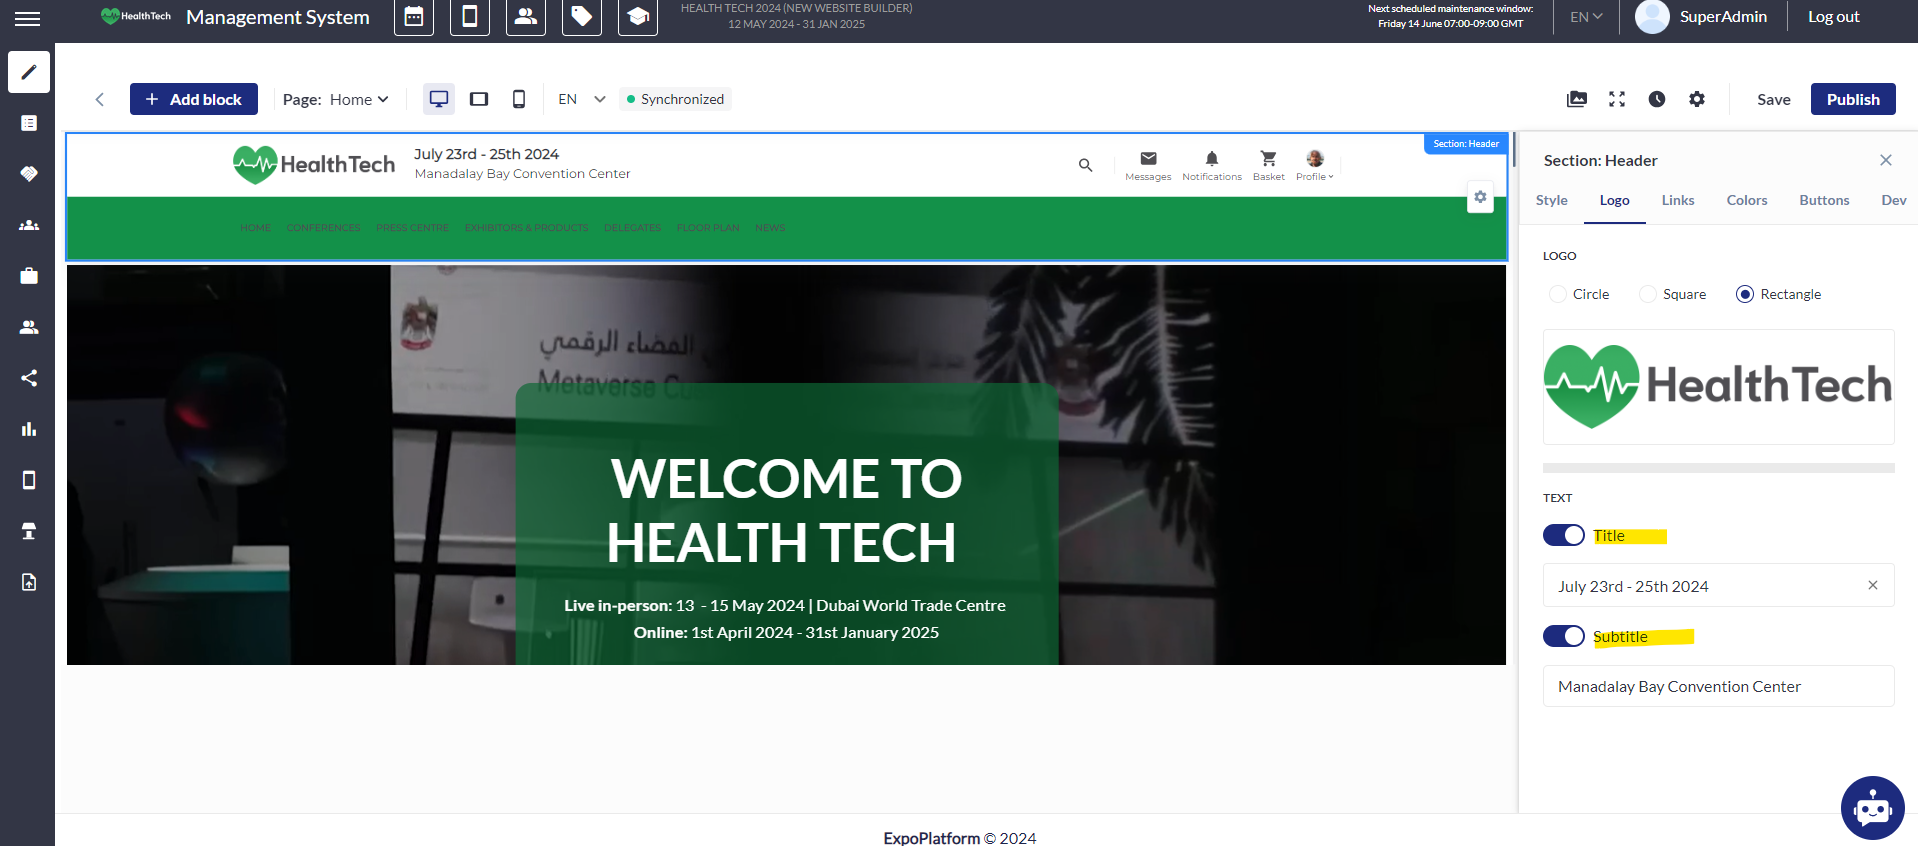
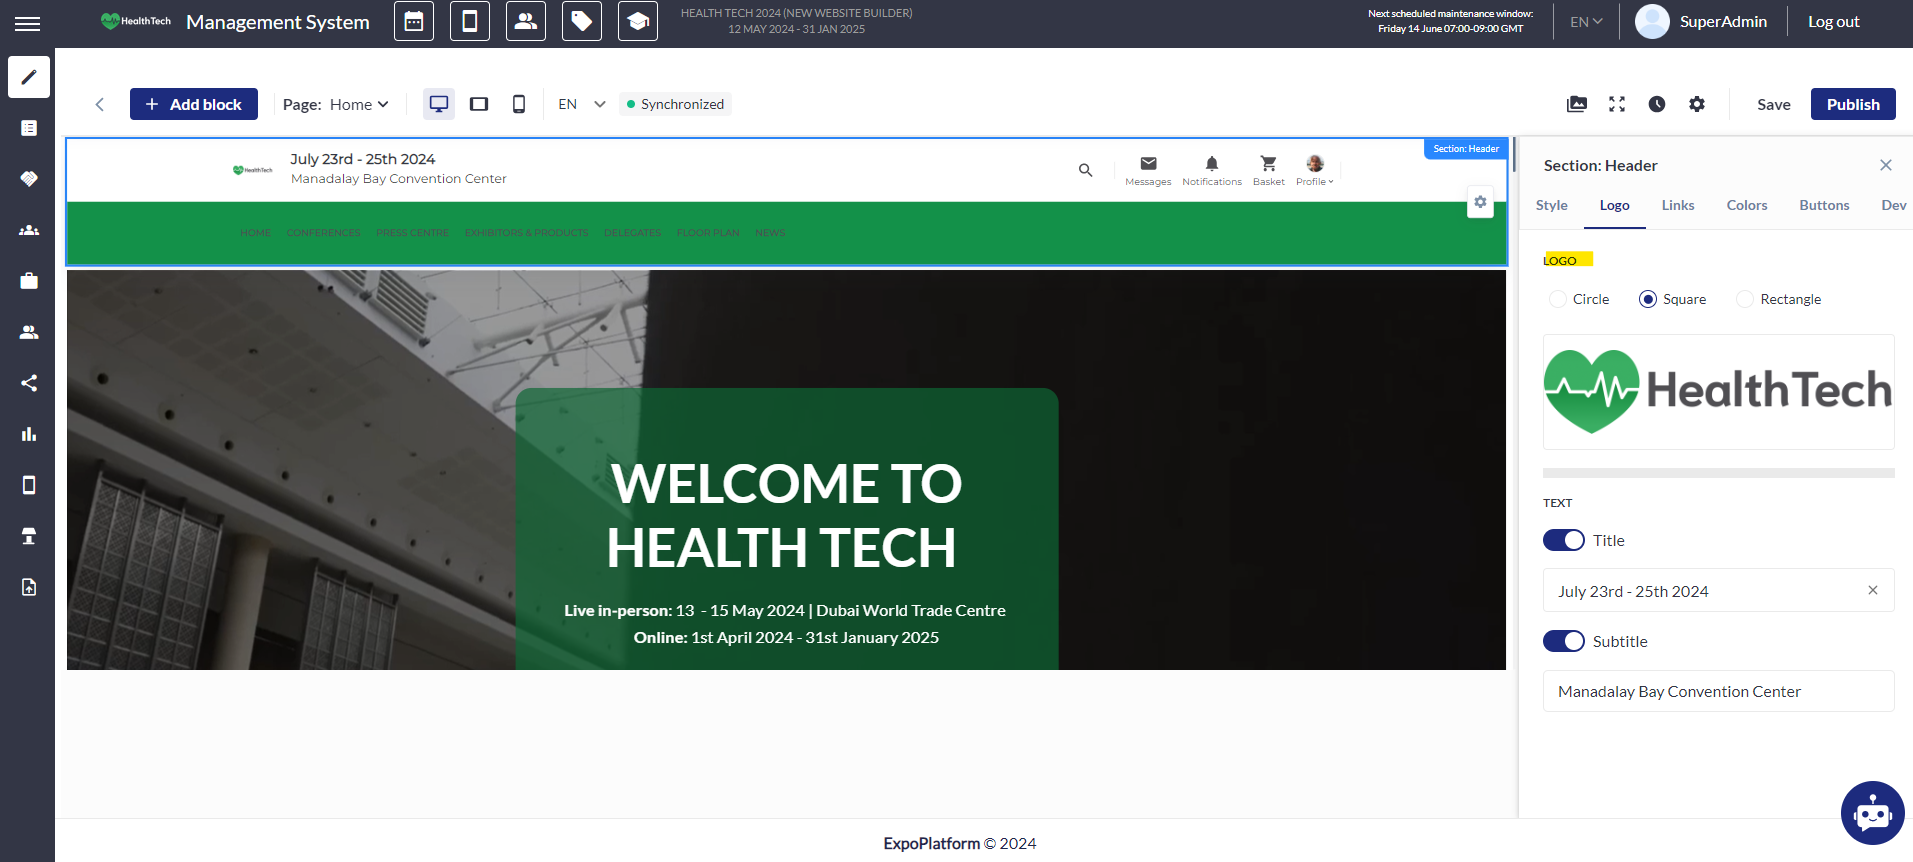
Logo
The logo image is automatically fetched from the event setup section, but it can be replaced and configured within the Header settings. Within these settings, the logo can be shaped as a circle, square, or rectangle. Moreover, you can include a title (event date) and subtitle (event name), which, when activated, automatically fetch data from the event setup section but can also be customized here.
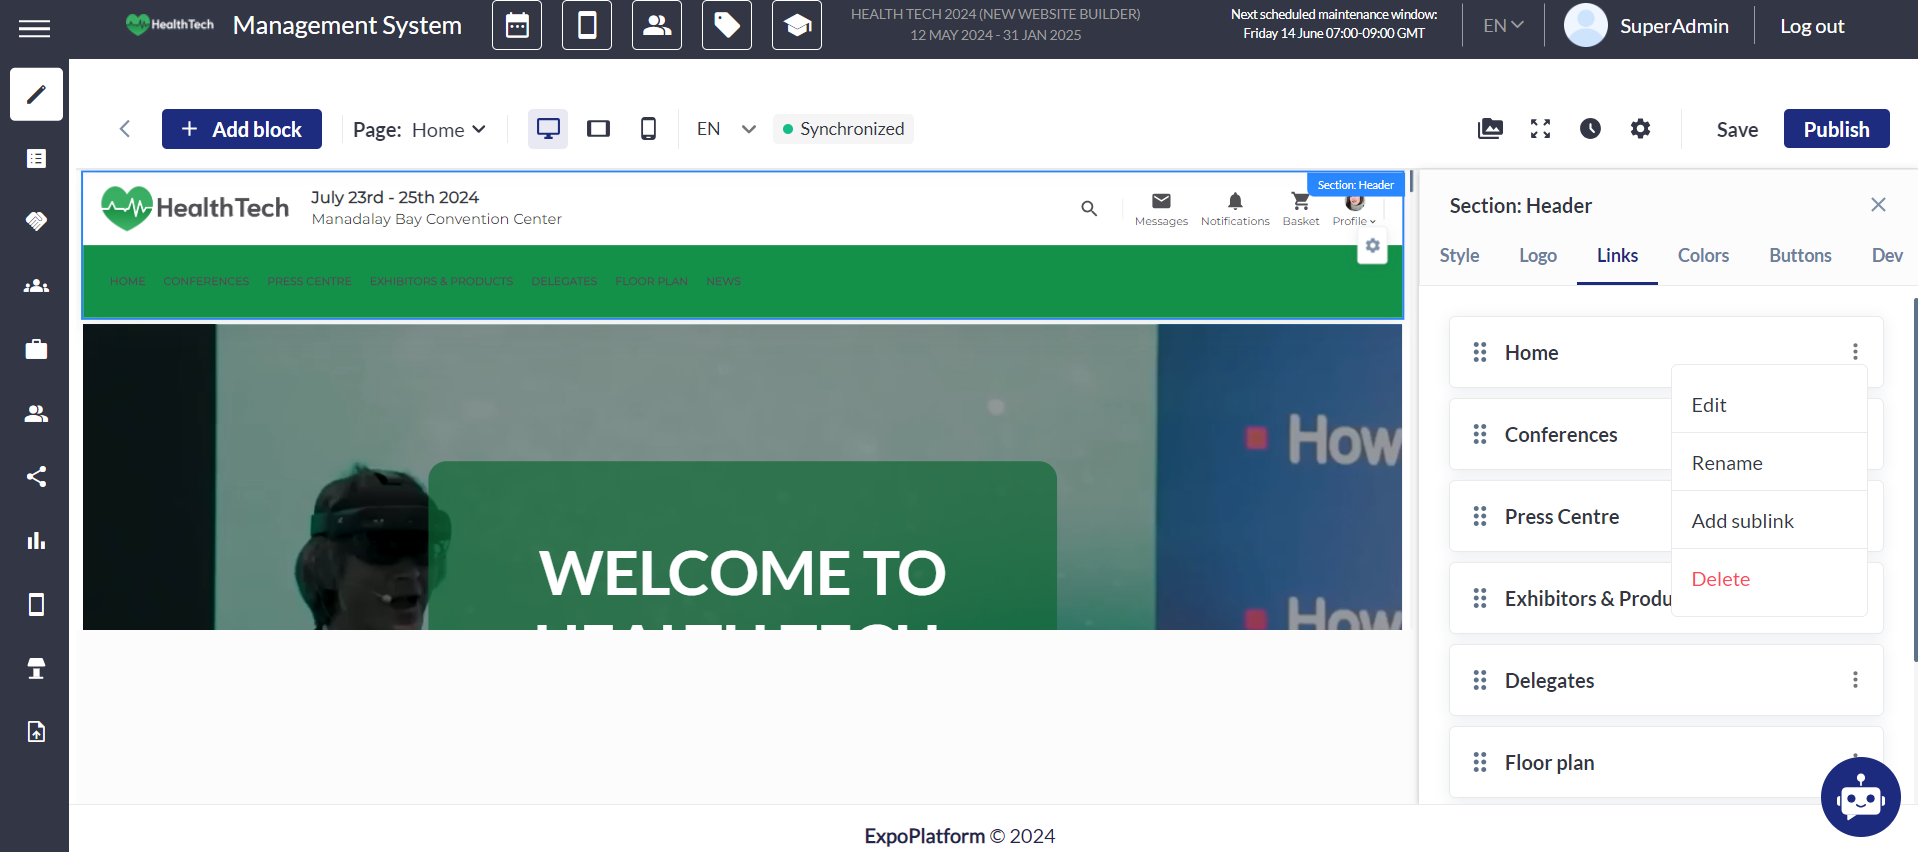
Links
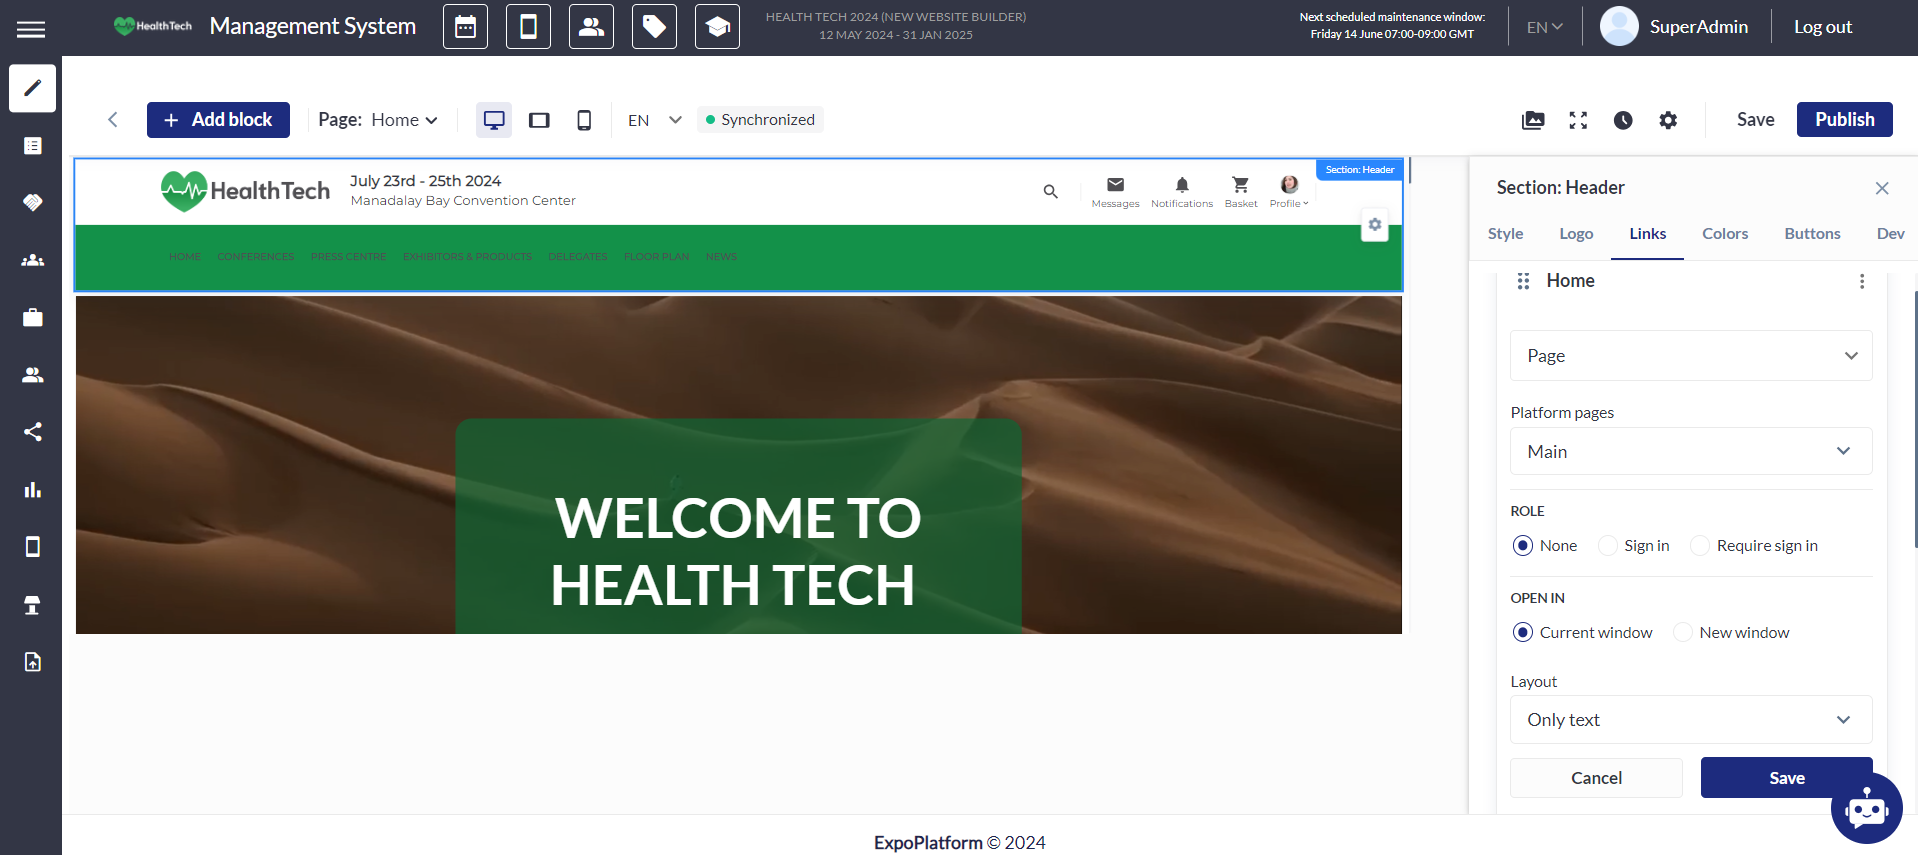
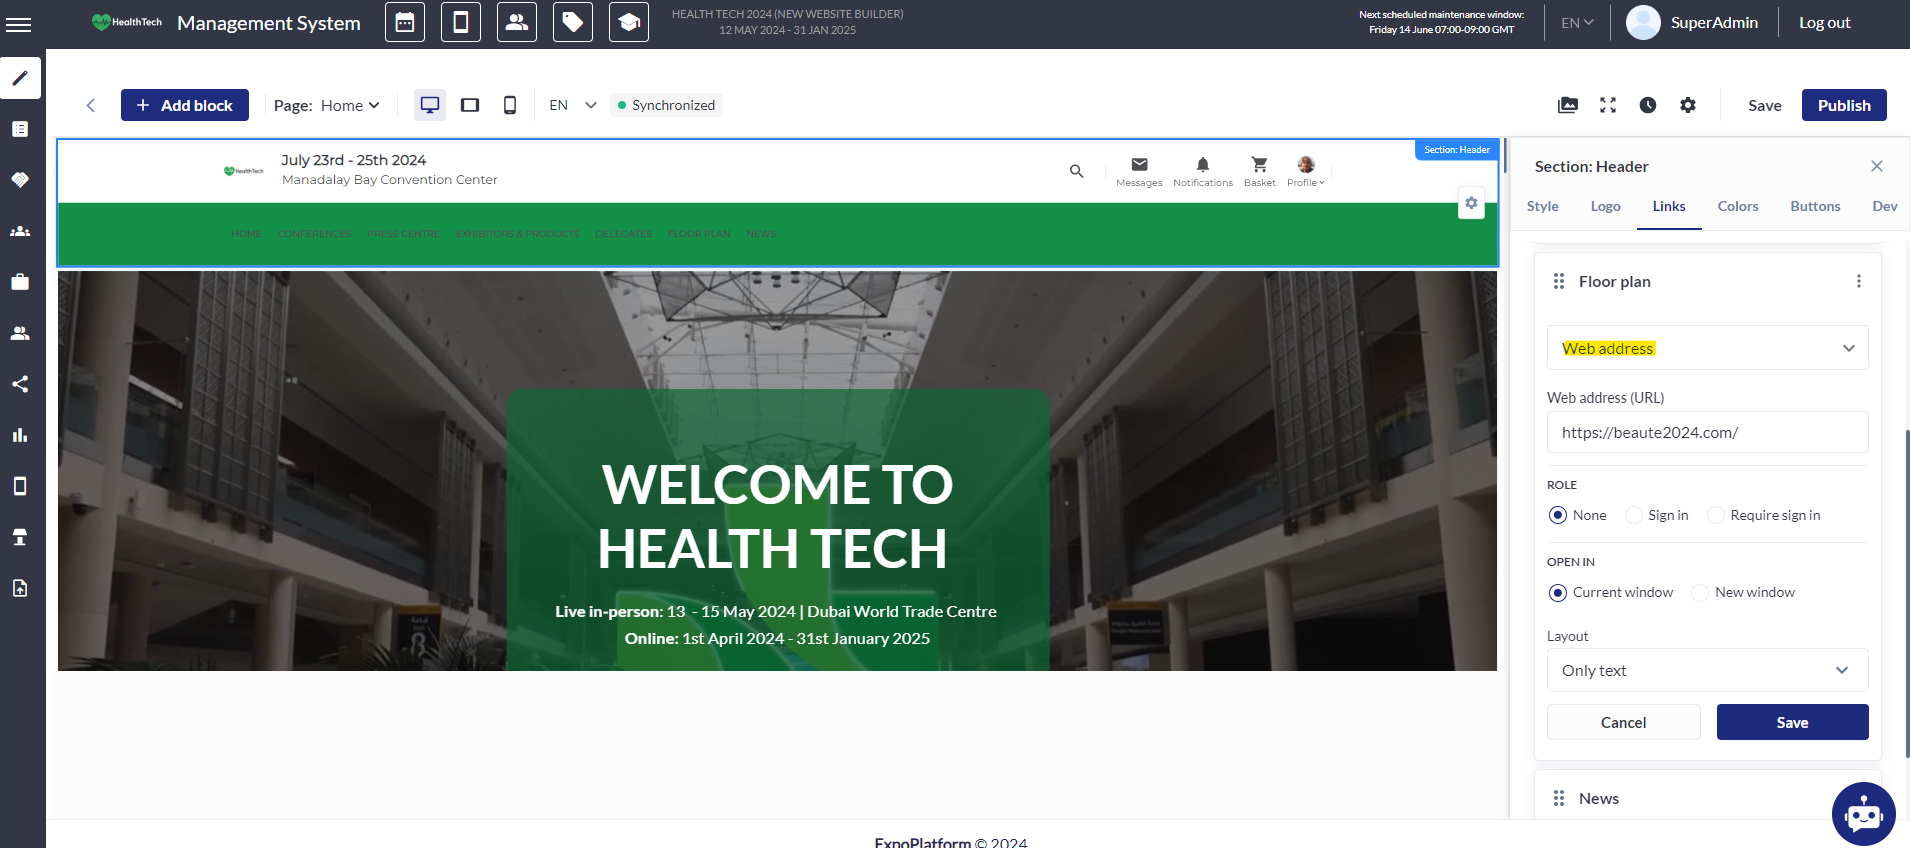
Within this setting, you have the ability to add, remove, and edit pages on the Header. For each page, you can modify:
-
The display name of the page on the header
-
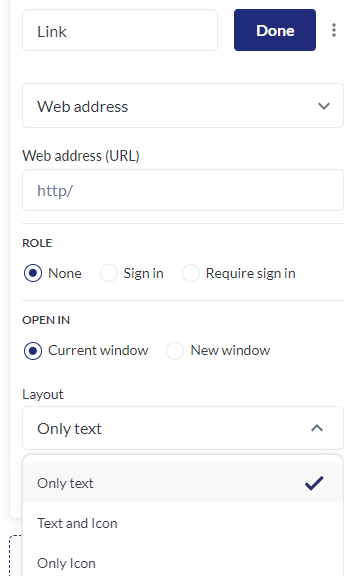
The web address to which the transition will be directed: a web address, page, sitemap, anchor, or attached file. Additionally, you can set its role: none, sign in, or sign in is required. You can also choose whether the page opens in a new window or the same one. Layout customization options include: text only, text and icon, or icon only. When selecting an icon, you can choose from a list in the website builder's gallery.
-
Similar page settings are available for sublinks, which can be created for each page. Any previously configured page can be made a sublink of another page by simply dragging it to the desired location.
Editing a page, adding links, role and changing the layout:
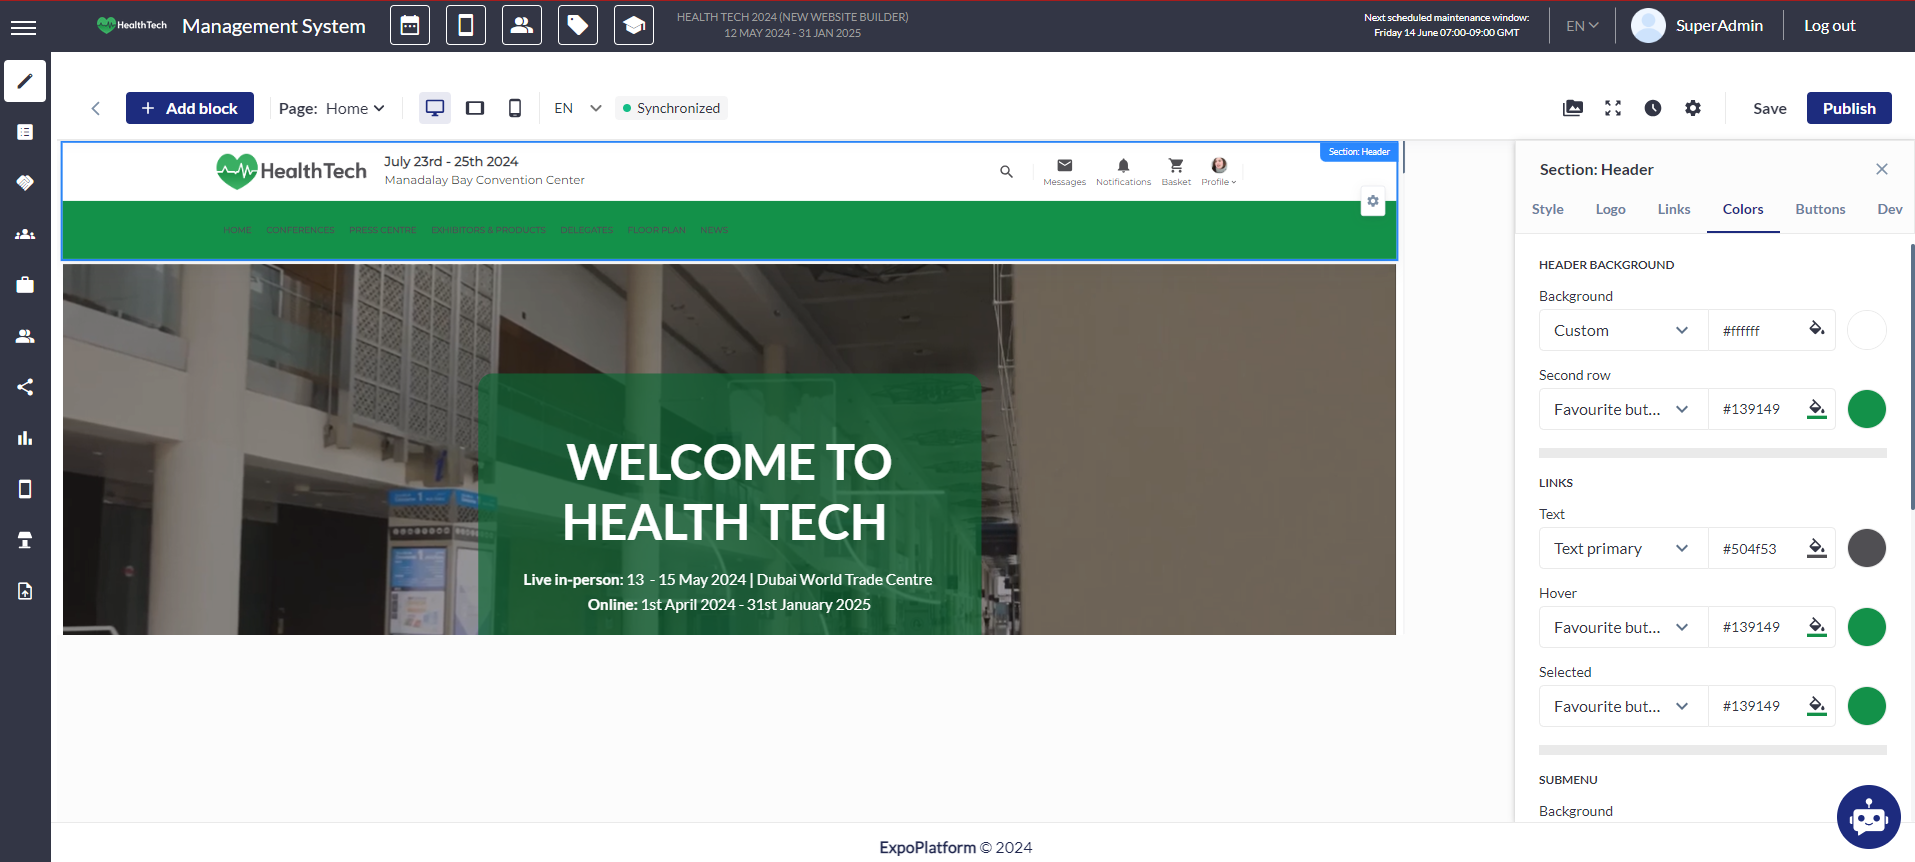
Colors
In the color settings, you can personalize the background of each layer of the selected Header type, adjust text color, its hover effect, and the color when clicking on a page. Similar color customization is available for submenu items. Additionally, the search field colors can be edited.
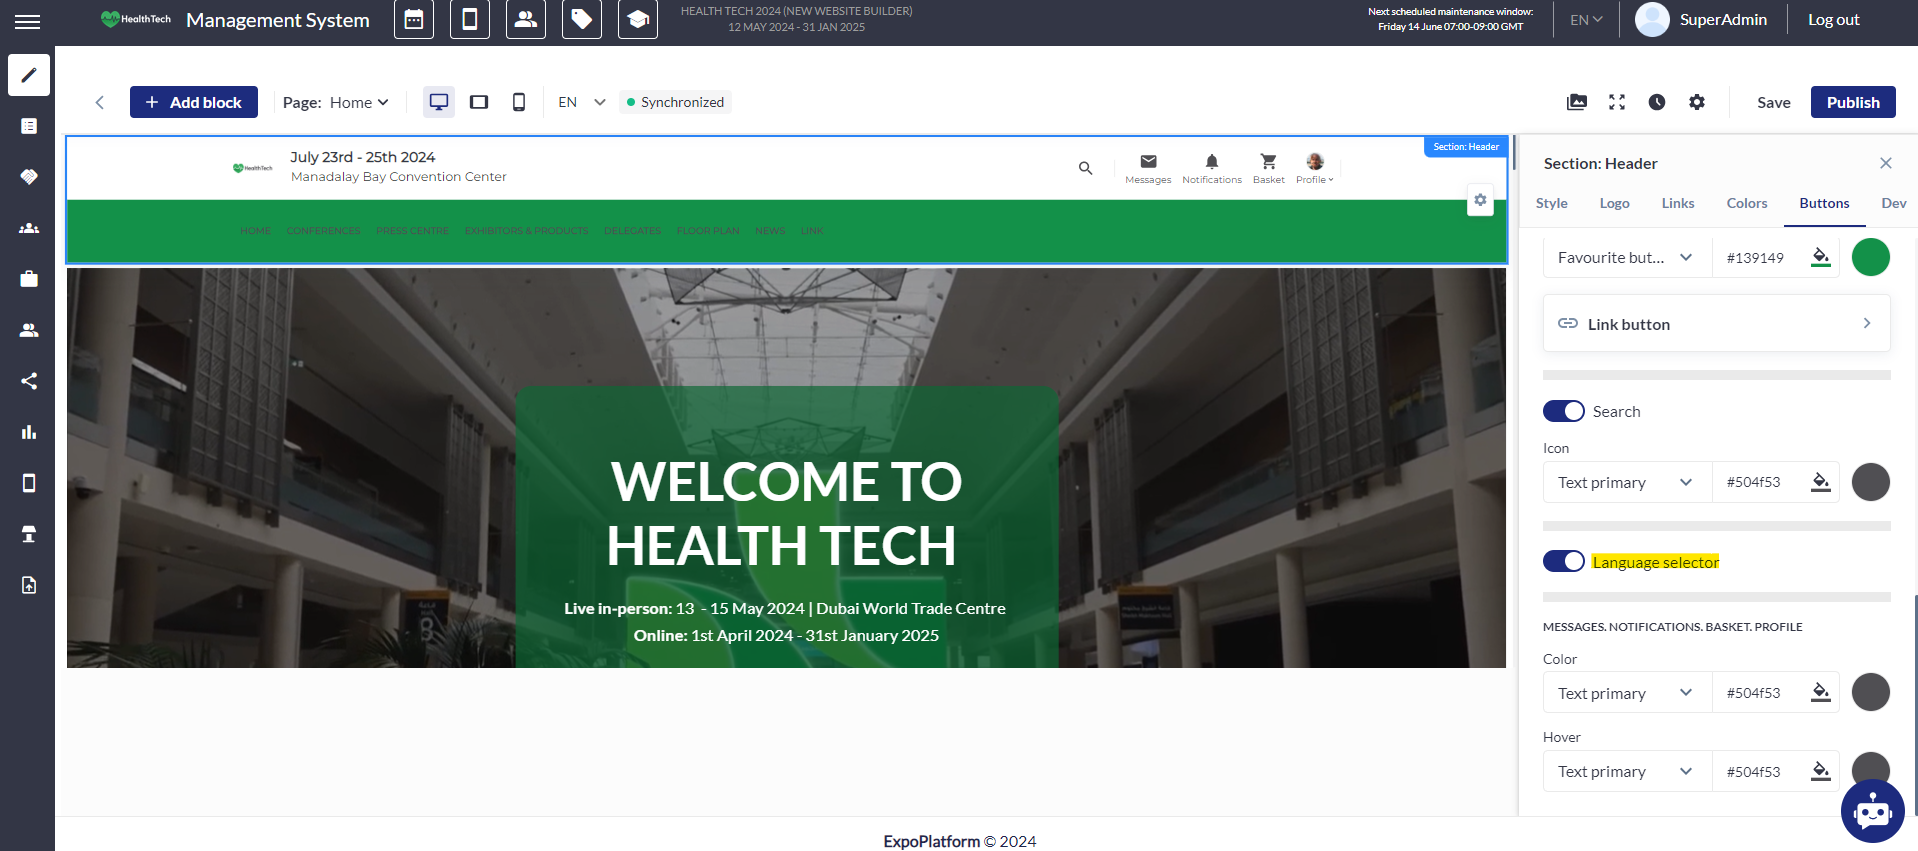
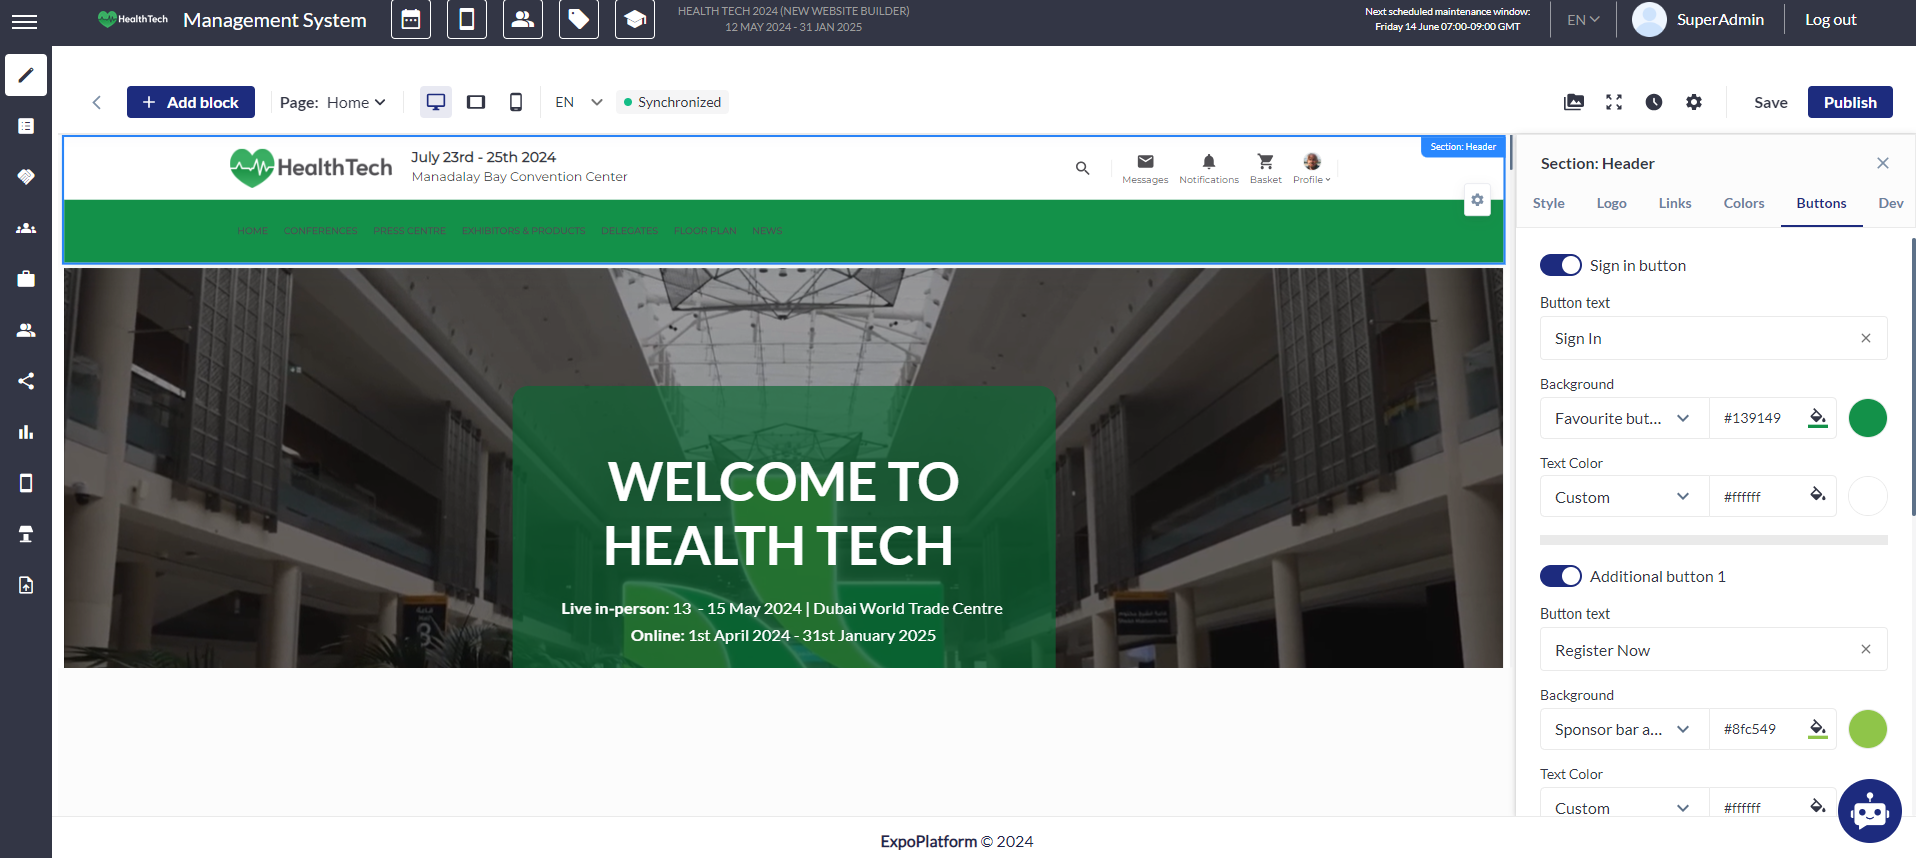
Buttons
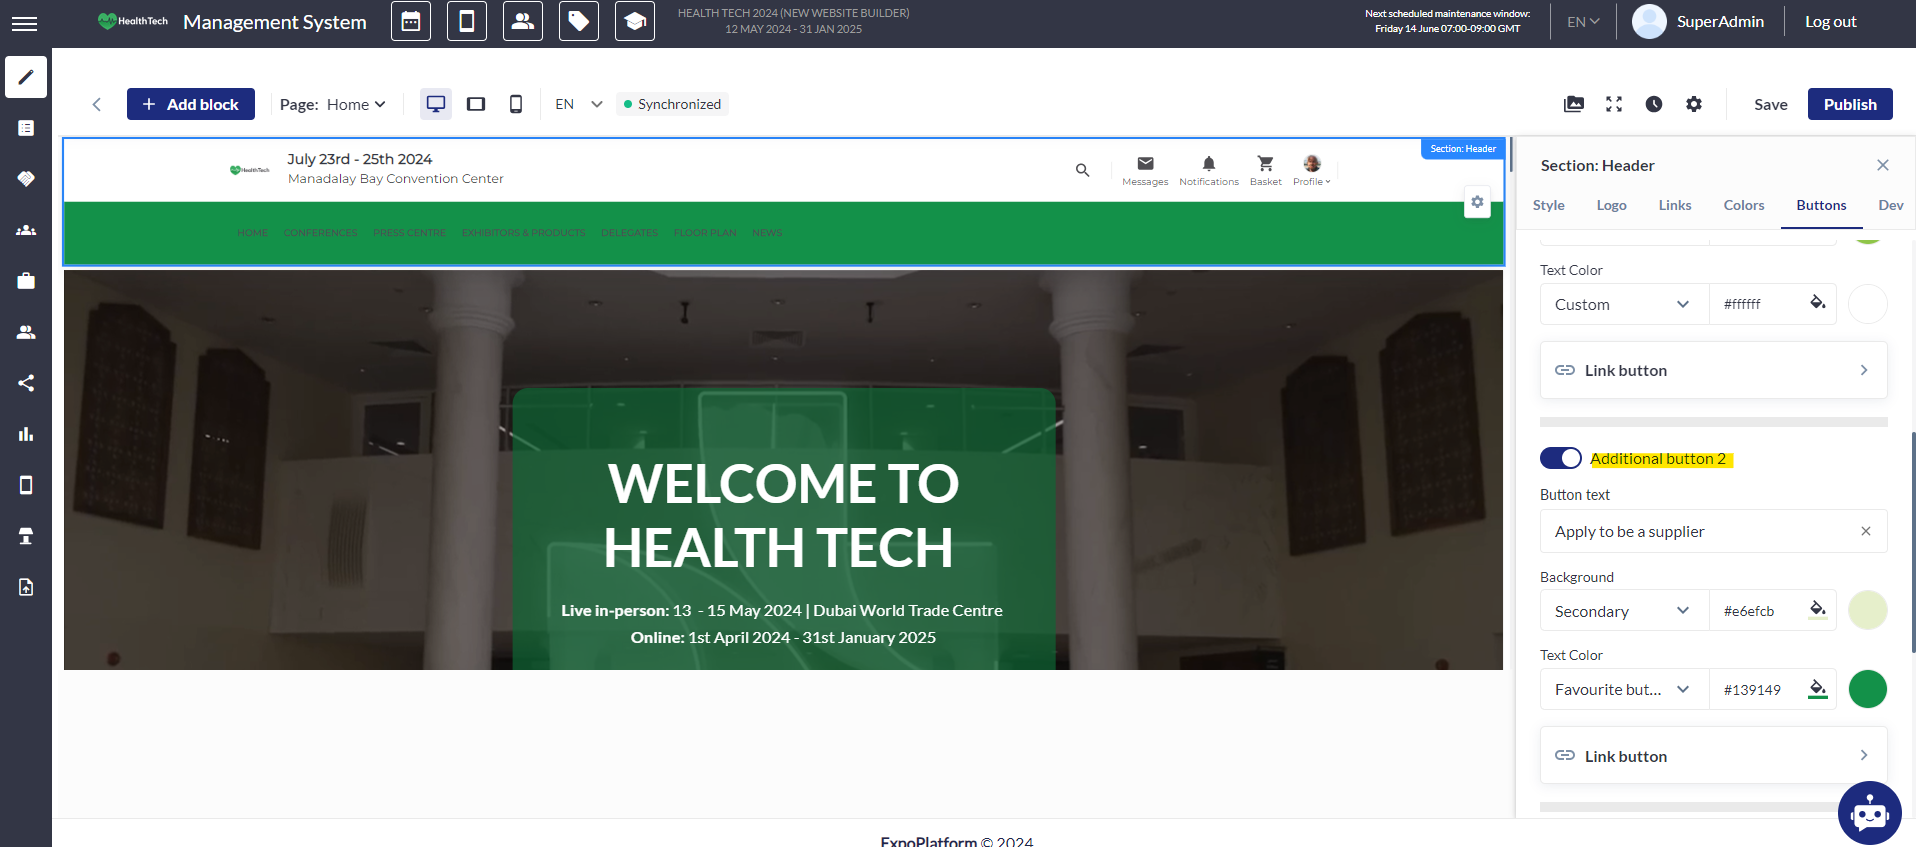
The sign-in button can only be toggled on or off, with the option to set the color of the text and background without linking it.
Three additional buttons can be added, removed, or edited, with options for button name, linking, and text and background color.
The search button can be activated or deactivated.
The language selector can also be toggled on or off.
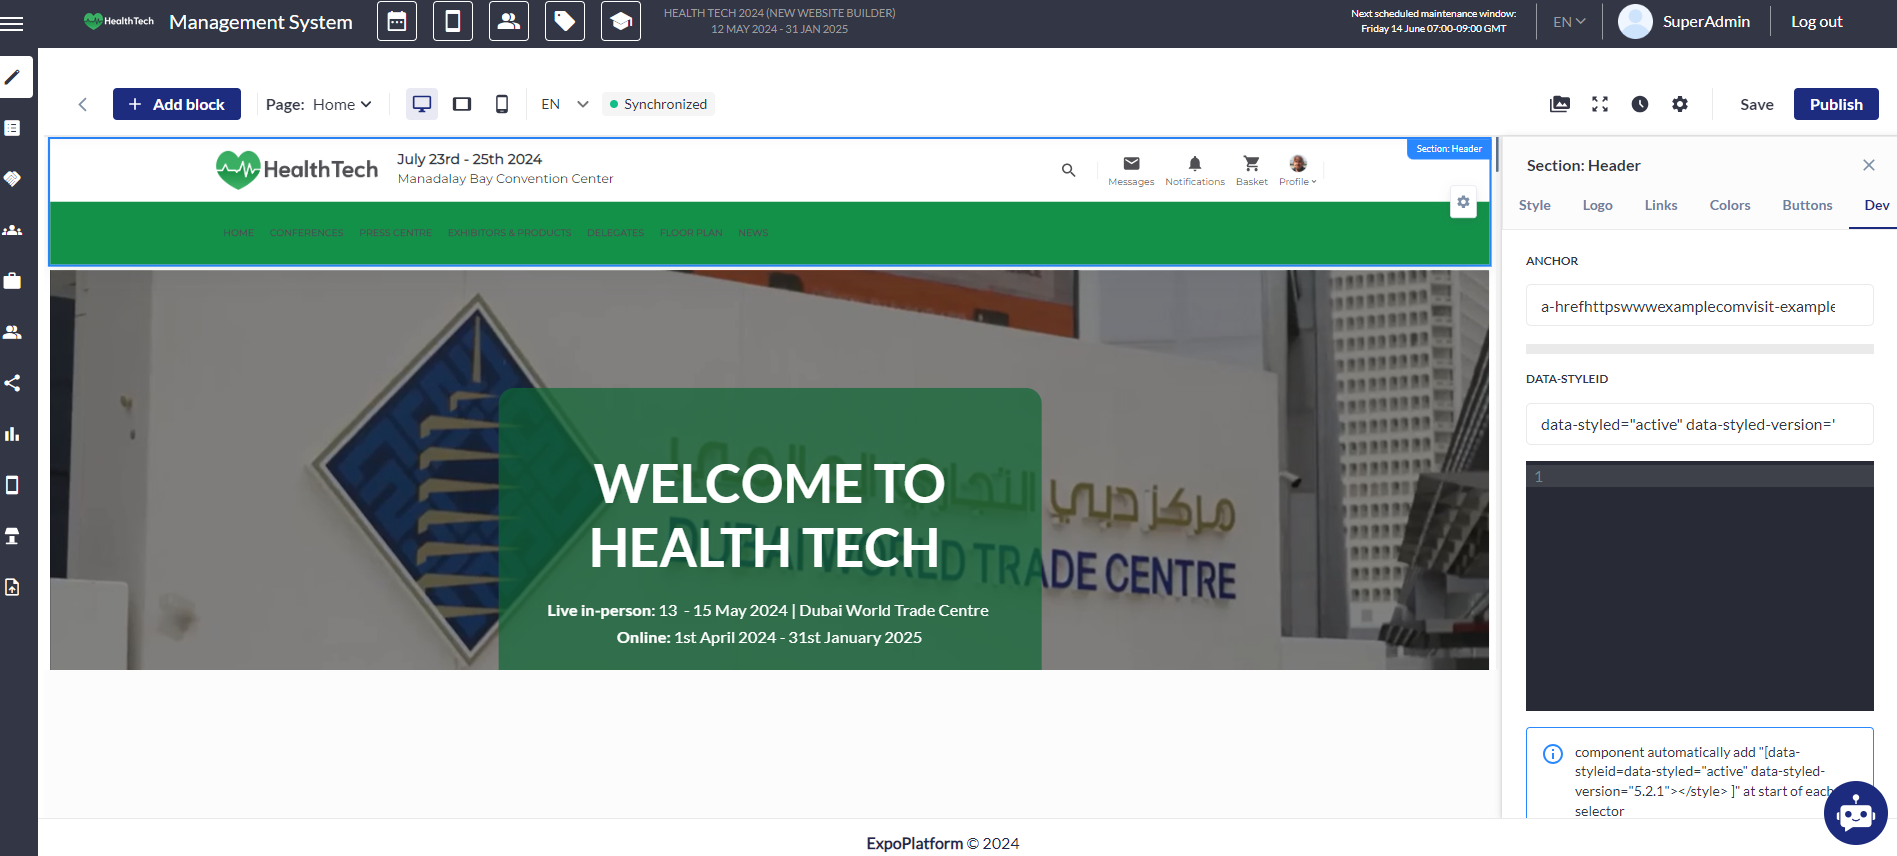
Dev:
The Anchor tag, denoted by <a>, is a versatile HTML element that allows you to create links to other web pages, files, email addresses, or even specific locations within the same page. It's the cornerstone of web navigation, enabling users to jump from one resource to another with a simple click. The anchor tag's most important attribute is the href attribute, which specifies the link's destination.
To create a link using the anchor tag, you'll need to wrap the text or image you want to be clickable in opening and closing <a> tags. The href attribute then points to the URL or anchor point you're linking to. Here's a basic example of HTML code with an anchor tag:
<a href="https://www.example.com ">Visit Example.com</a>
Data attributes in CSS are a way to store custom data on HTML elements without using custom attributes. They follow a standardized format: data-*, where the asterisk represents any text you choose. Here’s how they work:
Syntax:
You can create data attributes like this:
<div data-foo></div> (without a value)
<div data-size="large"></div> (with a value)
NOTE: Remember that you’re still in HTML, so be cautious with escaping code if you need to include more HTML inside.
For longer attribute names, use dashes: <aside data-some-long-attribute-name></aside>
Styling with Data Attributes: CSS can select elements based on data attributes and their values.
Troubleshooting:
Question:
Is it possible to include the event dates next to my website logo in the header?
Answer:
Certainly, you can go to the header settings and insert the event dates in the Logo section under Title or subtitle.
Question:
Is it possible for the event logo to have a rectangular shape?
Answer:
Certainly, you can achieve this by going to the header settings and selecting 'Rectangle' from the options available under Logo.
Question:
Is it possible for a webpage to open an external link in a new window?
Answer:
Certainly, you can adjust this by navigating to Links >>> Editing the respective page >>> choosing the web address and setting it to 'Open in a new window'.
Question:
Is it possible to include extra buttons in the website header?
Answer:
Certainly, you can add these by going to Buttons >>> Enabling additional buttons. Additionally, you can also provide links for these buttons.
Question:
Can I include the language selector on the website header?
Answer:
Certainly, you can activate this feature by going to Buttons >>> Enable the 'Language Selector'.