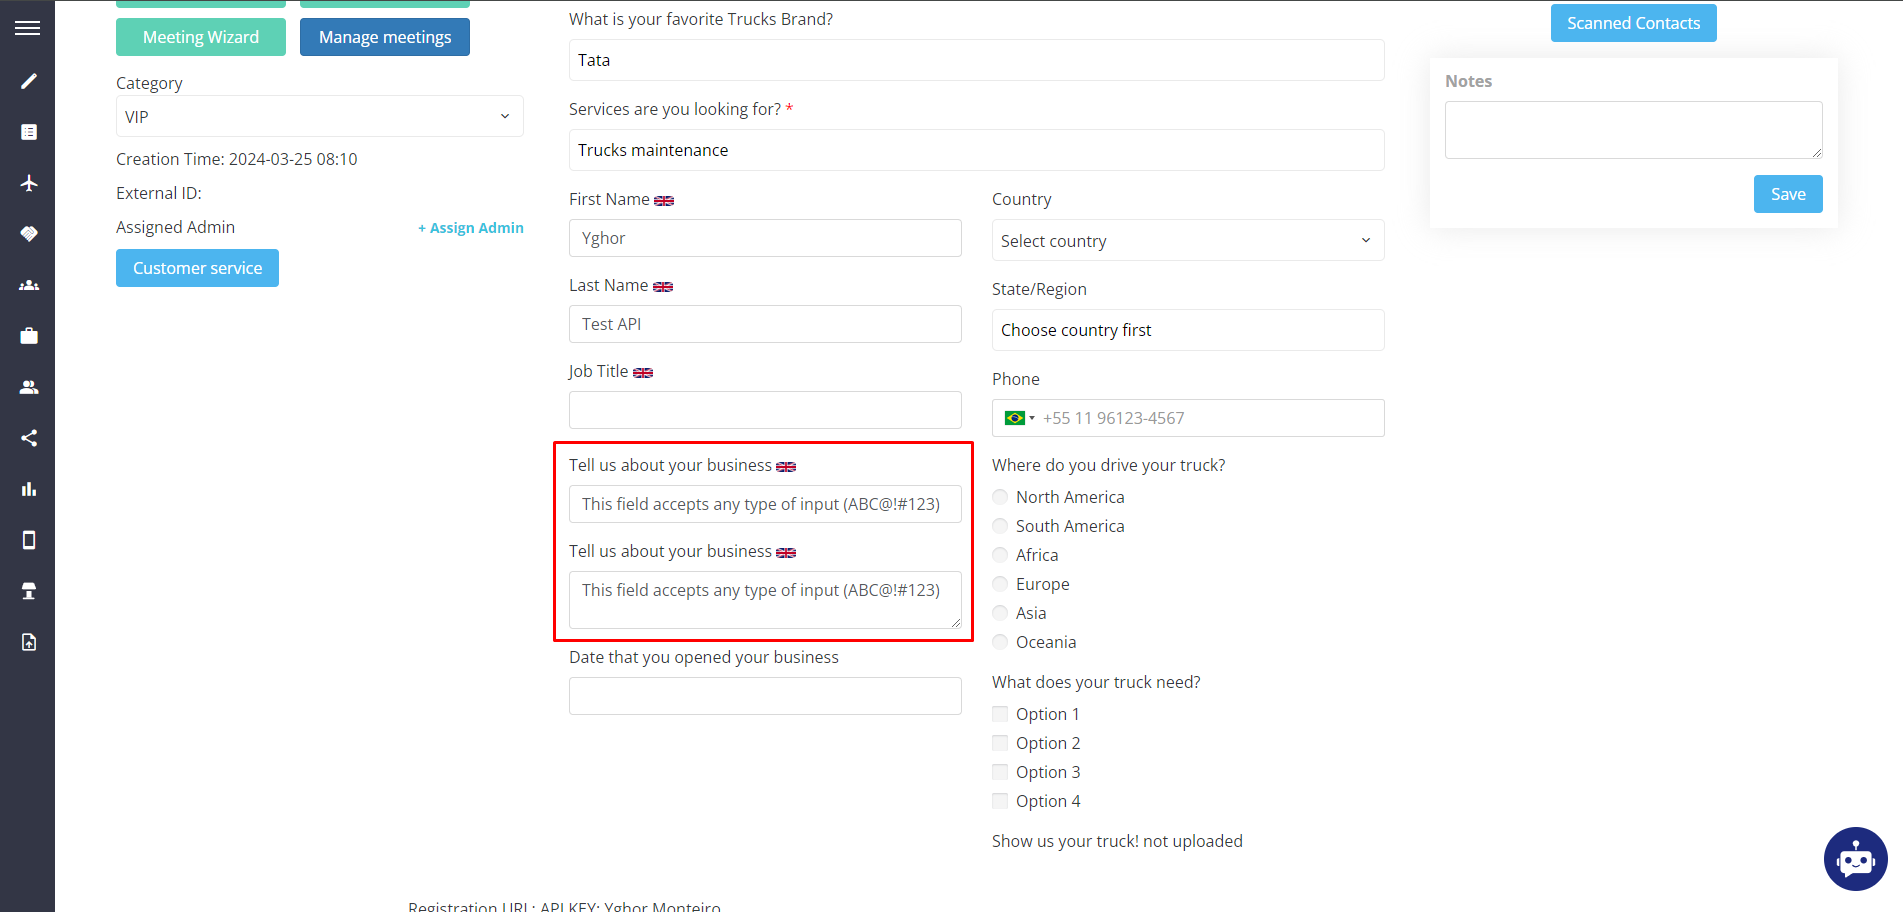
In order to populate the Participant using this custom field, it is necessary to gather the name (parameter) and the value corresponding to each item.
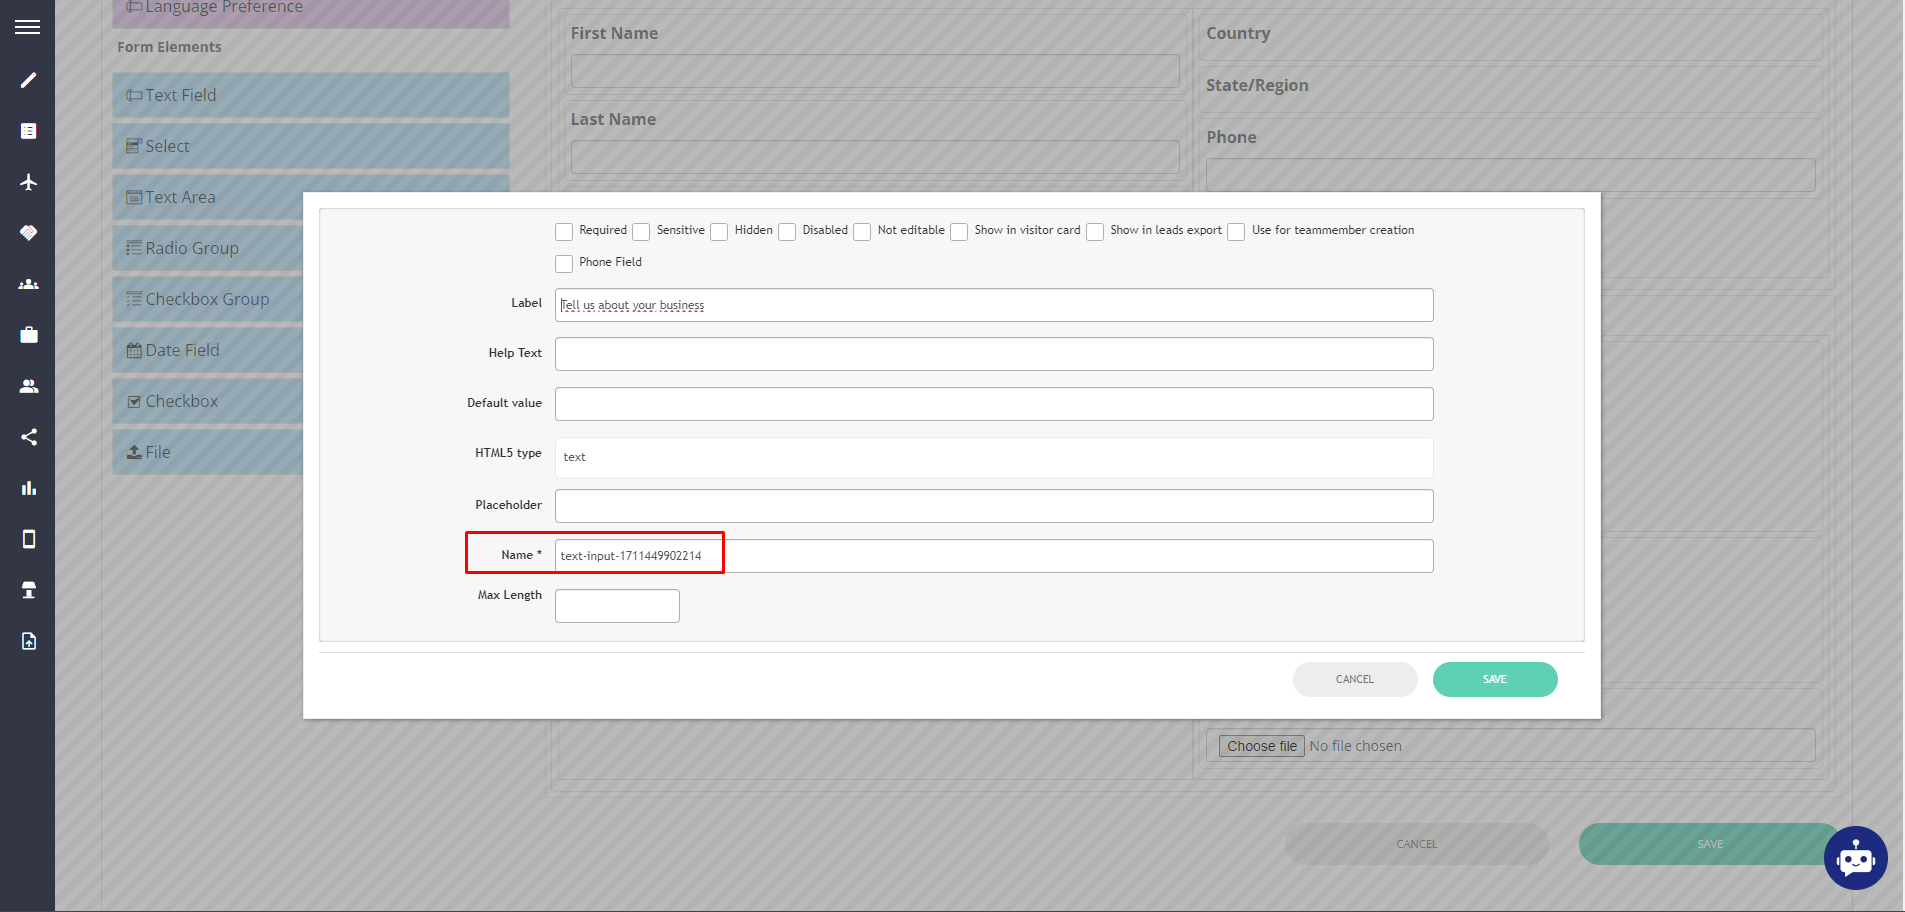
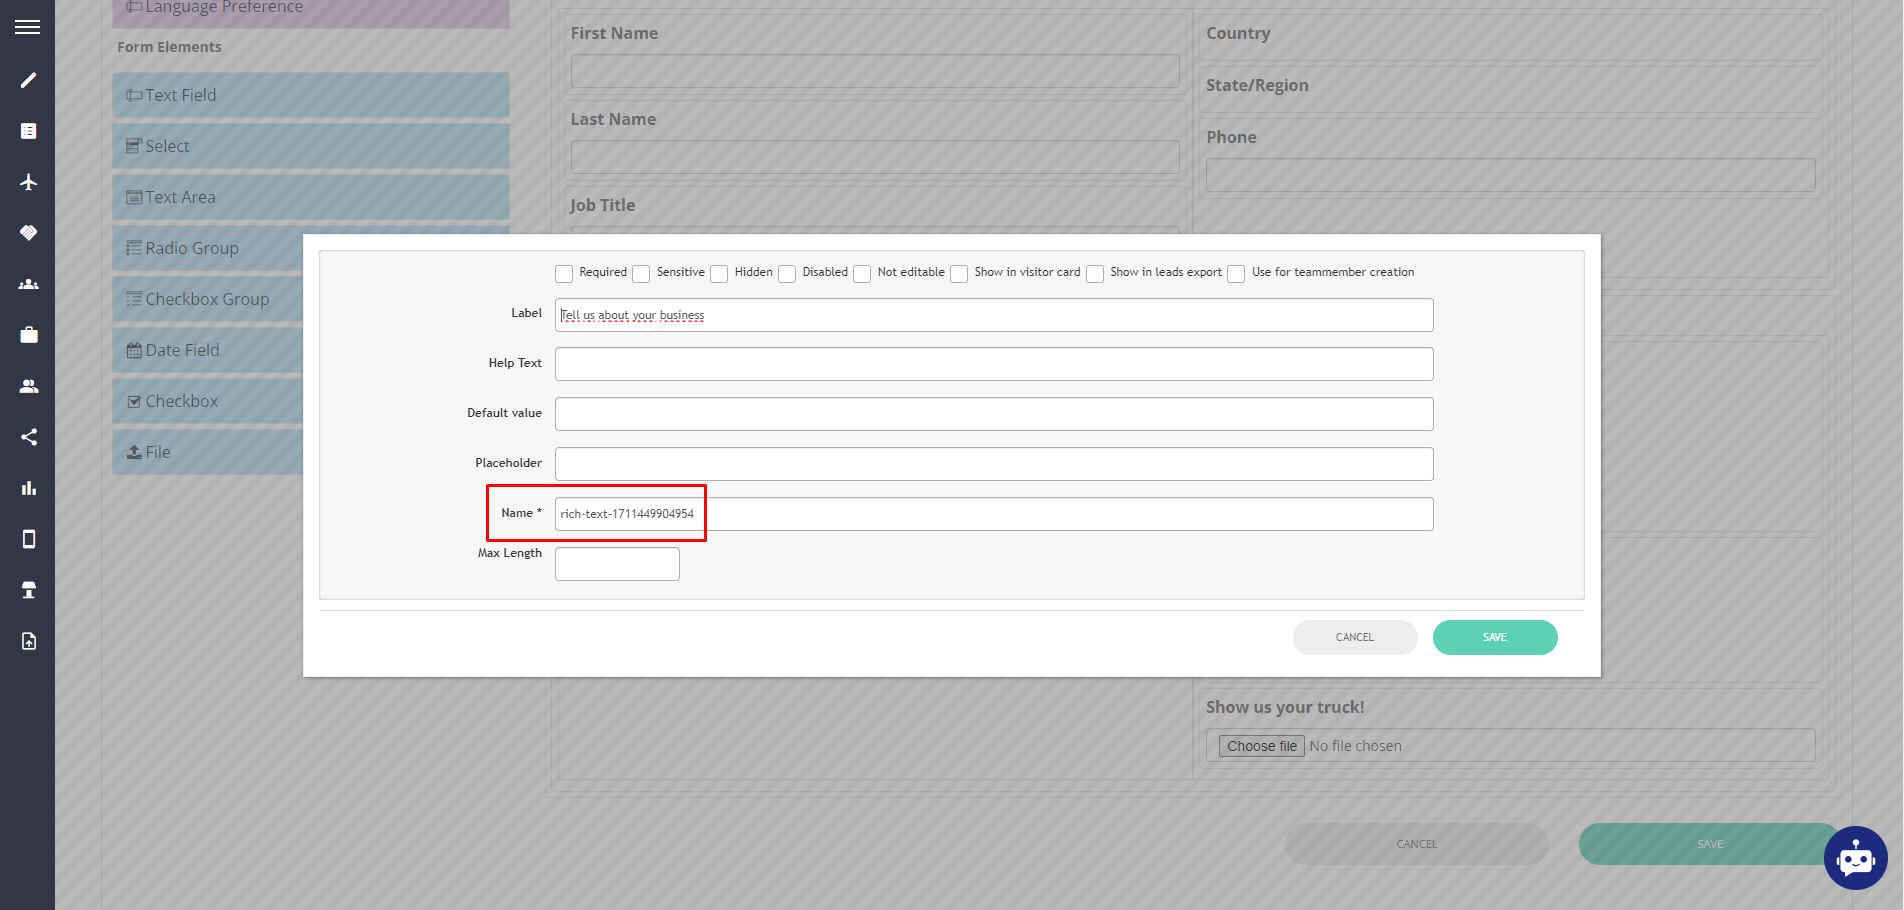
For Text Input and Text Area, it is basically the same, as the images below demonstrates:
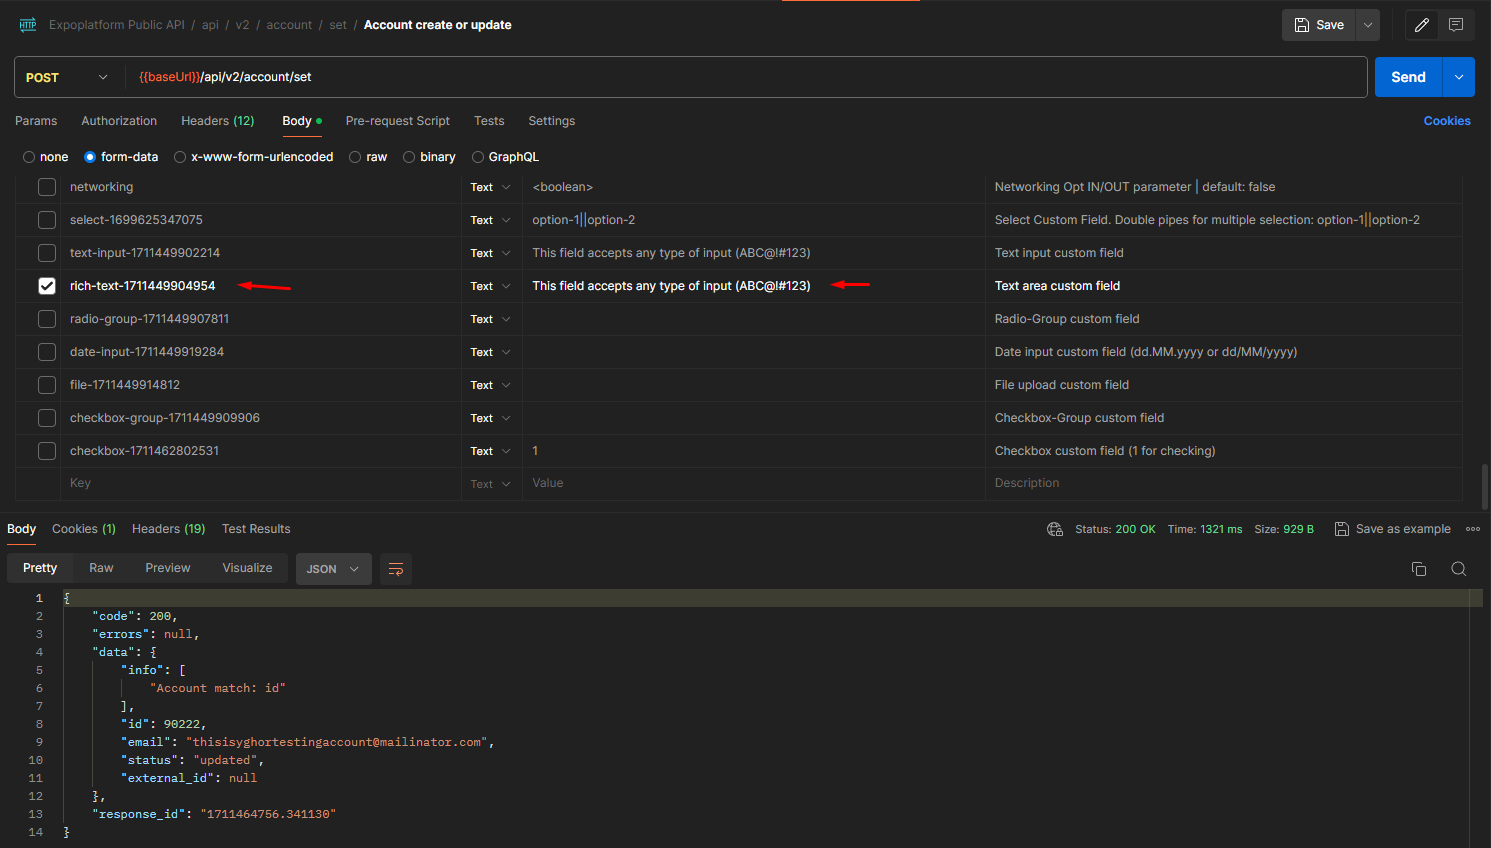
When you have these informations, simply apply the name as a parameter and the option as a value, as shown in the image below:
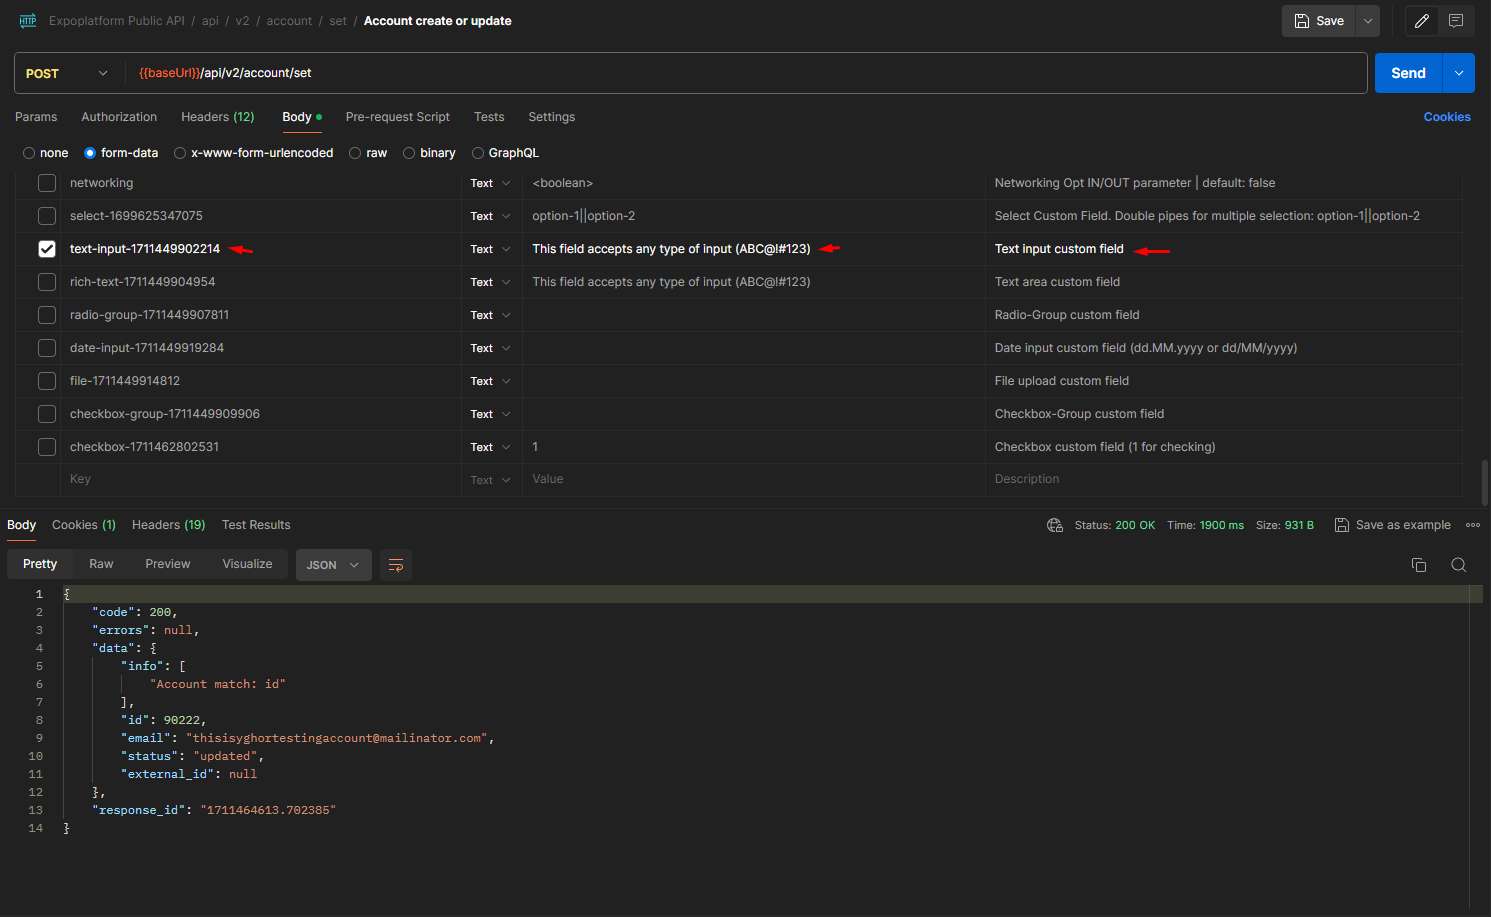
After a successful request, you can view the results by navigating to Management → Participant and clicking on the updated participant: