Add Badge Bar Code and QR code Variables to the Campaign
We've integrated Badge Bar Code and Badge QR code variables into the Campaign templates, simplifying the process for organizers to distribute badge codes (Bar/QR) to end users using the campaign module.
These variables are now available under the Standard Variable section.
Benefits
-
Effortlessly send badge QR/Bar codes to users through the Campaign Module, enhancing convenience and efficiency in managing event badges.
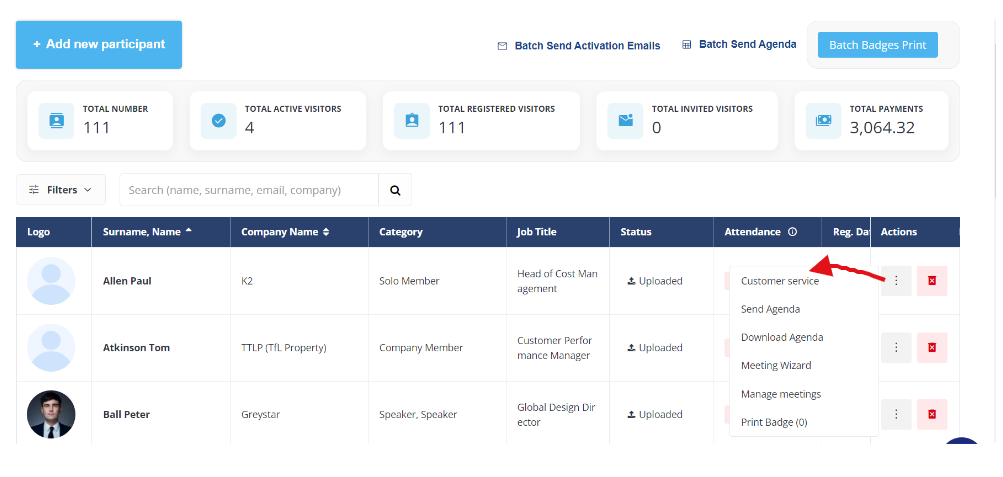
Adding a customer service button to “...” actions in the exhibitor/ visitor list
We have implemented the Customer Service button on the Exhibitor and Participants page on the Admin Panel. This setting will exist under the 3 dots menu located on the extreme right-hand side of the screen.
It allows organizers to directly impersonate any user profile from the Exhibitor/Participant list page, eliminating the need to navigate to the user edit page on the admin panel first.
Benefits
-
This feature enables organizers to seamlessly impersonate any user profile directly from the Exhibitor/Participant list page.
Mobile App Analytics
We have made a few changes to the Mobile App Analytics page to make it more intuitive for our organiser to read the graph data better.
-
Added tooltips based on the display are selected - Daily, Weekly, and Monthly.
-
Restructured filter in a more aligned way to represent the data
-
If the graph is set by day, it displays a maximum of 20 days. If more scrollbar appear
-
If the graph is organized by weeks, it displays a maximum span of 9 weeks. If there's only one week, it is centred within the graph. If more scrollbar appear
-
If the graph is arranged by months, it exhibits all the month names. In case the data spans across two years, a scrollbar emerges, and the year is appended to the month name
Benefits
-
The enhanced Mobile App Analytics page provides organizers with a more intuitive interface, enabling them to interpret graph data more effectively.
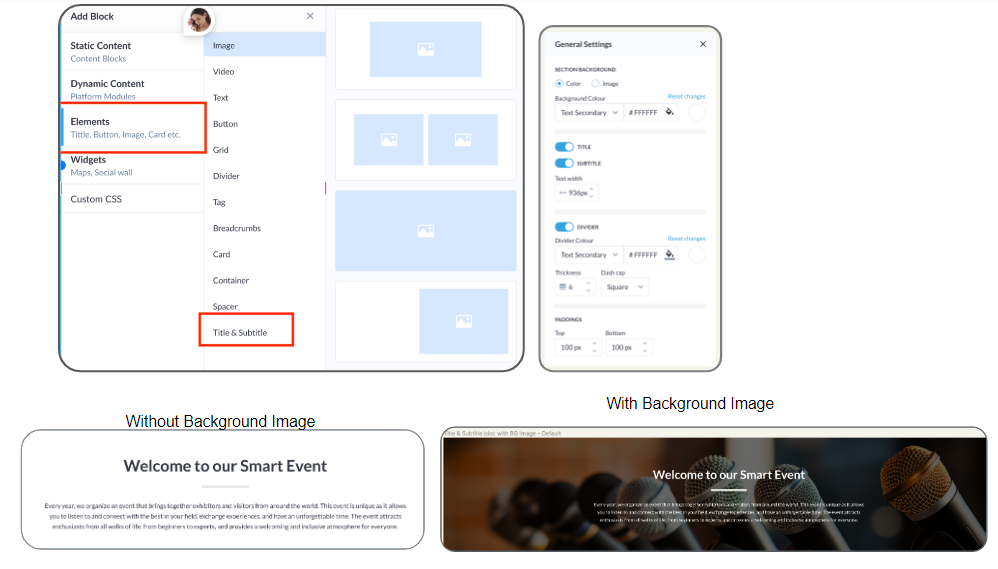
Web Builder Stage 3: Title and Subtitle Block
In the new website builder, the Title and Subtitle blocks were absent, which were available in the legacy web builder. The team has now incorporated the Title and Subtitle block under the Element block in the new website builder as well.
Admin Panel Settings
Navigate to Event Setup → Build Website → Edit Website → Add Block → Elements → Title & SubTitle → Add Block
Organizers can create this block with or without a background image. The background image can be added from Settings → General Settings for the block
The Title and Subtitle block offers six different appearance options:
-
With Title and Subtitle together
-
Without Title
-
Without Subtitle
-
Without Title and Divider
-
Without Subtitle and Divider
-
Without Divider
Benefit
-
Offers enhanced customization options for the websites, providing organizers with greater flexibility and creativity in designing their pages.
Parent Exhibitor column added in the meeting export report
A new column Parent Exhibitor is added to the meeting export report under Admin Panel →Data → Import/Export → Meeting Report.
The column contains the name of the parent exhibitor, whose child exhibitor or its Team Member has/had a meeting.
If no parent exhibitor is related to the Initiator/Receiver side meeting, the respective cell is empty.
Benefit
-
Provides enhanced insight of exhibiting company with which the is meetings scheduled
Multi-Language: New Website builder
Now we have an option of setting up the event in multi-language on New Website builder as well. It works the same way as it works on our legacy builder.
By default, all blocks are synchronized across all language versions. Any addition, removal, or editing of a block is reflected in all versions. However, the text content, including translations, fonts, and styles, can be customized independently for different versions. This allows users to use different words, styles, or hyperlinks for each version while keeping the blocks and their settings consistent.
Admin Panel Settings
Select the languages in which you wish to build your website under Event Setup → General Info → Frontend Language.
Navigate to Website Builder → Select the Language from the drop-down in which you want to create your site → Update the content of the block in the selected language → Save → Publish
Benefit
-
Capability to configure events in multiple languages, offering flexibility and customization to cater to diverse audiences.