Sessions
This article outlines the steps which organizers can follow to create and manage their sessions on ExpoPlatform.
Organizers can duplicate and remove sessions from the list, as well as export the session report. The session report provides a concise analysis, including participant names, designations, categories, email addresses, and subscription timestamps.
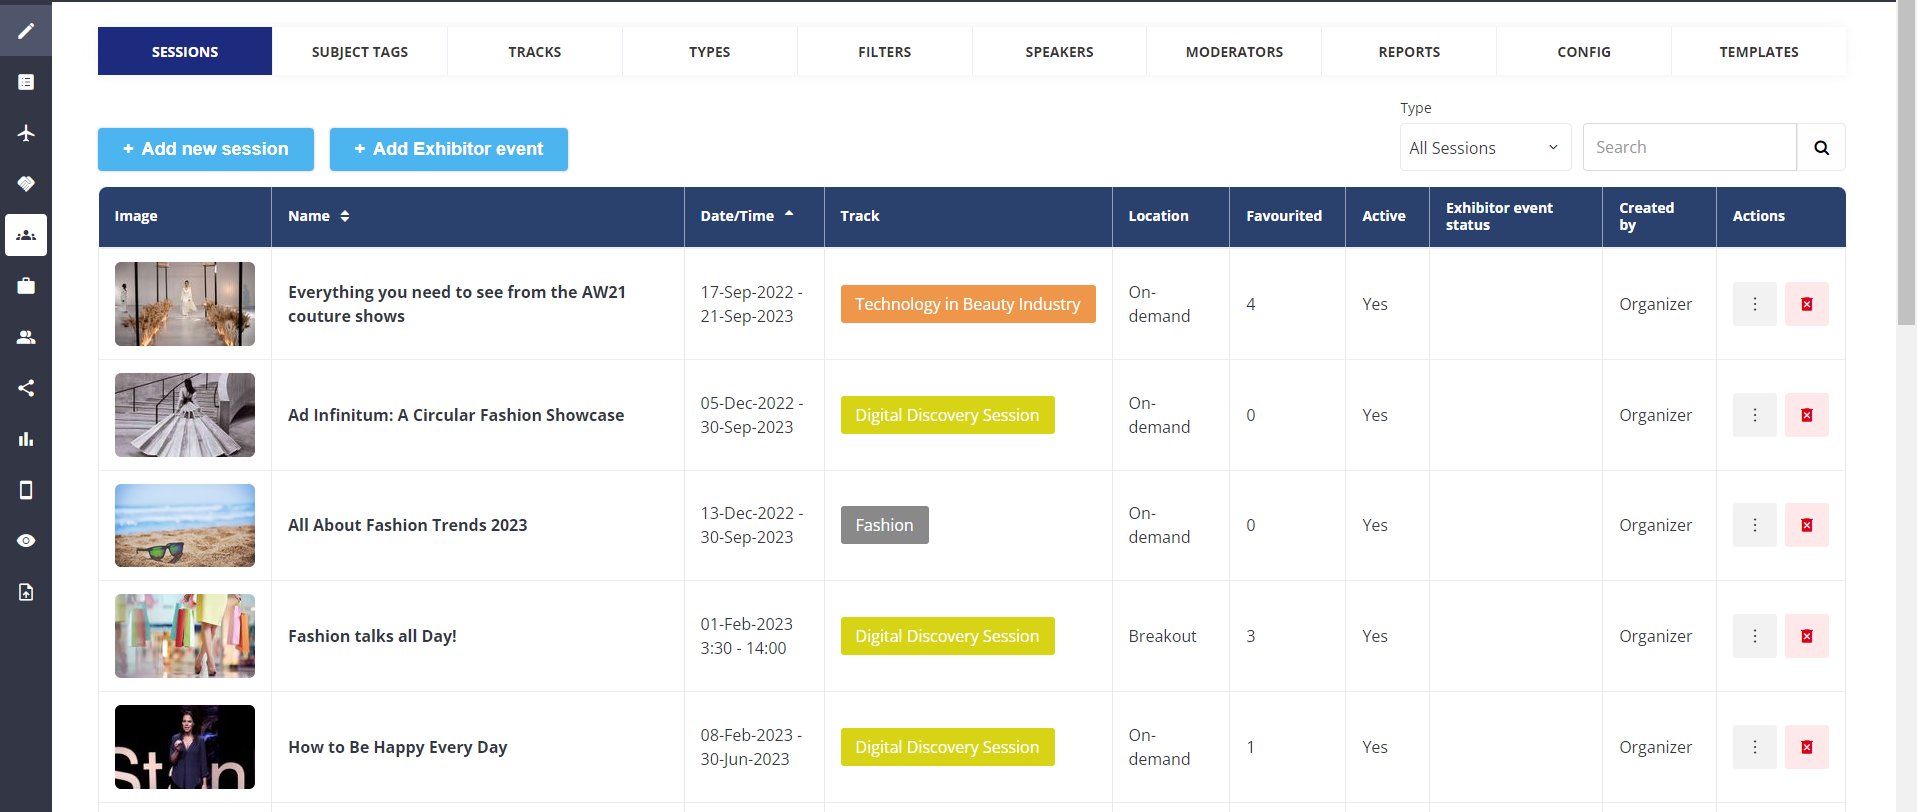
Sessions: Admin Page
Steps to Add a Session
Click on Add new Session tab, it opens a session edit page wherein you can add the relevant details about the session
Create tracks, subject tags and types before the creation of the session so that you can add them from the list while creating a new session.
In order to save the session, it is essential to complete the mandatory fields, including Session Name, Date, Time, Session Tracks, Session Types, and Language
Additionally, you can also attach documents in the content section which will be available to download in the session room.
Organizers can map Moderators, Speakers and Sponsors to the session from the bottom of the page.
Create speaker, moderators and sponsor prior to adding a session so that they can be respectively mapped to the sessions
For virtual events, you can activate the Online Session feature and select from options like Breakout, Livestream, On-demand, and External.
To assist you in selecting the appropriate format for your session, here's a brief guide.
If you opt for a live stream session, you have the flexibility to play back a video from the moment the user joins the session room using the Simulive feature.
The session room opens up 10 minutes prior to the actual start time for the attendees and 30 minutes prior for the speakers and moderators giving them ample time for pre-session setup and testing.
Incorporating a starting holding slide and a concluding slide is generally advisable. The concluding slide can guide participants on the next steps, such as moving to the next session etc.
Additionally, the session room remains accessible for 10 minutes after the scheduled end time, depending on the configuration setting.
Below, you'll discover explanations for the remaining features required in the session setup:
Active Session: Enable this feature to display the session on the front end.
Featured Session: Enable this to highlight the session at the top as the Recommendations section on the sessions page.
Direct Invite Link: You can also share the session's Direct Invite link with the participants. As soon as they click on it, they'll just need to log in (or register) for the event and the session will get automatically added to their schedule.
There are following different scenarios this feature is used for & the way it works:
User is Logged in as participant - This session is added to his schedule and the participant is redirected to the “My Schedule” page.
User is logged in as Exhibitor - The Exhibitor will get redirected to the main page and a message appears -“Sorry, but exhibitors can’t use this link”.
Exhibitor/company profile can not join the session online
Unlogged Users - It redirects to the main page and a sign-in popup appears. If the user enters and confirms the correct credentials, this session is added to his schedule and the participant is redirected to My Schedule page. If the user is logging in as an exhibitor, it redirects to the main page and the error message displays- “Sorry, but exhibitors can’t use this link”.
Impersonate (Customer Service) Mode: When the link is used in impersonate mode, it redirects to the main page and an error message appears - “Sorry, direct links can’t be used in impersonate mode”.
In case of specific access, visibility, payment, or limit restrictions, these conditions will be enforced everywhere except in My Schedule. In My Schedule, the session will be booked and accessible through the provided link.
For paid sessions, users will encounter a "Book Session" button on the session card. If the session is free, a "+My Schedule" button will be present, allowing users to add the session to their schedule
Notes: The organiser can include internal notes on the admin panel while creating a session. This is a similar function that we have on the Participant and Exhibitor edit page on the admin panel.
The internal Notes are also included as part of the session import and export file.
Flag Critical: A checkbox field is added to the session edit page from where the organiser can mark that session as critical. The session list page will also include a column that would list if the session is tagged as critical or not.
Additionally, a new filter is introduced to the session list page that would allow the organiser to filter out the session marked as critical for regular review.
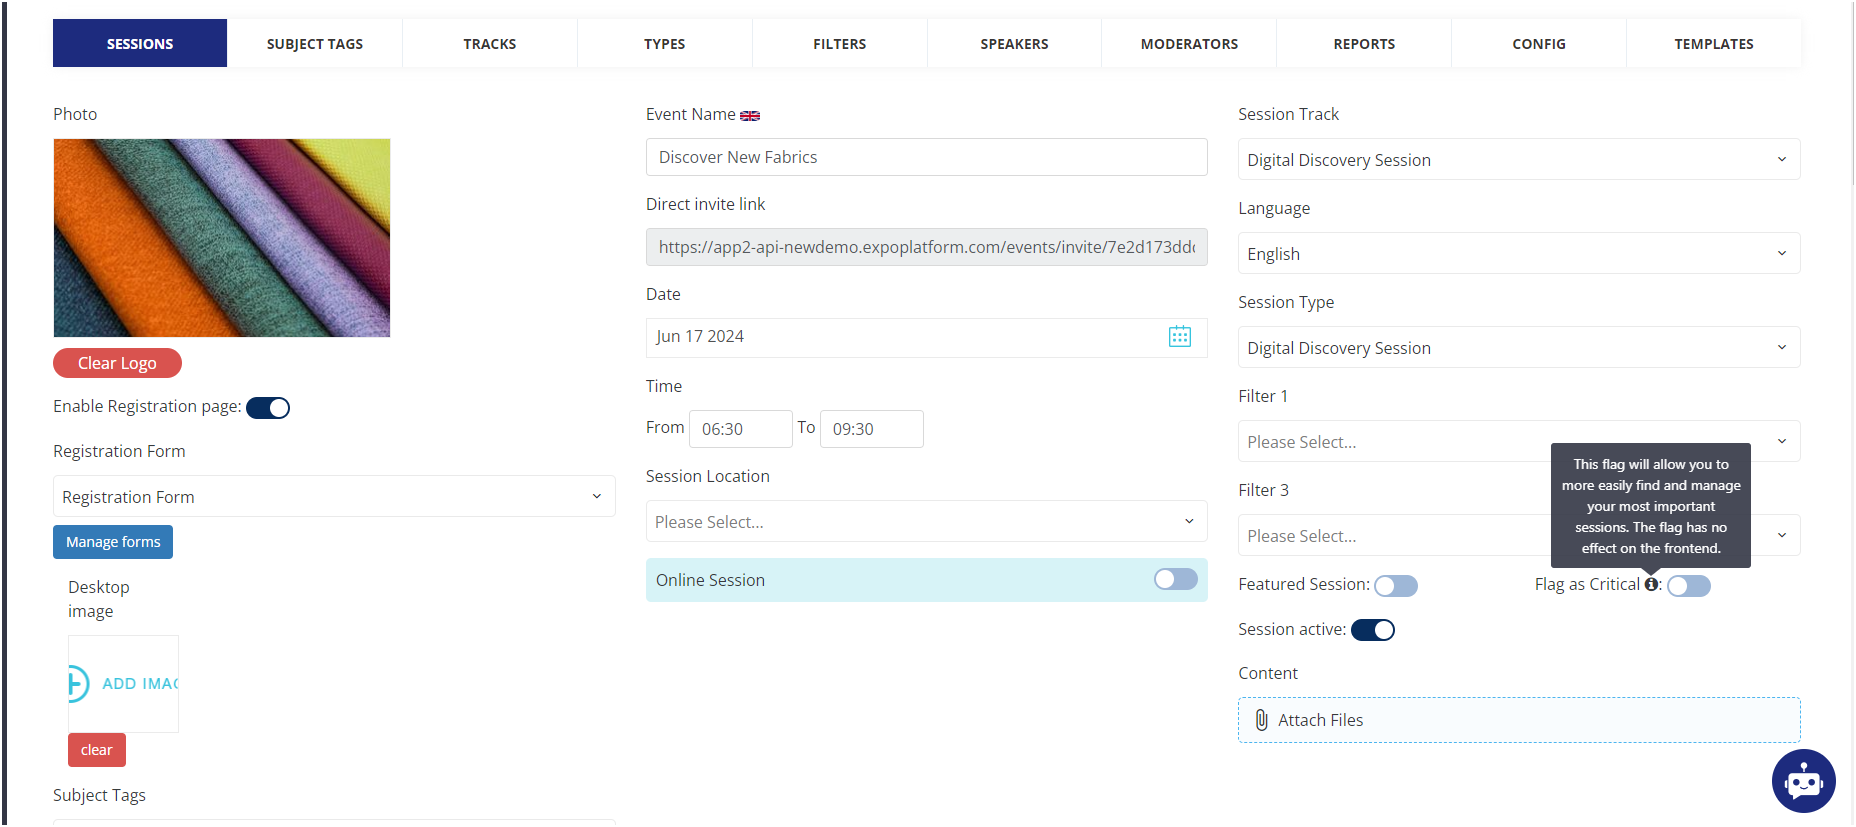
Marking a session as Critical
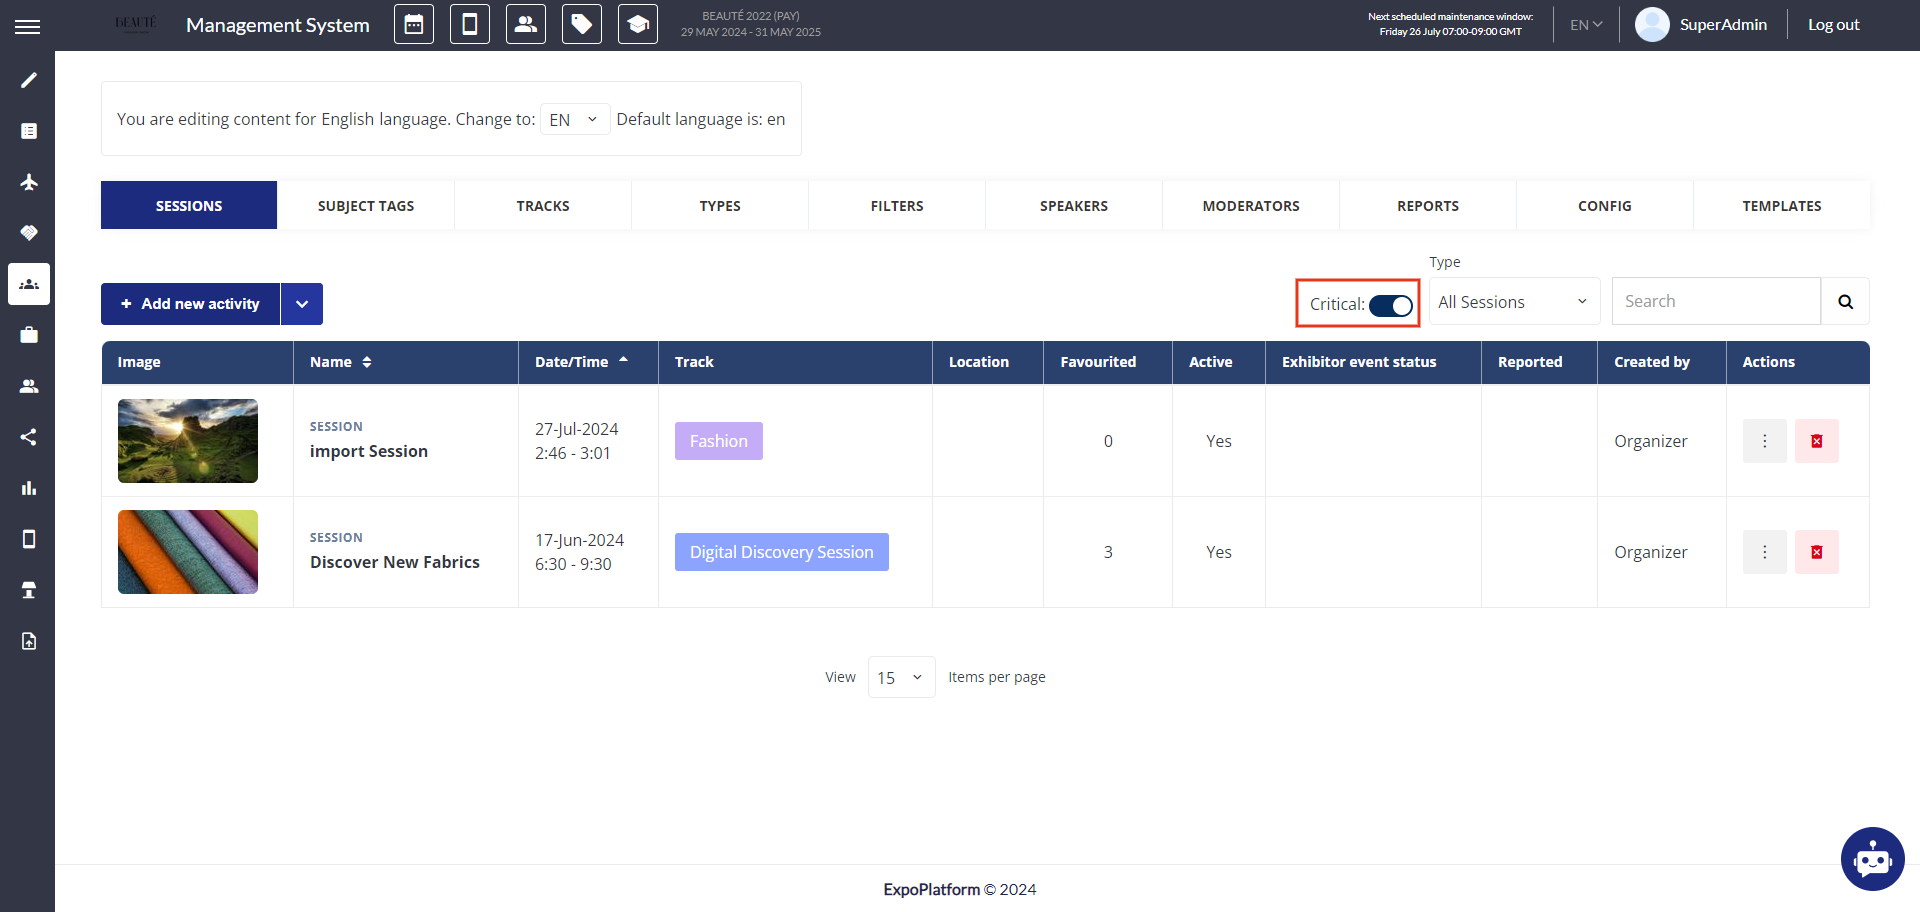
Filter to search Critical Session
Live Polls: For session feedback, live polls can also be set up in the admin panel by the organiser or directly during the live session by the moderator.
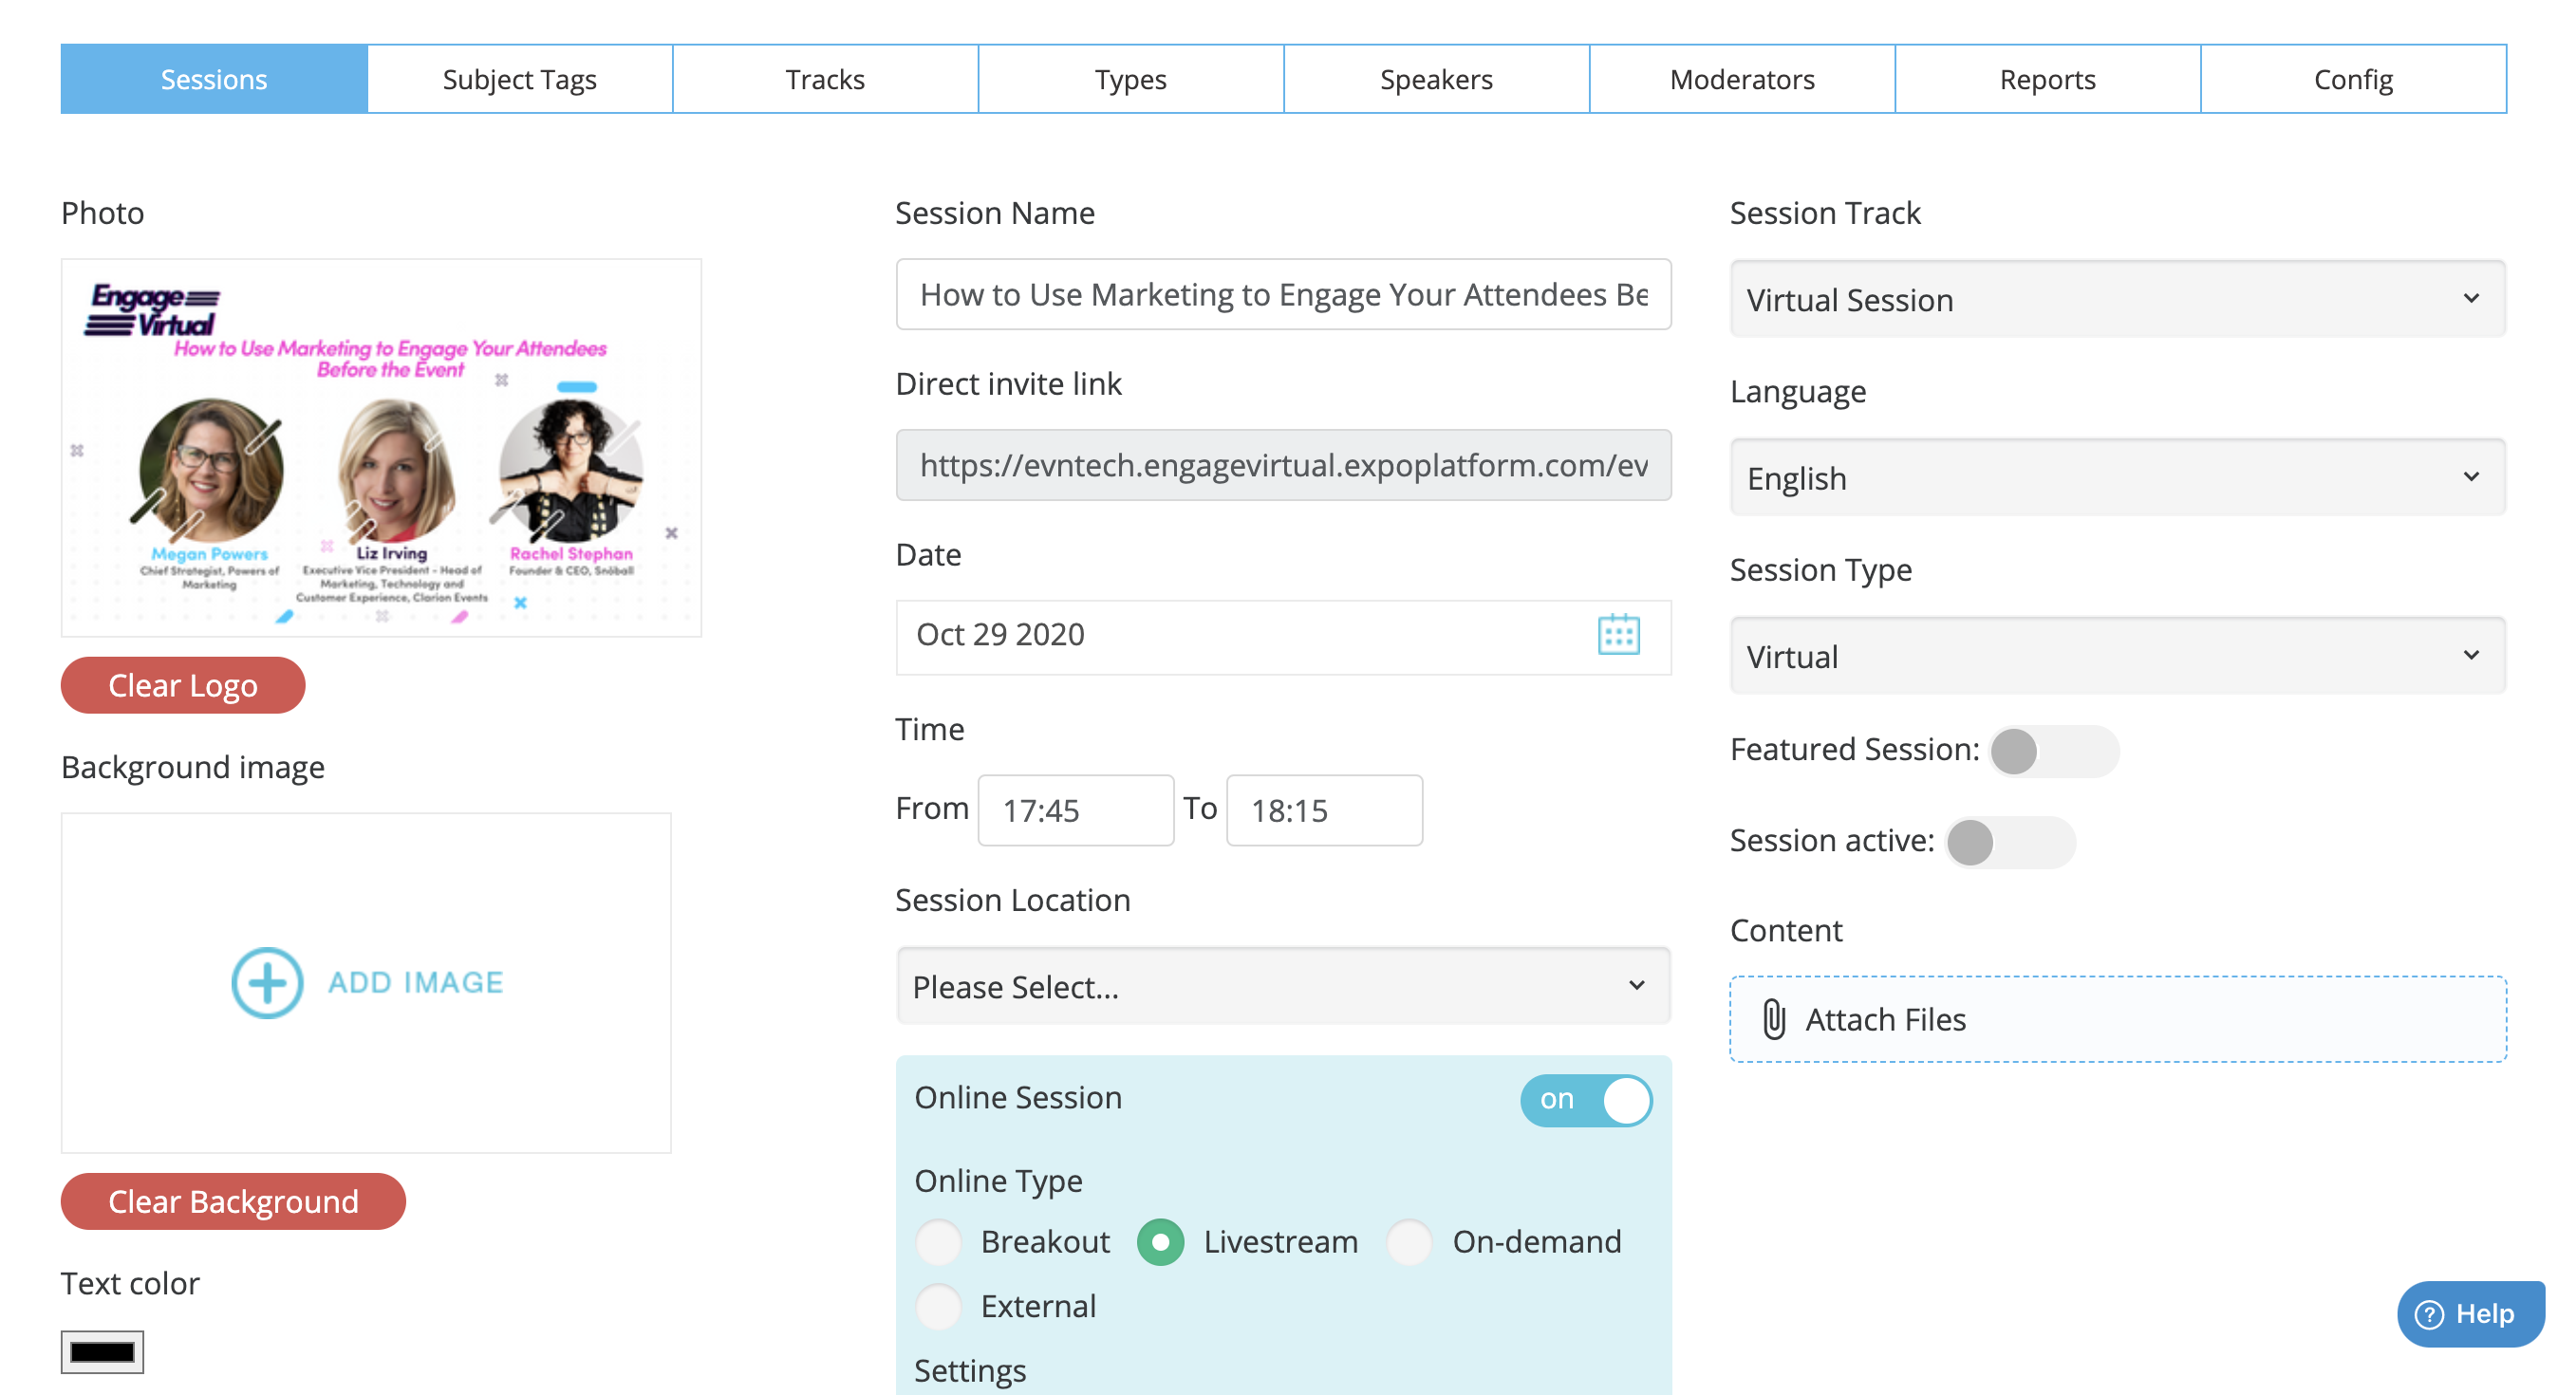
Edit Session Page
Session visibility: By default, the sessions will be visible to all visitors and can be joined by all visitors unless you make changes to the settings shown in the below image.
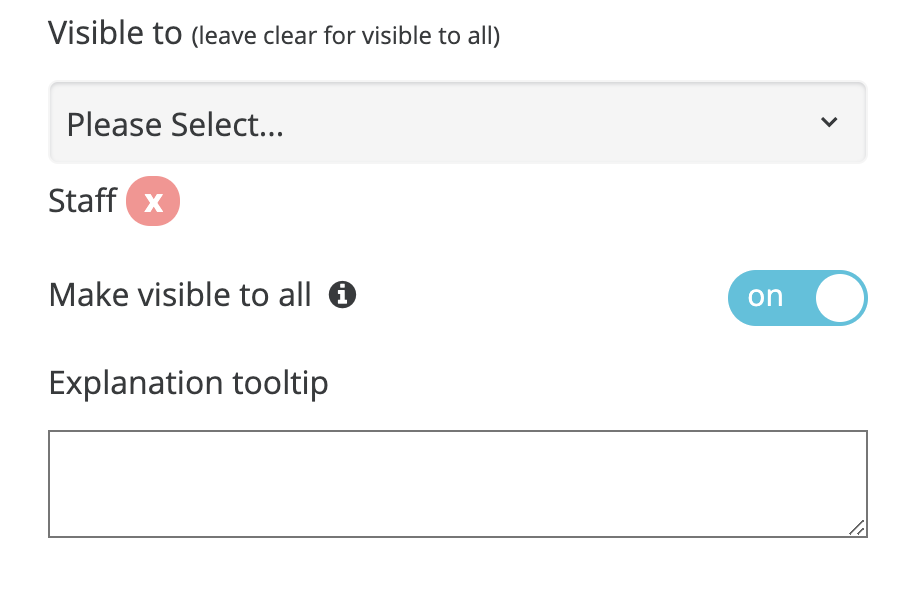
Visibility Settings for a session
You can customize the visibility for various visitor categories, permitting only the chosen categories to include sessions in their schedule. Also, you can make the session to be visible to all visitors but only booked by specific categories.
Moreover, you have the option to include a brief explanatory message in the tooltip for the audience.
Registration Form: You can create a registration form for specific sessions.
Toggle on ‘Enable registration form’
Click on "manage forms, to create a custom form for session registration.
It will direct you to the Form tab within the marketing module. Here, you can proceed to craft a custom form.
Form are listed under ‘Marketing → Forms’ on the admin panel.
After creating the form, select the Form from the dowpdown list and save the details
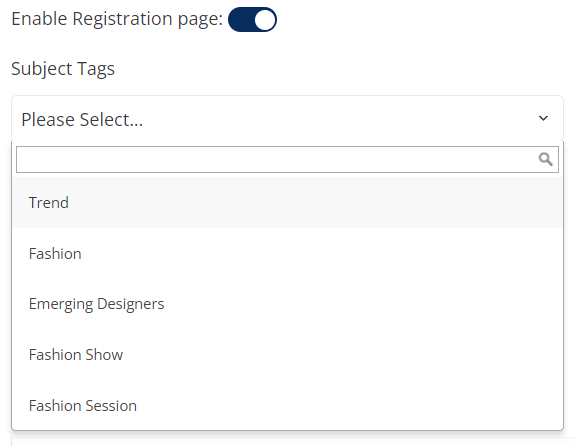
Session Registration
Session Payments: For paid sessions, you can add the session price and track the payments made. You can also specify a maximum limit up to which the participants can add the session to their agenda/schedule.
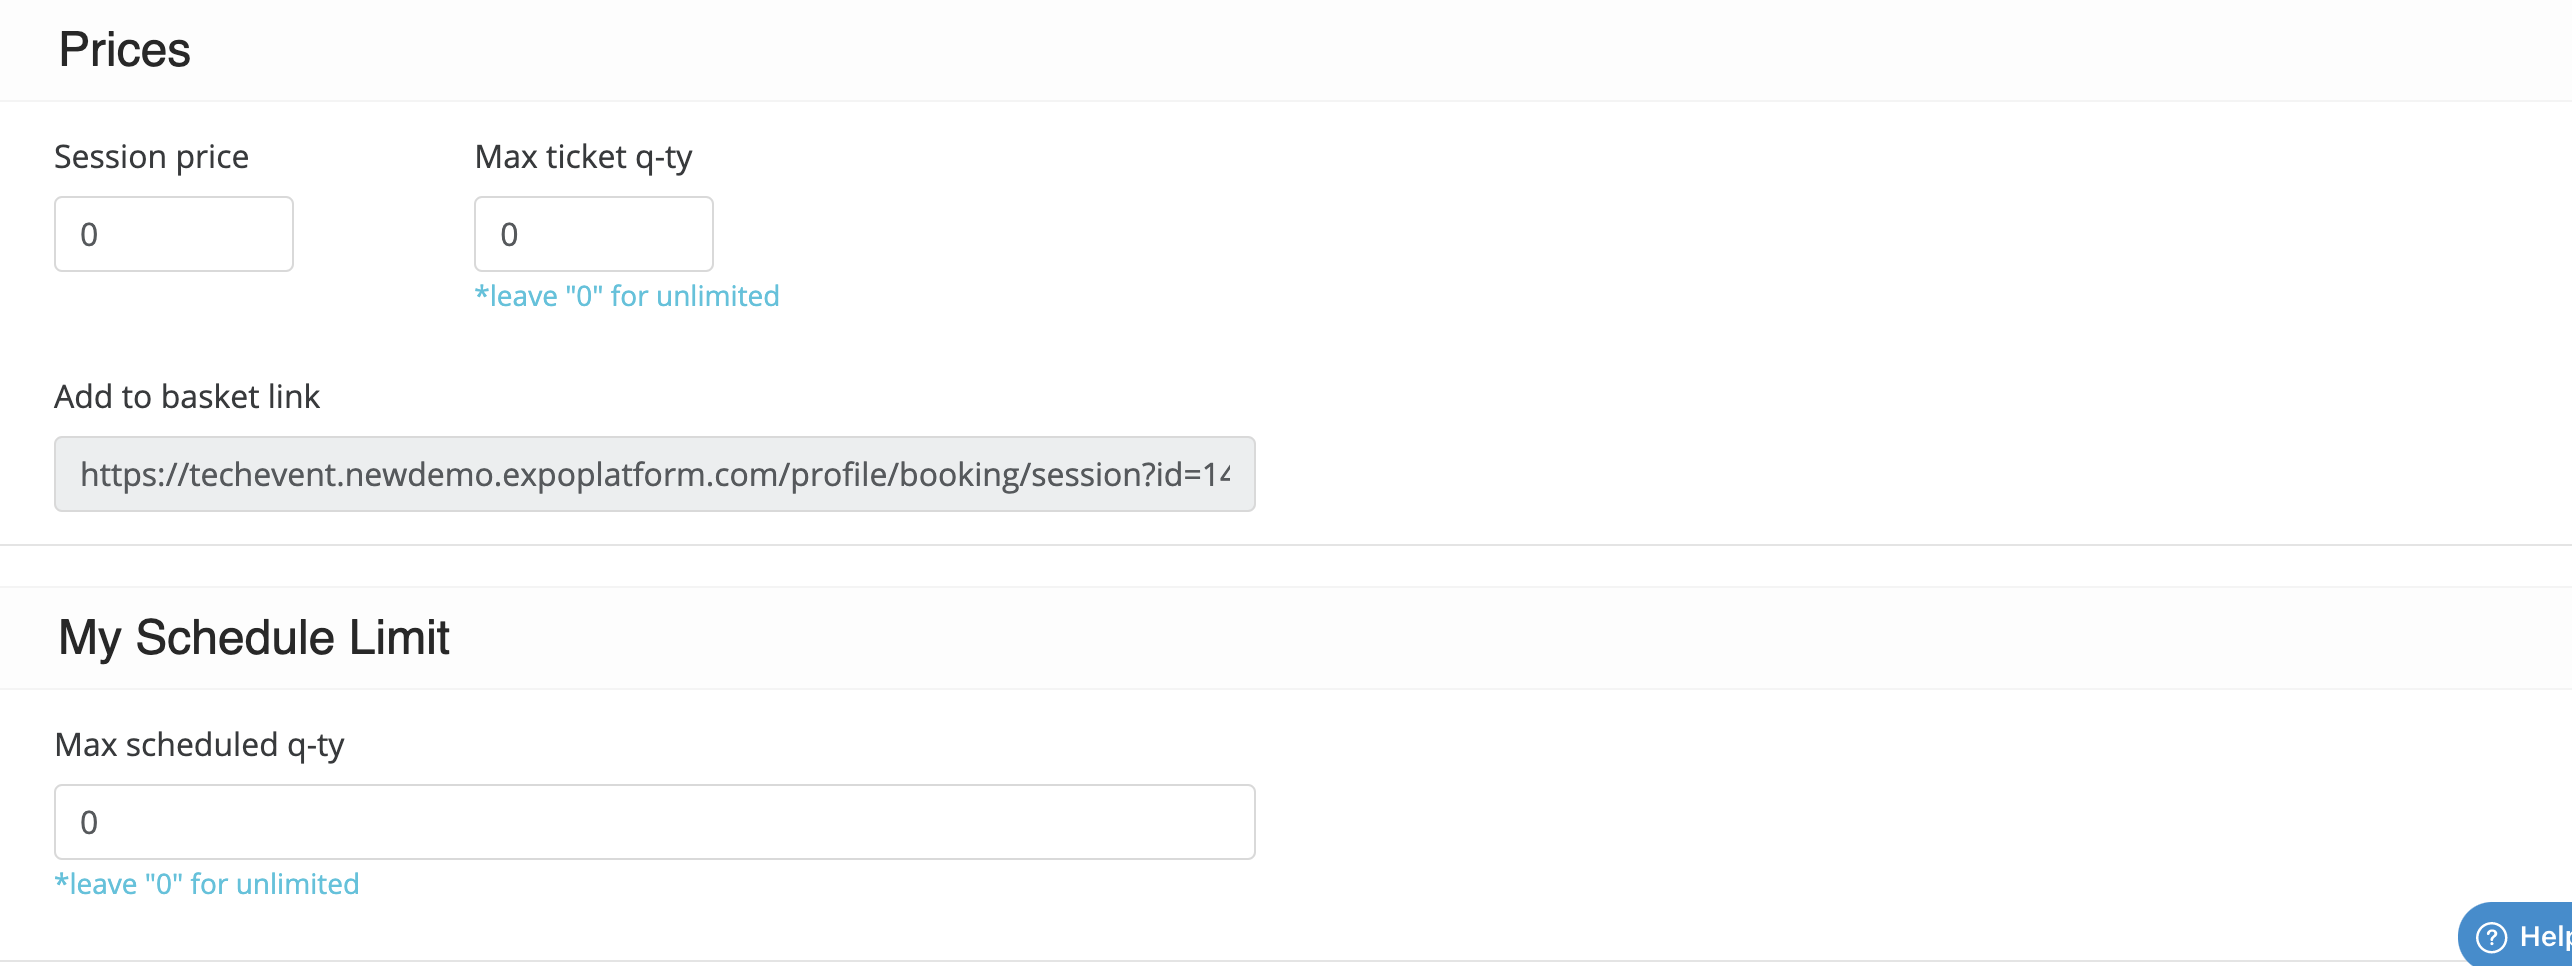
Setting Payment details for the session
Upon completion of a session, you have the choice to either duplicate it to generate an on-demand version or modify the existing session to an on-demand format.
Opting to clone sessions is ideal when you wish to showcase the original agenda in the "All Sessions" section. In such instances, you can include the on-demand session link in the session description, providing direct access to the on-demand version for users. This approach is advantageous for maintaining post-session analytics data.
Please note - The session image cards don’t exist by designs on IOS mobile app
