Feature Purpose
Concierge Meetings is a feature within ExpoPlatform designed to facilitate personalized and organized meeting experiences during events. It enables event organizers to set up specific zones and tables for scheduled meetings, ensuring that participants can connect efficiently and effectively.
The primary purpose of Concierge Meetings is to provide a structured environment where event attendees can engage in pre-arranged meetings. This feature is particularly beneficial for networking sessions, business matchmaking, and other scenarios where targeted interactions are essential. By utilizing Concierge Meetings, organizers can enhance attendee satisfaction and maximize the value of their events.
Working with this Feature:
To effectively implement and manage Concierge Meetings, it's important to understand the following components:
1. Meeting Zones
Meeting Zones are designated areas within the event venue specifically allocated for concierge meetings. These zones help in organizing meetings in a centralized location, making it easier for participants to find their scheduled appointments. When setting up a Concierge Meeting Zone, consider factors such as accessibility, capacity, and proximity to other event activities.
These are physical areas at the venue where meetings are held. Each zone can be configured with specific:
-
Capacity (how many tables or meetings per slot)
-
Time slots (for scheduling)
-
Location information (to help attendees find it onsite)
How to Set It Up:-
Go to Admin Panel > Meeting Formats > Concierge Meetings > Zones.
-
Click Add Zone.
-
Enter the zone name (e.g., VIP Lounge).
-
Define the number of tables that will be placed in this zone.
-
Specify location details (to appear in notifications and schedules).
-
Set time slot duration (e.g., 20 minutes) and overall scheduling range (start/end times).
-
Save the zone.
Why this matters:
Properly configured zones help match meeting schedules with real-world logistics , they tell attendees where to go, and help admins plan resources. -
Screen recording shows the Back-end and front end navigation of the Concierge Zones
2. Meeting Tables
Within each Concierge Meeting Zone, specific tables are assigned for individual meetings. Each table can be labelled and numbered to correspond with the meeting schedule. This organization ensures that participants can locate their meeting spots promptly, reducing confusion and delays.
- Each zone consists of individual tables used for the meetings. Tables are:
-
Named/Numbered for easy assignment
-
Tied to specific time slots (e.g., Table 3, 11:00–11:20)
-
Linked to participants through the meeting assignment process
How to Set It Up:
-
Navigate to Admin Panel > Meeting Formats > Concierge Meetings > Tables.
-
Select the zone you created earlier.
-
Click Add Table.
-
Name or number the table (e.g., Table 1, Table A).
-
Associate it with specific time slots (these should align with the zone’s schedule).
-
Repeat for each table in the zone.
Screen recording displays a zone and table setup within a Concierge Meeting Zone.
3. Setting Up Offline Concierge Meetings
Offline meetings are hosted at physical venues using designated Concierge Meeting Zones. Each zone contains specific meeting tables, which are scheduled for use during available time slots.
To configure offline concierge meetings:
-
Navigate to Meeting Formats > Concierge Meetings > Offline Meetings in the Admin Panel.
-
Define the Offline capacity, months, days and hours the offline meetings can be scheduled
-
Select hours allowed and its applicability to the whole event or to the current month.
-
On the front end , Exhibitors can use the Meeting Wizard to assign participants to meetings by selecting available time slots.
Offline meetings benefit from clearly marked zones at the venue, physical table numbers for orientation, and real-time tracking using the Concierge Meetings Dashboard during the event. Floor plans and table maps should be provided to help attendees locate their meetings onsite.
On the backend:
-
On the meeting settings, ensure the “other location” toggle is turned on
-
Add a location
-
Select hours allowed and its applicability to the whole event or to the current month.
-
When scheduling meetings on the frontend, ensure to that on the location option, “Others” is selected to enable you book and offline meeting from the offline locations
The screen recording shows the Front and Back-end navigation
4. Setting Up Online Concierge Meetings
Online concierge meetings follow the same setup process as offline ones but without a physical zone or table requirement. These meetings are held using virtual meeting rooms embedded into the platform or linked through third-party services.
To configure online concierge meetings:
-
Go to Meeting Formats > Concierge Meetings > Online Meetings. This virtual zone helps organise meetings in the backend but does not require physical location data.
-
There is no need to create physical tables, but you can still define virtual “slots” for time-based grouping.
-
Ensure to toggle the “Online meeting” option through the settings, once this is enabled, virtual meeting schedules on ExpoPlatform automatically generates meeting links.
-
Use the Meeting Wizard to assign participants to online meetings and time slots as with offline meetings.
-
The platform sends meeting links and calendar invites to participants automatically via notifications.
Participants will be able to join the meetings directly from the platform via the agenda or meeting dashboards. Reminders and access links are sent via email, in-app notifications, and push alerts as configured.
-
The screen recording displays the Back-end and Front-end Navigation:
20250409-0355-54.2068481.mp4
Managing Hybrid Events
Events that combine both online and offline concierge meetings require clear organisation. Each concierge meeting should be labelled accordingly in the admin panel, such as “VIP Meeting Lounge (Offline)” and “Online Concierge Zone – Buyers Day 1.” This helps both admins and attendees differentiate between physical and virtual engagements.
During the event, the Real-Time Dashboard provides live data on meetings happening across both formats. It includes participant check-ins, meeting status, and rescheduling tools that are effective for both online and offline concierge zones.
5. Meeting Wizard
The Meeting Wizard is a tool within ExpoPlatform that guides organizers through the process of setting up concierge meetings. It assists in defining meeting parameters, assigning participants, and scheduling times. Utilizing the wizard simplifies the setup process and ensures that all necessary details are accounted for.
This is your core setup tool. The wizard helps organizers:
-
Select meeting zones & tables
-
Create time slots
-
Upload or input participant data
-
Match users and assign them to meetings
-
Preview and adjust the schedule before publishing
6. Meetings Notifications
To keep participants informed, ExpoPlatform provides notification features related to concierge meetings. Attendees receive reminders and updates about their scheduled meetings, including time, location, and any changes. Effective communication helps in minimizing no-shows and ensures a smooth meeting experience. Participants receive automatic notifications that include:
-
Meeting confirmation
-
Location & table number
-
Time slot details
-
Reminders before the meeting
How to Set It Up:-
Go to Admin Panel >Networking and Matchmaking > Notifications.
-
Ensure the correct delivery channels are active , these can include: Email , Notifications (app and
web) WhatsApp , SMS
How to set up Meeting Email Templates - Go to Admin Panel > Meeting Formats > Concierge Meetings > Email templates.
- Find templates related to Concierge Meetings (e.g., meeting confirmation, reminders).
- Edit message text as needed (include variables like name, table number, zone, time).
-
Screen recording shows back-end navigation of notification emails templates or in-app messages sent to participants and the frontend notification settings too
7. Meetings Dashboard
The Team Meetings Dashboard offers Exhibitors a comprehensive view of all scheduled meetings, including details such as participants, times, and table assignments. This dashboard is essential for monitoring meeting progress and making real-time adjustments if necessary. This is can also be used during the event. It shows:
-
Which meetings are happening now
-
Which tables are free or occupied
-
Live check-ins (who showed up)
-
Admin override tools to reschedule on the fly
It’s perfect for onsite staff to manage the meeting zone smoothly.
Screen recording shows the Meetings Dashboard interface highlighting key features on the frontend
8. Assigning Admin
In managing concierge meetings, it's possible to assign administrative roles to team members. Admins have the authority to oversee meeting setups, make adjustments, and handle any issues that arise. Clearly defining admin roles ensures efficient management and accountability.
-Admins help manage the meetings — including assigning people, editing meetings, and troubleshooting.
-
Admins can be assigned per event or per zone
-
Access can be limited to only the meetings relevant to their zone
-
Ideal for large teams managing different concierge zones
Screenshot Opportunity: Demonstrate the process of assigning admin roles within the platform.
9. Meeting Management
Effective management of concierge meetings involves overseeing the scheduling, participant assignments, and logistical arrangements. Regularly updating the meeting schedules and promptly addressing any conflicts or issues contribute to a seamless experience for all attendees.
This is where the real magic happens. Meetings can be:
-
Manually curated: You assign Person A to Person B
-
Semi-automated: Based on interests, profiles, or categories
-
Imported via CSV: Bulk scheduling of meetings
You can assign attendees to meetings directly in the platform or import schedules created externally.
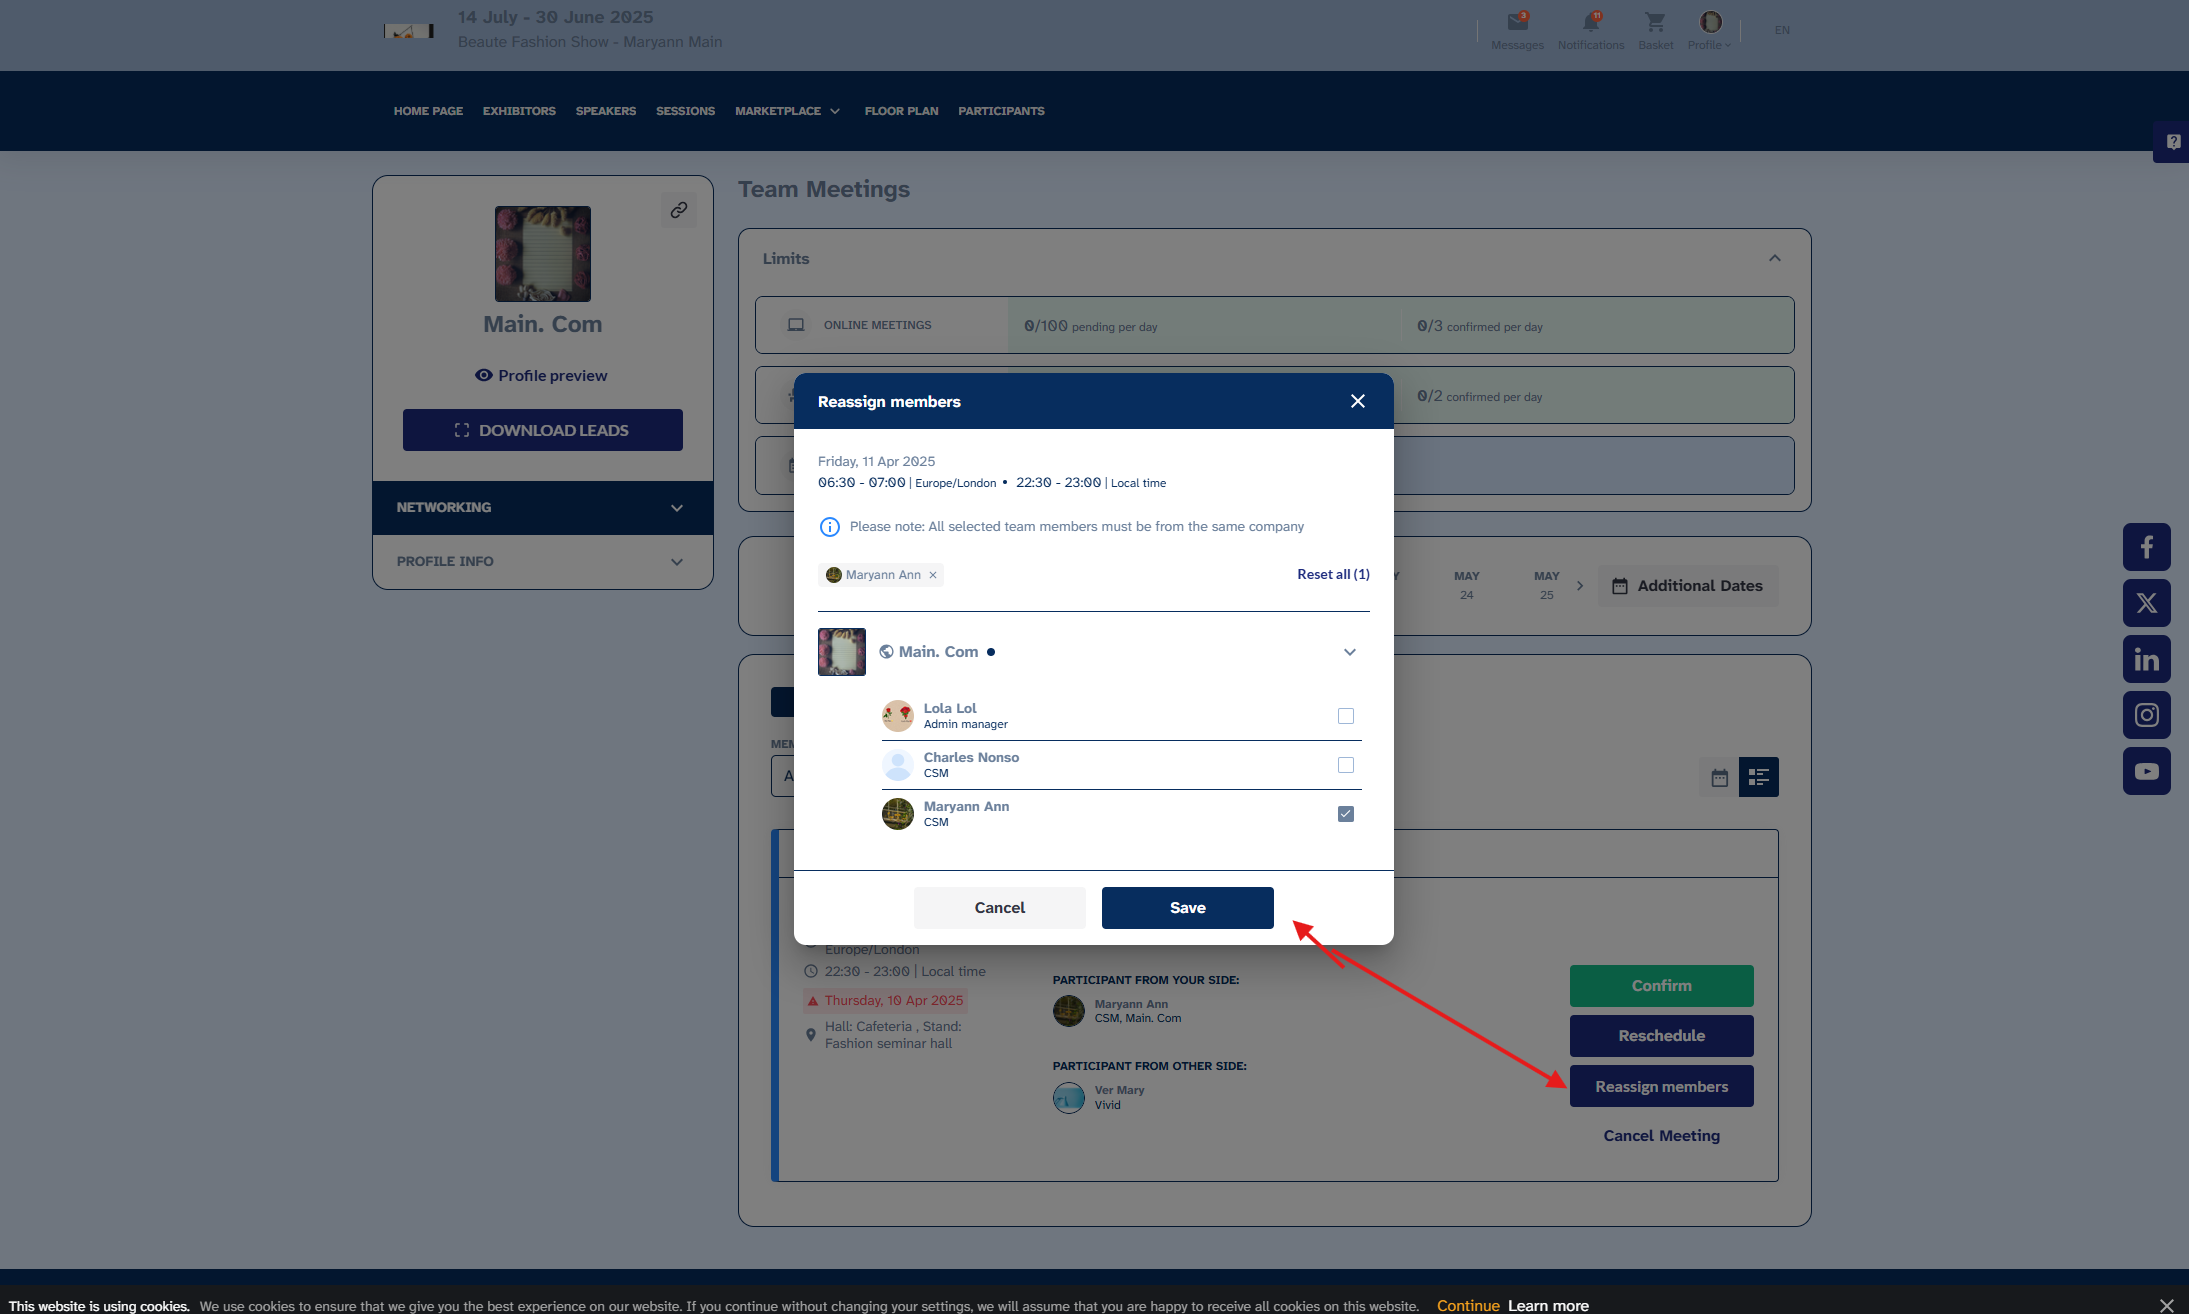
Screenshot showcases the management interface where meetings are scheduled and monitored. and can be reassigned to team members
Troubleshooting:
While Concierge Meetings is designed to be user-friendly, users may encounter some common issues:
Here are common issues that may arise when working with Concierge Meetings, and how to resolve them:
-
A participant says they don’t see any meetings assigned.
Check whether the participant has actually been matched and assigned through the Wizard or CSV. Also, ensure their meeting is published. Sometimes, if a zone or table wasn’t linked properly, it may prevent display. -
Admins can’t access the zones they’re managing.
Go to the Admin Assignment screen and verify that the admin has been granted access to the correct zone(s). If their access is too limited, they won’t be able to manage or view any meetings. -
Two meetings are scheduled on the same table at the same time.
This usually happens if manual assignments are made without double-checking availability. The Wizard helps avoid this, but if done manually, always check the Concierge Meetings Dashboard to prevent overlaps. -
Participants didn’t receive notification emails.
Ensure notifications are enabled in the platform settings. Ask the participant to check their spam folder. You can also resend notifications manually from the management dashboard. -
A participant didn’t show up for a meeting.
Use the Real-Time Dashboard to check in participants. If someone is absent, you can reassign their meeting or reschedule it on the fly from this same dashboard.
The CSV upload didn’t work.
Double-check your formatting. Each row must include a valid user ID, time slot, and table ID. If any fields are missing or mismatched, the upload may fail silently or partially. -
A meeting disappeared after assigning.
Verify whether any recent changes were made to the zone, table, or time slot. Deleting any of those will automatically unassign meetings linked to them.