Applying Limits at the Exhibitor Category Level (v2)
As an organiser, you can define limits on the exhibitor category level or give more visibility to exhibitors who are probably paying more and deserve to be given more marketing opportunities.
Perform the following steps to access the settings for Exhibitor Category on the admin panel:
Go to Registration Settings> Exhibitor > Exhibitor Categories and then click on the Settings button.
Team member inherits the category limitation from their exhibitor. They dont have separate custom category limitations.
The exhibitor category must have been created to perform the below steps. (Exhibitor Categories can be created by clicking on the ‘Create New Category’ button).

Exhibitor Default Category
In Admin Panel we will now have a Default Category which will be auto created and assigned to Exhibitors without any Category
Default Category will have following features
Default Category can’t be removed from the category List
Default Category will be pinned on the top of the category list and can’t be moved
Category Name can be changed by the organizer as per the event requirement
Not visible on the Frontend Filter
The “Settings“ pop-up can be configured like other categories
If any custom category is deleted then all the exhibitors with that category will be assigned Default category and will auto inherits all the settings of default category
If the exhibitor is added to the platform without any category via import, API or manual creation will be auto-assigned with the Default category and its settings, except limits and restrictions that were set manually at the exhibitor level.
While switching Exhibitor category from Default to Custom or vice versa, Individual level settings will always take precedence over category settings
1. ONLINE PRESENCE SETTINGS
1A. Showroom
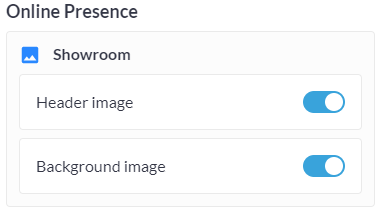
Exhibitors can be given access to increase their online presence by toggling on the Header and the Background image. Once activated, all the exhibitors under the defined category will get the option on the frontend to upload the images, which look them stand out from the rest of the categories who don’t have this feature activated.
i. Backend:
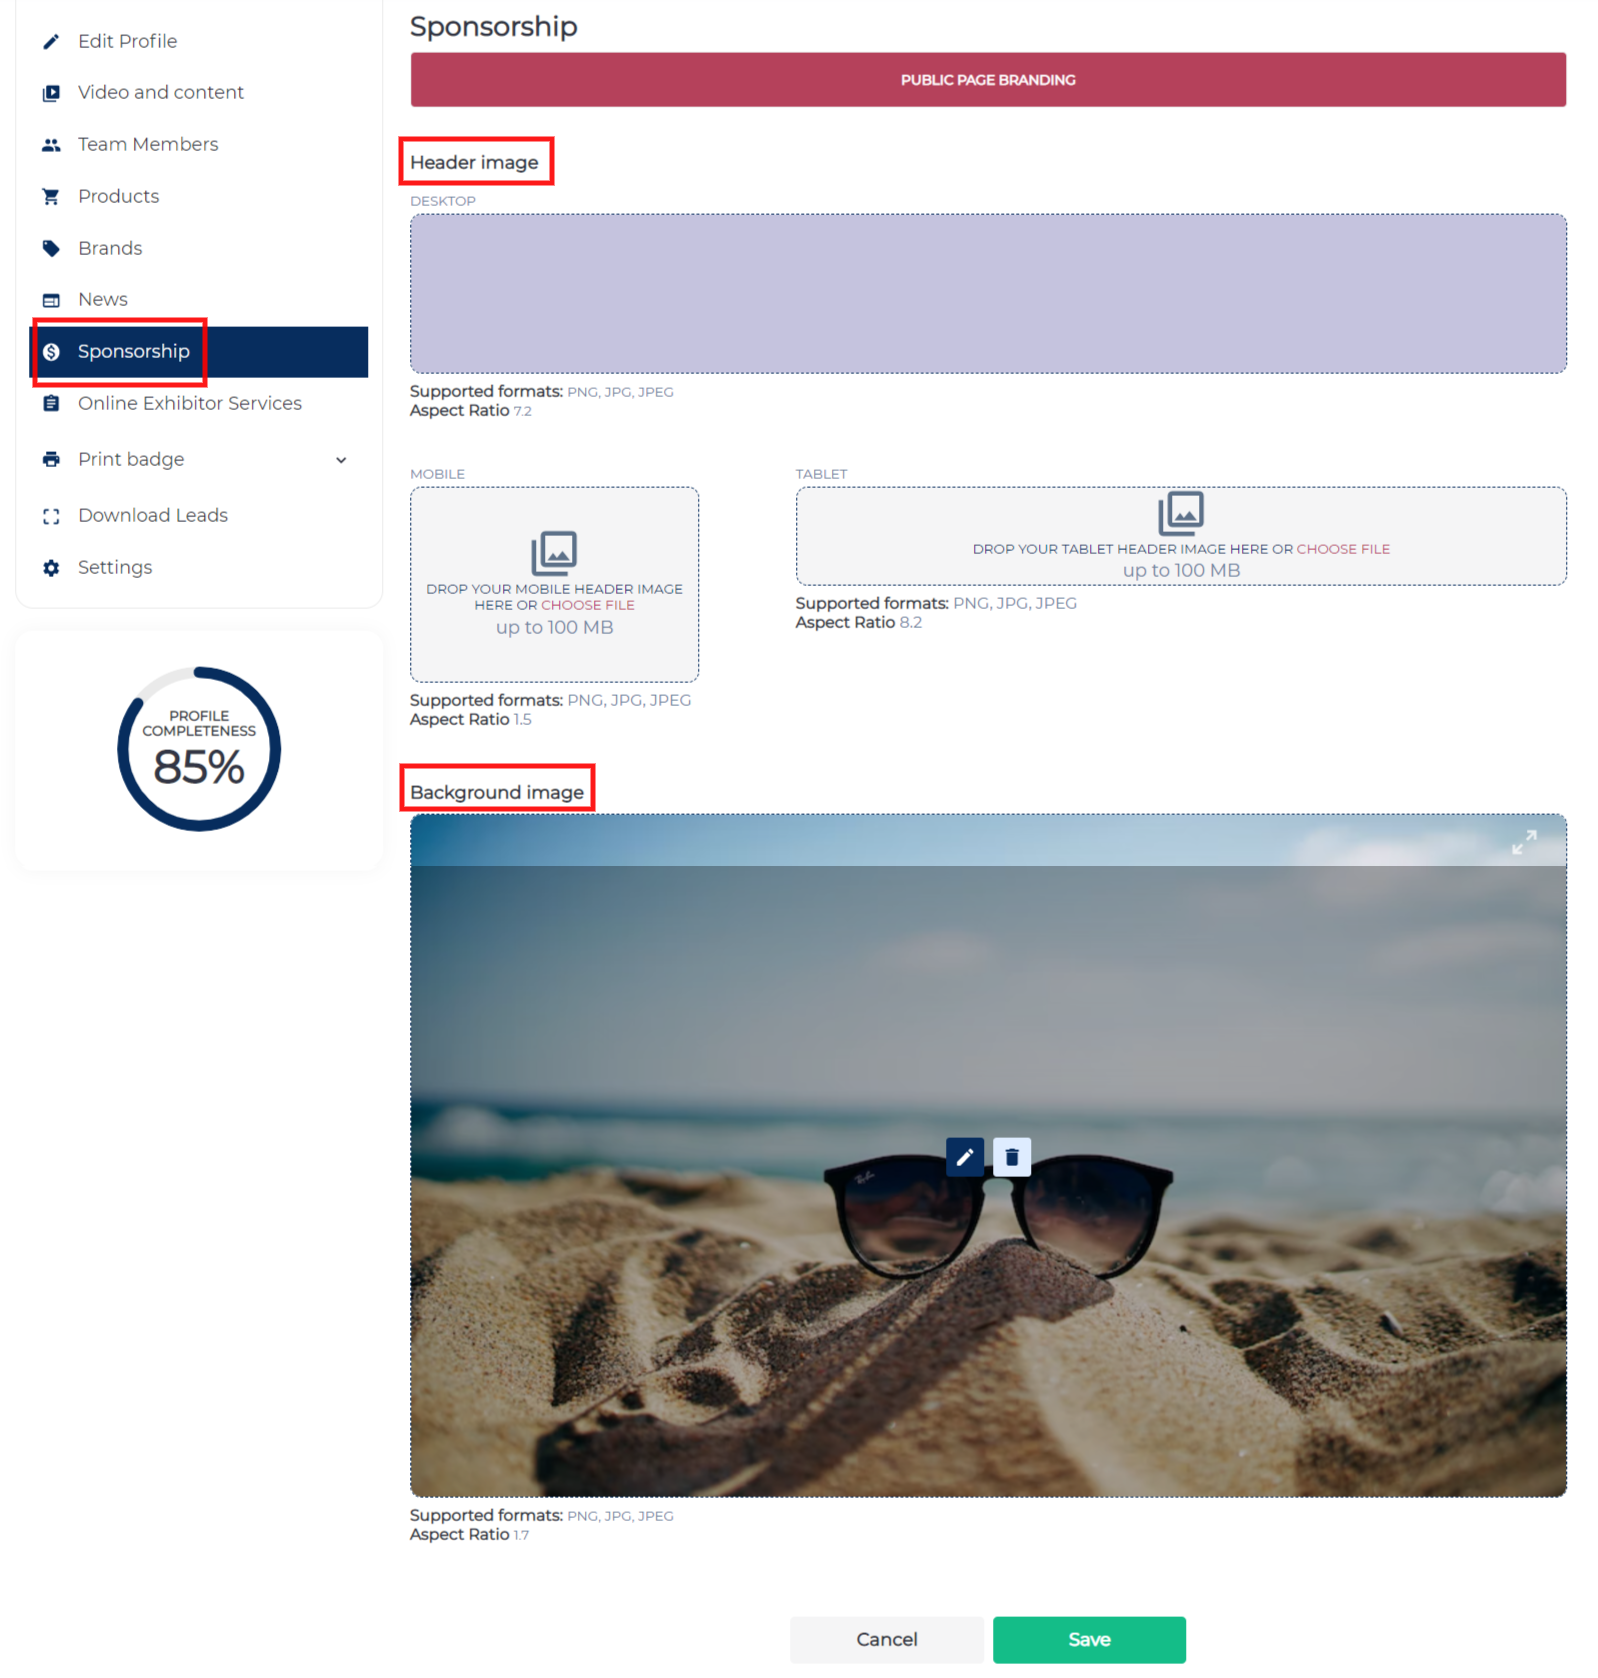
ii. Frontend Steps for Exhibitor:
When logged in: Profile Info > Sponsorship > Upload the header image for desktop, mobile and tablet along with the Background image.
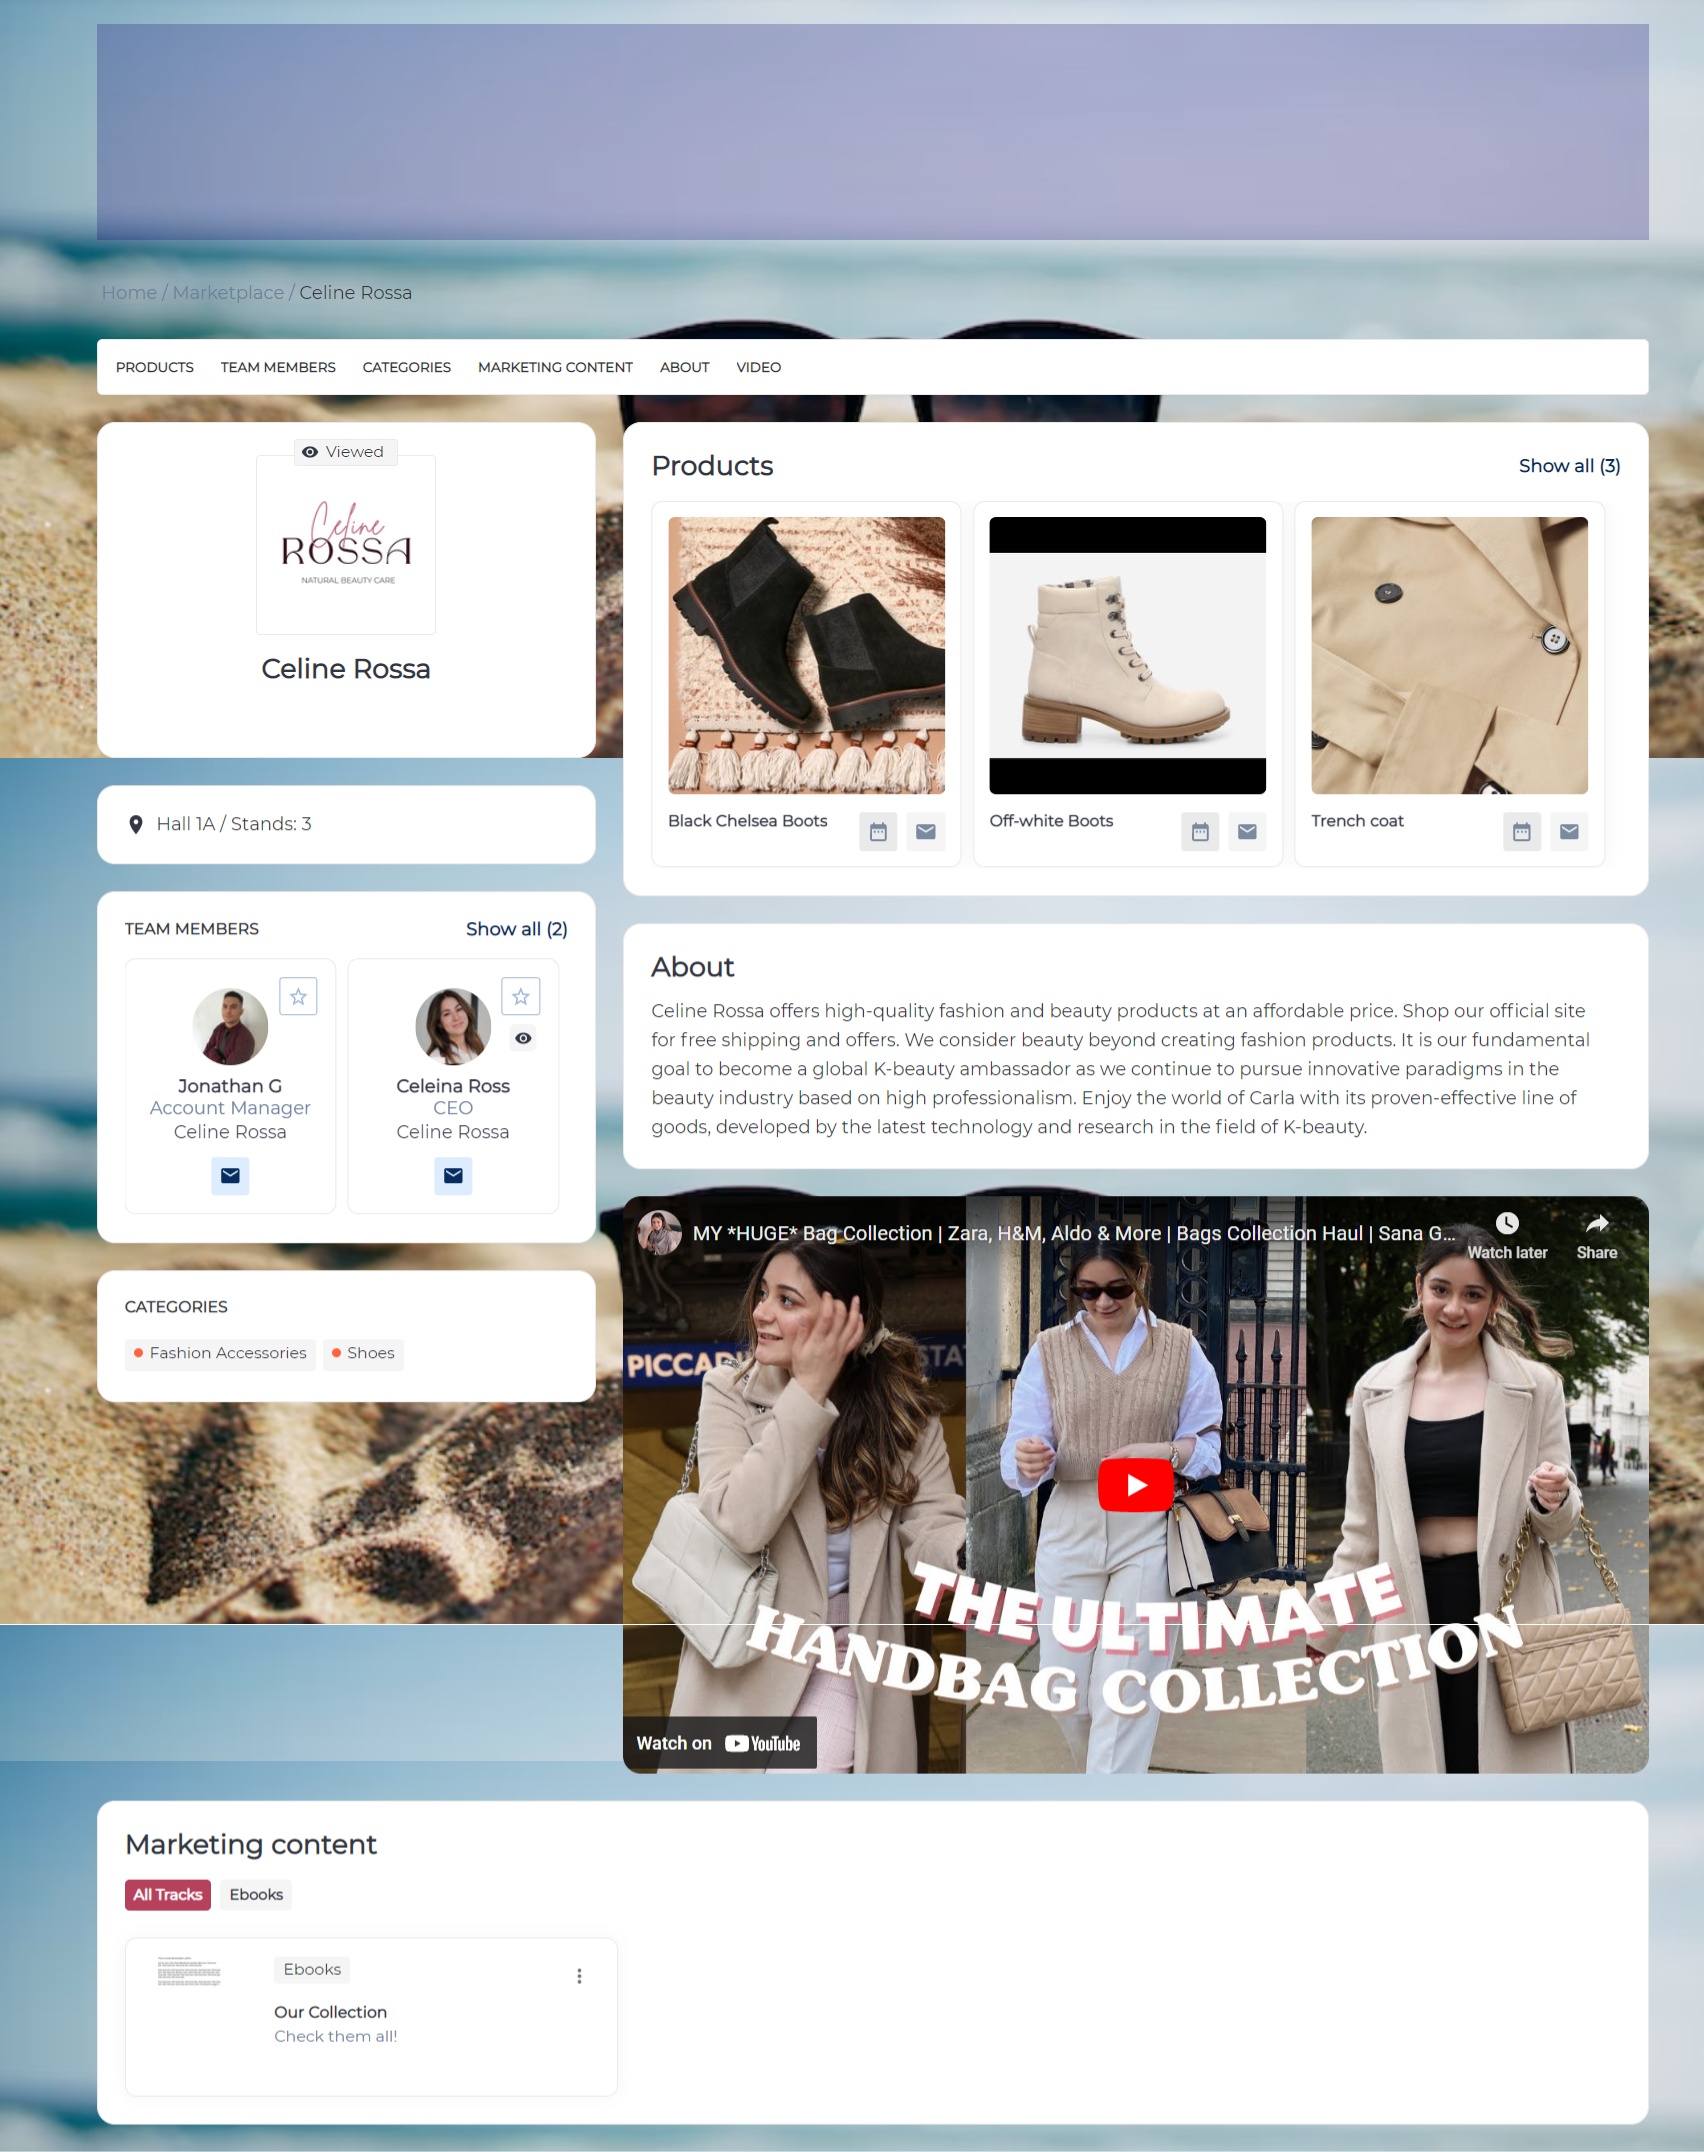
iii. Profile preview for participants:
1B: Content
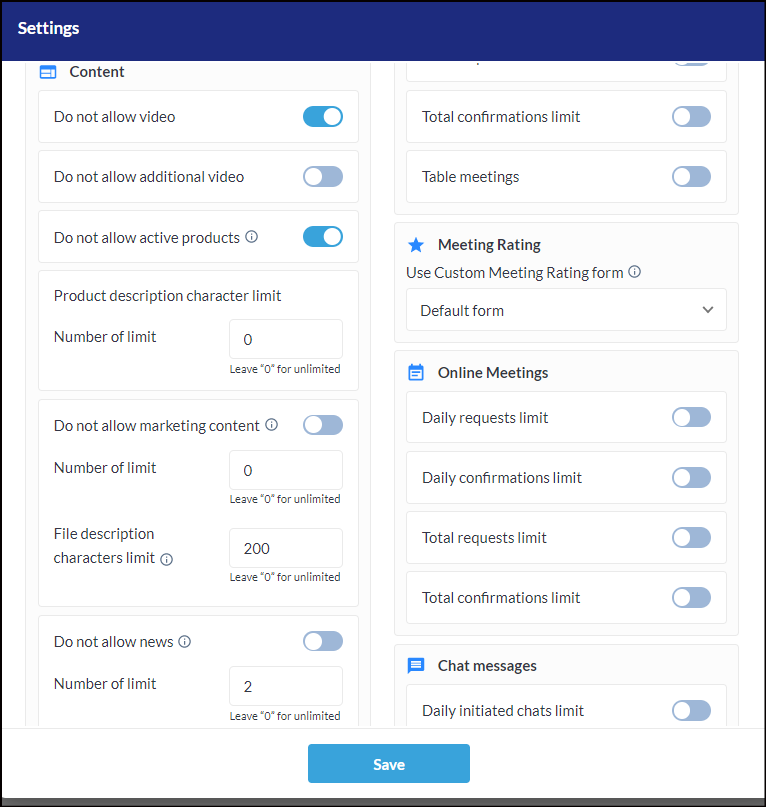
Under this section, everything related to showcasing their online profile can be controlled.
Do not allow video- The exhibitors under this category will not get the option to upload a video, if toggled on
Do not allow additional video- The exhibitors under this category will not get the option to upload the additional video, if toggled on.
Do not allow active products- The exhibitors under this category will not get the option to add their products.
Number of limit- You may define the limit on the number of products that can be added.
Product description characters limit- Each product would have a description section for the exhibitors to explain about the same. The limit to the characters can be defined from here.
Do not allow marketing content- The exhibitors will not be able to add any marketing media files like brochures, ebooks, product documents, videos, etc.
Number of limit- However, the limit for each of the exhibitor category can be defined.
File description characters limit- The description which is added in the text box while uploading the marketing content can have a limit defined to the characters.
Do not allow news- The exhibitors will not get option to add news articles.Article characters limit (for news)- The limit to the characters can be defined.
ii. Frontend Steps for Exhibitor:
In this screen recording, you will be able to check all the steps where the limitations are applied.
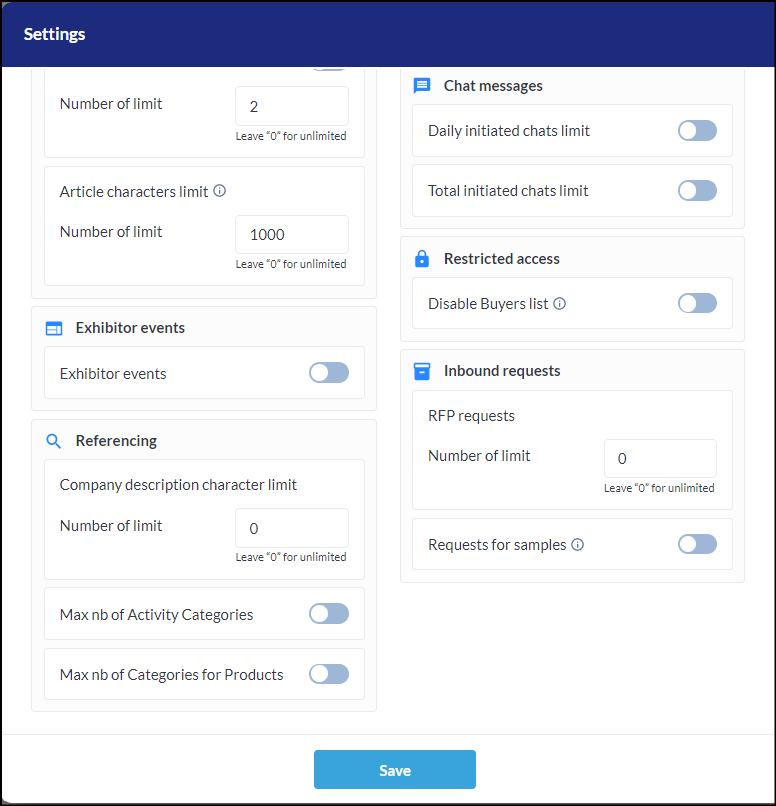
1C: Referencing
Under this section, the character limit for the company description, the maximum number of activity categories and the maximum number of categories for a specific product can be defined.
i. Backend
ii. Note for Exhibitors on Frontend while selecting the activity categories
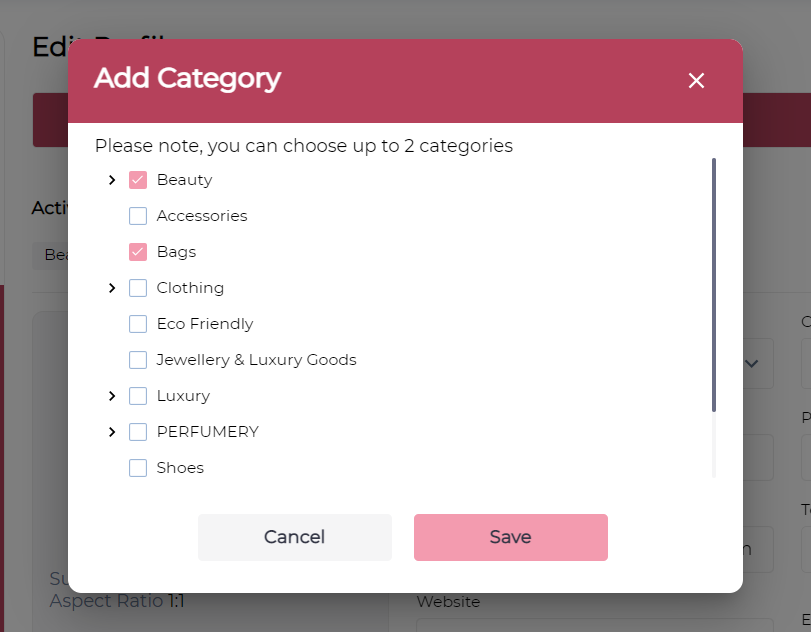
iii. Note for Exhibitors on Frontend while selecting the product categories
1D: Lead Questions
This section allows the organizer to set the limit on the number of lead questions that can be included by the exhibitor for the lead capture page after scanning the user badge from the mobile application. The organizer can define limitations for both the Standard and Custom Questions that exhibitors are allowed to include.
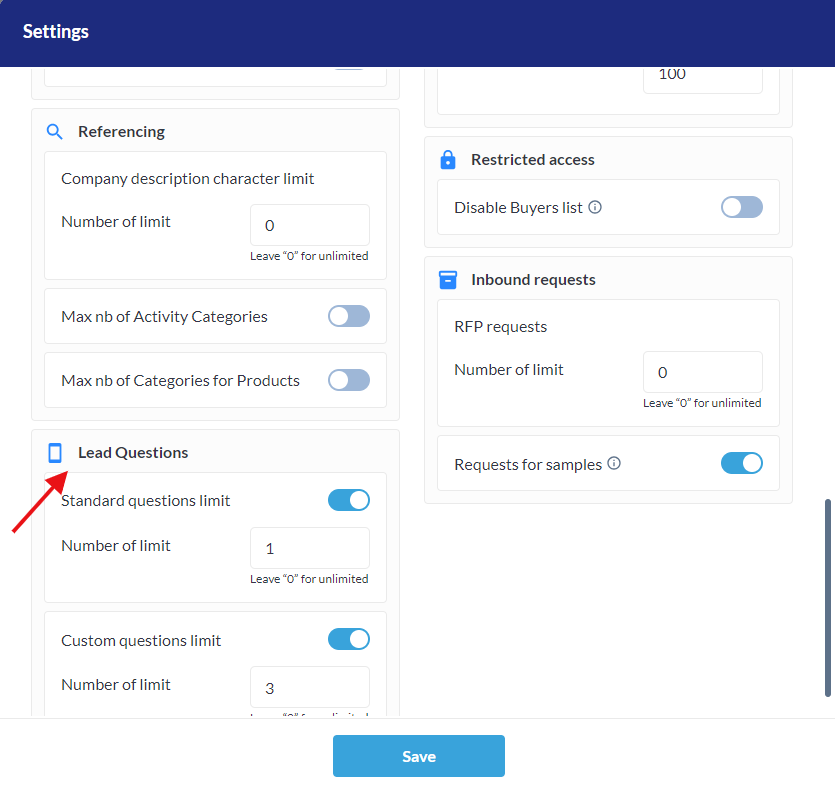
Backend Settings
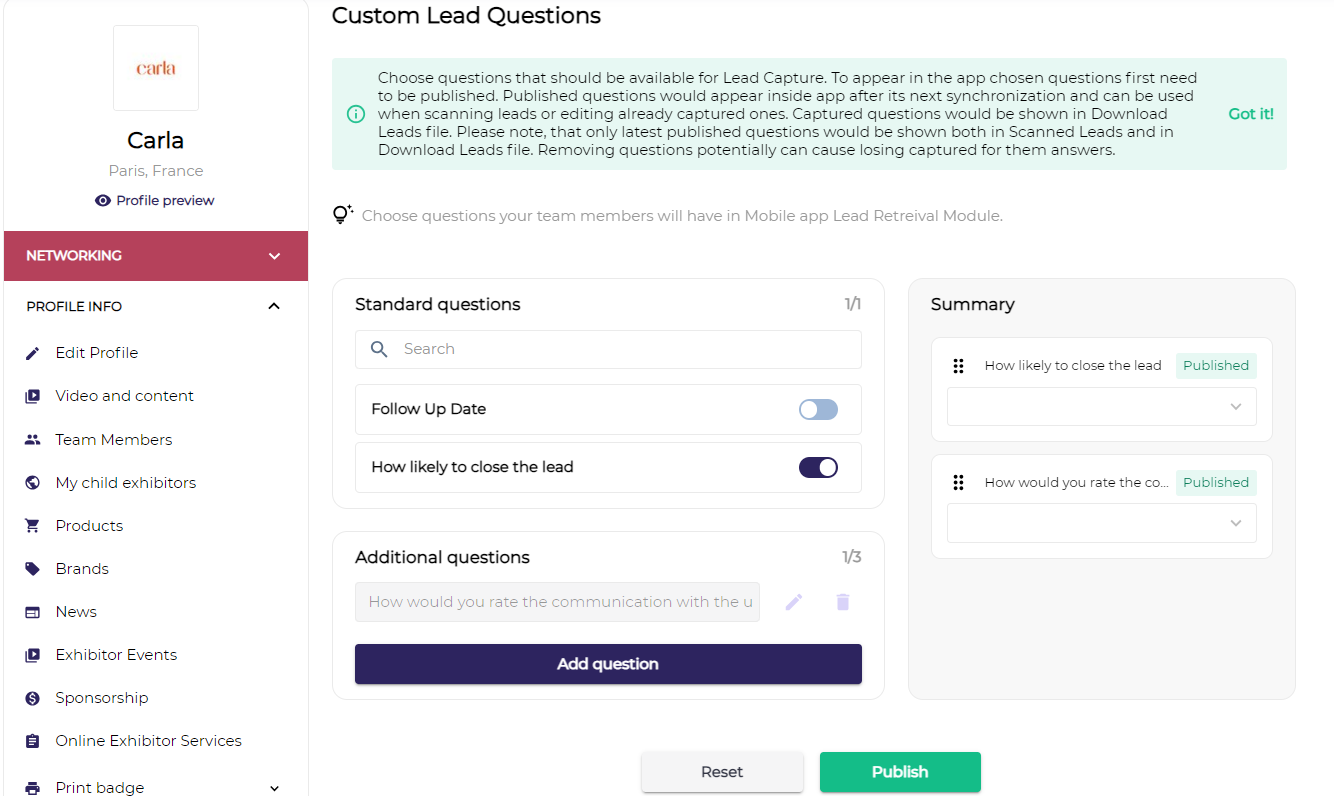
Frontend Settings/View
2. NETWORKING SETTINGS
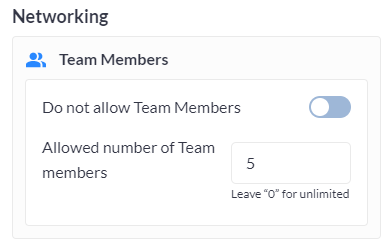
2A. Team Members
You may define whether the exhibitor category can add team members or not, and define the number to it.
i. Backend
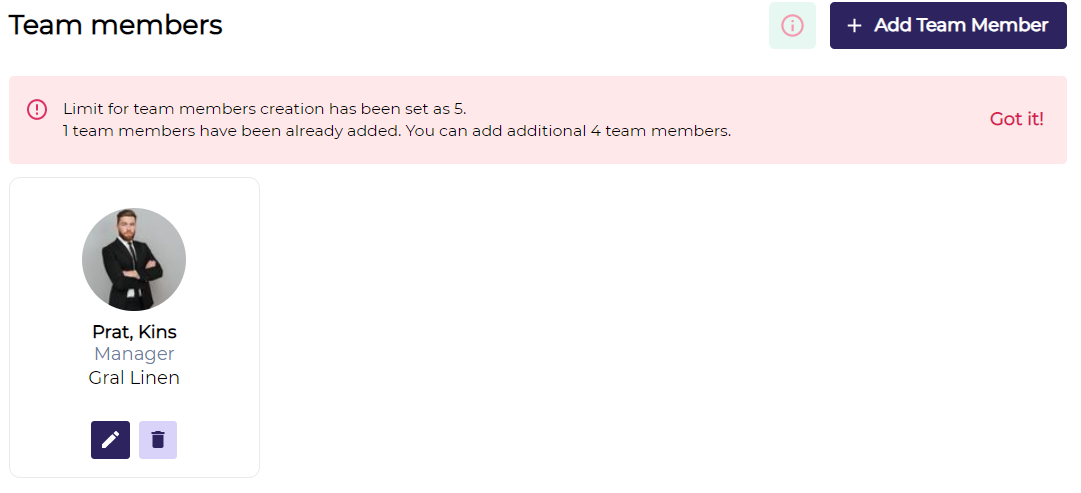
ii. Frontend instructions for Exhibitors while adding a team member
2B Download Leads: When the toggle is enabled, it allows the organizer to permit the download lead functionality at the exhibitor category level. This setting also applies to Team Members.
2C: Meetings Minimal Request: When enabled, organizers can establish the minimum number of confirmed meetings users must schedule. If this threshold isn't met, the system sends a reminder to the user, prompting them to fulfil the required number of confirmed meetings.
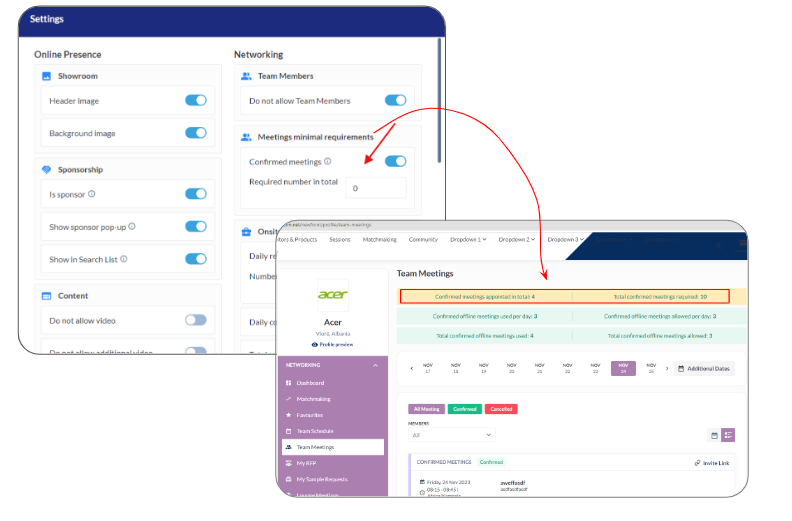
Minimal Meeting Requirement
This field doesn’t accept 0 as the value
2D: Onsite Meetings
In this section, you can define the limits to the number of daily pending requests, confirmations, the total number of pending meeting requests, and total confirmation along with table meetings for the particular onsite meetings.
When the autoconfirm meeting toggle is Enabled from Meetings → Settings
When no limit is set for the user category, then the user can have any number of confirmed meetings
When the limit is set, the number of confirmed meetings can only be as per the defined limit
If the set limit is reached and a user attempts to book a meeting or is added as a participant in a meeting, the system will display an error message: "Some users you are requesting a meeting with exceeded the online confirmation limit." Additionally, the meeting request button ("Next step" button) is disabled.
Confirmation limits are counted for the meeting receiver.
When rescheduling a pending meeting, category limits is not enforced.
When rescheduling a confirmed meeting, category limits is not enforced.
When autoconfirm is Disabled from Meetings → Settings
Pending limits are counted for the side of meeting initiation.
Confirmation limits are counted for both sides of the meeting receiver.
During the rescheduling of pending meetings – the category limit is not applied.
During the rescheduling of confirmed meetings – the category limit is not applied.
This applies to Online, Offline and Table Meetings
Meetings and Message Limitations applied work for both WEB and Event APP to maintain control over the frequency of the interactions limit set within the platform, regardless of the device the user is using.
Following the logic of the "Use minutes credit" limit on the frontend, the system does not restricts the ability to create an online meeting when the minutes' credit is nearly or fully exceeded.
However, users won't be able to join the online room if their minutes' credit limit is exceeded, and they will be kicked out of the room when the limit is reached. Additionally, the "Join Room" button will be hidden for users with exceeded minutes credit.
i. Backend
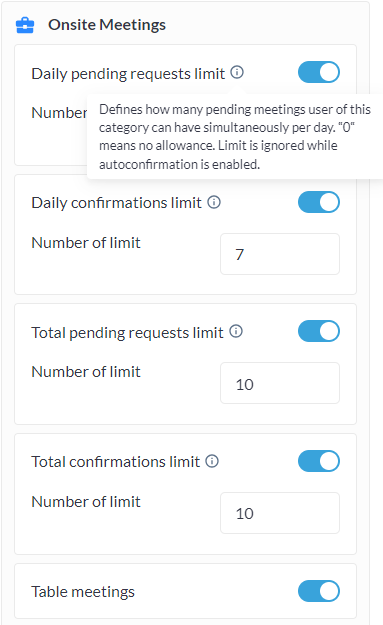
Setting Limit on Onsite Meetings
ii. Frontend instructions for Exhibitors while requesting a meeting

2E. Meeting Rating
As an organizer, you may want to capture the quality of meetings by asking them to fill out a custom form. There is a default form or can select a custom form from the dropdown.
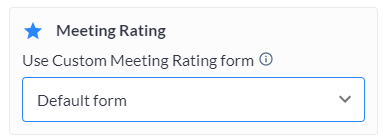
Selecting Custom Form for Meeting Rating
2F: Online Meetings
Similar to the ‘Onsite Meetings’, the limits can be defined in this section and the same manner, the instructions for the exhibitors appear on the front end.
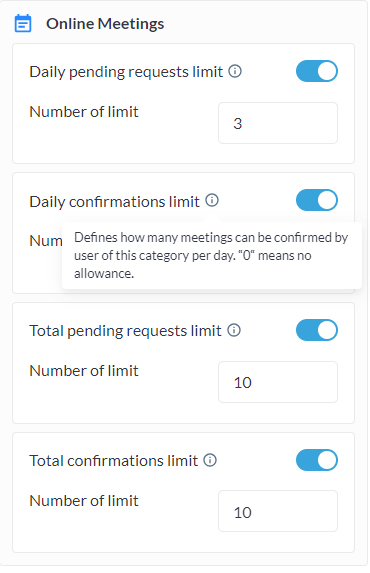
Adding Limits to Online Meetings
2G: Chat Messages
Chat is one of the most used features by the exhibitors and visitors to connect with each other, however, you may put some restrictions on the daily chats initiation and total number of chats by defining them under the category restrictions.
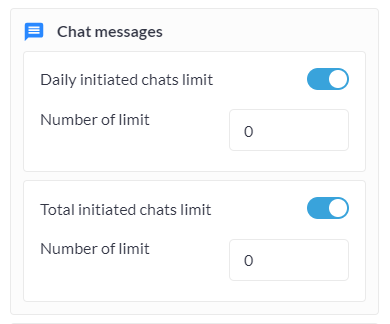
Notifications on any page from where a user can initiate a chat:
When the char limit is exceeded, clicking on the "message" button will trigger a notification indicating that the limit has been exceeded unless the user already has an ongoing chat with the another user.
2H: Restricted Access
Access to the hosted buyer list can be restricted by turning on the toggle.
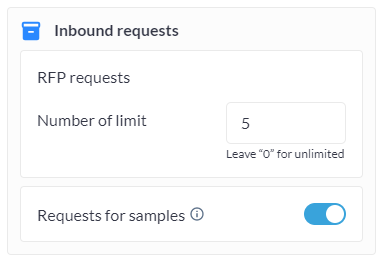
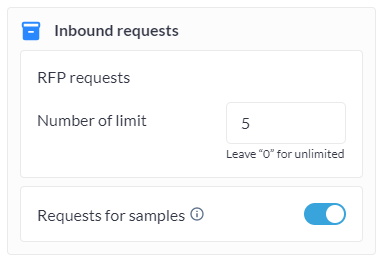
2I. Inbound requests
The number of RFPs (Requests for Proposals) can be defined in this section.
The individual settings done on the exhibitor level take precedence. Example: Exhibitor XYZ Co. belongs to Silver category which doesn’t allow the exhibitor to upload the background and header image, however, if the organizer has toggled on the feature (Under Management > Exhibitors > XYZ Co. > toggle on ‘Allow upload background image' and 'Allow header image’.
