
Registration Forms Setup
Before commencing the setup of registration forms, it is crucial to contemplate the sequence through which a user should progress when registering for an event. The pipeline bar (just below the tabs) defines the registration flow.

Clicking on a step opens up its settings. Steps can be dragged around, disabled, and deleted. New steps can be created by clicking the + icon at the far right.
The form editor in the registration section has the largest collection of predefined fields:
Register with:
Social Links
Photo
Mr. / Mrs.
First Name
Last Name
Country
City
Nationality
Address
Post Code
Networking Opt-in
Company Name
Website
Job Title
Email
Tel.
Date of birth
Category
Language Preference
These fields can be renamed in the editor, but should always be used to collect the corresponding information. Not doing so will result in diminished matchmaking and issues with reporting functionality and is not recommended.
Please note that email address, first name, and last name and always required for any registration.
Language Preference enables the user to receive all the communications and system notifications in the selected language
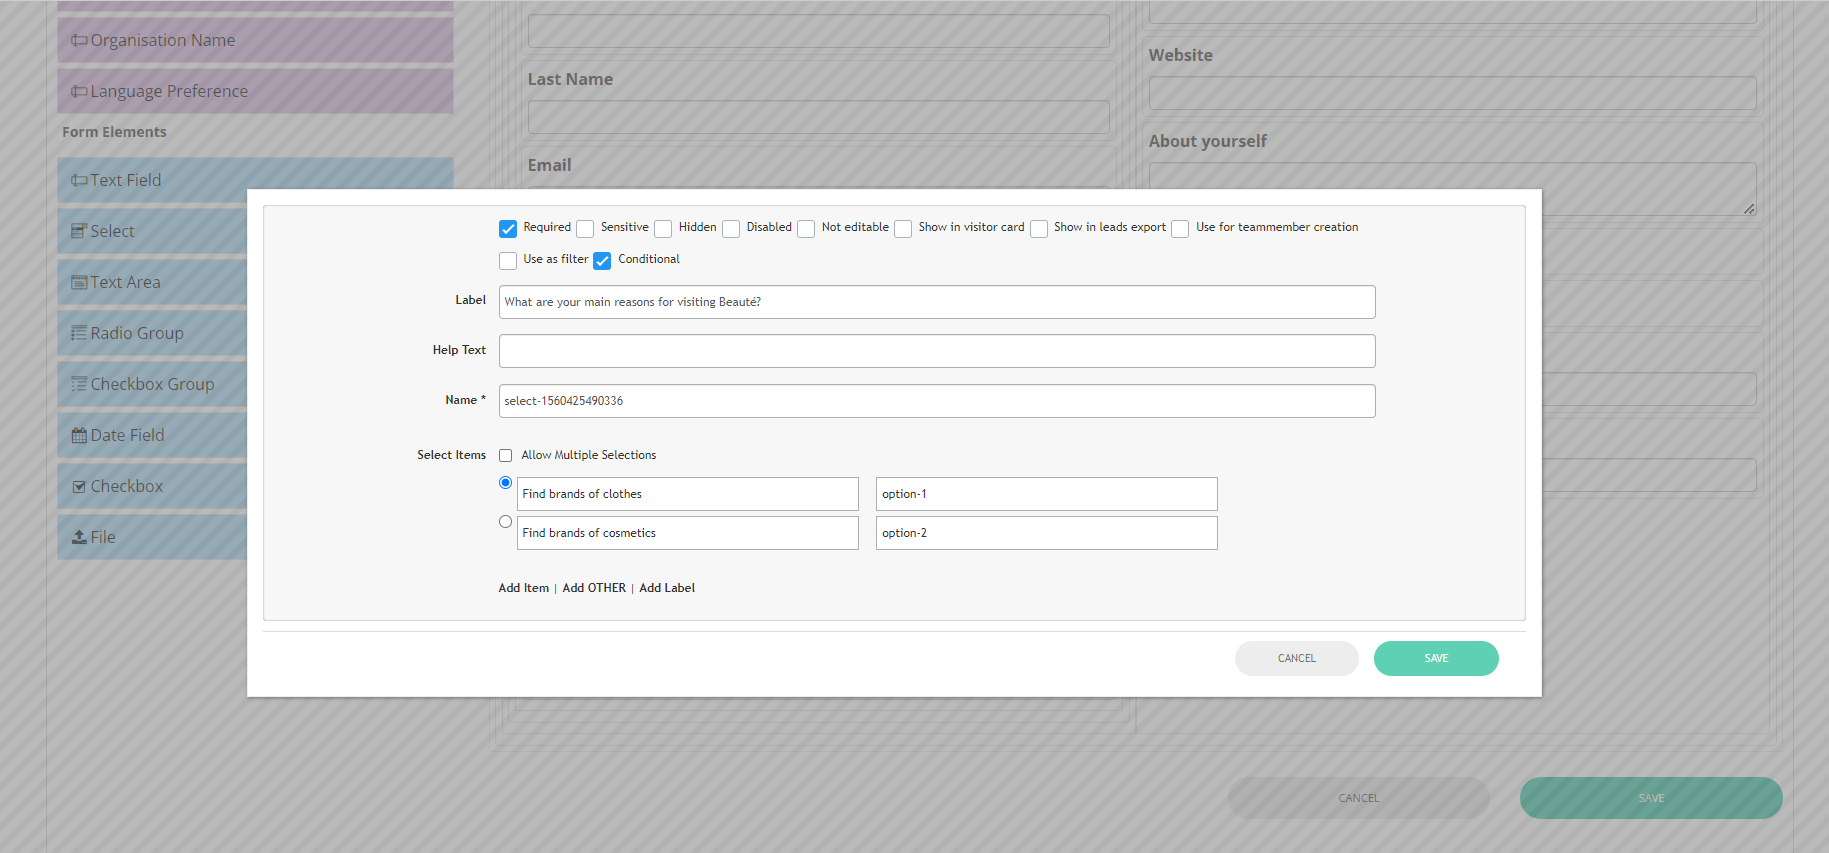
Conditional Logic
One difference from the generic form builder is that the registration form builder allows conditional logic in the Contact Details and Custom section types. Questions can be defined as conditional, and the visibility of grids can depend on the answers that were given to questions. This effectively enables a custom registration experience for different visitors, depending on their category and answers to questions.
To create a conditional question, select a multiple-choice form element (e.g. a selector), open its settings, and tick the Conditional checkbox.
For both visitors and exhibitors, the organiser may choose to hide the custom registration page from the Registration Form, Summary or Edit Profile page.
By doing so, it will disable or hide the required section on the respective page for the user.

All text/content on that page would be hidden if the toggle Enable is switched off on any of the registration pages
.png?inst-v=8531b658-bb1f-4fa3-8a3e-3bf9395329ca)
Accompanying Persons (OLD FUNCTIONALITY, NOT IN USE)
The accompanying person step configures the registration procedure for accompanying persons. Accompanying persons do not participate in the main event but may participate in leisure activities, etc.
There is a form builder where custom information about the accompanying persons can be collected. Additional persons may also be made chargeable by adding ticket types.
Ticketing
The ticketing section is responsible for setting up ticket types, ticket schedules, ticket pricing, and discount codes.
Setting up ticketing
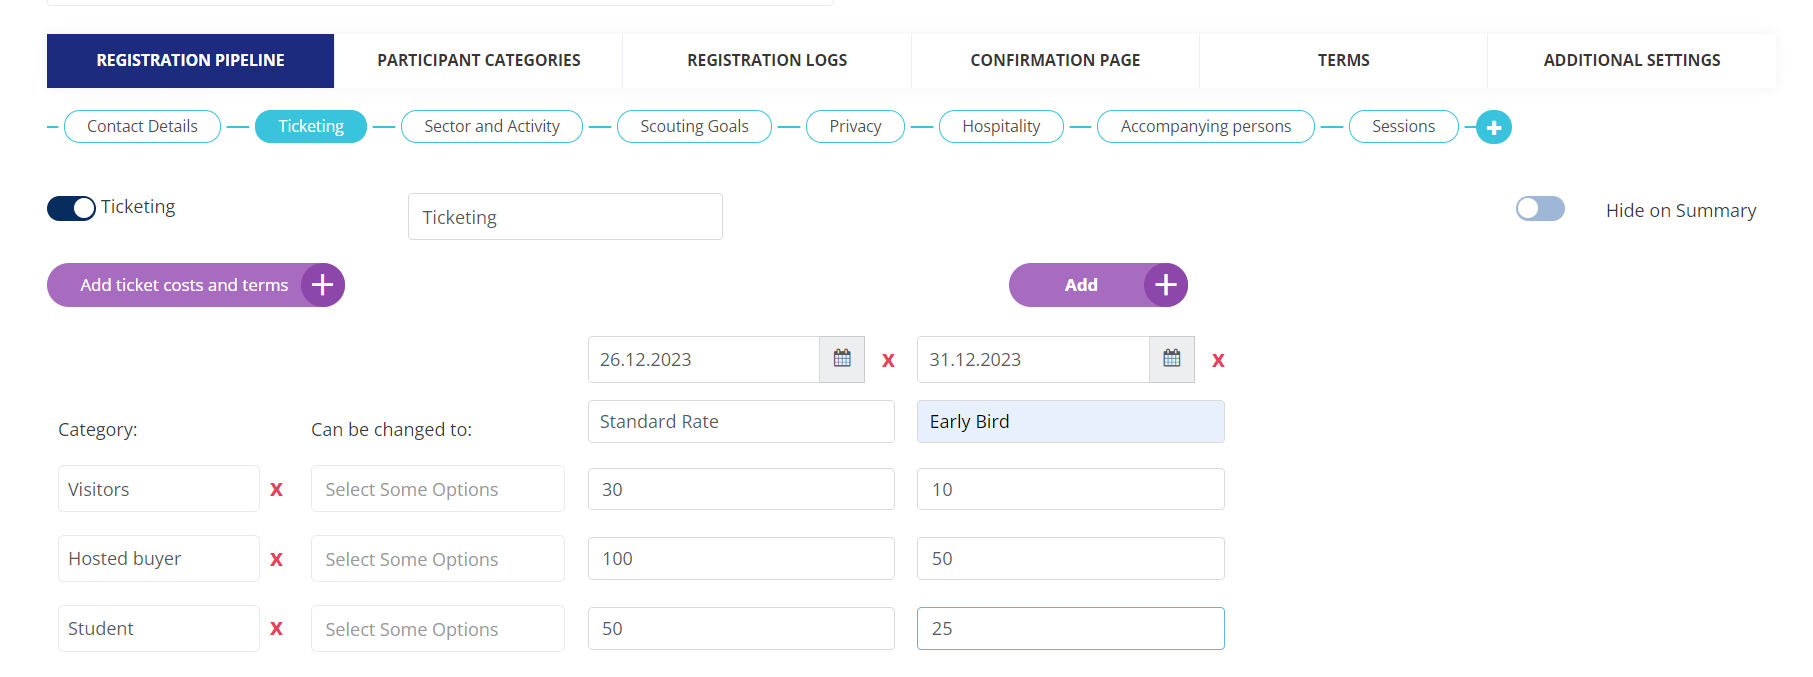
Setting up ticket types is done by clicking the Add button on the right-hand side. The ticket types are tied to date deadlines, after which the ticket becomes unavailable. Example ticket types can be Early Bird, Late Registration, Standard rate, etc.
The ticket expiry deadline is exclusive of the set date. In the image above, the ticket expires at midnight on December 26, 2023.
Categories and prices can be associated with ticket schedules. To add a category click Add ticket cost & terms, and set up pricing as desired.
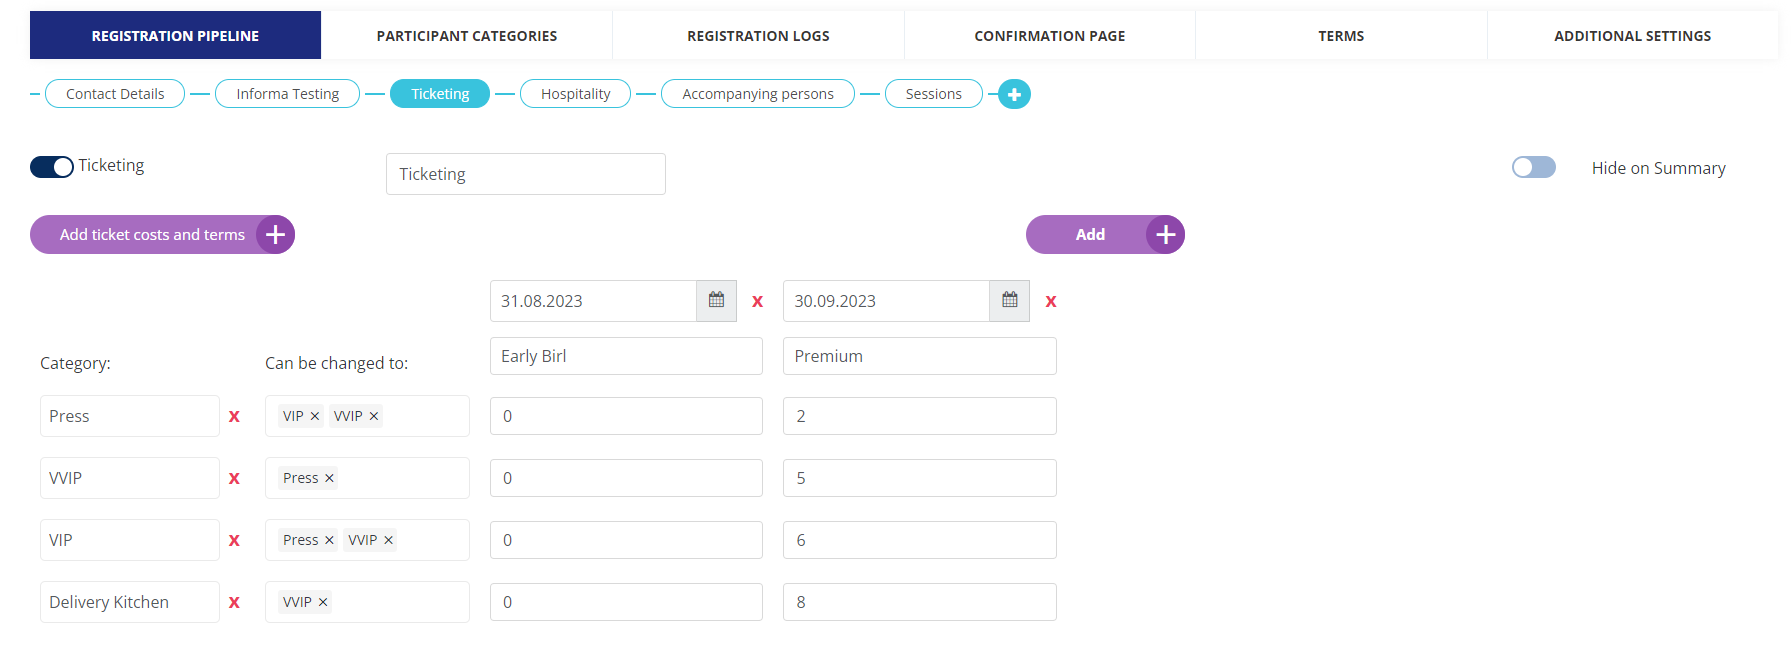
Allow visitors to switch/upgrade category after registration
Organisers can additionally specify which category users may upgrade/switch their category even after finishing their registration.
We have a field “Category can be changed to” under the tickets tab where the organiser can set the categories the user can upgrade to by tagging/selecting those categories in this area.
This field will have a drop-down menu of categories added to the participant categories page.
Upgradation to Visitor category
The sequence of the visitor categories on the Ticketing page on the Registration form(frontend) will be the same as it is defined in the Admin Panel →Registration Settings→ Visitor →Participant Category.
The visitor category sequence set on (/admin/registration/pricing) is independent of the visitor category sequence set on Participant Category Page
Discounts
Discount codes can be set up as absolute value or per cent-based. Each discount can be associated with one or more categories, and with multiple alphanumeric codes. To add another discount click Add Discount.
To read more on how discounts can be set Click Here Discounts
Field properties/attributes of the Predefined fields
Once you drag & drop the predefined fields & click on the pencil icon for editing, you will have the following properties as shown below:
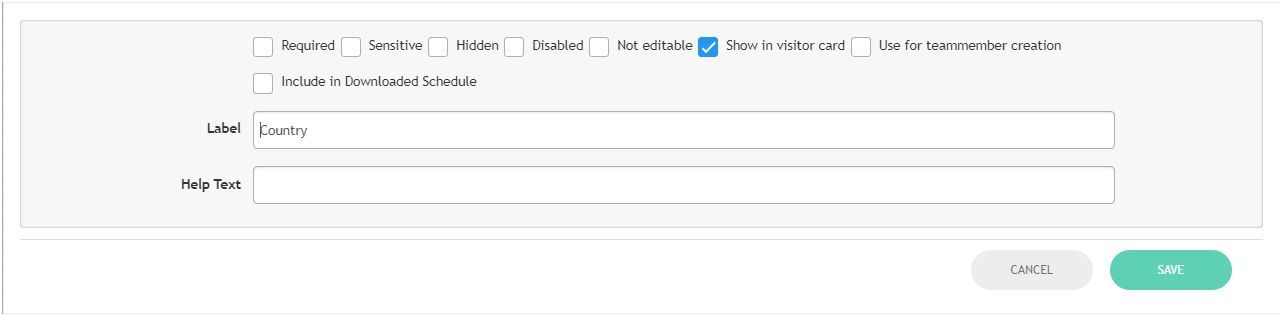
Required: You can tick this box if you want to keep the field as mandatory to be filled by the visitor.
Sensitive: You can tick the sensitive box if in case the visitor data is very sensitive & if GDPR is applicable.
Hidden: Enabling this will keep the information hidden during the visitor registration process.
Disabled: If this box is ticked, then the visitor will not be able to fill in any details for this particular field while registering.
Not Editable: If this box is ticked, then the visitor will not be able to edit any data for this field while registering.
Show in visitor card: This will show the field on the visitor card in the front end.
Use for Team member Creation: The field will appear in the team member creation popup on the front end in the exhibitor profile, while the exhibitor creates a member.
Include in Download Schedule: When this attribute is enabled, then this field data gets downloaded in the Schedule Download Report, providing the user a more comprehensive overview of their meetings.
Label: It is the name of the field you choose.
Help Text: This enables the visitor to add the help text for the pre-defined field.
Capture Input Timestamp: If this setting is enabled for any field in the registration pipeline it records the timestamp when the data is inputted for that field.
Points to be Noted
When the timestamp recording feature is activated for a field, the export report will include the corresponding timestamp for that field. The column name for the timestamp will be generated as "Timestamp" plus the name of the field for which the timestamp is enabled.
The timestamp is captured in the format dd-mm-yy hh:mm:ss and reflects the local time zone of the event.
When data is received through the registration form, the system captures the latest timestamp before the registration is completed.
If a user has left certain fields unfilled in the registration form, those fields will be marked as "No" on their profile on frontend
If you delete any of the form elements & replace them with some other element in the middle of the registration, then the old data cannot be retrieved, it will be lost.
It is always suggested that if you would like to change any form element, then please export the visitor data first, from the Data>>Export section, then later you can reimport this data to restore.
Google Analytics script can be used to track the registration source for the event. This UTM code is a part of the Registration URL (to collect and track user registration via Google Analytics).
These UTM are also available on the Registration Confirmation Page for useful tracking data in Google Analytic