Mobile Application Builder
A mobile app builder allows organizers to create and develop mobile applications without the need for extensive coding or programming skills. Mobile app builders provide a user-friendly interface and a set of pre-designed templates and components to streamline the app development process.
The platforms support both Android and iOS app development and enable users to customize the app's appearance, features, and functionality to suit their specific needs.
Steps to Configure Your Event App
To create a new app, click on the ‘Apps’ and then click on ‘Add New App’ button.
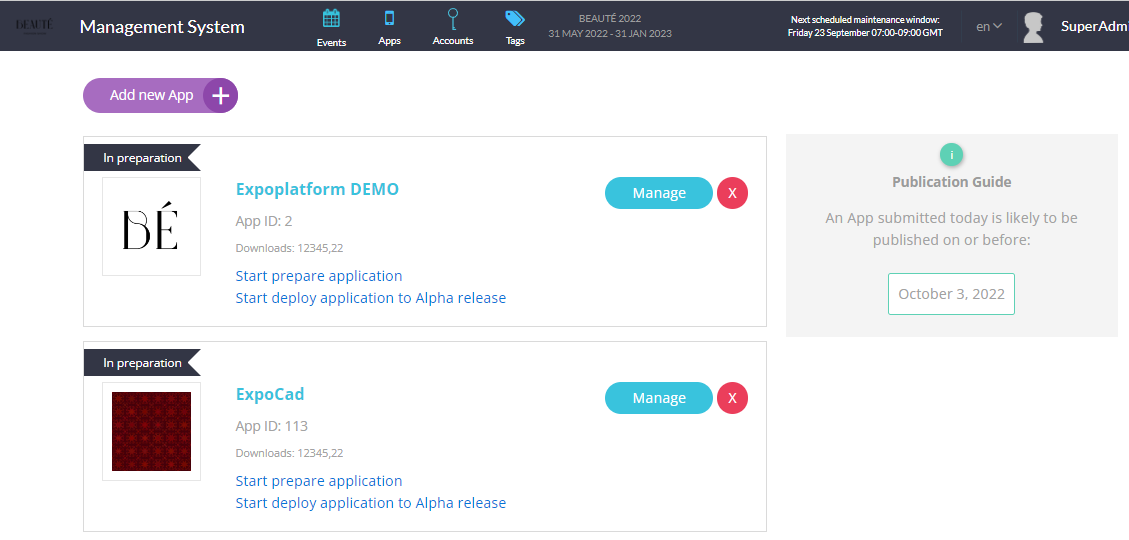
It will take you to a new screen as soon as you click on "Add New App". The whole App Builder is divided into 5 different modules:
1. GENERAL:
The first step under this section is to select whether the app is a single event or multi-event.
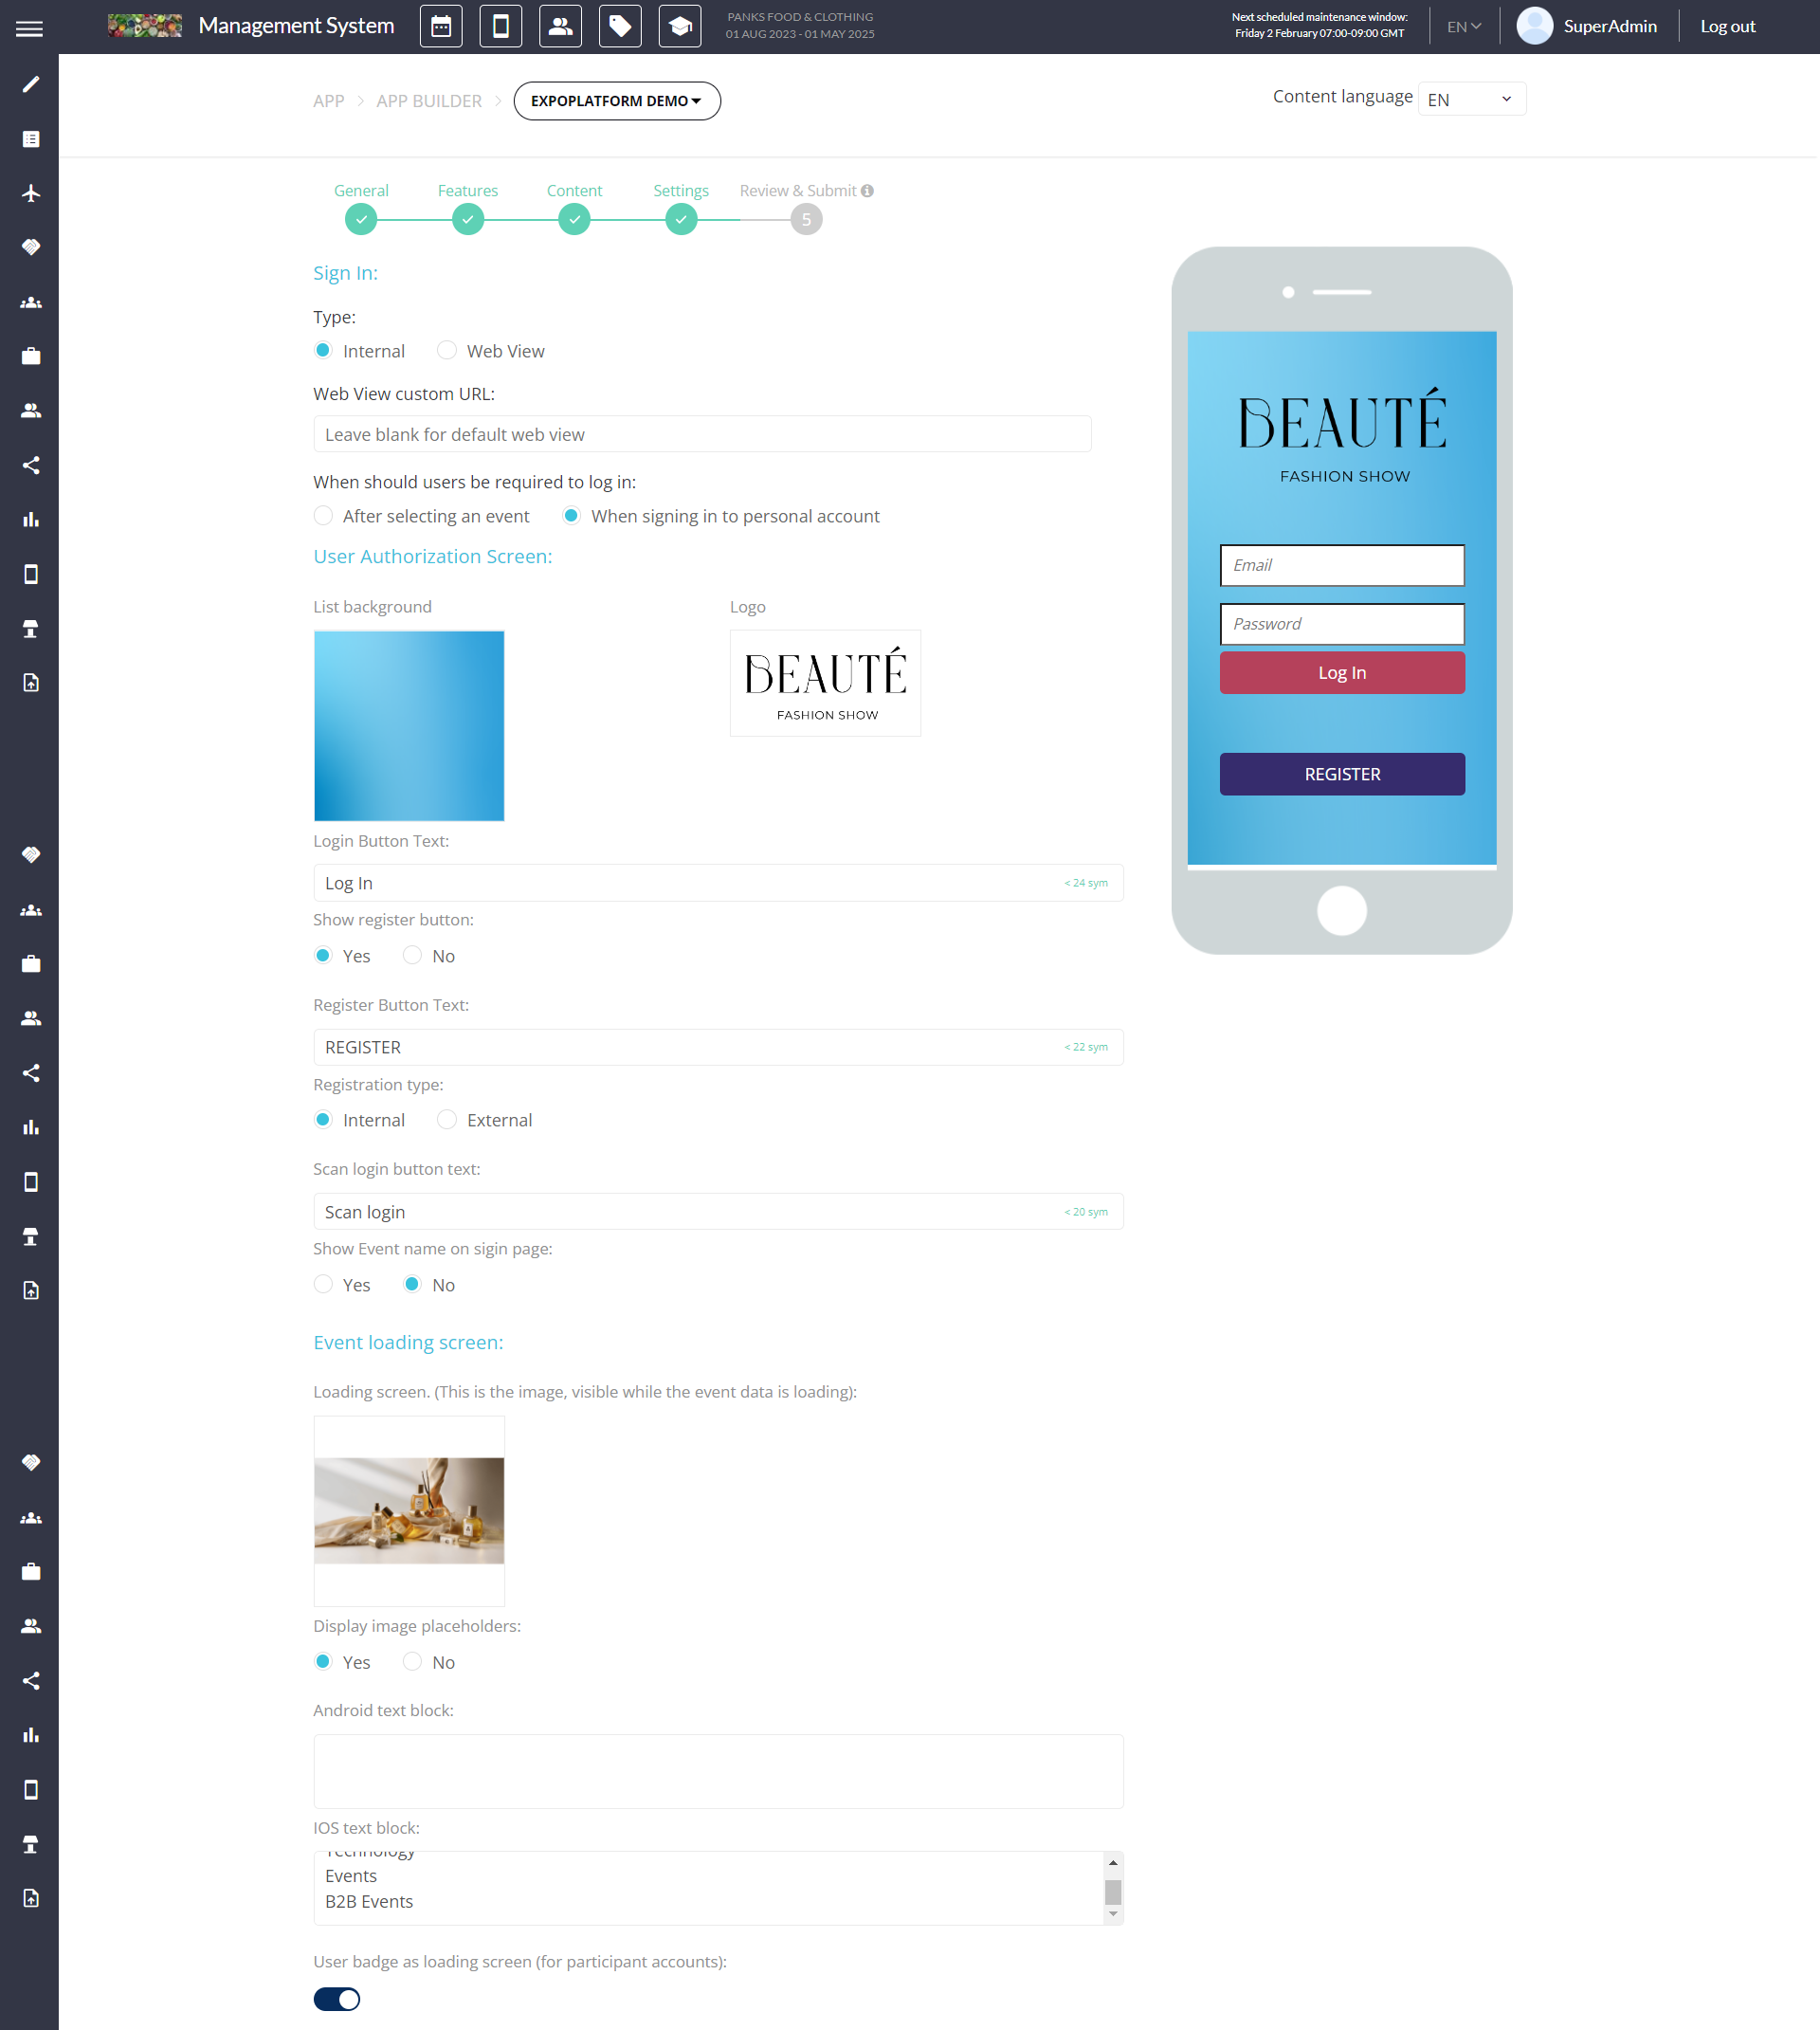
Organisers can set the sign-in page to have an internal app view or a web view.
The organiser can select whether users should be allowed to log in "after selecting an event" or "when signing in to a personal account"
The organiser can set the background image for the event selection screen.
Under Application → Title, organisers can set the name of the mobile application.
Organiser can set the icon of the app by uploading the image in the "Icon" field
Organiser can also set the splash screen for the app; the splash screen is the screen that appears just after opening the app. It can be monetised by the organiser
Organiser can set the duration for which the splash screen will appear.
Organisers can choose the background colour of the splash screen.
At the bottom of the screen under the description section, the organiser can add the description of the app which will appear under the app description in the Play Store and App Store.
In-App Update: The In-App Update feature enables organizers to prompt end users about the availability of a new version of the app for them to update from the App and Play Store. The In-App update is further classified as Critical Update and Desired Updated
Critical Update: It notifies end users about the bug fixes and security of the app which is significantly affecting the working of the app and hindering the use of the app. This app update will draw users attention to prioritize and promptly update their app for smooth app functioning and mitigating the negative user experience
Desired Updated: This In-App Update keeps the users informed about the general update pushed to the app so that they can choose to update their app accordingly for a better user experience
In IOS it only works for 1.46 and above versions. In both IOS and Android, it wouldn’t work for users with very old app versions. As a workaround, we can add this as a disclaimer message on the custom home page being used for all mobile apps. This way, the users will be informed regarding this.
Steps to Enable In-App Update
Enable Toggle In-App Update
Enable toggle Critical Update/Desired update as required
Now add the version update title and description for the end user
For Critical Updates, organizers can specify the iOS and Android version numbers to which the app must be updated, in other words the latest version number from the app store or play stores should be included here.
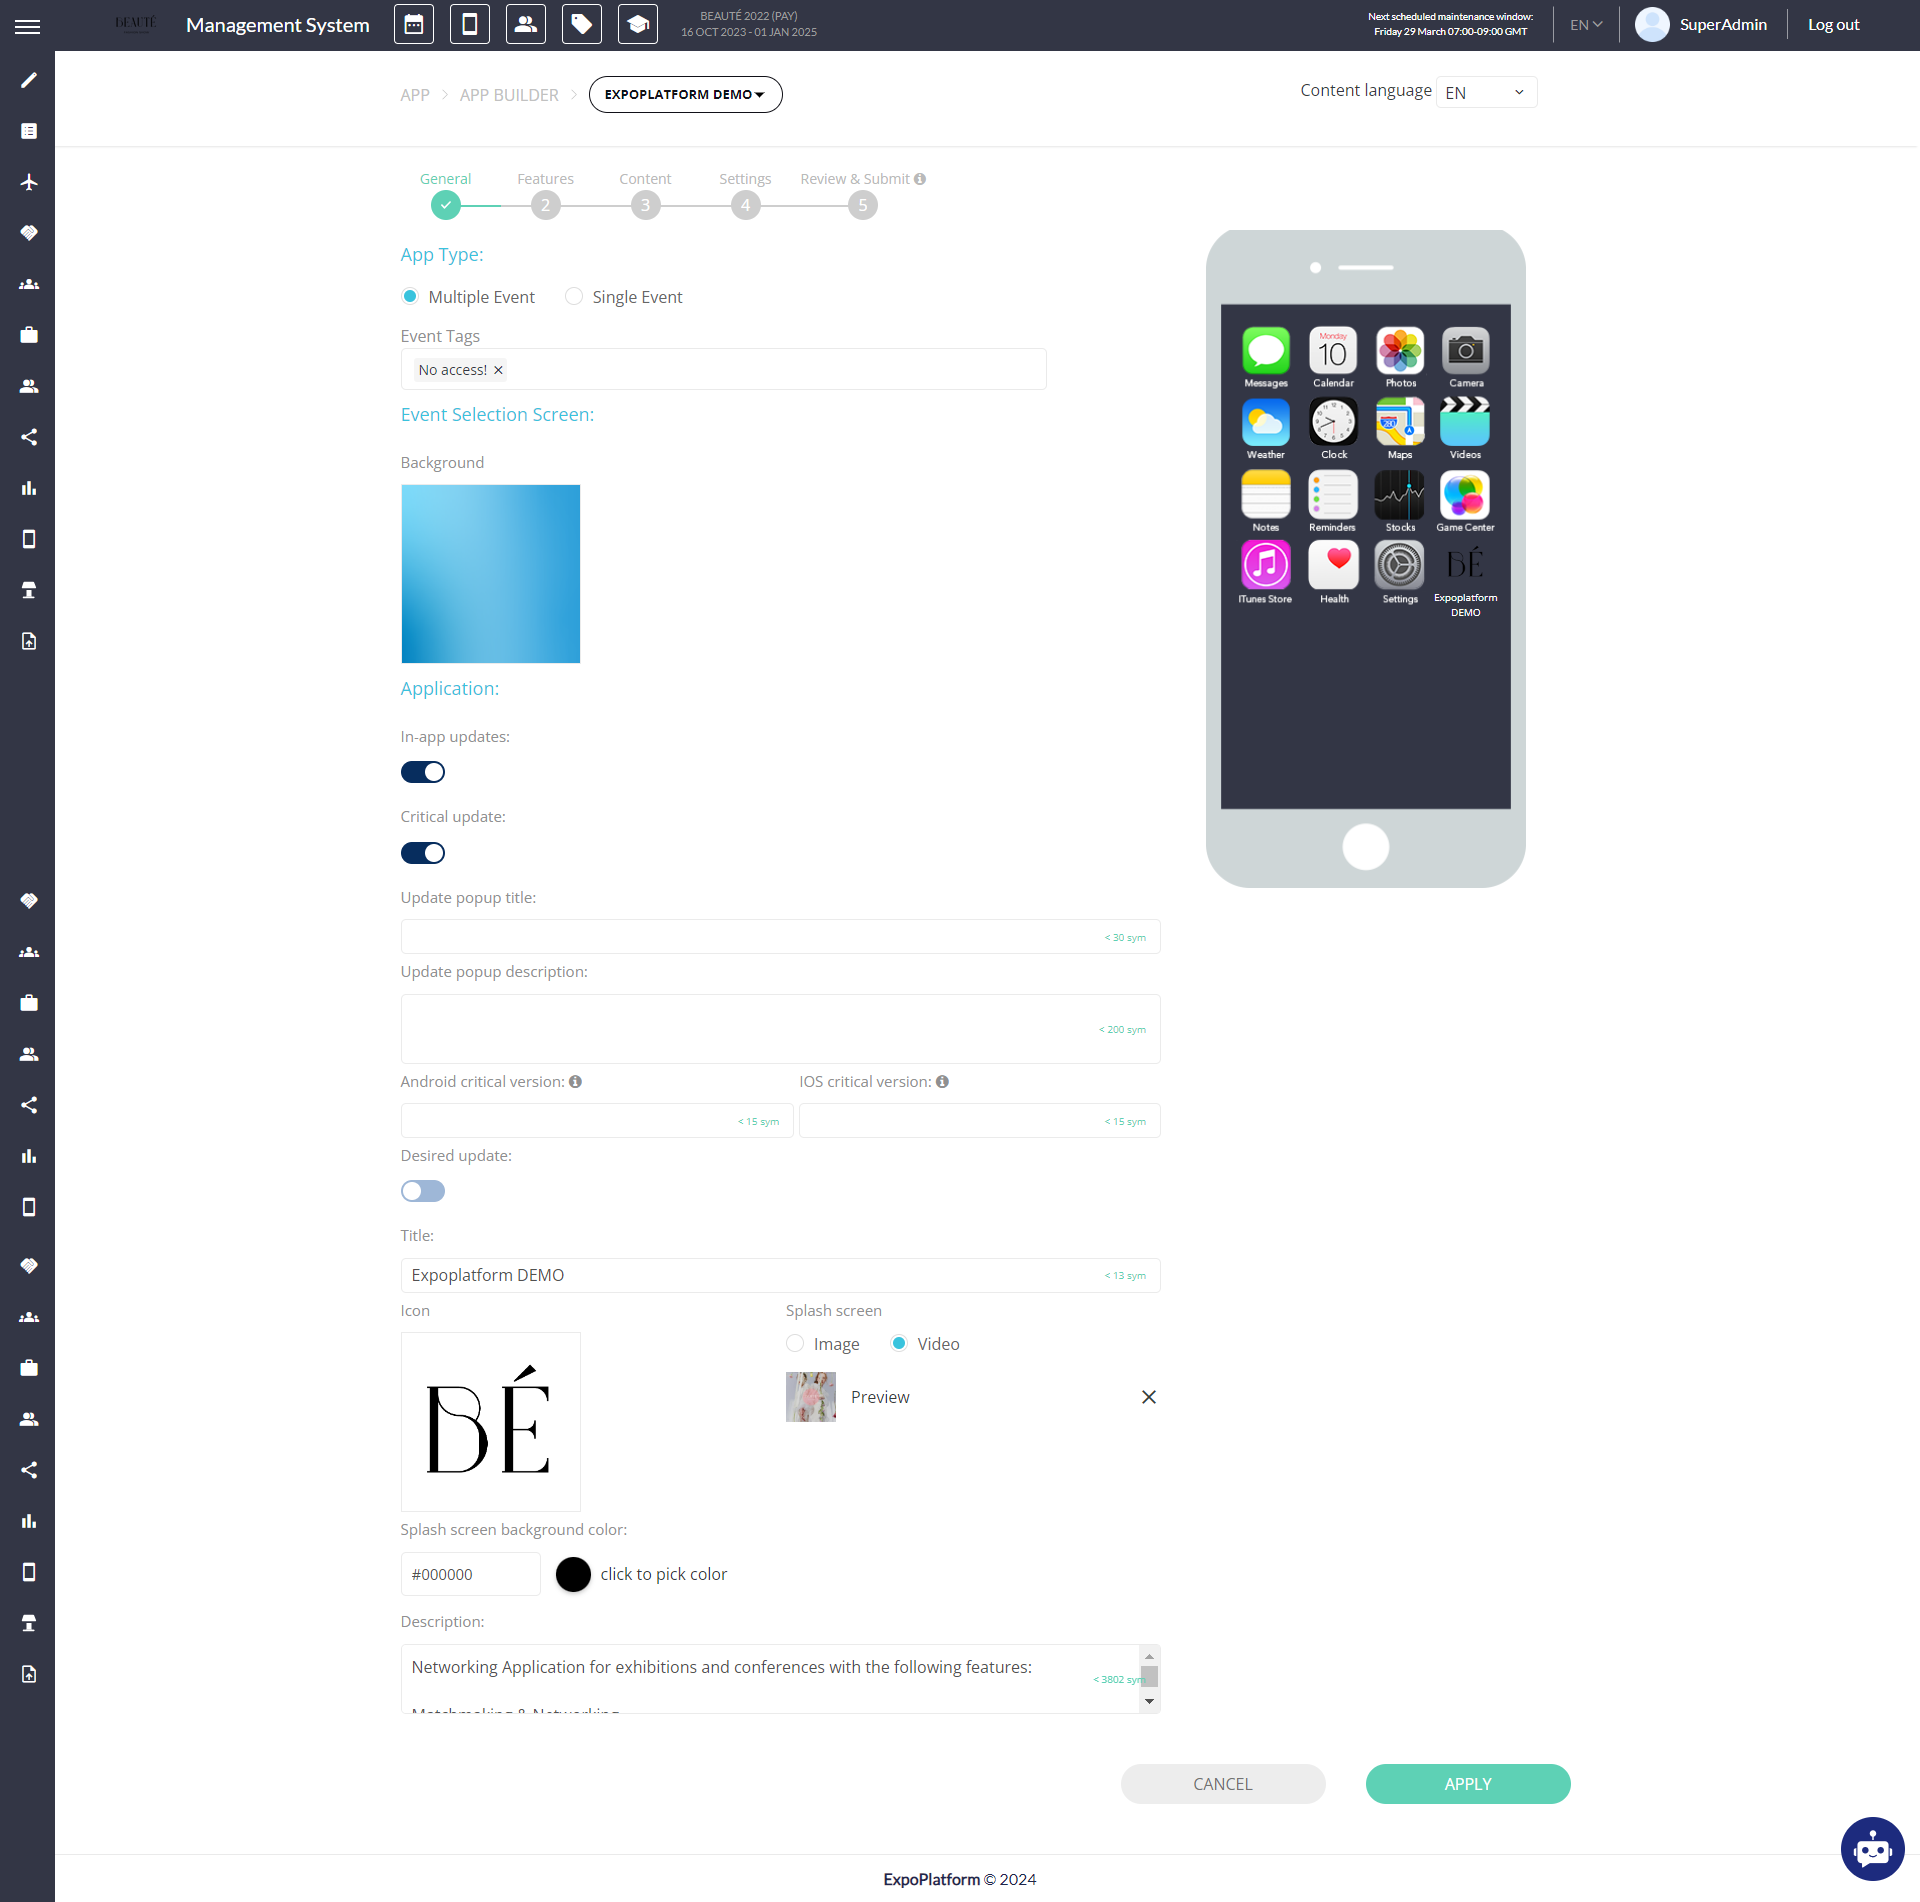
App Builder: General
2. FEATURES:
App Features
In this section, event organizers can incorporate various features into their app. This includes customizing elements such as the
Background image: The Organiser can add a background image which will be visible on the sign-in page, where the user inputs their login details.
Event logo: This will be visible on the sign-in page.
Login button text: Organiser can customise the login button text from this tab
Registration button text: Organiser can customise the registration button text from this tab
Registration Type: The organizer can choose whether registration occurs directly on EP or through an external platform, and they can also input the link to the external registration platform in the "External registration link" field that pops up when the external registration type is selected
Login App by Scanning Badge: Allow the user to log in to the app by scanning the user badge. This setting can be enabled from General Info → Advanced Settings. To Read More Advanced Settings.
Show Event name on sigin page: They have the option to decide whether they want the Event Name to be visible on the sign-in page or not.
Enable SSO login from General Info → Settings for Edit profile page to function properly
Display Image Placeholder:- If this option is enabled then placeholders will be available for participants, exhibitors and brands.
We cannot accept images of very large size such as 8000px, for example, otherwise the image won't be uploaded.
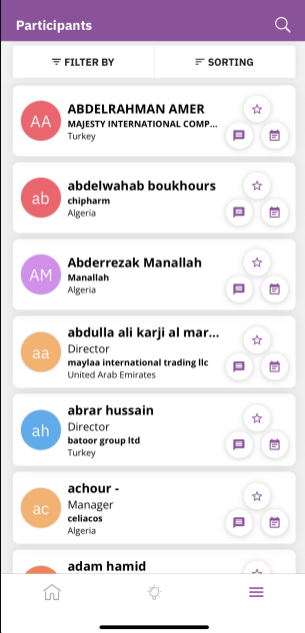
Image placeholder is enabled
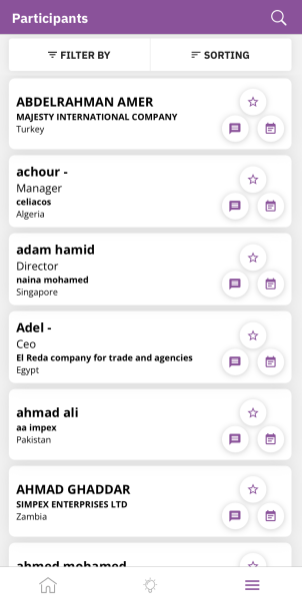
Image Placeholder not enabled
For Participants (visitors, team members, speakers, sponsors) - It will display the placeholder with letters.
For brands and companies - It will display the square placeholder with their logo image.
Display Badge as Loading Screen:- If the organiser enables this option, then all the participants (team members and visitors) will see their digital badge on the loading screen.

As exhibitors don’t have badges in general, they will still see the loading screen.
Furthermore, organizers can configure the app menu for different user categories such as Visitors, Participants, Team Members, and Companies/Exhibitors
App Menu
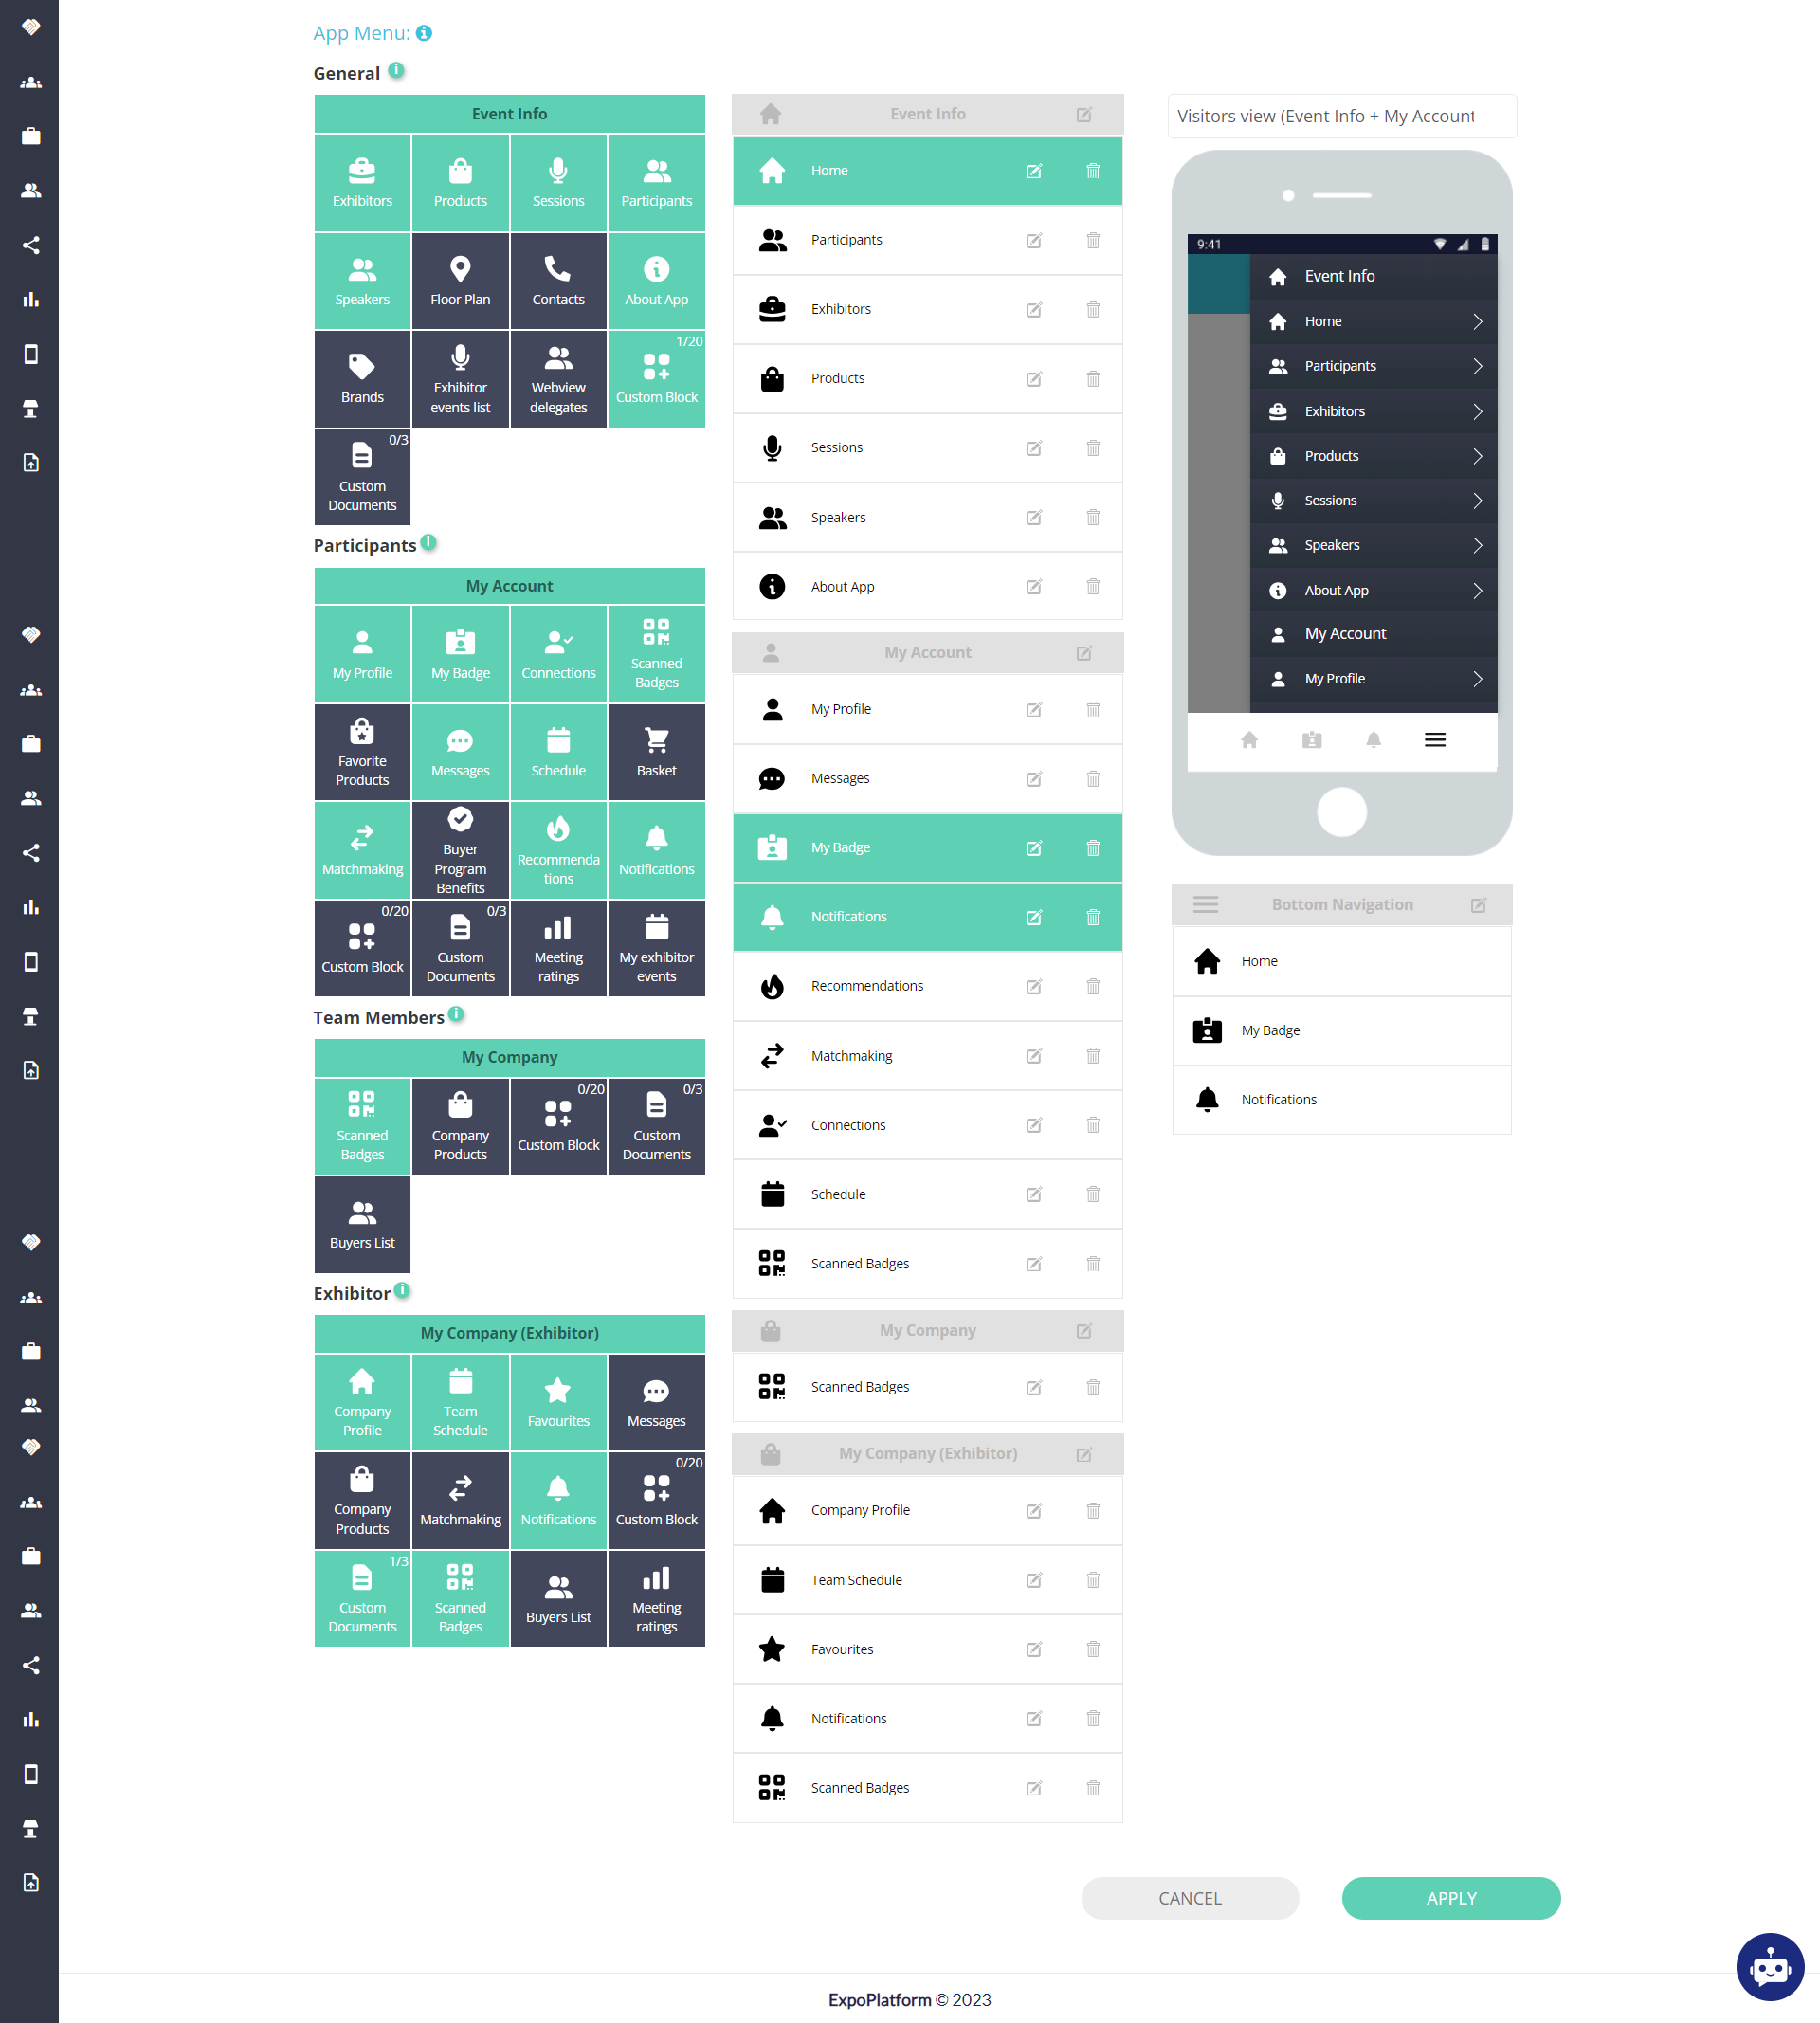
App Menu
Under the app menu, you can set the menu for different views such as the Visitor's view, Team member's view, and Exhibitors' View.
You can simply drag the menu items from the left-hand side that you would like to add and then drop them onto the right-hand side.
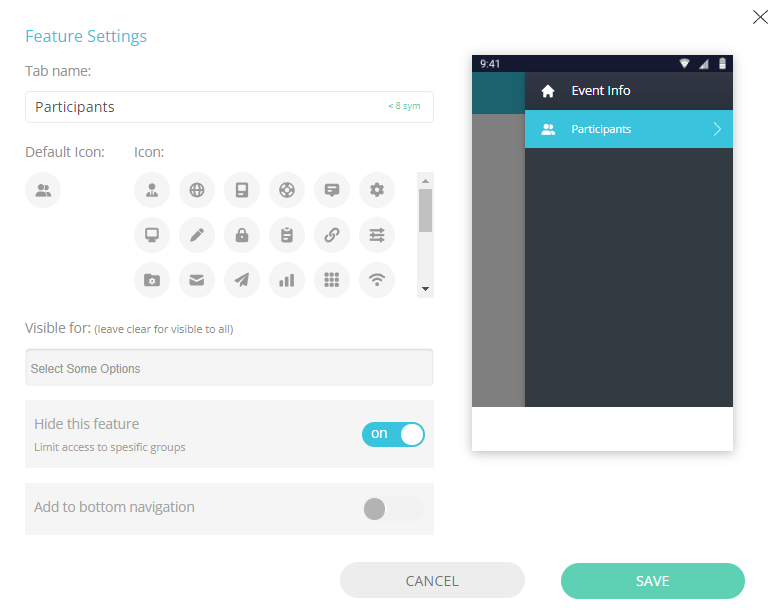
In addition, the individual feature settings can be managed by clicking on the pencil icon. The tab name, icon, visibility, hiding the feature, and bottom menu addition can be controlled from here.
You may also delete the menu item by clicking on the bin/delete icon.
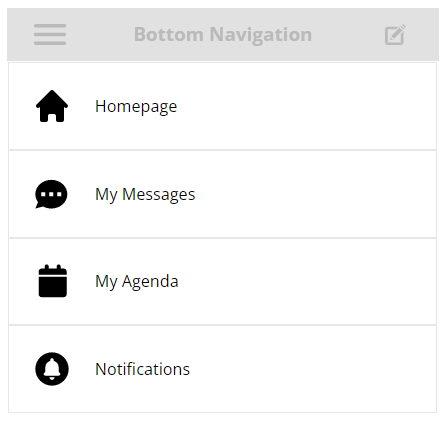
The bottom navigation serves as a quick menu for all the important items available at the tip of the finger. As a best practice, we recommend keeping Home, My Messages, My Agenda and Notifications.
To add any menu item for bottom navigation, Click on the pencil icon of that setting → Enable toggle Add to Bottom Navigation → Click Save button
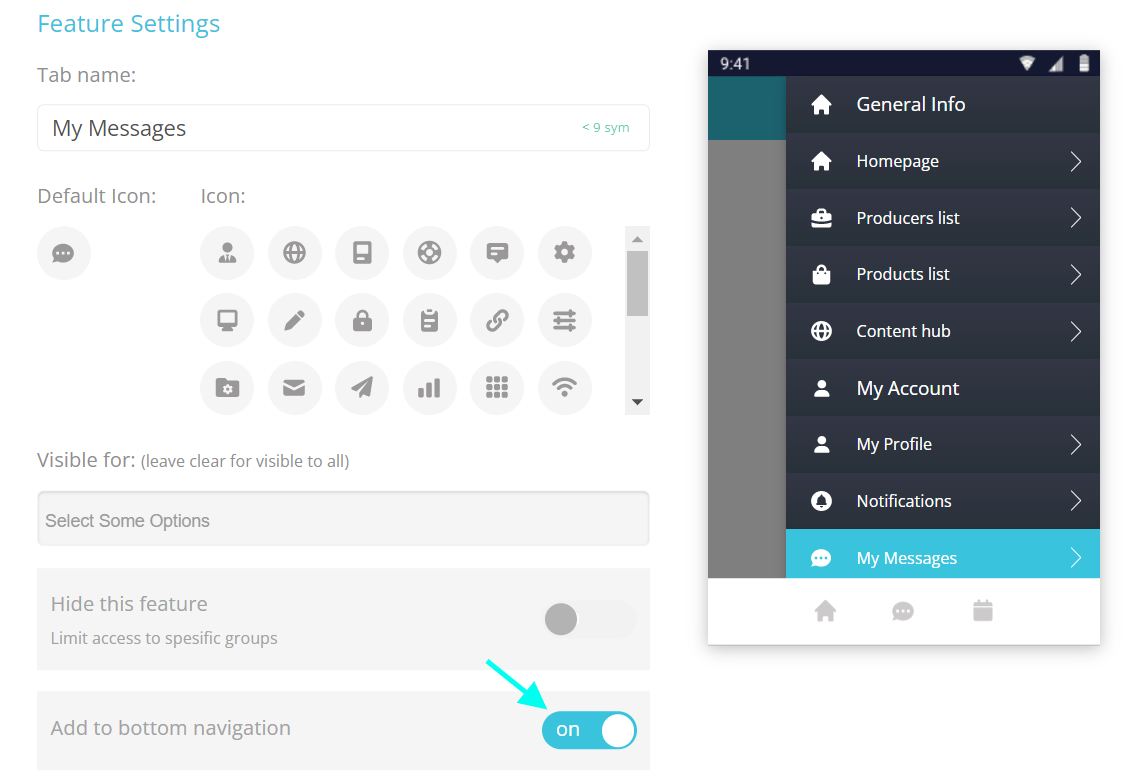
Toggle On Add to bottom navigation
Bottom Navigation
Only 4 feature/navigation options can be added on the bottom navigation
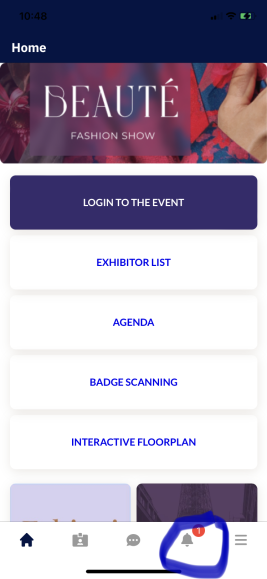
The Notifications bell icon captures real-time notifications from both the web and mobile app, with the count updating dynamically based on the notifications that have been read.
Notification
Notifications for the chat occur once, specifically when the chat is created. System do not send notifications for each individual message in the chat
The appearance of buttons on the iOS and Android apps will differ due to the distinct operating systems.
According to the permission matrix, if a user category is restricted from scheduling meetings with another category, the meet/message button will be removed on iOS. On Android, the meet/message button will be present, but the actions will be blocked.
3. CONTENT:
In this segment, organizers have the flexibility to customize the content of the custom tabs added in the Feature Section. As you create the content, you can preview it on the right-hand side..
The custom homepage can be generated within this section.
You also have the flexibility to craete distinct content for various menu items added in the Features section, such as Event Info, My Account, My Company, and more.

App Builder: Content
4. SETTINGS:
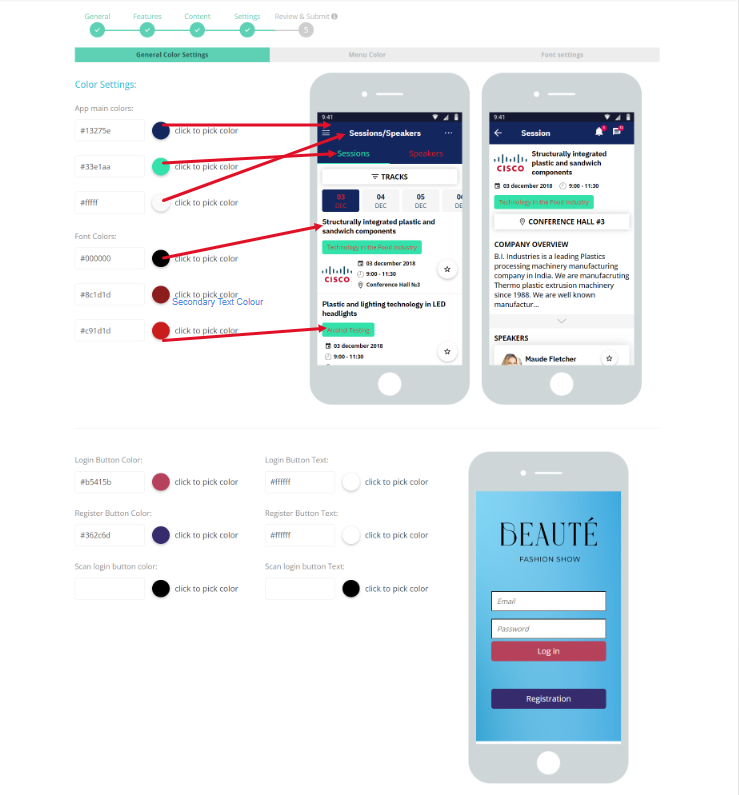
Organizers have the flexibility to personalize the colour scheme for the background, homepage buttons, fonts, menu, and section headers. Additionally, you can choose the font style for both headings and text.
App Builder Settings
5. REVIEW & SUBMIT:
This marks the last step in the app submission process.
Once the app is completed and submitted, the organizer is required to notify the designated Technical Account Manager. The team will then proceed to review and subsequently submit the app to both the App Store and Play Store.
For detailed steps, please check the Mobile App submission, functional testing and publication page.
