Feature Purpose:
Allows organisers to set up the Exhibitor Manual as needed for their particular event
Working with this feature:
Below are the list of functionalities offered for the Exhibitor Manual
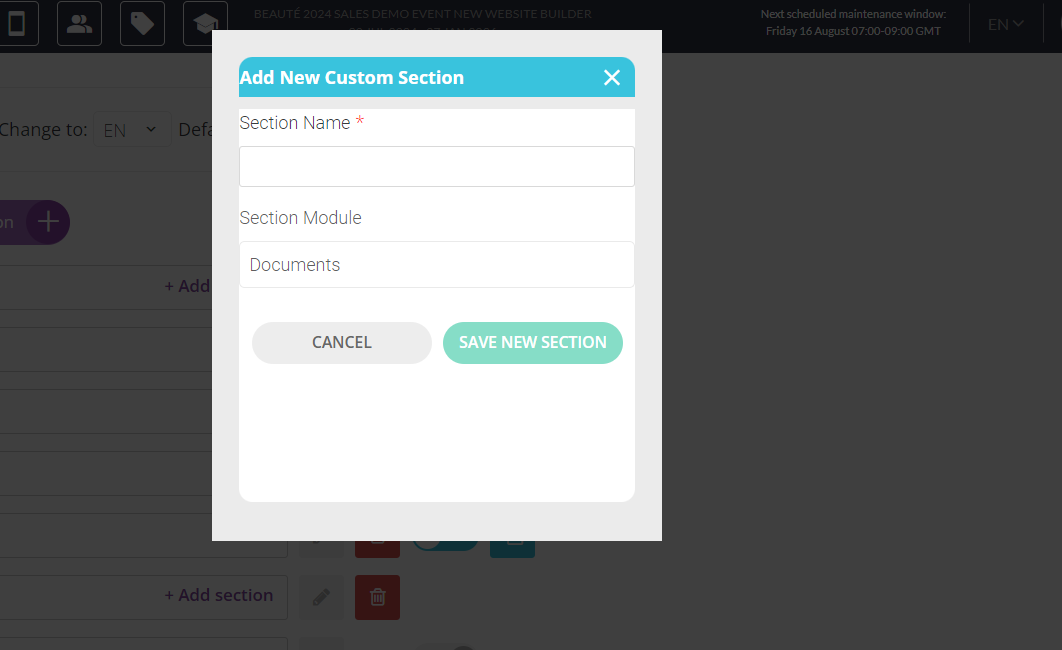
Add New Section
In the Exhibitor Manual under Manual Settings, you can add a new section by clicking on ‘Add new section’. Some default sections are pre-created (Profile Info, Team Members, Summary) and cannot be deleted, only disabled. When you click the ‘Add new section’ button, a pop-up will appear with two fields: Section Name (which is required) and Section Module (optional, with Documents as the default).
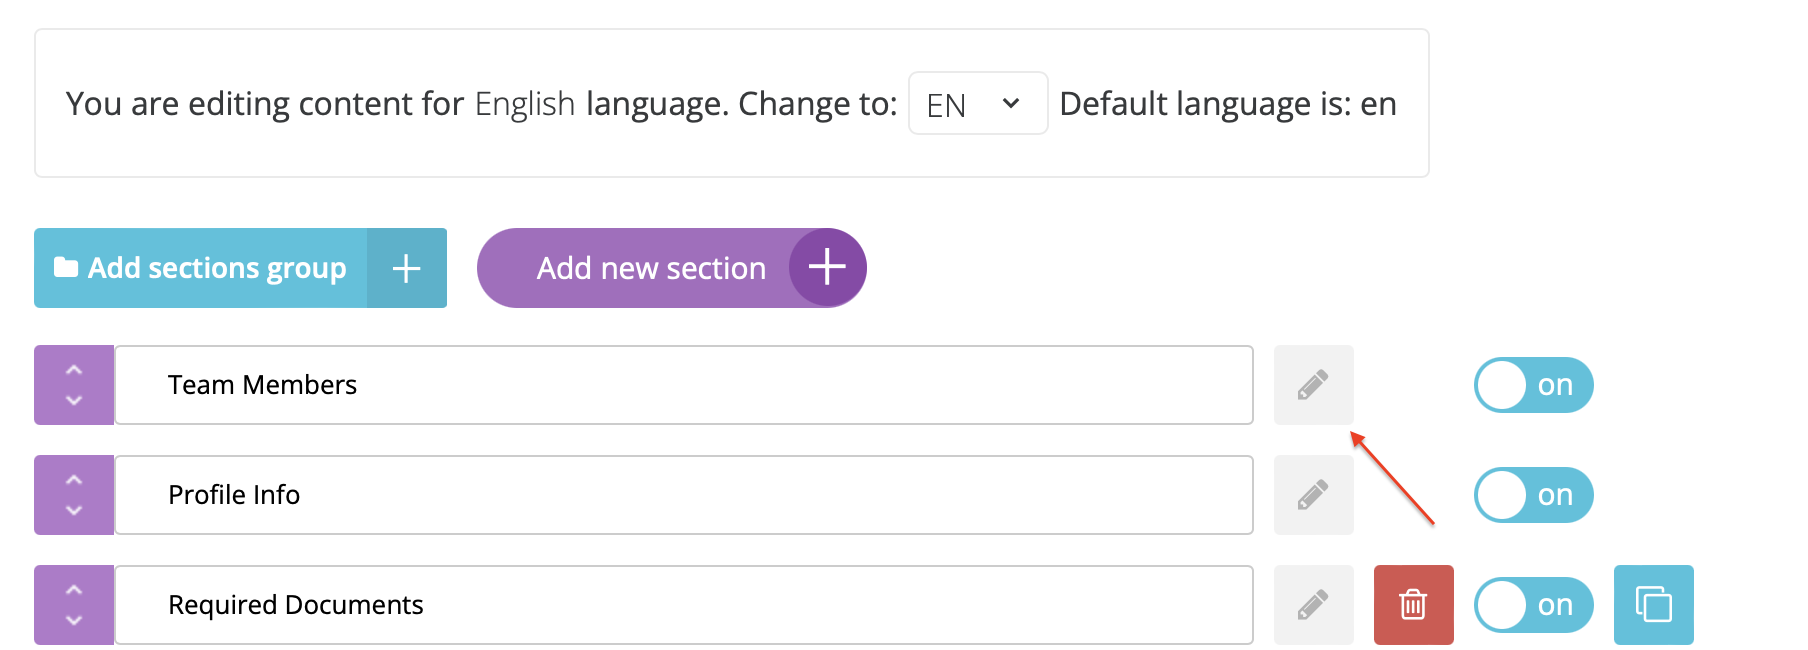
You can rearrange the position of all sections using the drag-and-drop tool.
Default sections created for new events include Profile Info, Team Members, and Summary.
The sections can be categorized under the following modules:
-
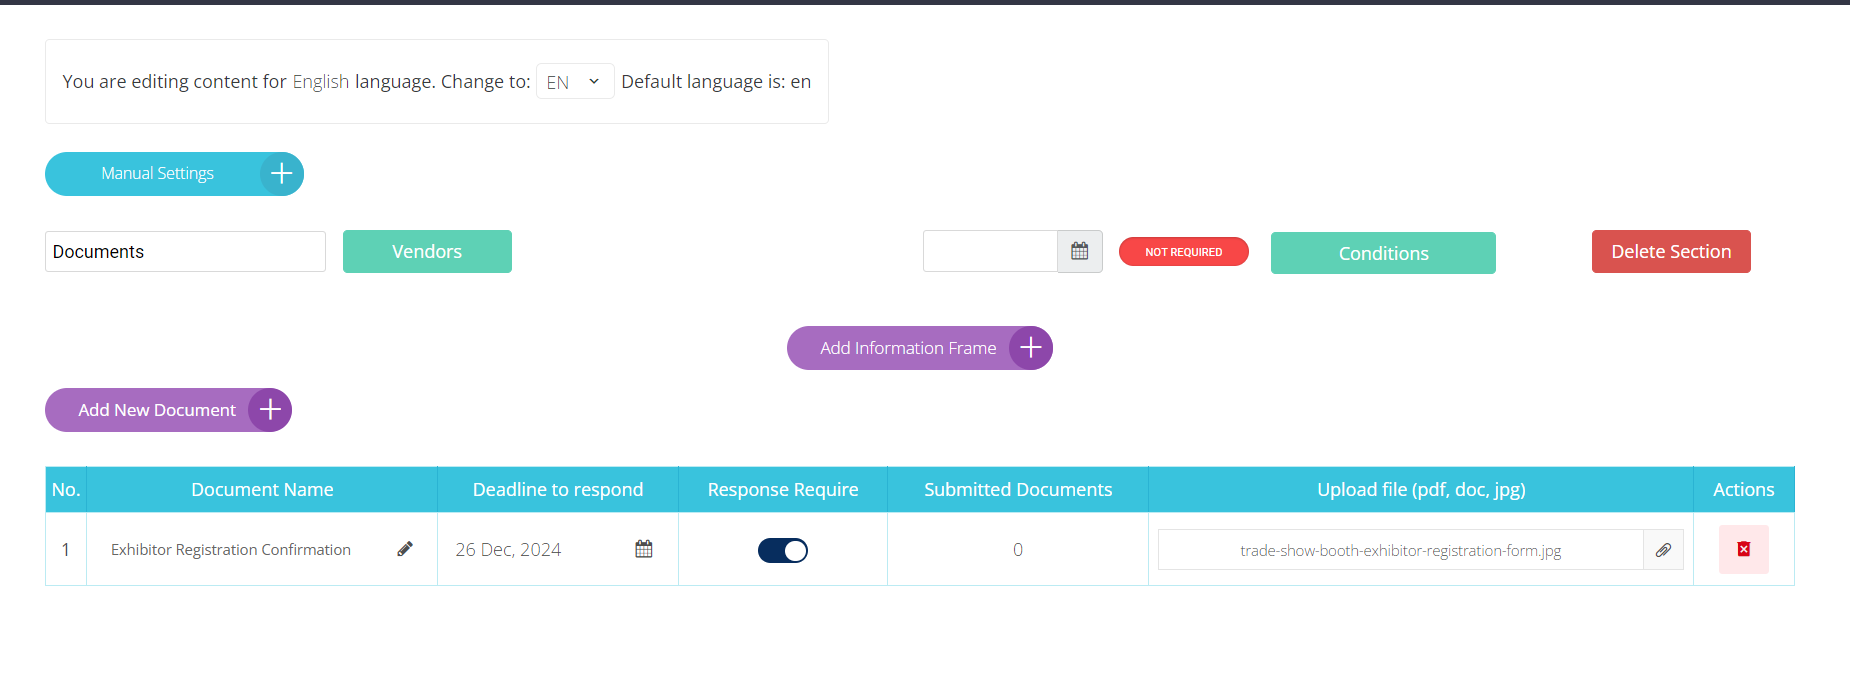
Documents: A space for exhibitors to upload documents.
-
Badges: Allows exhibitors to request additional badges for services or other needs.
-
Table: Enables you to set up a table with necessary information.
-
Booking: Provides availability and pricing for hall bookings.
-
Equipment: Lists various equipment available for rent during the event.
Add new section under Manual Settings:

Popup after clicking on ‘Add new section’:
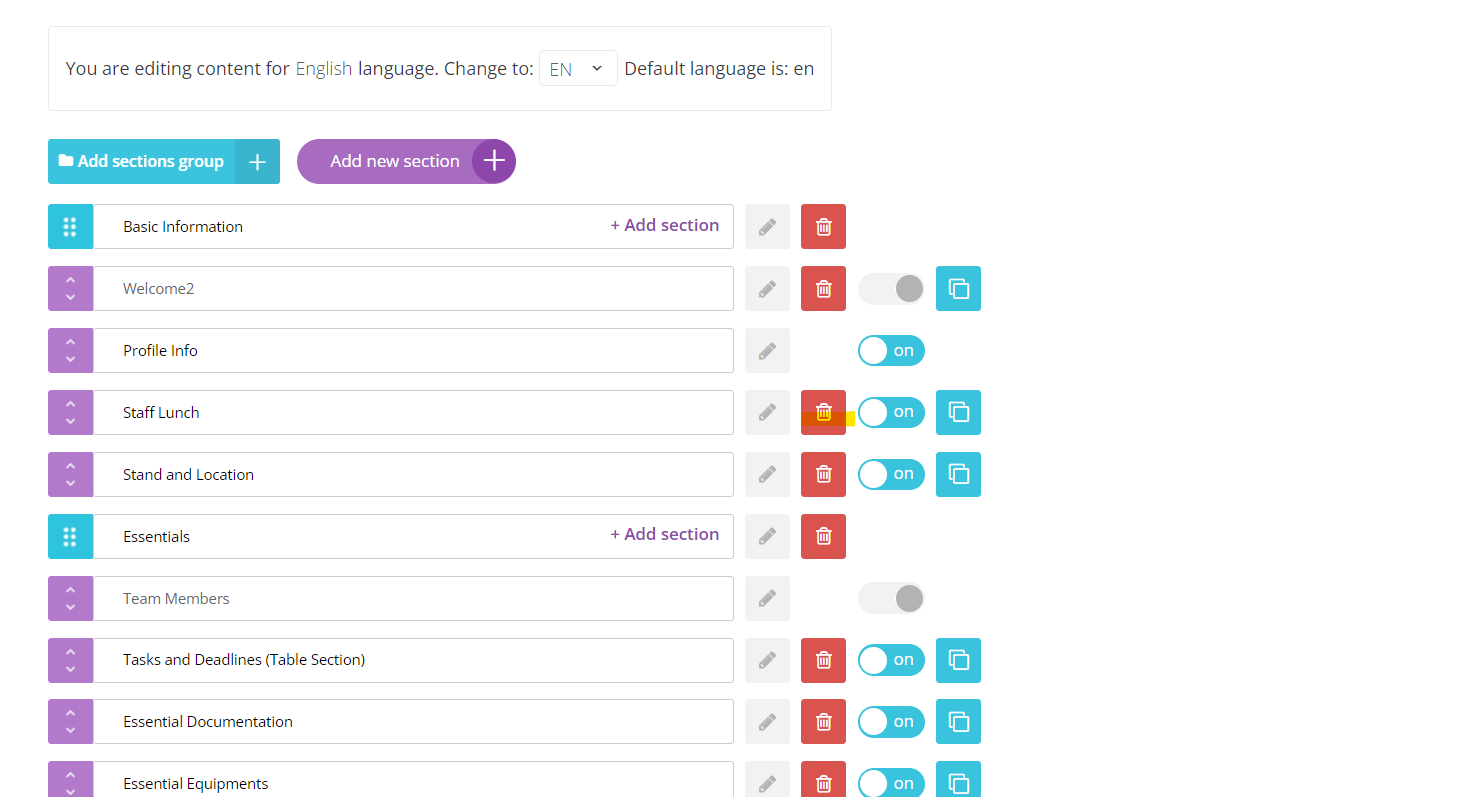
Create grouping for sections
The "Add sections group" button allows you to create a group of sections. Similar to individual sections, these groups can be rearranged within the list using the drag-and-drop tool. You can also move sections into these groups using the same drag-and-drop functionality. Exhibitors can navigate between different sections and groupings using this tool.

Video illustration:
Rename Section
A section can be renamed in two ways: either on the section page or the manual sections page.
-
On the section page, there is a field displaying the section's name. The admin can enter a new name and click Save to apply it. Note that if the name is changed, any data previously entered by exhibitors will be deleted, and they will need to re-enter it.
-
On the manual sections page, the admin can click the Edit button, modify the section name, and then click Save to update it.
Video illustration:
Both the section page and the manual section page feature a translation tool. By selecting a different language in this tool, you can create a translation for that language. This translation will be displayed on the front end if a user chooses to switch to that language.
Delete Section
Default sections (Profile Info, Team Members, Summary) cannot be deleted. Only custom sections that you create can be removed.
To delete a section, use the delete buttons available on both the manual sections page and the section page. Keep in mind that deleting a section will erase all the data entered by exhibitors for that section, and it will no longer appear in the Exhibitor Manual report on the exhibitor's page under Admin/exhibitor manual/submissions.
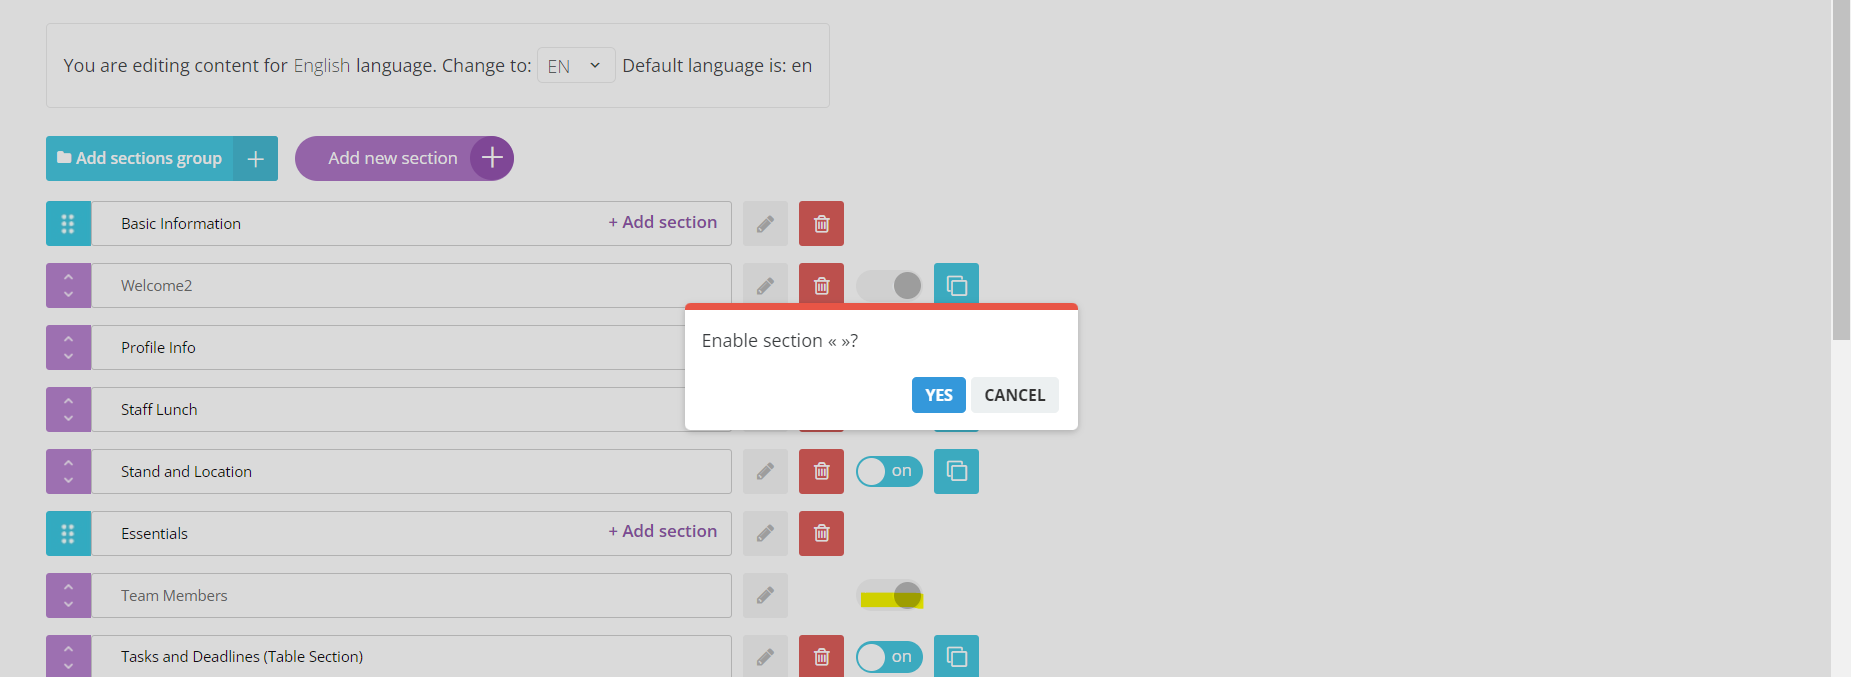
Turn ON / OFF Sections
By using this toggle the section can be turned off so it won’t be displayed on the front. Turning off the section doesn’t result in loosing the data.
Clone Section
Copy button allows copying the section.
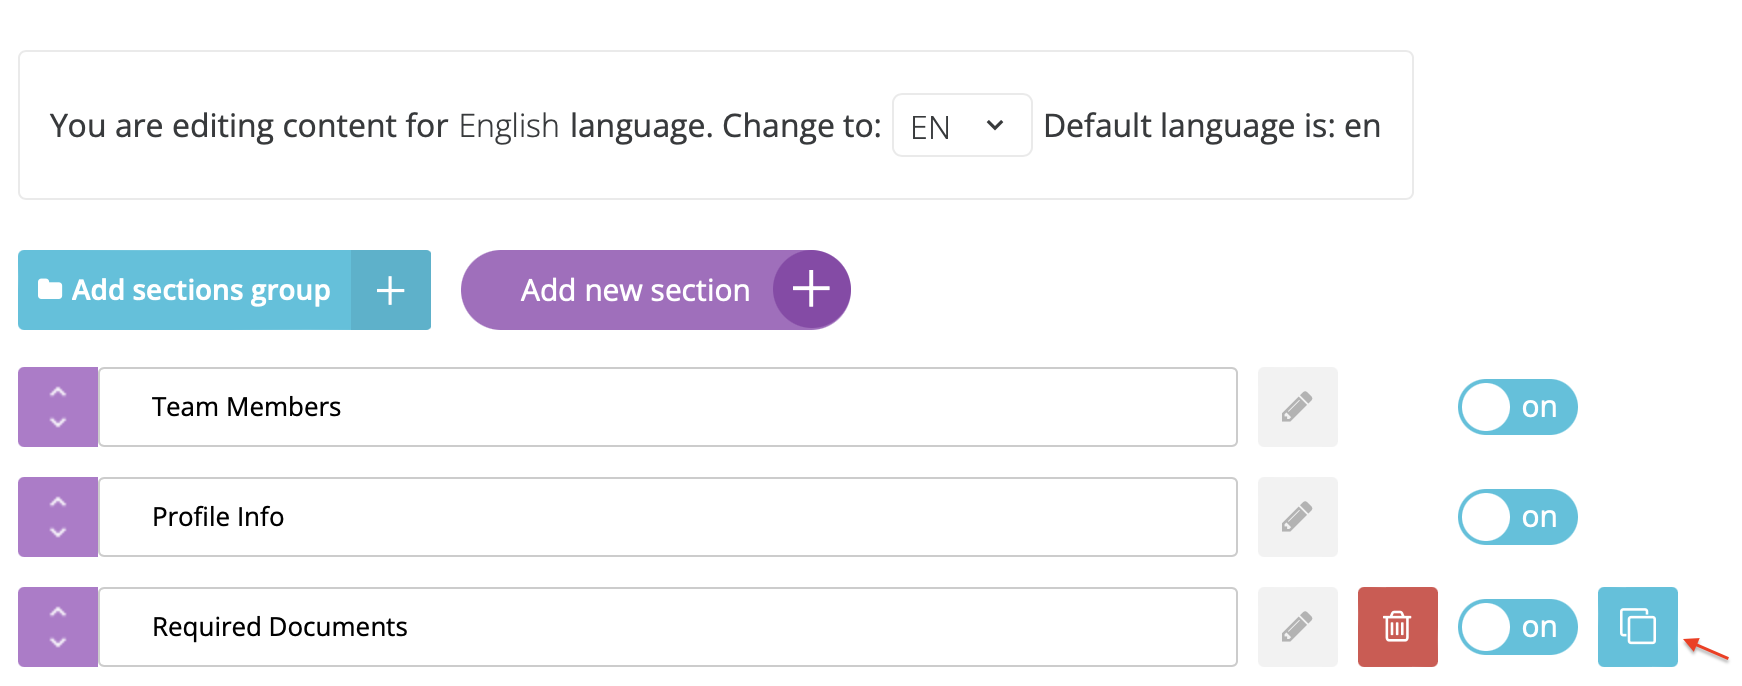
When you click on it, a pop-up will appear asking the admin if they want to copy the section's settings.
The new section will be named {Name of the section} (copy).
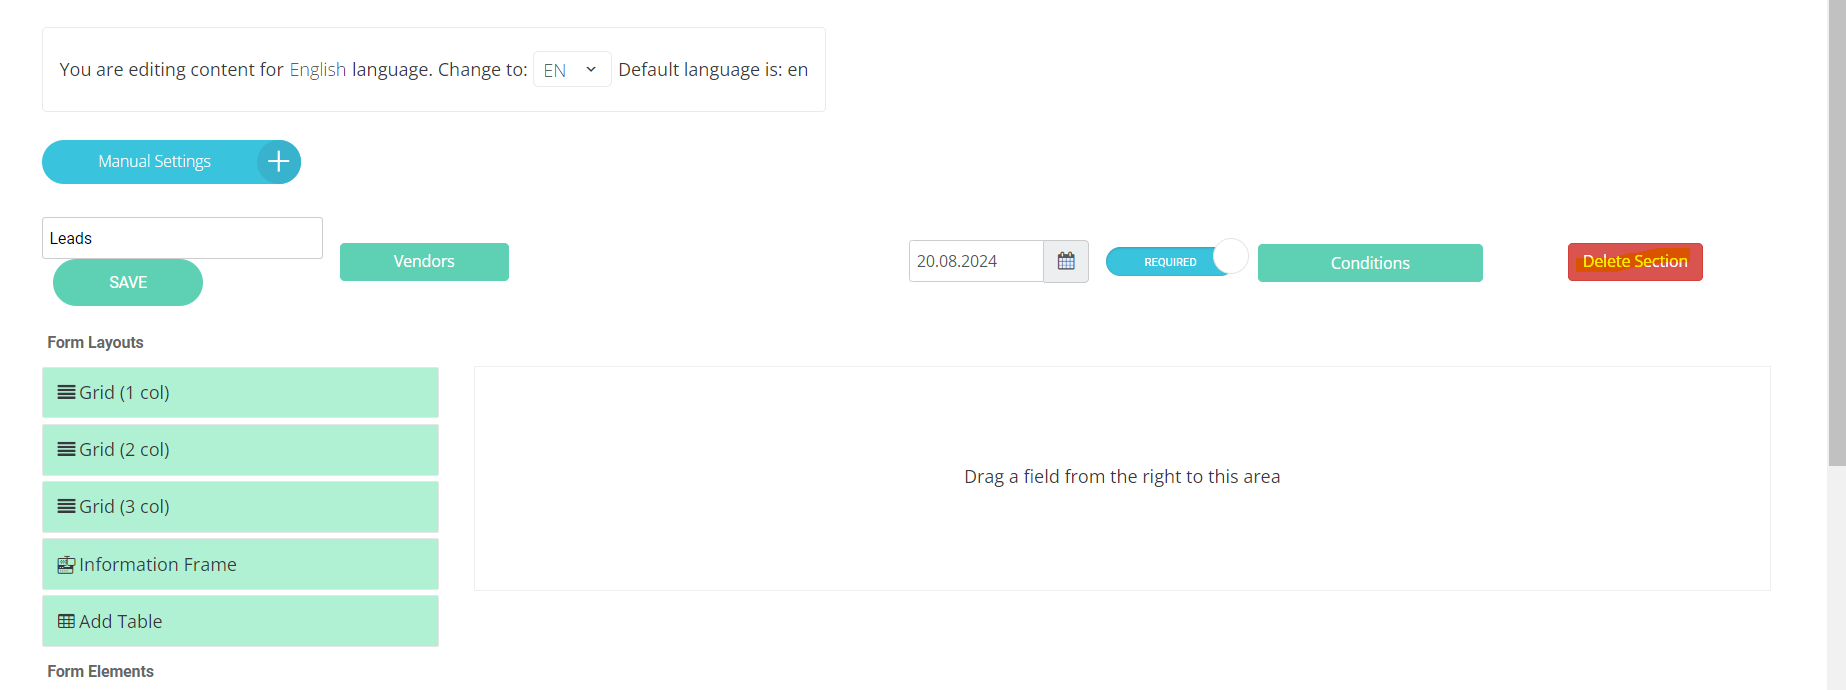
Set Deadlines
Each section has a deadline and can be made required.
Deadline is saved by Ajax so clicking on the Save button is not required to save a deadline - it is automatically saved once changed.
There are settings in Global settings related to deadline - Allow edit exhibitor profile after deadline, Allow edit exhibitor team members after the deadline, Allow Edit Manual Page after Deadline.
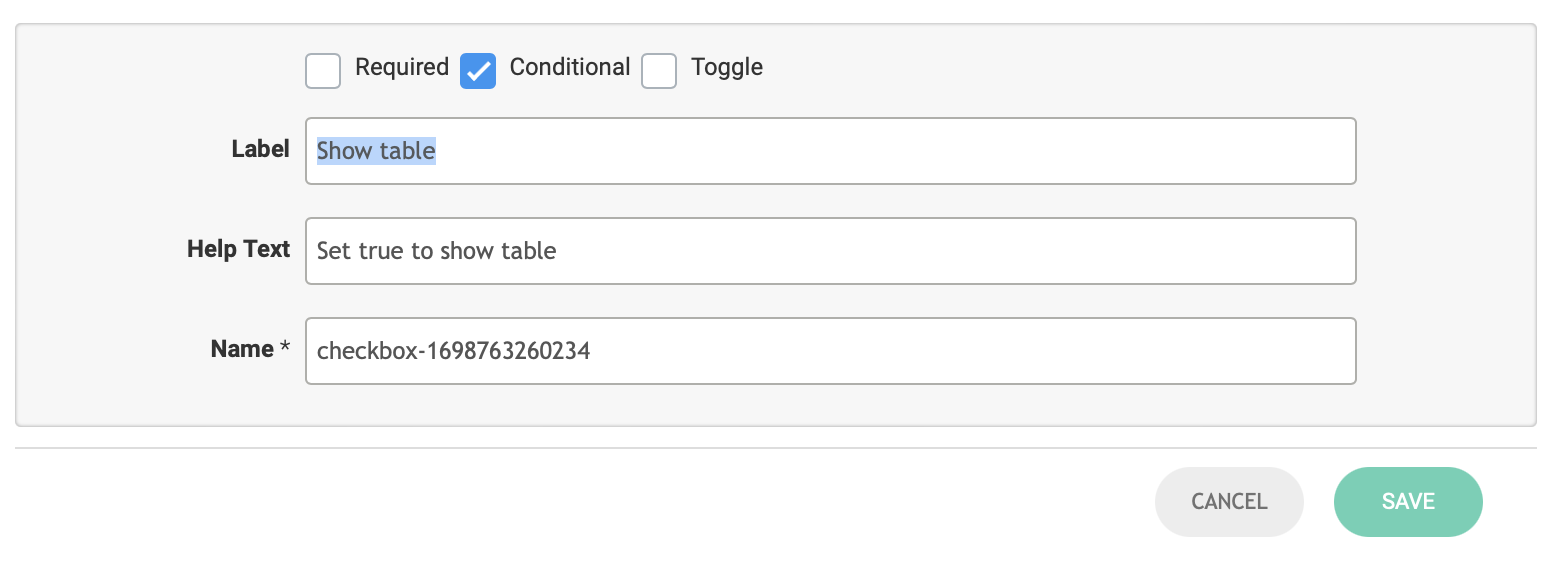
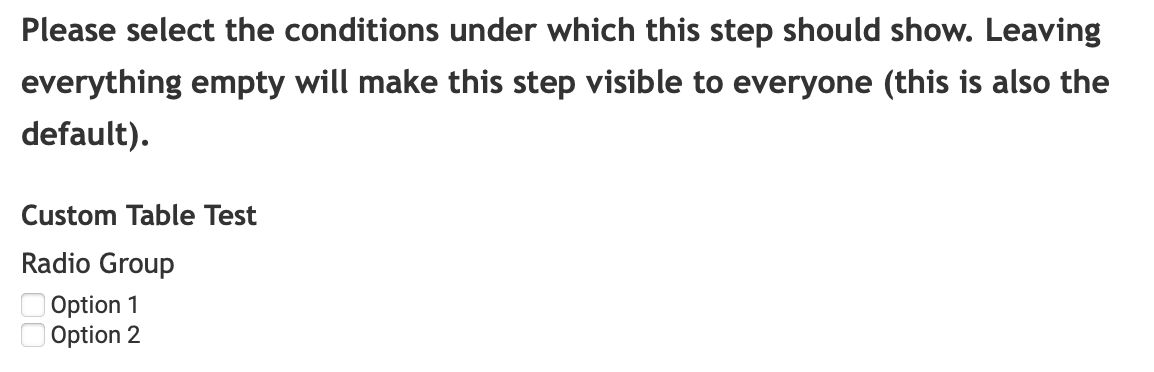
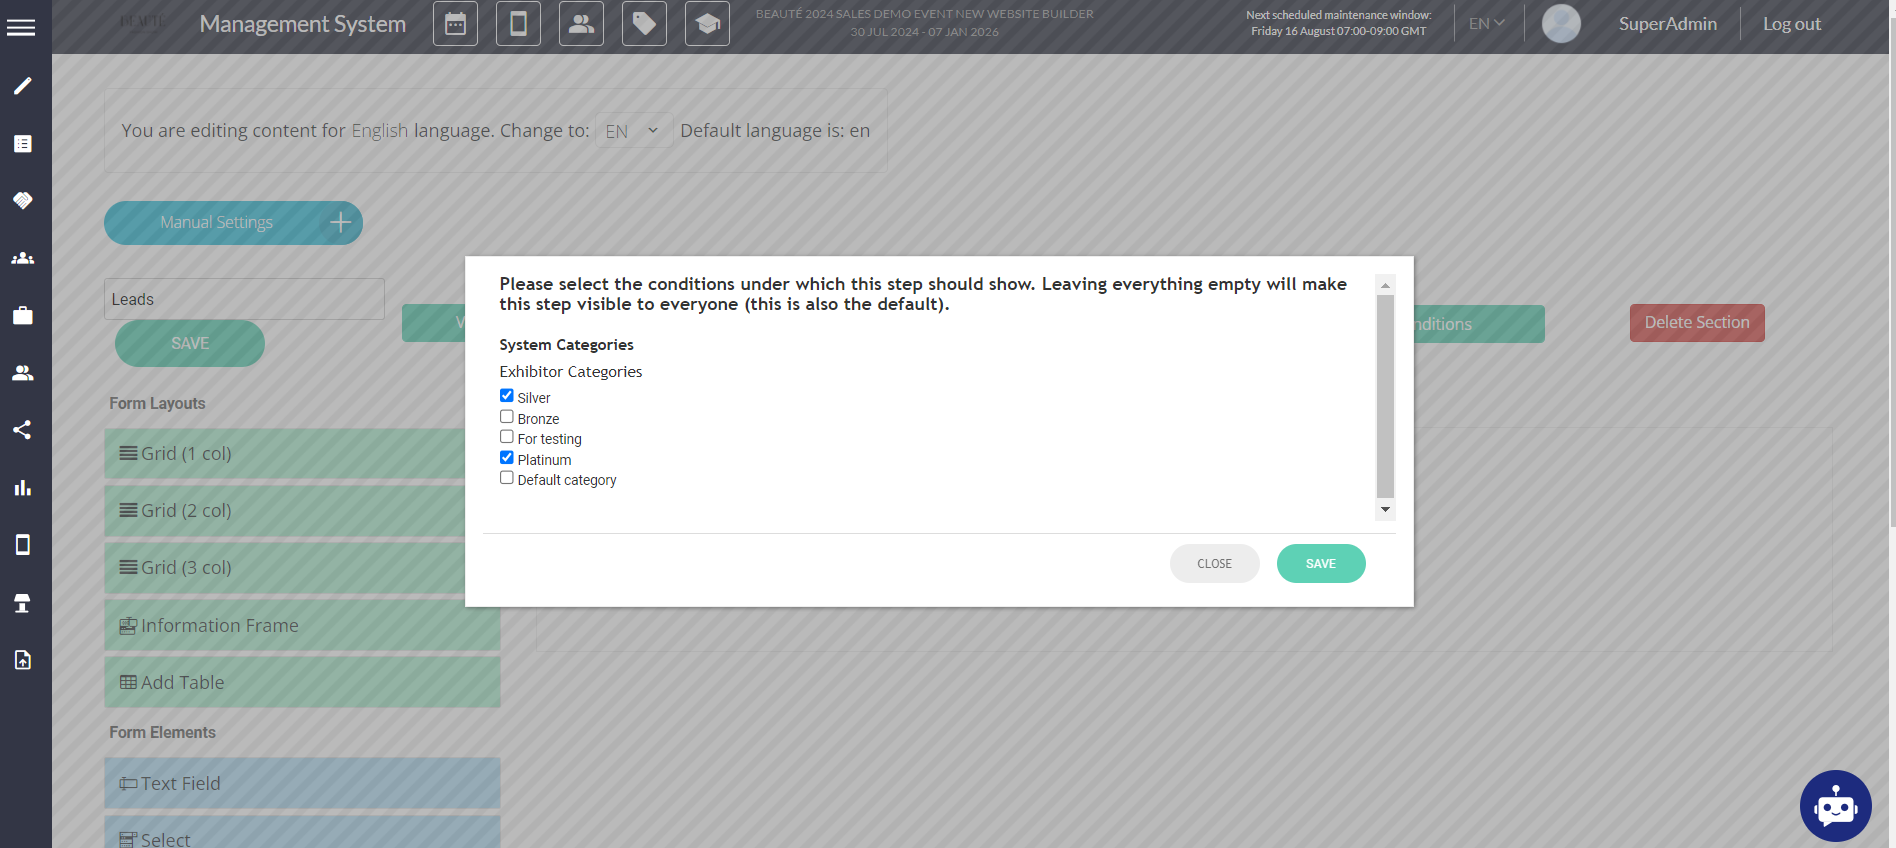
Set Conditions
On the section page, an admin can configure which exhibitors are allowed to access and submit the section. Access can be granted based on exhibitor categories and Space status.
Conditional logic can also be applied, meaning that access to the section can be controlled based on responses to conditional fields.
Translation of Exhibitor manual
All sections of the exhibitor manual include a translation tool, except for the Summary section. The Summary section does not need a translation tool since it compiles the results from other sections.
The variables that admins use in the information can also be translated when the user changes the language on the front end.
-
{exhibitor_category}: The translation for this variable comes from admin/categorisation/general
-
{exhibitor_name}: The translation for this variable is sourced from the exhibitor profile, where admins can create translations for the exhibitor's name.
NOTE: Currently, there is no translation available for {space_type}.
The translation tool on the general page allows for creating translations of section names collectively, rather than individually for each section. The translations added on this general page will be reflected in the corresponding sections of the exhibitor manual once the appropriate language is selected.
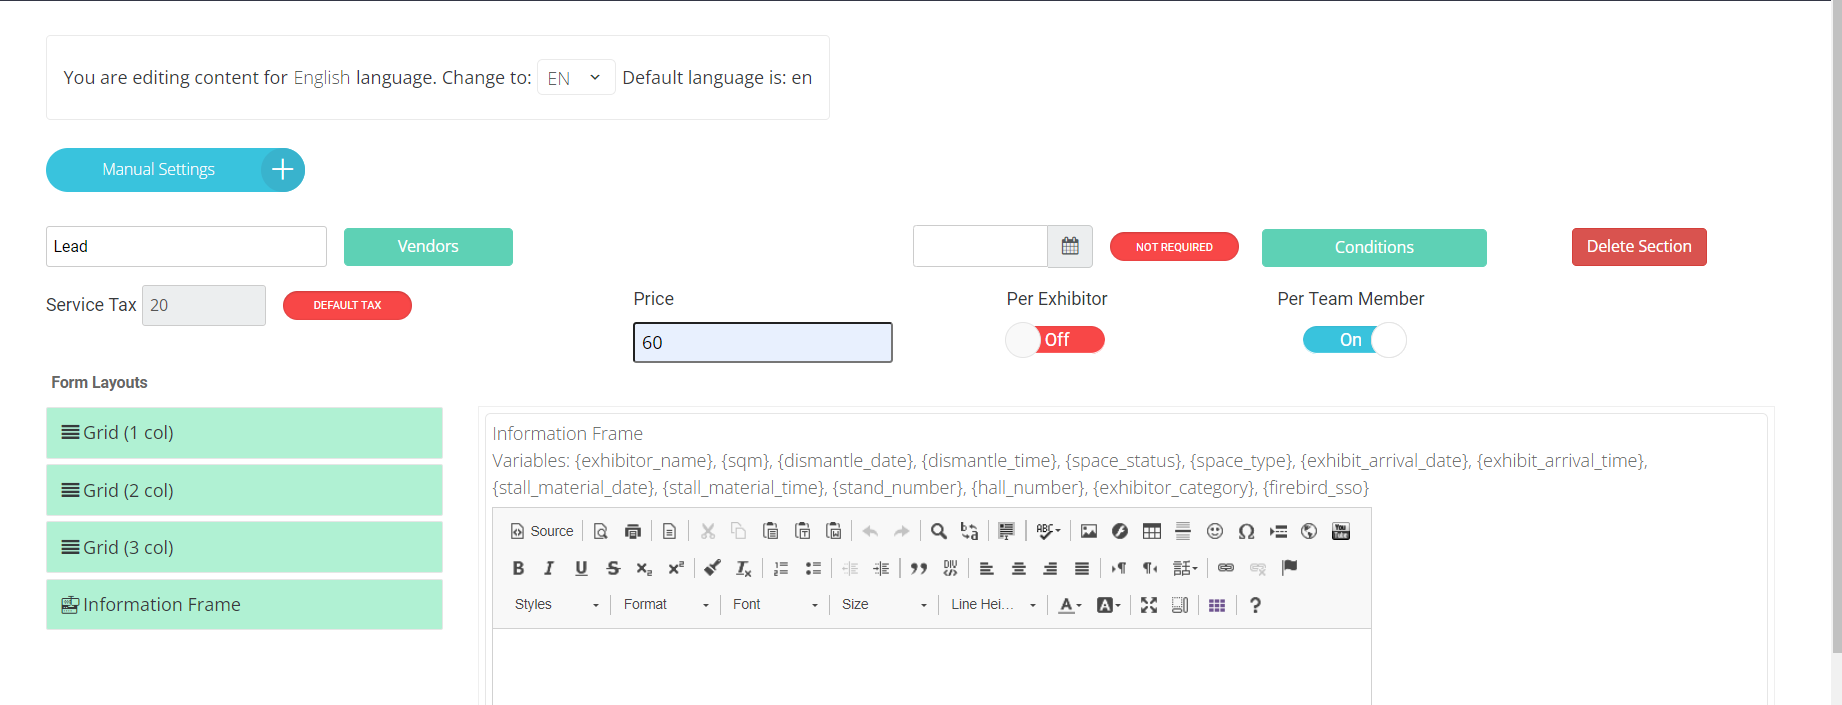
Information frame
The common text input field of all sections.
Only these fields can utilize a variable functionality - {exhibitor_name}, {sqm}, {dismantle_date}, {dismantle_time}, {space_status}, {space_type}, {exhibit_arrival_date}, {exhibit_arrival_time}, {stall_material_date}, {stall_material_time}, {stand_number}, {hall_number}, {exhibitor_category}, {firebird_sso}
Also has an editing panel as shown below:
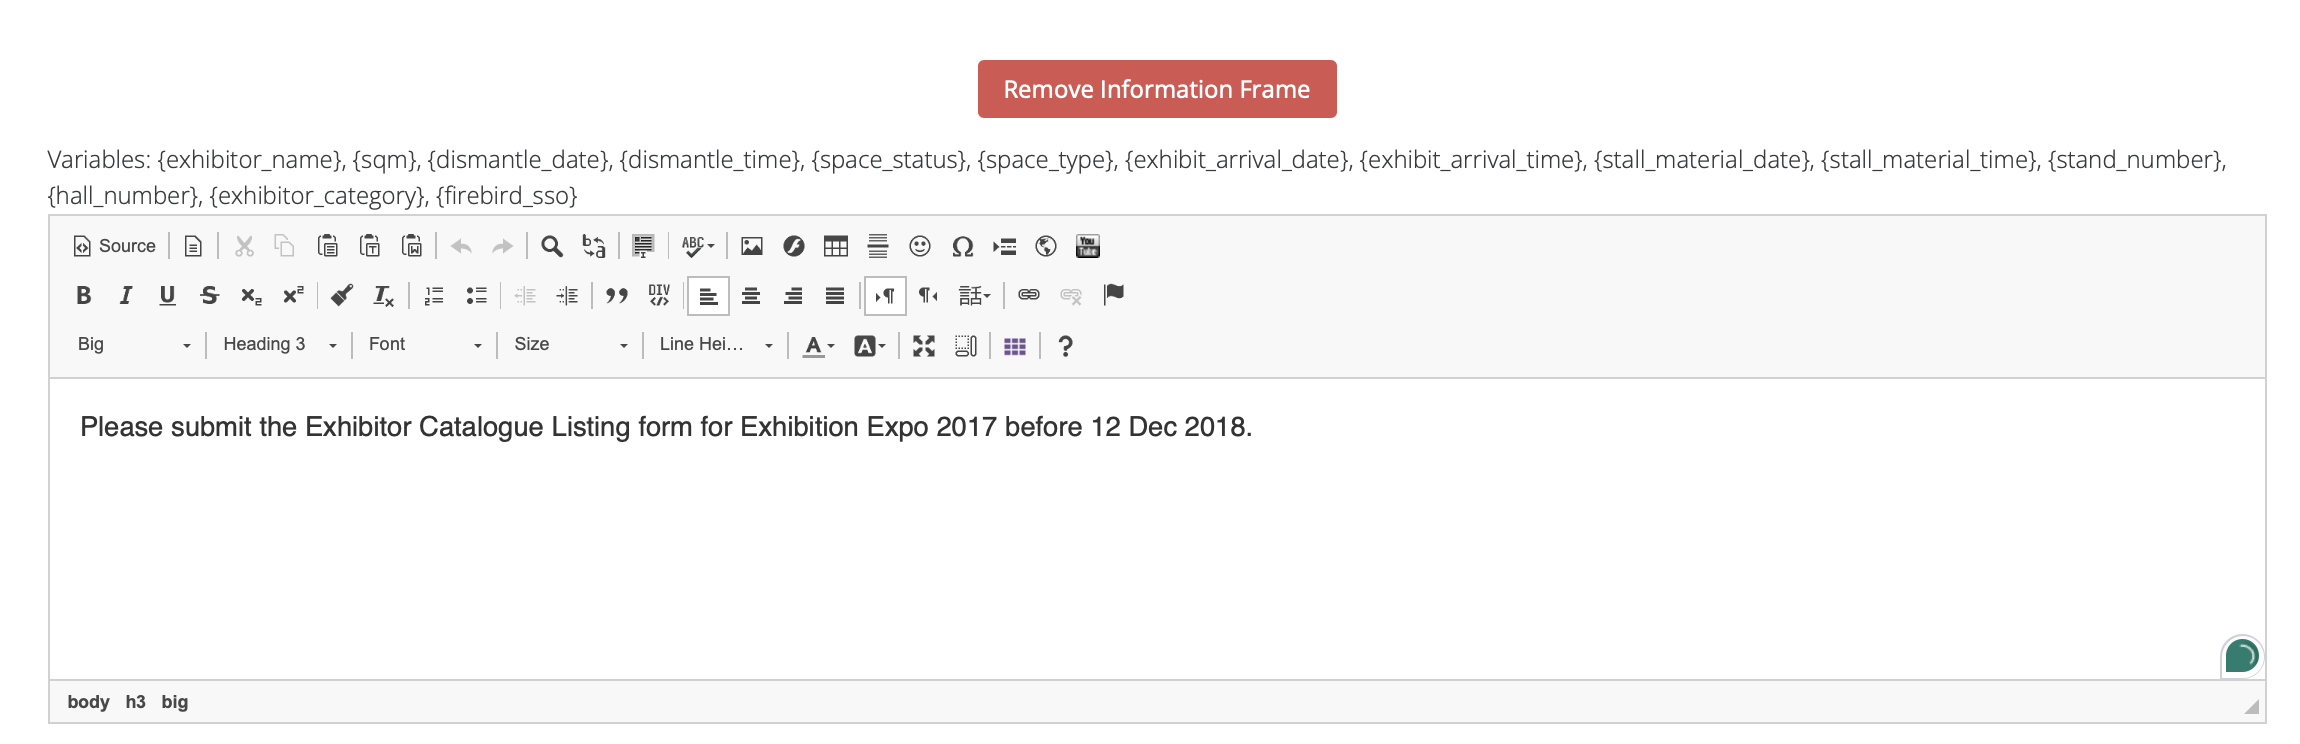
Here are all of the components of the editing panel (CKEditor 4.8.0, to be edited):
-
Source - Toggles the source code view for the text.
-
Content templates - templates for the outlook of the input information.
-
Cut
-
Copy
-
Paste
-
Paste as plain text
-
Bold (B) - Applies bold formatting to the selected text.
-
Italic (I) - Applies italic formatting to the selected text.
-
Underline (U) - Applies underline formatting to the selected text.
-
Strikethrough (S) - Applies strikethrough formatting to the selected text.
-
Subscript (x₂) - Applies subscript formatting to the selected text.
-
Superscript (x²) - Applies superscript formatting to the selected text.
-
Link (chain icon) - Adds or edits a hyperlink.
-
Unlink (broken chain icon) - Removes a hyperlink.
-
Left Align - Aligns text to the left.
-
Center Align - Centers text.
-
Right Align - Aligns text to the right.
-
Justify - Justifies text.
-
Bullet List - Creates a bulleted list.
-
Numbered List - Creates a numbered list.
-
Decrease Indent - Decreases the indentation level.
-
Increase Indent - Increases the indentation level.
-
Quote (double quotes icon) - Formats text as a blockquote.
-
Div (DIV icon) - Wraps text in a DIV tag.
-
Formats (dropdown menu) - Provides additional text formatting options.
-
Heading 3 (dropdown menu) - Provides heading formatting options.
-
Font (dropdown menu) - Allows font selection.
-
Size (dropdown menu) - Allows font size selection.
-
Line Height (dropdown menu) - Adjusts line height.
-
Text Color (A with color picker) - Changes the text color.
-
Background Color (A with color highlight) - Changes the background color of the text.
-
Clear Formatting (eraser icon) - Clears all formatting from the selected text.
-
Special Character (Ω icon) - Inserts special characters.
-
Horizontal Line - Inserts a horizontal line.
-
Emoji (smiley face icon) - Inserts emojis.
-
Settings (gear icon) - Opens settings.
-
Help (question mark icon) - Opens help options.
-
Fullscreen (arrows icon) - Toggles Fullscreen mode.
-
YouTube - Inserts a YouTube video link.
In addition to exhibitors, their team members can also view the exhibitor manual. However, only admin team members have the ability to submit sections and make purchases for items in the exhibitor manual.
Troubleshooting:
Question:
I am an Admin but unable to access the Manual settings under Exhibitor Manual as I get the error ‘you don’t have access to this module'.
Answer:
Please contact your lead Admin as they might not have given you permission to access and make changes in this module.
Question:
Can I control the visibility of a section in the Exhibitor Manual based on Exhibitor categories?
Answer:
Yes, go under the section >>> Conditions >>> select the exhibitor category.
Question:
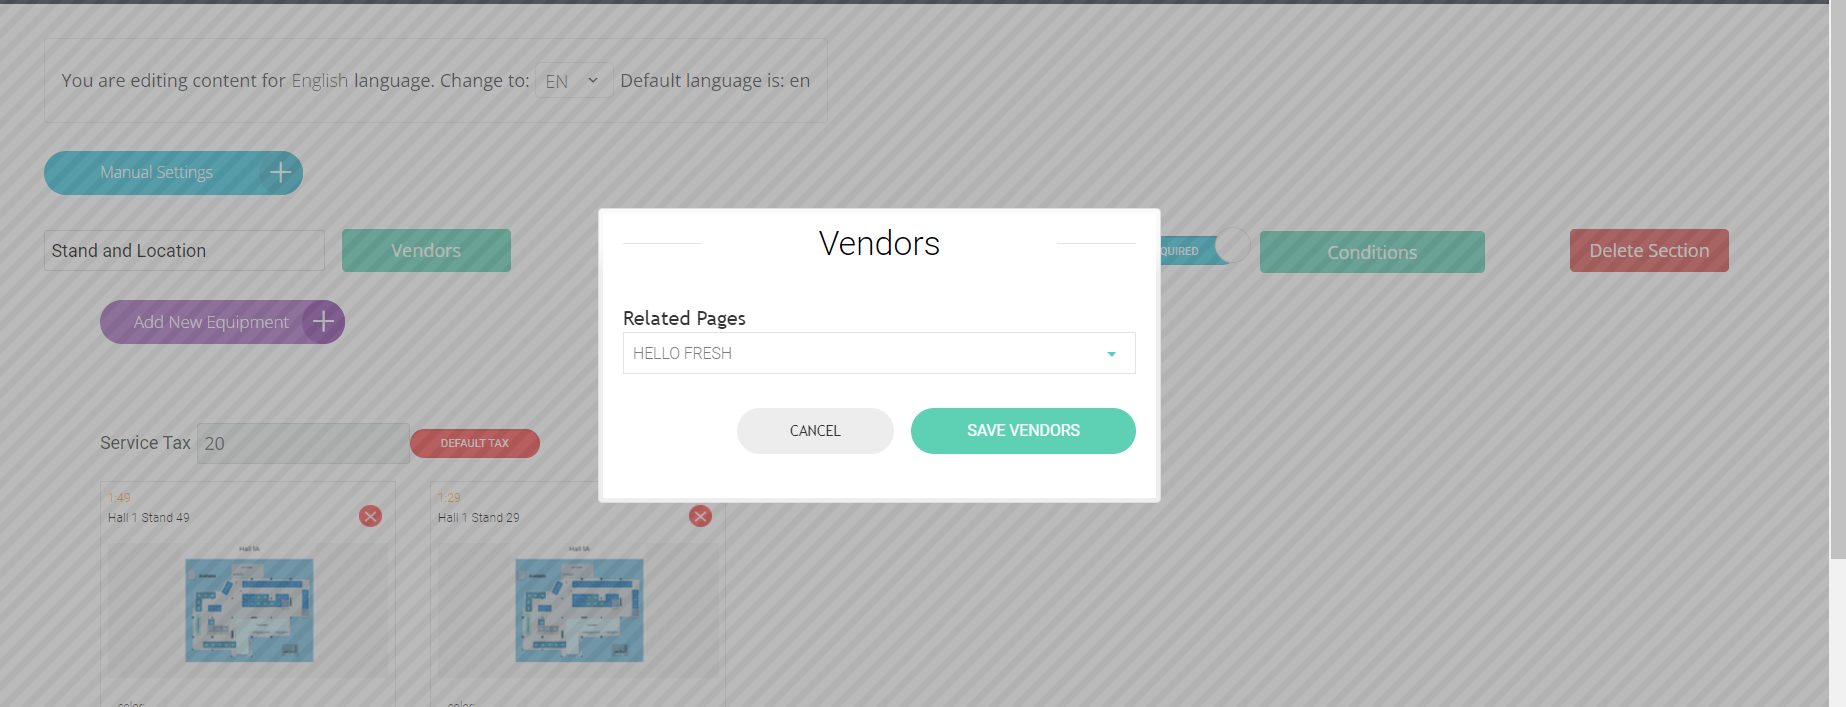
Can I allocate vendors to a particular section in the Exhibitor Manual?
Answer:
Yes, click on the section >>> vendors >>> select vendor and save.
Question:
I have added a ‘Documents’ section and want to the response required while submitting the document. Is this possible?
Answer:
Yes, please toggle on the ‘Response require’ under the Documents section.
Question:
Can I charge an exhibitor or team member for each lead captured using the exhibitor manual?
Answer:
Yes, the price can be set per exhibitor or team member under the 'Leads' section.