Feature Purpose
The App Meeting Request feature enables users to effortlessly schedule, manage, and track meetings directly within the ExpoPlatform mobile app. This functionality is designed to streamline the process of connecting with fellow attendees or exhibitors, ensuring that all meeting details—from participant selection to scheduling and status updates—are clearly captured and communicated. Ultimately, it improves networking efficiency by integrating online and in-person meeting setups into one cohesive system.
Working with the Feature
Meeting Permissions and Management
The ability to request and manage meetings is governed by:
-
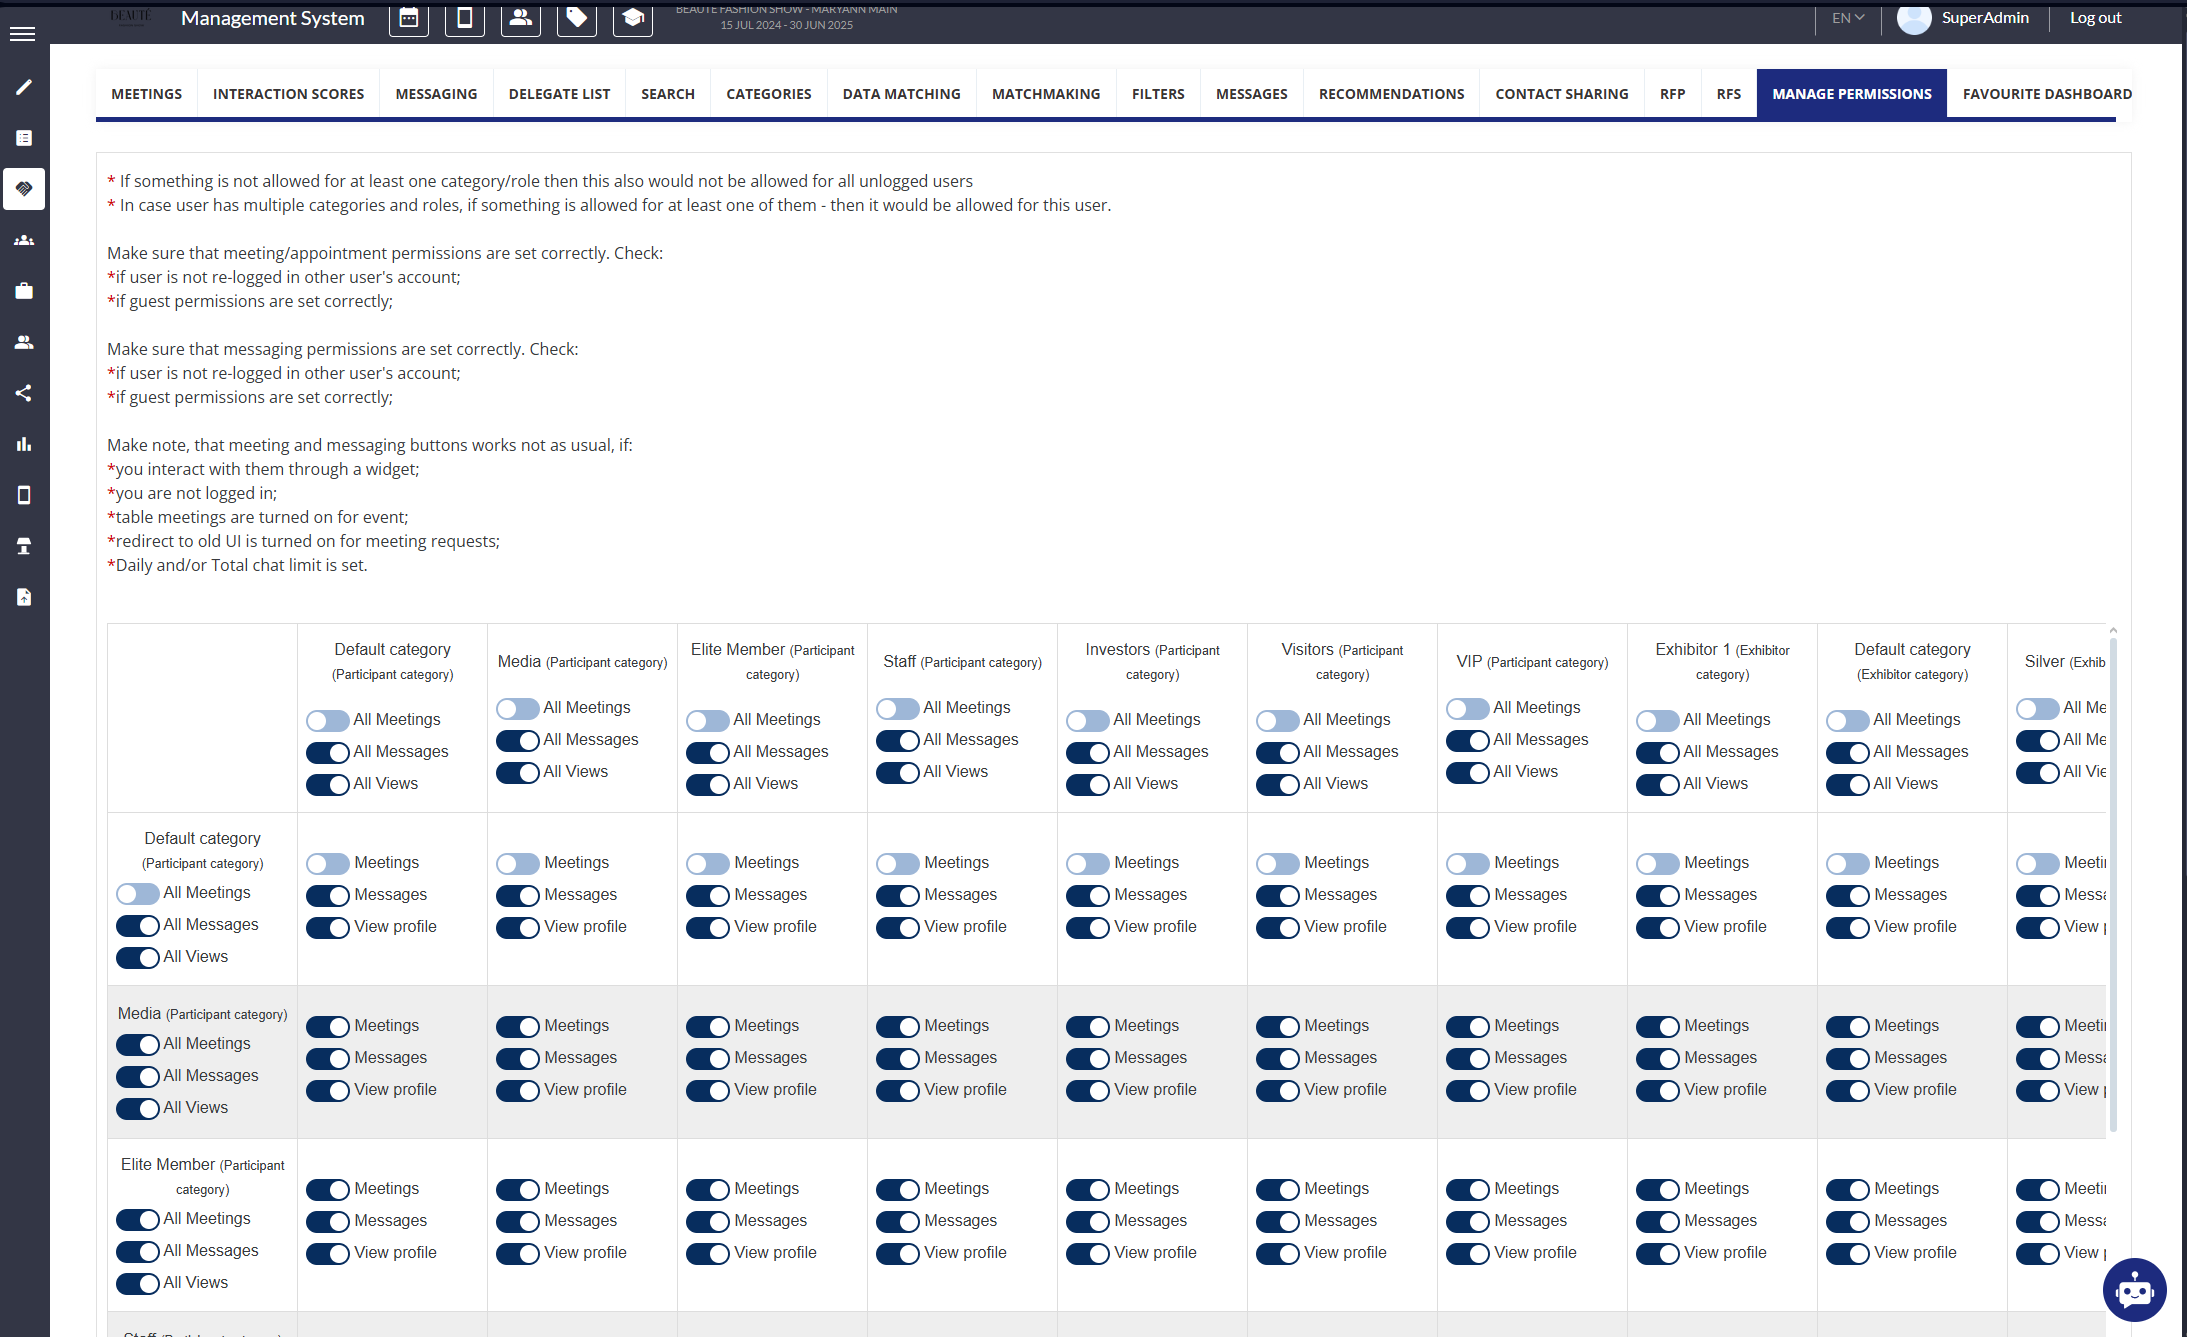
Permission Matrix: Controls visibility and accessibility for each user based on their registration category and role. The matrix is located under Networking and Matchmaking > Manage Permissions and additional information about working with the matrix can be found here.
-
Personal Account Settings: Allows users to adjust connection settings, affecting who can request meetings with them. Additional details can be found here
-
Networking Opt-In: If this field has been included on the registration forms, users can choose to participate in networking, which influences meeting request capabilities. Additional details can be found here. Note - for the web ONLY, additional settings apply, such as prohibiting meetings for exhibitors without team members.
Meeting Request Process
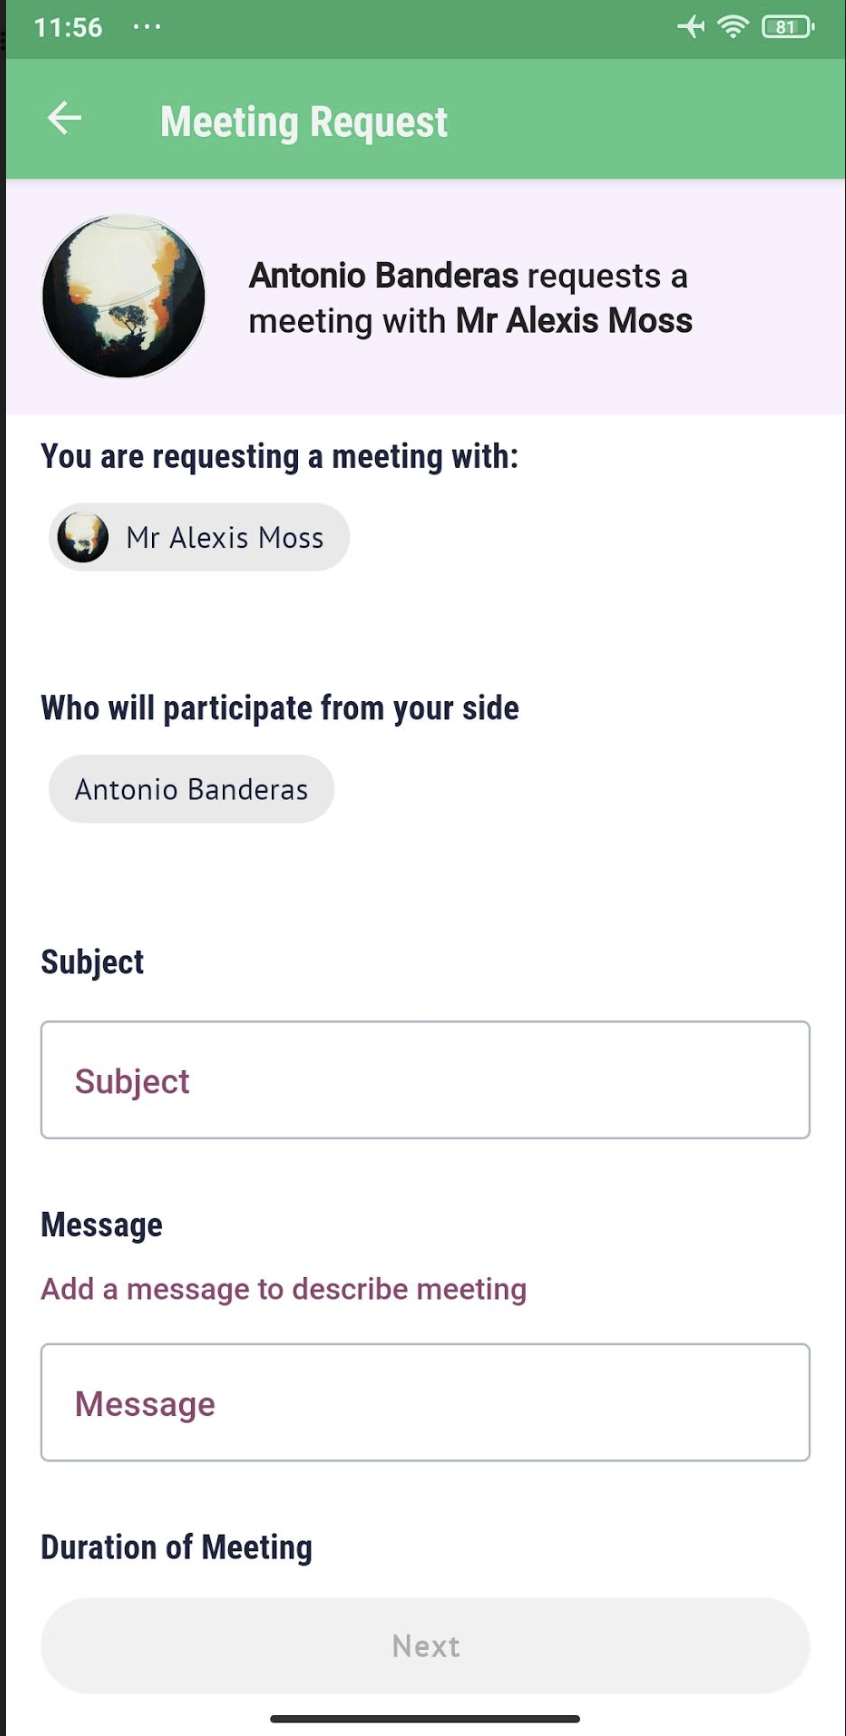
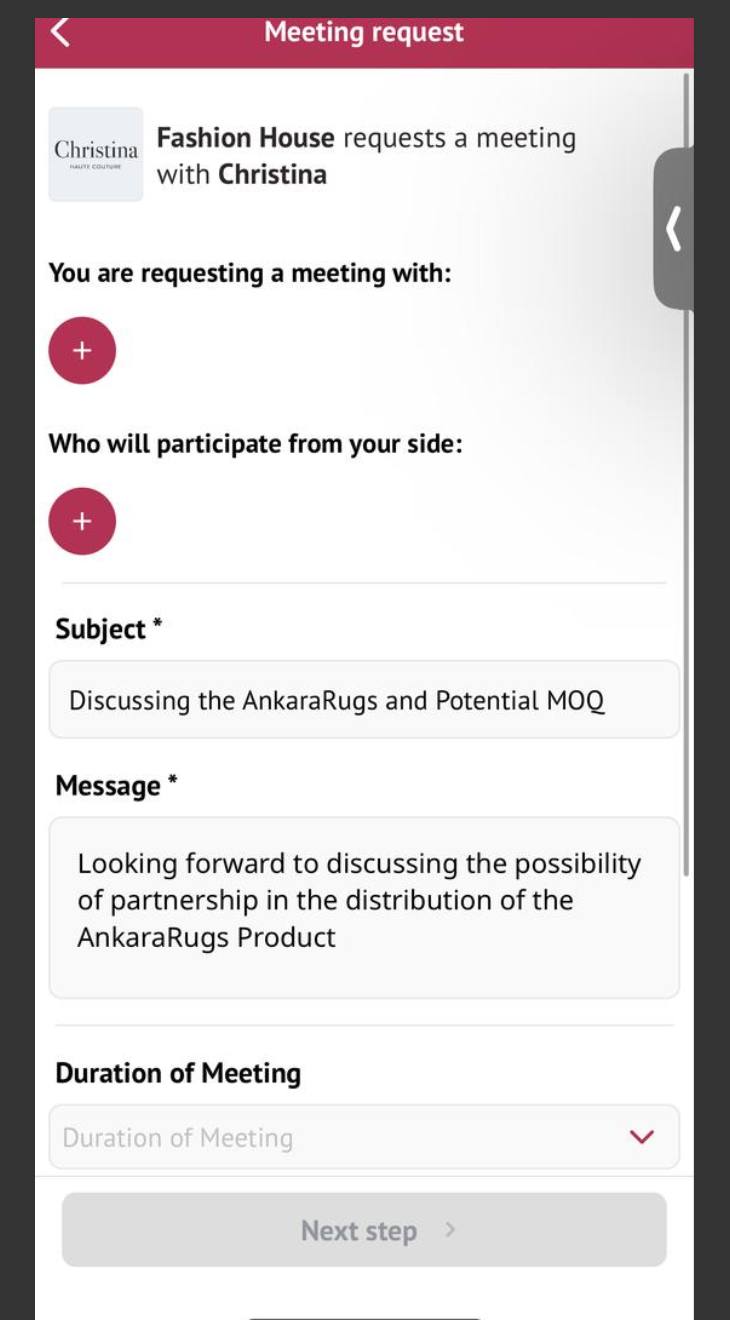
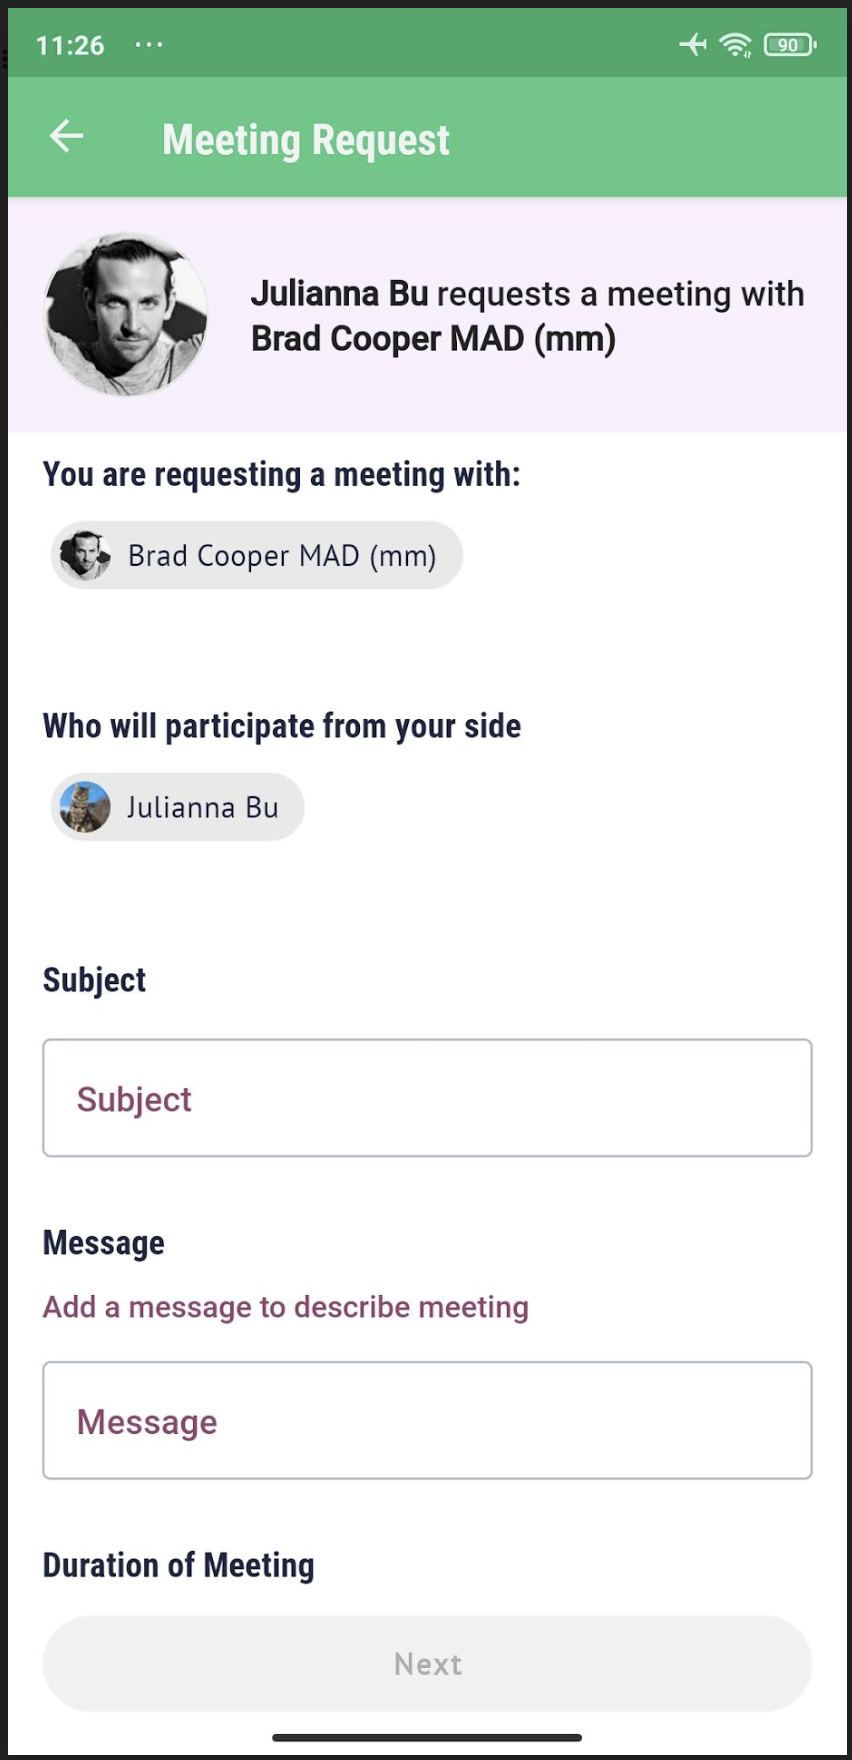
Accessing the Meeting Request Interface:
-
From any user’s profile (whether you are browsing visitors or exhibitors), tap the dedicated “Meeting Request” icon/button.
-
This action opens the meeting request form where you can input all required details.
Filling in Meeting Details
-
Participants & Delegate Selection:
-
Primary Participant: Choose the main contact (or exhibitor team member) from a dropdown list if available.
-
Additional Delegates: Optionally, add extra delegates by entering their email addresses. These individuals will receive the meeting details but cannot reschedule.
-
Please note: The meeting request screen layout will vary based on the sender and receiver’s roles:
-
Visitor Requests to Visitor: Simple request form without team member options.
-
Visitor Requests to Exhibitor without Team Members: Limited request form for direct meeting with exhibitor.
-
Visitor Requests to Exhibitor with Team Members: Option to select a specific team member to meet with, based on permission settings.
-
Team Member Requests: Team members can send meeting requests to visitors or exhibitors, with options to include additional team members if applicable.
-
Exhibitor Requests: Exhibitors can request meetings with each other, with options to select multiple team members depending on permissions.
Meeting Subject and Message:
-
Subject: Input a brief yet descriptive meeting subject that reflects the purpose of the discussion.
-
Message: Include a detailed message or agenda to outline the discussion points. This information is essential for both setting expectations and ensuring clarity among participants.
Meeting Location Options
-
Location Selection Logic
-
Exhibitor Stand: Universal meeting location for meetings with exhibitors/team members.
-
Actual Exhibitor Stand: If the exhibitor has an actual stand, it is shown as a meeting location by default in the app (the web version respects “Disable actual stand location” and “Hide stand/hall” settings).
-
Other Locations: Locations can be managed and toggled on/off in the admin panel. Users may select these manually if no predefined options are set.
-
Online Location: An online meeting room.
-
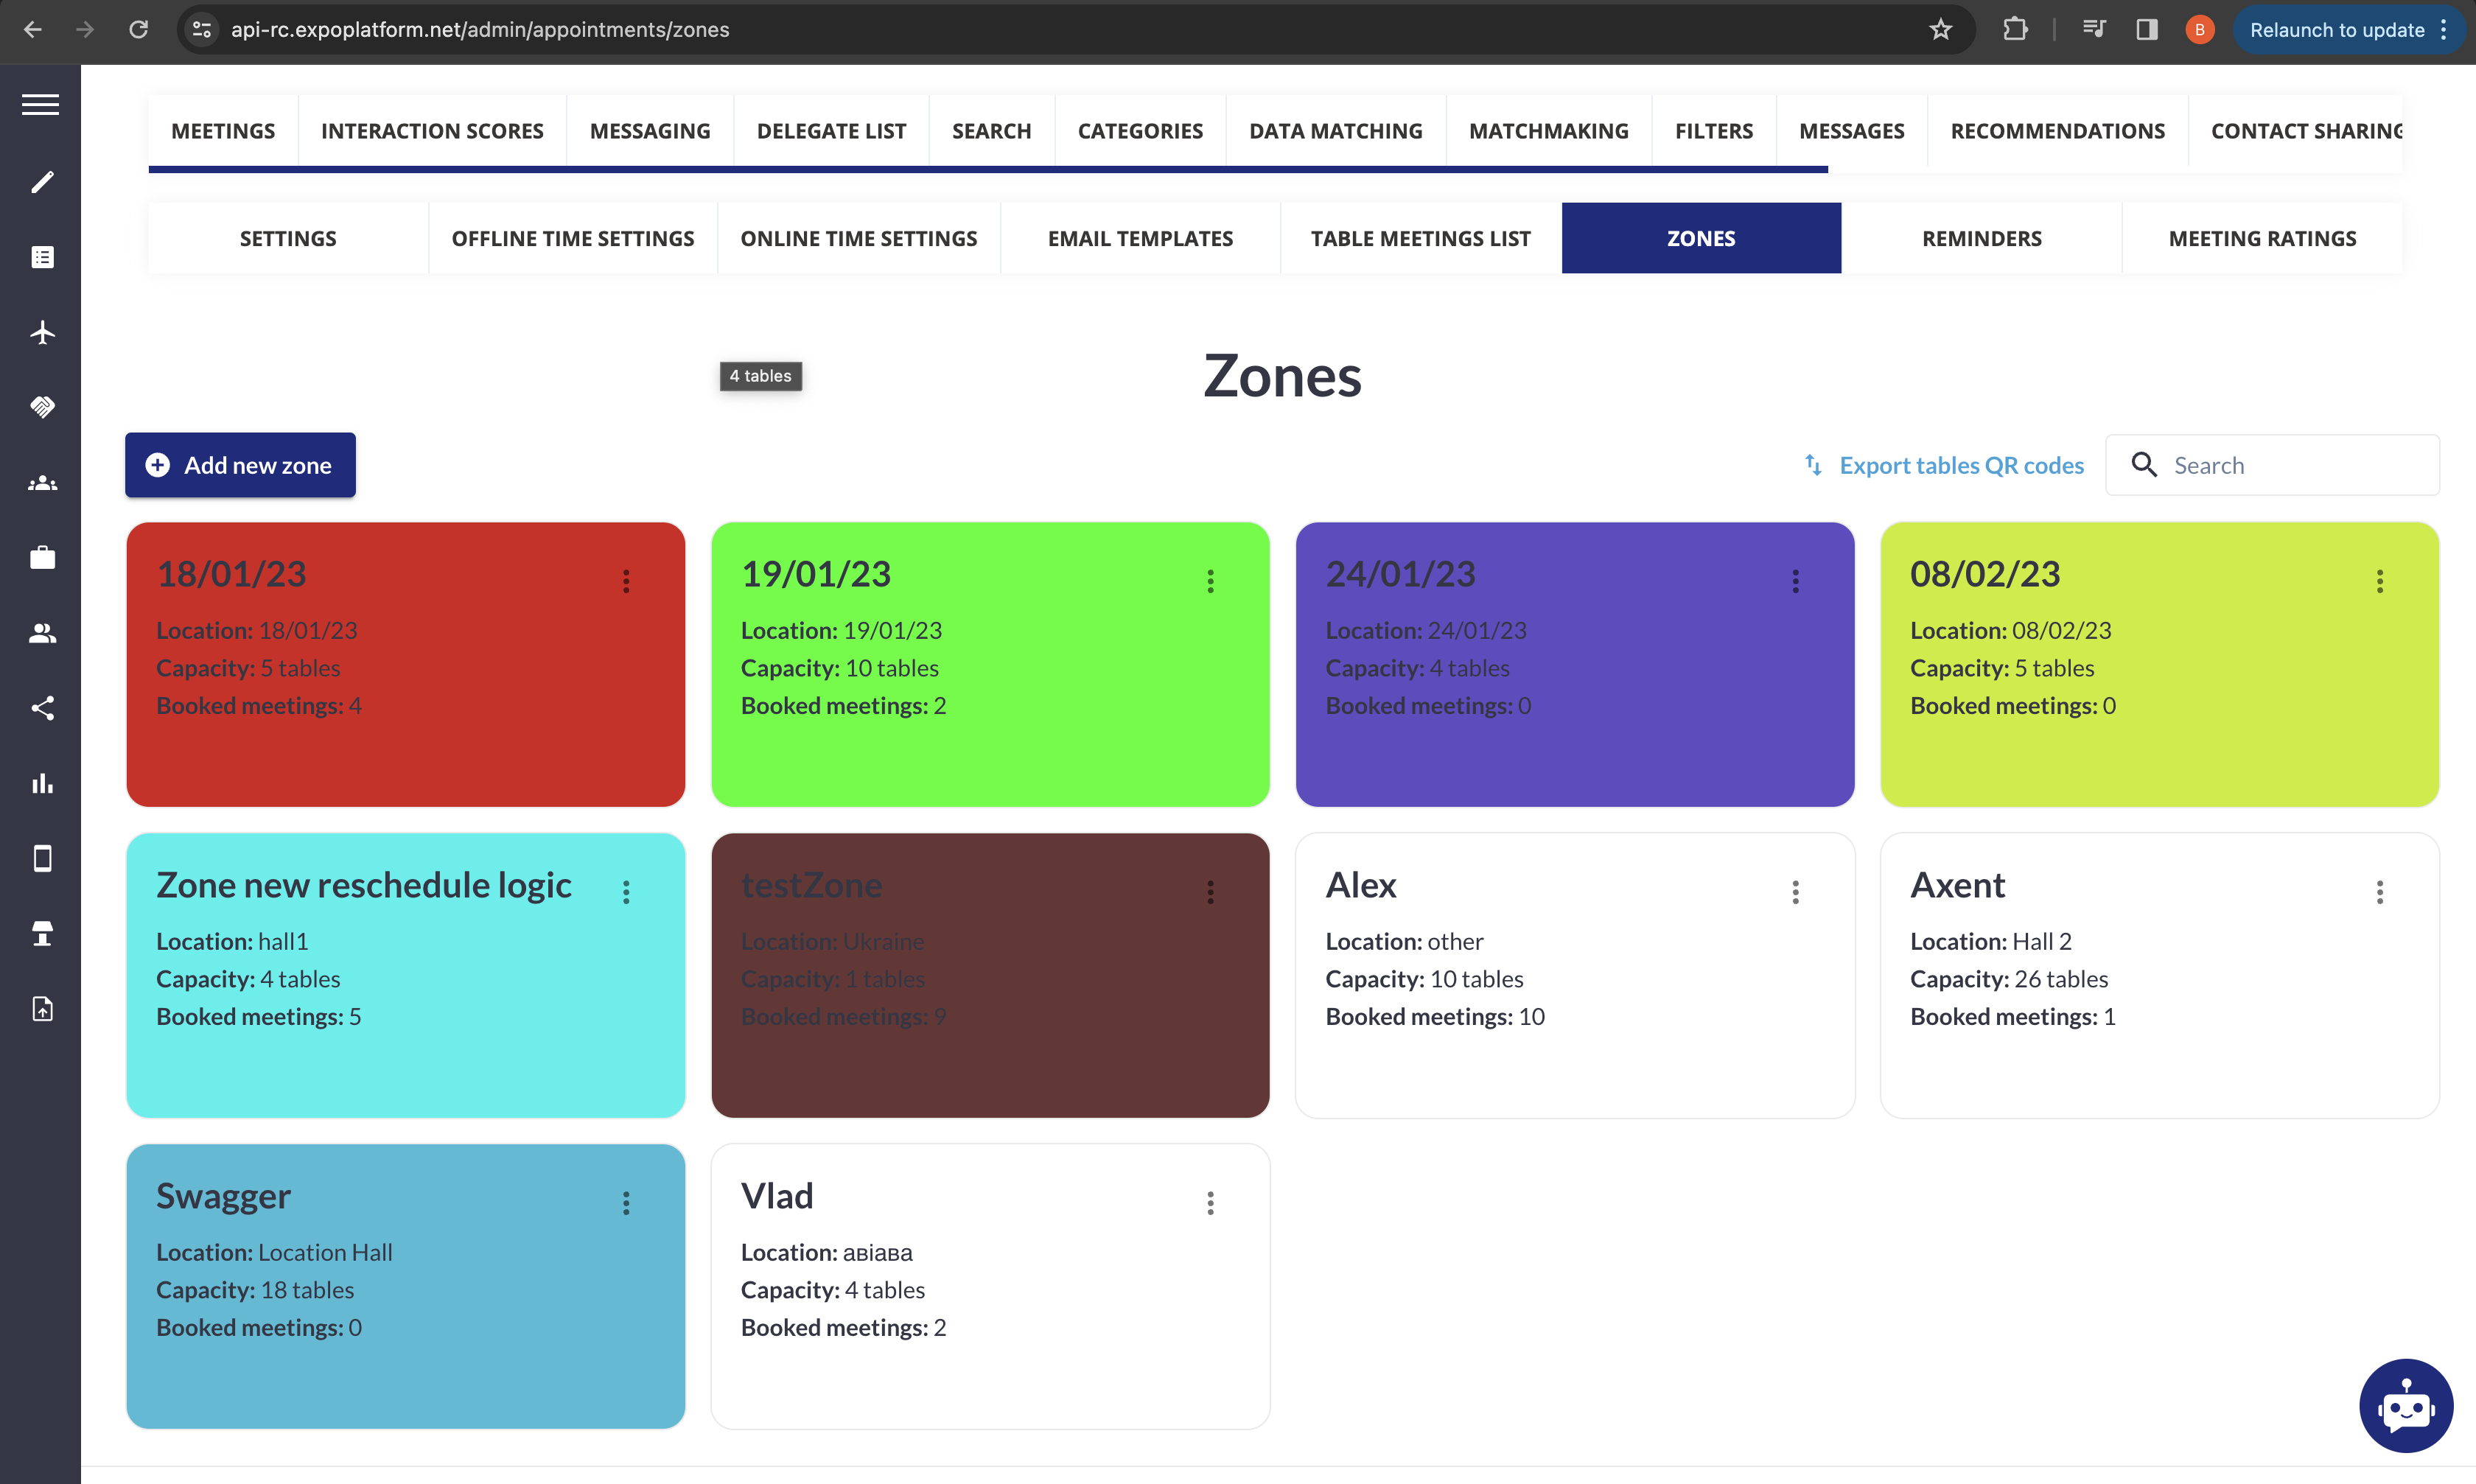
Table Meetings: Available for specific event types and user roles, managed in the admin panel’s meeting zones settings.
-
Location Options Based on Meeting Type
-
Visitor to Visitor (Regular Meeting): Can select Other Locations or Online only (if both are disabled in the admin panel then no meeting request option will appear).
-
Visitor to Team Member/Exhibitor: Access to Other Locations, Online, and Exhibitor Stand if enabled, plus specific stands if available.
-
Team Member to Exhibitor/Exhibitor to Exhibitor: All locations as above, plus stands from both parties.
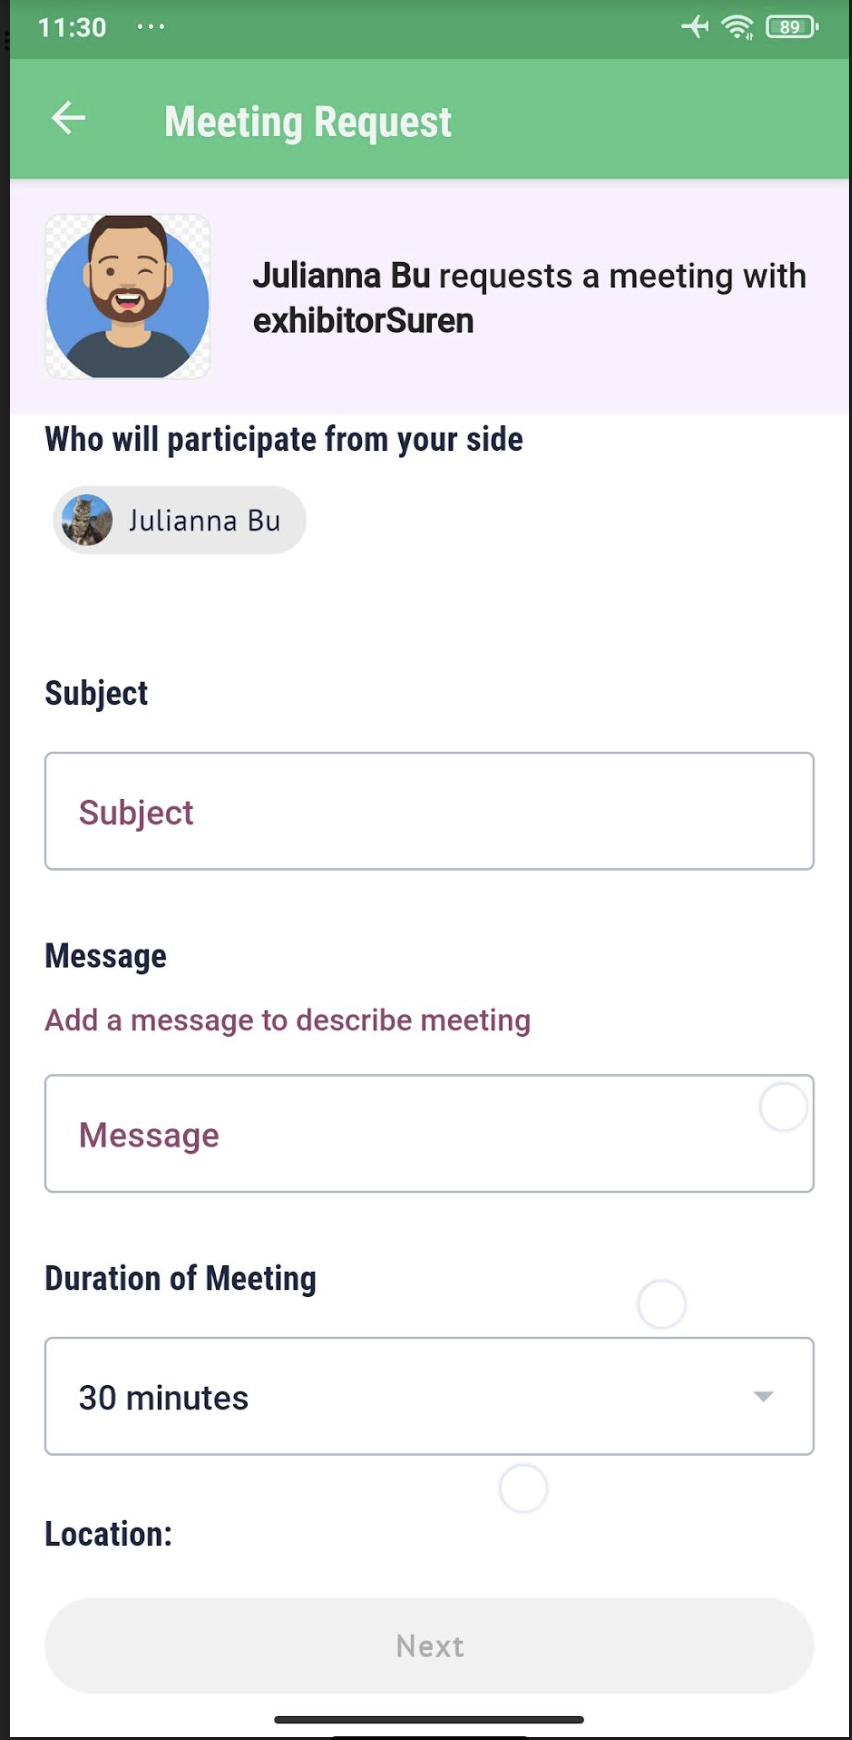
Time Slot Selection:
-
Calendar Integration: View your calendar within the app to check available time slots. The system shows both your local time and the event time (if they differ), helping avoid scheduling conflicts.
-
Selecting Date and Time: Choose a date and time that work for all parties involved. The system automatically flags conflicting time slots.
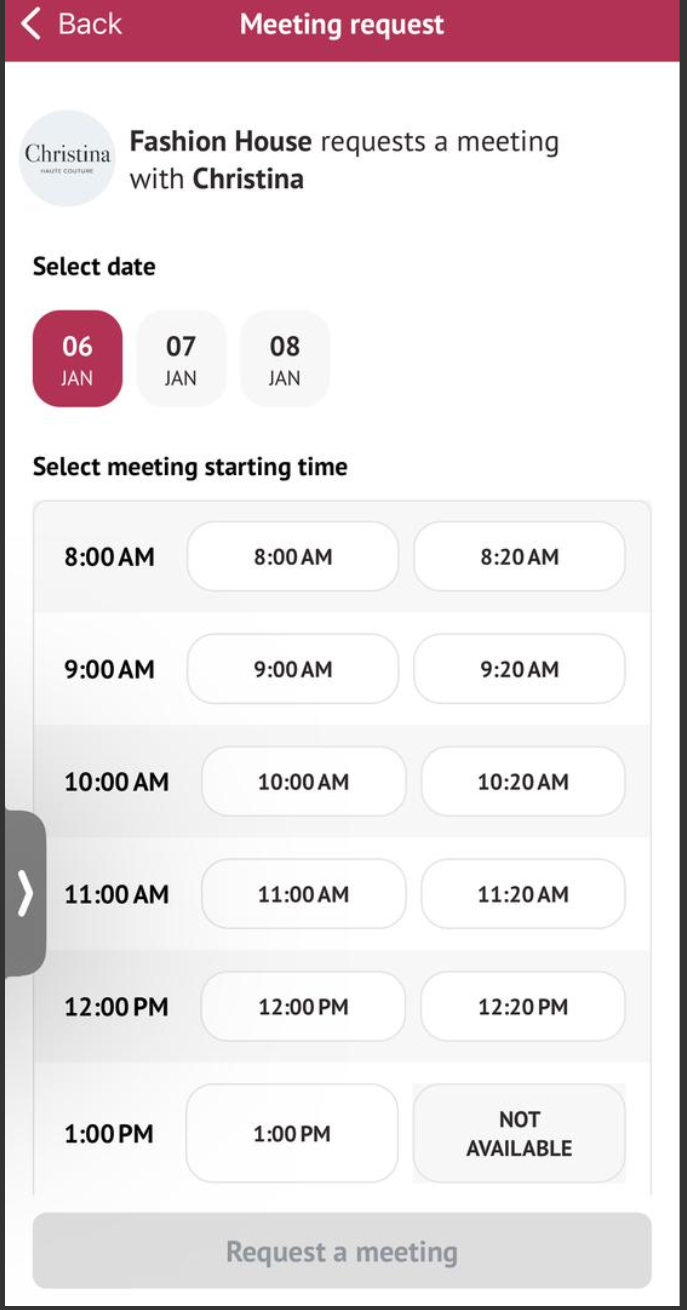
Finalizing the Request:
-
Submission: Once all details are reviewed, tap the “Send” button. This dispatches the meeting request to the intended recipients.
-
Notifications: Recipients receive an email and a push notification on their mobile devices. They can then accept, decline, or propose a new time.
-
Calendar Sync: Upon confirmation, the meeting is automatically added to the participant’s personal calendars (Google, Outlook, etc.).
Managing Meetings
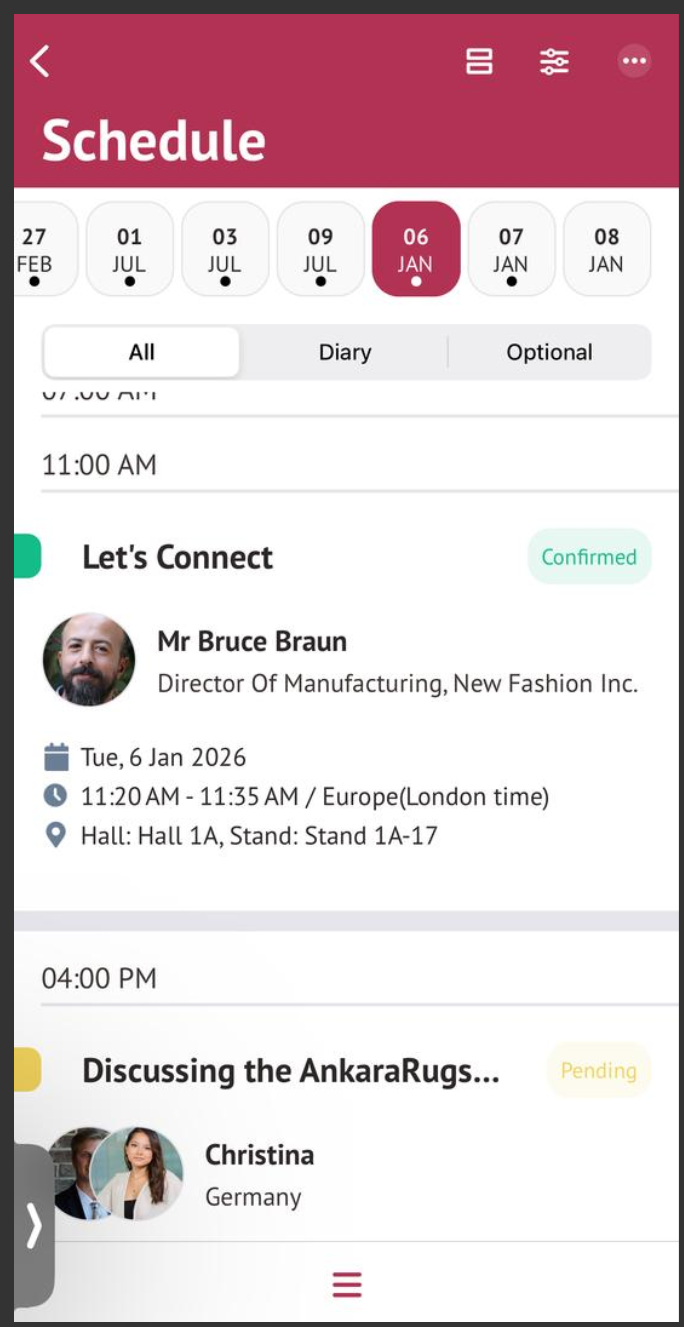
Tracking Your Meeting Requests:
-
Pending: Indicates that the request has been sent and is awaiting a response.
-
Incoming: Shows meeting requests that have been received and are awaiting action (acceptance, rescheduling, or rejection).
-
Confirmed: The meeting has been accepted by all parties.
-
Cancelled: The meeting was cancelled by either party.
Screenshot below shows the web dashboard view with clear, color-coded meeting status indicators. For example, a list or grid view that distinguishes between “Pending,” “Incoming,” “Confirmed,” and “Cancelled” meetings. This same color-coding is used in the app.
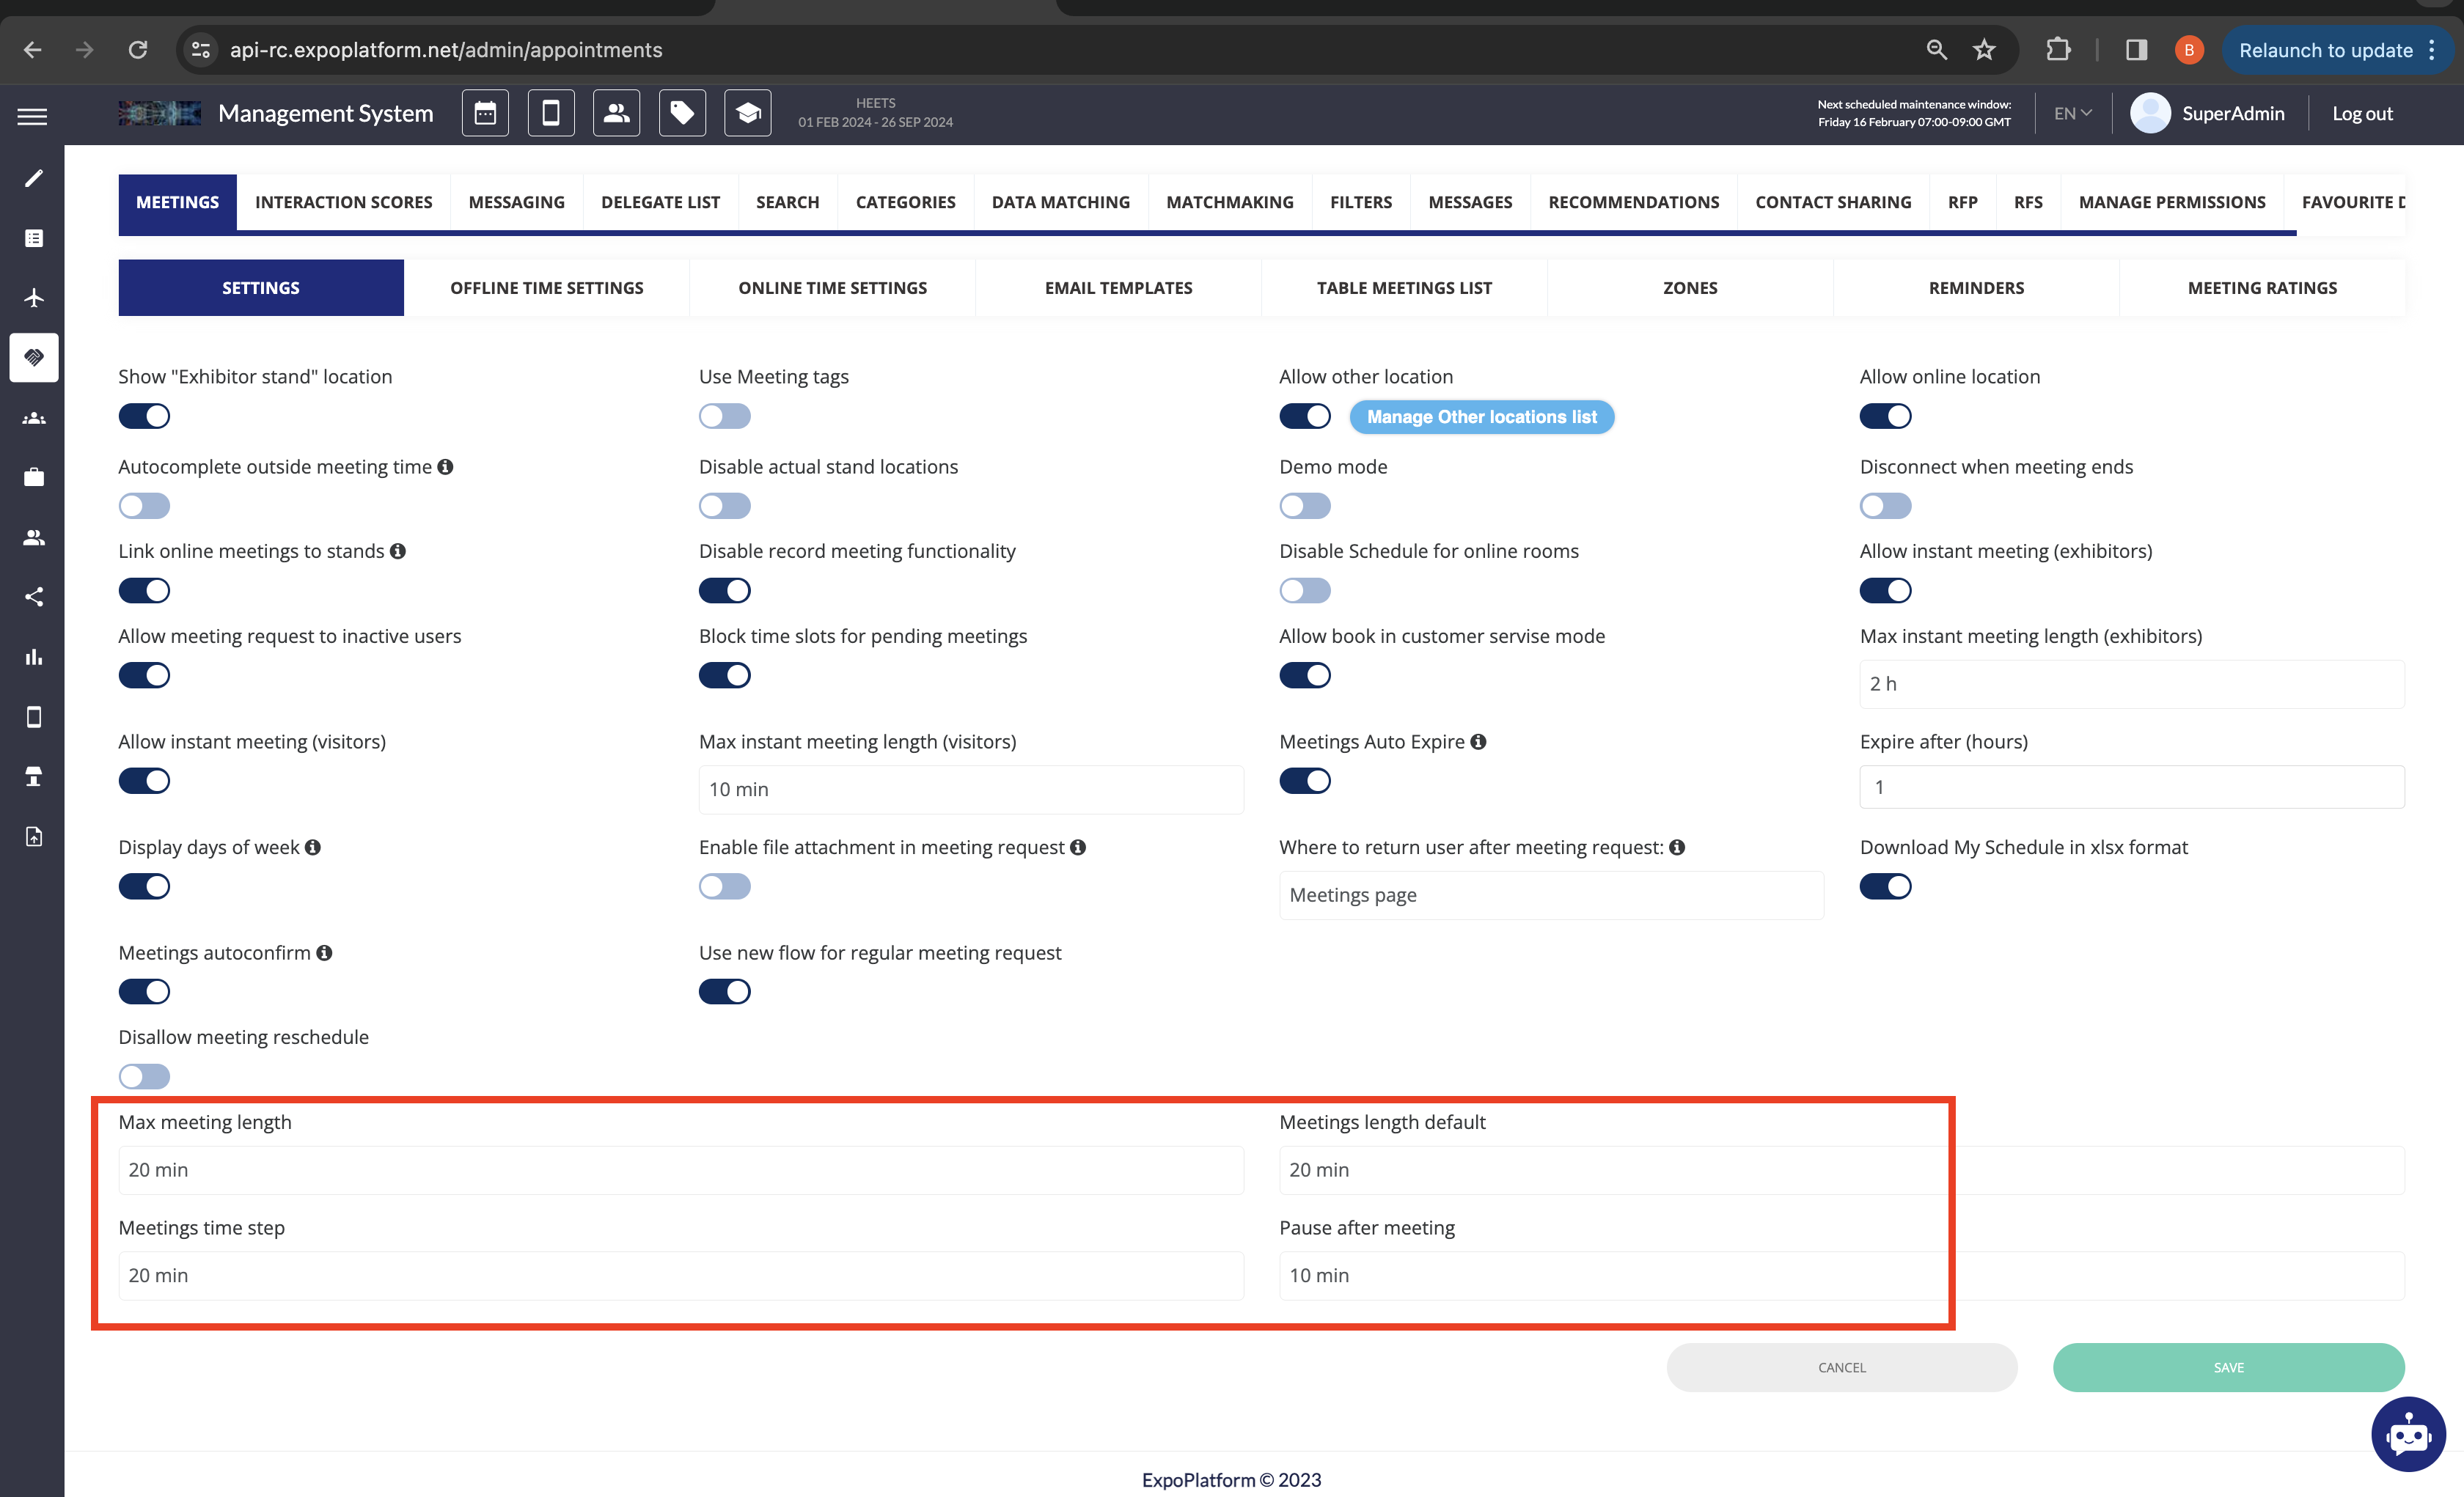
Admin Panel Settings
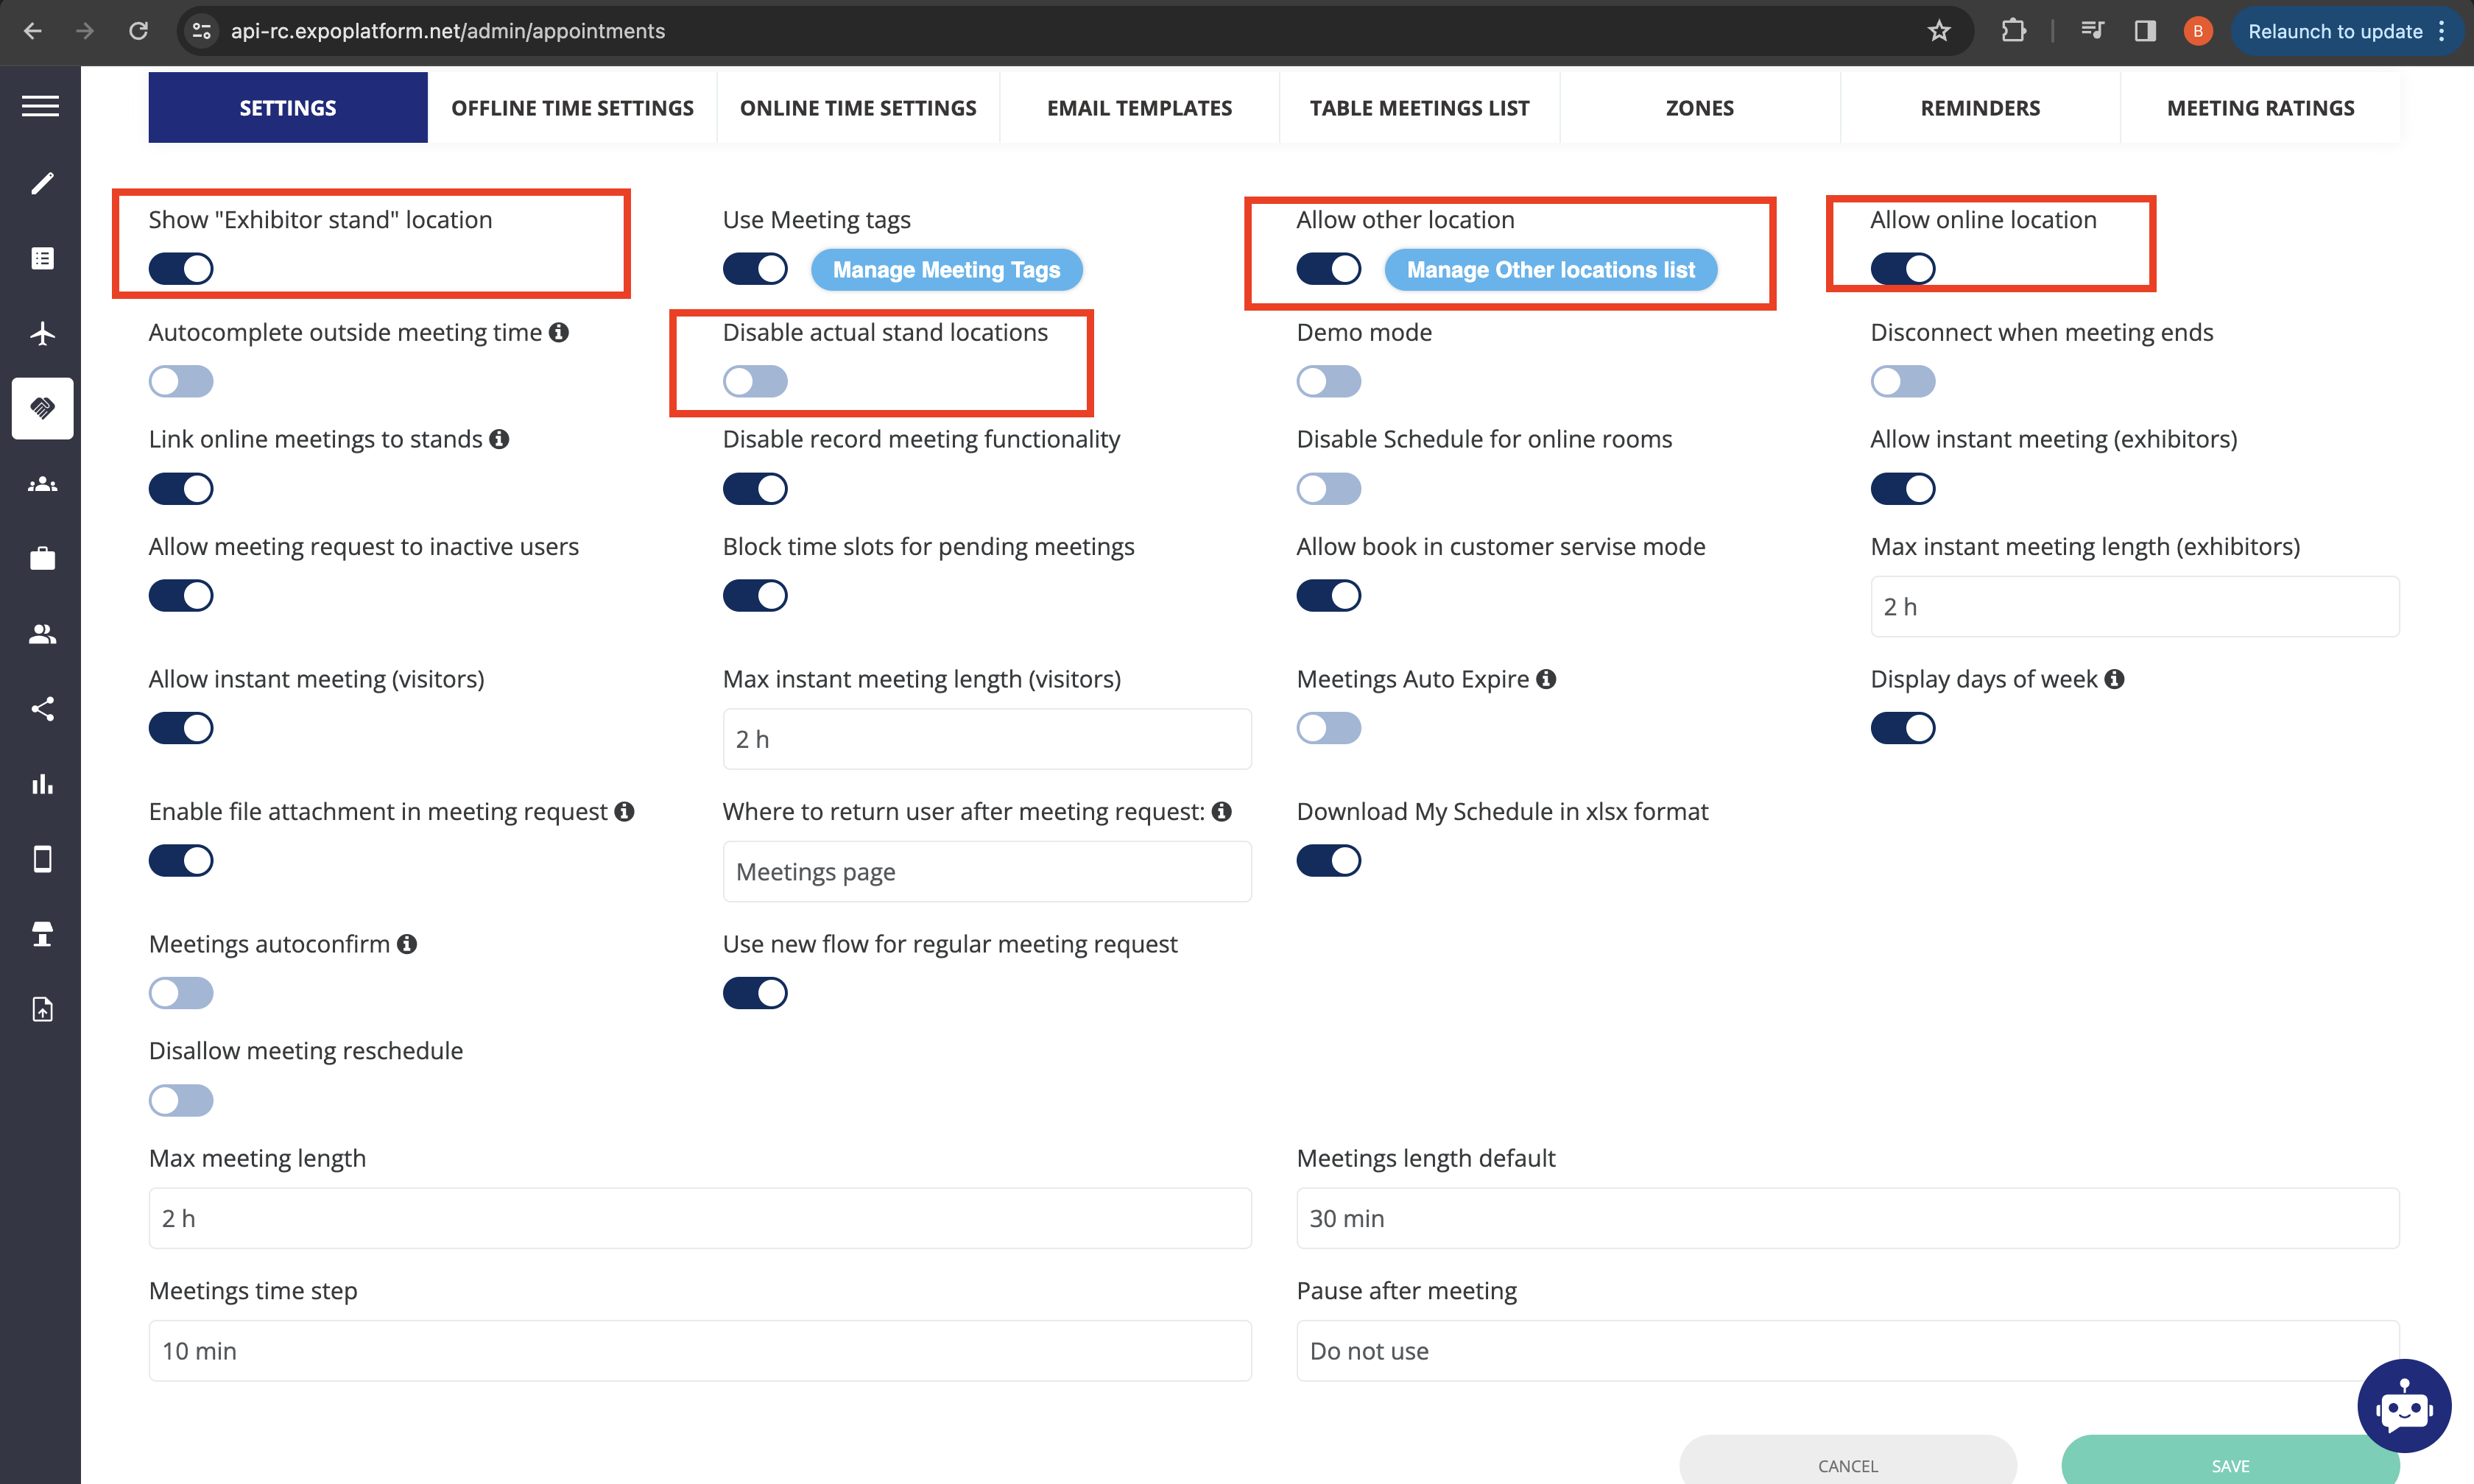
Location: Networking & Matchmaking → Meetings → Settings
-
Main Fields
-
Max Meeting Length: Sets maximum duration for meetings.
-
Meetings Time Step: Defines the interval between meeting slots.
-
Meetings Length Default: Sets a default duration for meetings.
-
Pause After Meeting: Adds a pause period following each meeting time step.
-
-
Additional Features
-
File Attachment: Allows users to attach files to regular meeting requests.
-
Attach Product/Content: For exhibitors with products or content, enables linking to meeting requests with online locations.
-
-
Event Timing and Online Rooms
-
Event Days: Primary event days when meetings are available.
-
Extended Online Room Availability: Option to keep online rooms available beyond event days.
-
-
Meeting Time Settings
-
Online Meetings: Can be set to dates beyond the actual event.
-
Offline Meetings: Restricted to event days.
-
Table Meetings: Specific time settings for each table meeting zone.
-
-
Exhibitor Stand Time Settings
-
Applies to meetings scheduled at an exhibitor’s exact stand.
-
Troubleshooting:
-
Meeting Request Not Available
-
Cause: No available meeting locations.
-
Solution: Check admin panel settings for location availability and ensure either Online or Other Locations are enabled.
-
-
Team Members Not Displaying
-
Cause: Personal account settings or permission matrix restrictions.
-
Solution: Ensure team member visibility is set correctly in permission matrix and individual account settings.
-
-
Meeting Location Missing
-
Cause: Disabled location in admin panel or restricted by “Hide stand/hall” settings.
-
Solution: Adjust the admin panel settings to enable the desired location for the meeting request.
-
-
File Attachment Not Working
-
Cause: Attachment settings not enabled.
-
Solution: Enable file attachment for regular meetings in admin settings.
-
-
Extended Online Room Not Available Post-Event
-
Cause: Online room availability settings not configured.
-
Solution: Adjust the event timing settings to allow extended online room access after event days.
-
-
Meeting Request Fails to Send
-
Internet Connectivity:
-
Verify that your device has a stable internet connection.
-
-
Mandatory Fields Check:
-
Ensure that all required fields (participants, subject, location) are properly filled in.
-
Screenshot suggestion: Form highlighting missing fields with error messages.
-
-
-
Scheduling Conflicts
-
Calendar Sync Issues:
-
Confirm that your calendar is updated and that no conflicts exist. The integrated calendar view should accurately reflect your availability.
-
-
Time Zone Discrepancies:
-
Double-check that your local time and the event time are correctly set, especially if they differ.
-
-
-
File Attachment Errors
-
File Type or Size Restrictions:
-
Ensure that the files you are trying to attach conform to the platform’s guidelines (supported file types and size limits).
-
Make sure that your app or browser is up-to-date to support file uploads.
-
-
-
-
Meeting Status Not Updating
-
Notification Settings:
-
Check that your email and push notification settings are correctly configured so you receive updates in real time.
-
-
Refresh the Dashboard:
-
If a status update seems delayed, try refreshing the meeting dashboard to see the latest information.
-
-
-
Connectivity Issues During Online Meetings
-
Network or Firewall Restrictions:
-
If you’re experiencing trouble joining an online meeting, confirm that your network or firewall settings aren’t blocking the meeting platform.
-
Use tools like the Amazon Chime connectivity checker to diagnose any network issues.
-
-