
Schedule, Meeting & Message Page: Mobile App
Schedule: It lists all the scheduled sessions(favourited sessions) and meetings of the user.
User can now download their schedule directly from the app, once they click on the download schedule button an email will be sent to their email with all the details.
User can also sync their ExpoPlatform calendar with the external calendar (Outlook & Gmail) by clicking on the top right button → Select the type of account with which you want to establish the sync → Click on continue → Select the email address and login to establish the Sync
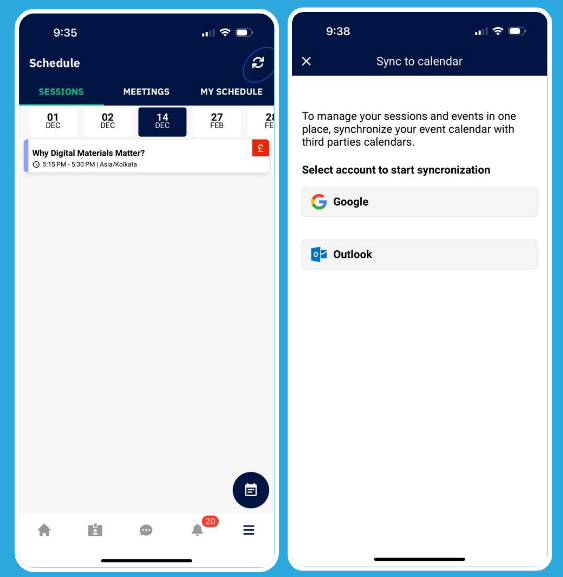
Schedule Tab on App
Meetings: End users have the opportunity to actively interact with fellow participants, exhibitors, and their team members during the event using the meeting functionality.
Steps to book a Meeting
The user can book a meeting by clicking on the meeting icon next to the profile of the visitor or exhibitor.
When booking a meeting with an exhibitor, users are required to choose a team member with whom they wish to request the meeting. If there are no team members, the meeting will be scheduled directly with the exhibitor.
Fill in the details on the meeting request page, after adding all the details click on Next Step
Select the Date and Time for the meeting And Click on Confirm
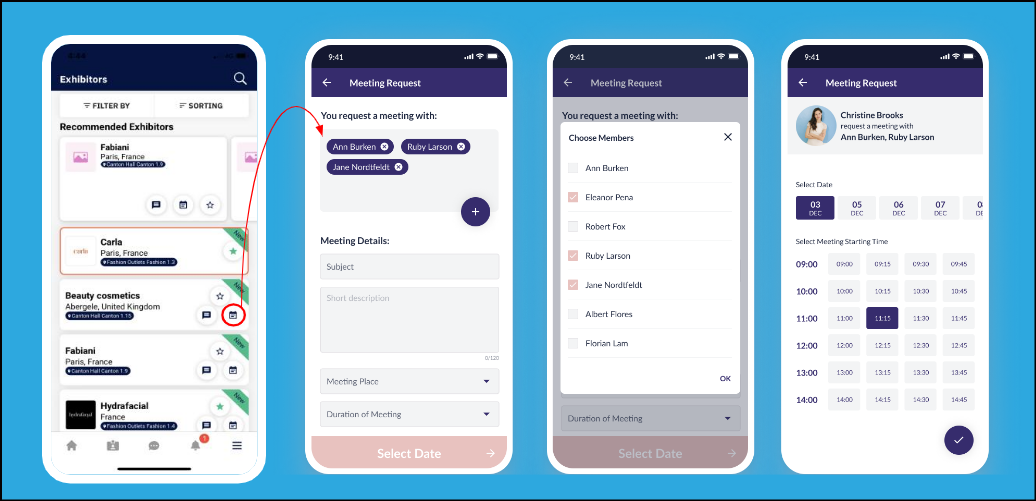
Meeting Flow on App
Internal messaging: End users can actively engage with fellow participants during the event through the messaging feature within the app. This feature allows them to create group chats with users who share similar interests.
Steps to send a message
To start a chat conversation, click on the message icon on the visitor/exhibitor profile.
Enter your message and then click the send button.
Group chat can be created with the users whose profile has been favourites by you
Navigate to the message tab.
Click on the "Add Participant" button located at the top right of the screen.
Select the participants you want to include, add the group name, and finally, click on "Create a Group Chat."
This will establish a message window for all the members of the group to engage in a conversation.
To access ongoing chat conversations, you can click on the "Message" tab either within the app's burger menu or at the bottom of the screen, depending on where this feature is located in the app.
Generally message tab is location at the bottom navigation of the app
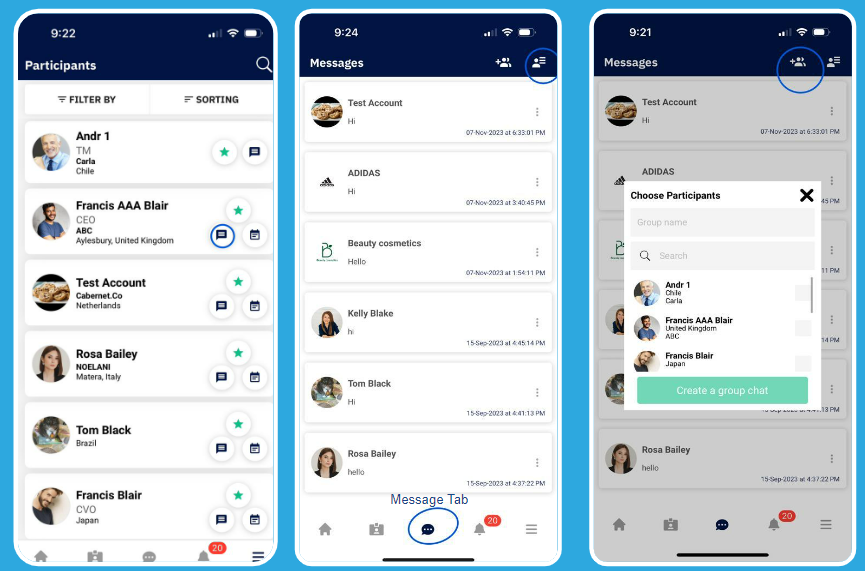
Message Tab on the App
The appearance of buttons on the iOS and Android apps will differ due to the distinct operating systems.
According to the permission matrix, if a user category is restricted from scheduling meetings with another category, the meet/message button will be removed on iOS. On Android, the meet/message button will be present, but the actions will be blocked.