Requesting Online Meeting
This article explains how you can schedule an Online Meeting with other users/participants at the event.
Steps to Schedule Online Meetings
Click on the Meeting icon on the exhibitor/visitor profile to request a meeting with them.
This will open a screen as shown below where a new meeting request can be set up. Below are the fields explained:
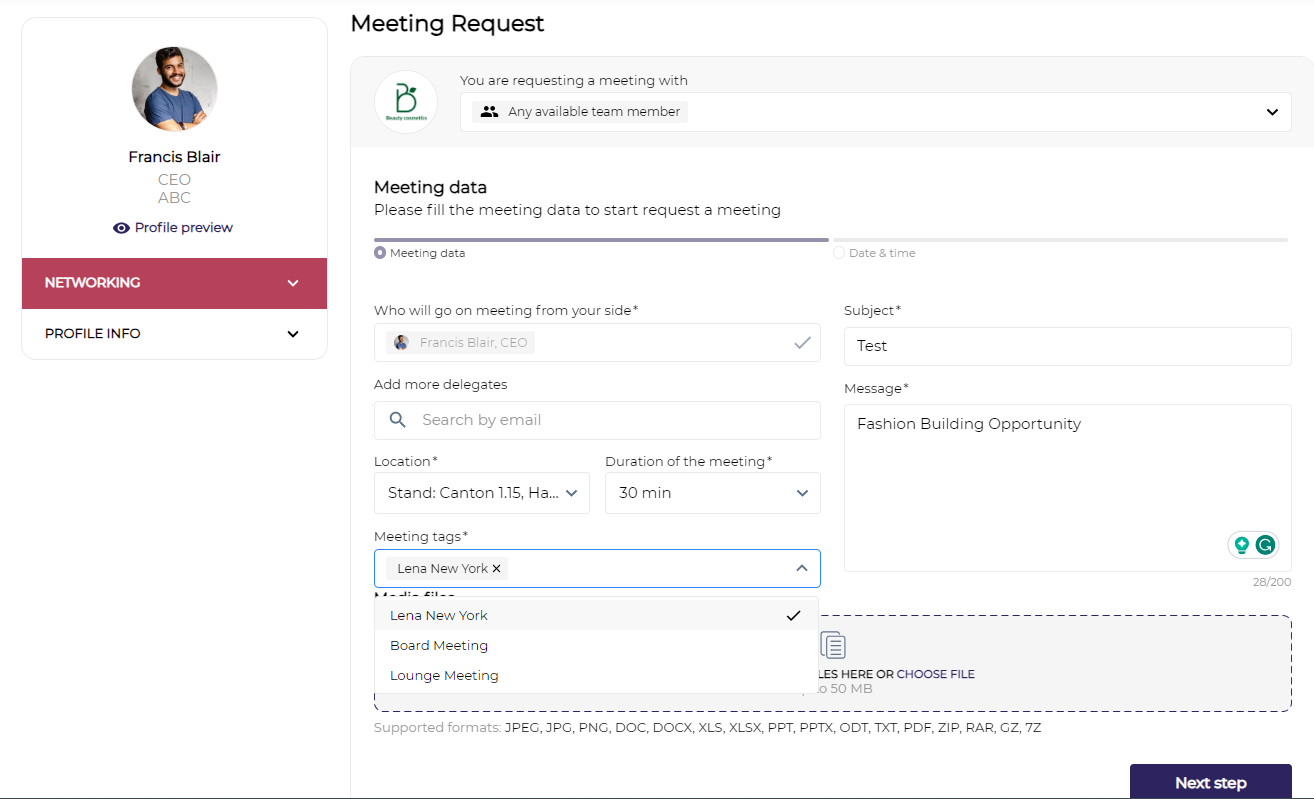
You are requesting a meeting with:
Choose the Exhibitor and/or the associated Team members/or visitors with whom you want to set the meeting. Team members and Participants have their job titles next to Name.
Who will go to the meeting: The Exhibitor can select the right team member in his team or select multiple team members to attend this meeting. In the case of a group meeting, the system will check the calendars of all the selected team members and will display certain time slots based on their availability/
Subject: Add an appropriate subject for the meeting invite
Add More Delegates: While booking or scheduling a meeting, users can include additional participants by simply entering their registered email addresses in this field.
The users added as additional participants(Add More Delegates) do not have the authority to reschedule the meeting. They are simply included as participants in the meeting.
Message: Add a message to be sent to the other party.
Location: Choose the meeting location as "ONLINE" in case of online meetings or a suitable exhibitor stand in case of physical meetings.
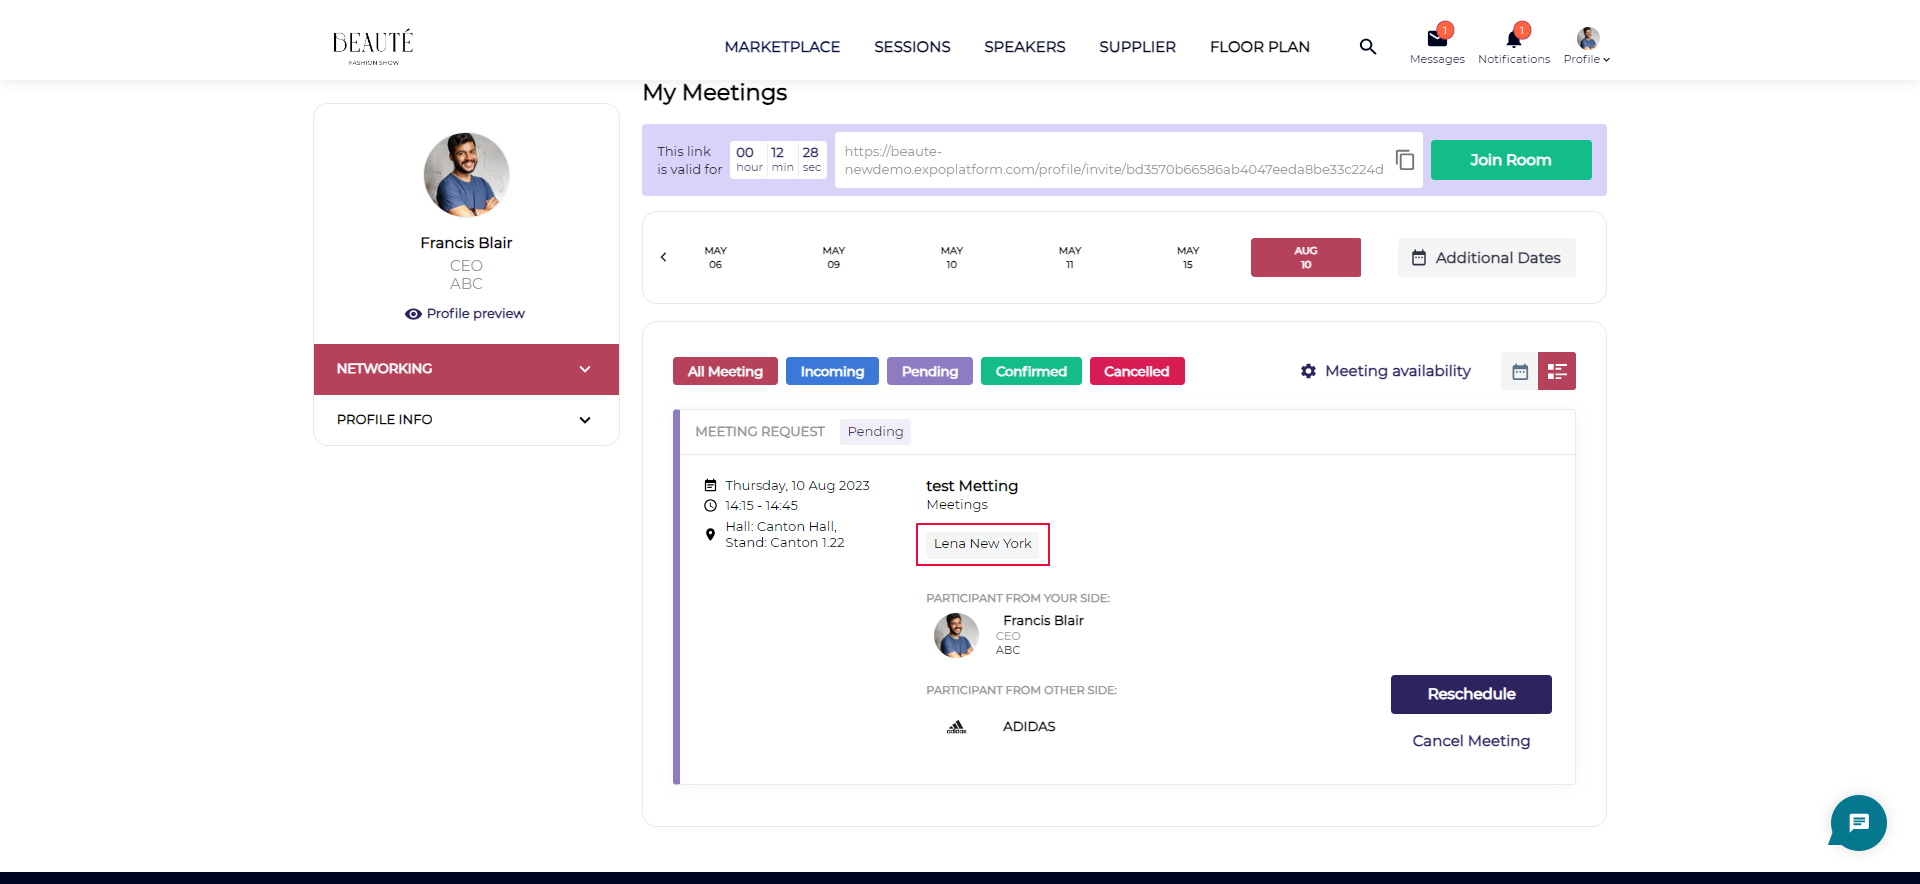
Meeting Tag: Select the meeting tags from the dropdown and these tags will be visible to all participant of the meeting in their schedule. This allows to add an extra level of information related to the purpose of the meeting
Media Files: You can also add/share any marketing file/content with the participant of the meeting while scheduling a meeting with them
Products: You can select the products you are interested in and/or marketing content relevant to the meeting. In case, you are a buyer and might be interested in some of the exhibitor's products or an exhibitor can add his key product while requesting a meeting with a buyer.
Duration of your meeting: The default value is set to 30 minutes. You can select any value from 15 minutes to an hour depending on the length of the meeting.
The meeting time slot will display both the event time and the local at the time zone of scheduling a meeting.
If the event time is the same as the local time. It will show only the event time.
If the exhibitor with whom the meeting is being scheduled has no team members, the requested exhibitor will be pre-selected in this field.
If the exhibitor with whom the meeting is being scheduled has one team member, that team member will be pre-selected in this field
If the exhibitor with whom the meeting is being scheduled has more than one team members, “Any available team member” will be pre-selected
User also has the option to select the team member(s) with whom you want to request meeting with.
If you don’t select a team member and set it as “any available team member” and all team members are available at the required meeting time, then the team member that was registered first, will be set by the system as the meeting invite receiver.
Who will go to the meeting when the meeting is scheduled from the exhibitor’s end
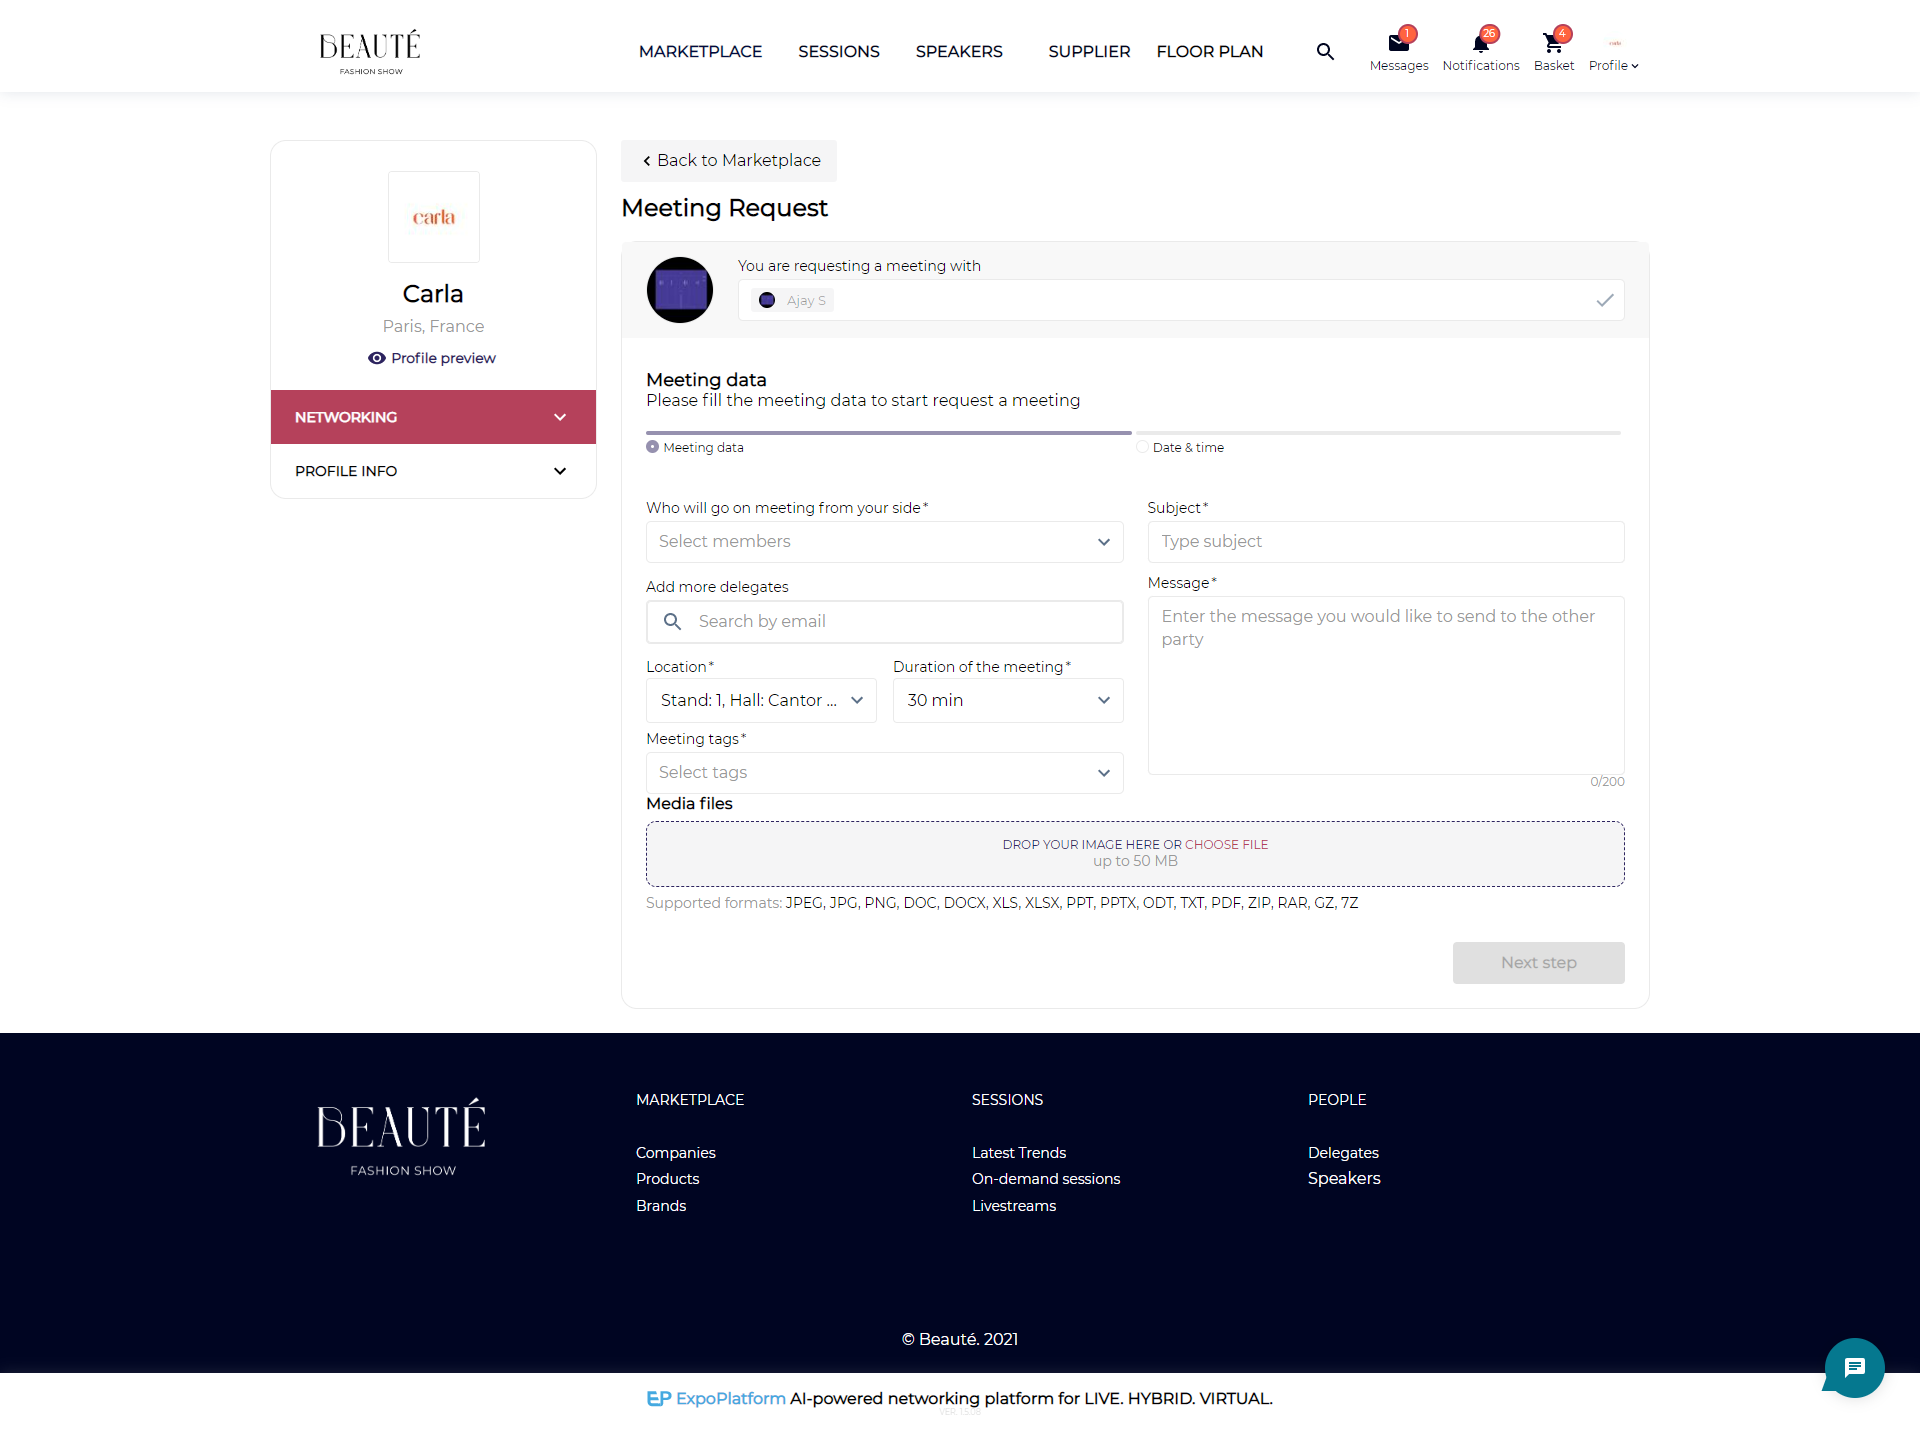
Meeting Scheduler Page
The exhibitor can select the right team member(s)in his team to attend/participate in the meeting. In the case of a group meeting, the system will check the calendars of all the selected team members and will display certain time slots based on their availability.
If the meeting is being scheduled by an Exhibitor’s team member, then the team member’s name will be pre-selected in this field.
An email is sent containing the details of the meeting to the participants along with a push notification on their mobile app.
From the email, the user can access the meeting calendar and accept, reject or reschedule the meeting invite.
If the user confirms the meeting, the exhibitor gets notified in a confirmation email and can also view the meeting in the platform under Team Schedule as shown below. Exhibitors can also filter the team schedule based on each Team Member.
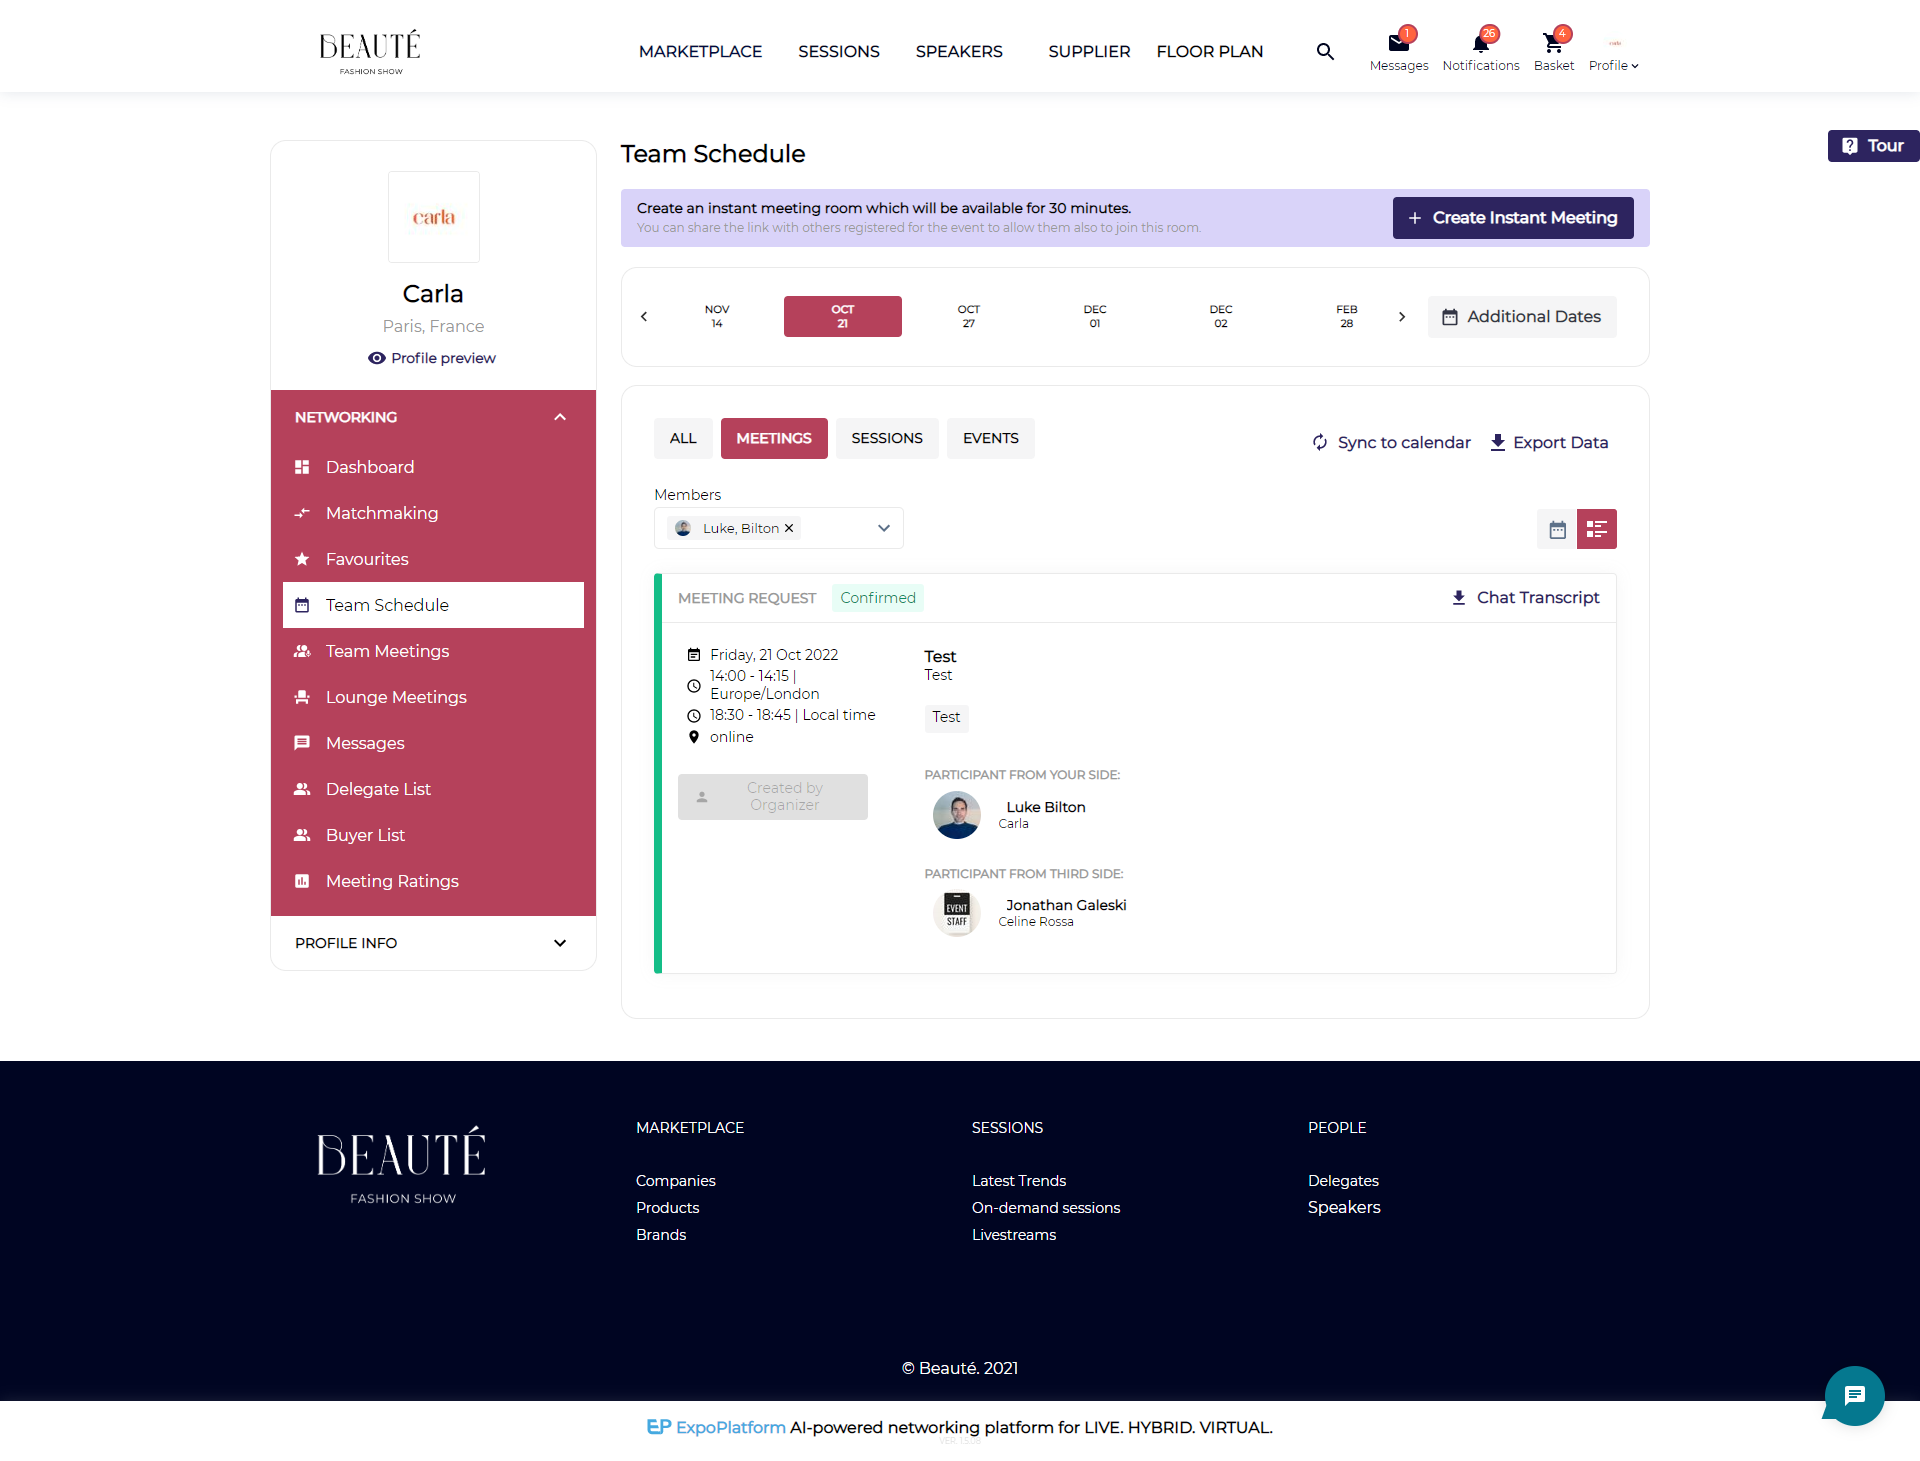
New Meeting Flow for Regular Meetings
We have a new meeting flow where the availability of participants, location, date & time of the meeting work in co-relation
In the Admin Panel if the new flow for regular meeting requests settings is enabled following will be the flow
Based on the user selection, participants, locations, date and time availability information gets updated.
For instance, if the user selected Date & Time first then participants and Location availability get updated accordingly. Similarly if participants are selected first then date and location availability get updated
If no time slots are available for any date, that date will not be displayed
If a user attempts to select a time slot that, overlaps with an Unavailable slot, the system displays an error message
By default meeting page, select event time.
Possible flow based on the selection of different fields
Based on Date and Time selection
Based on the Participants' selection
Based on location selection
Pre-fill Meeting Information (Web)
To address the challenge of repeatedly filling in meeting details, we've introduced a new settings that allow users to save default information for the meeting edit page. This information can then be utilized when booking future meetings, streamlining the process.
This feature is exclusively available on the New Flow for Regular meetings.
How to fill in the details for Default Info
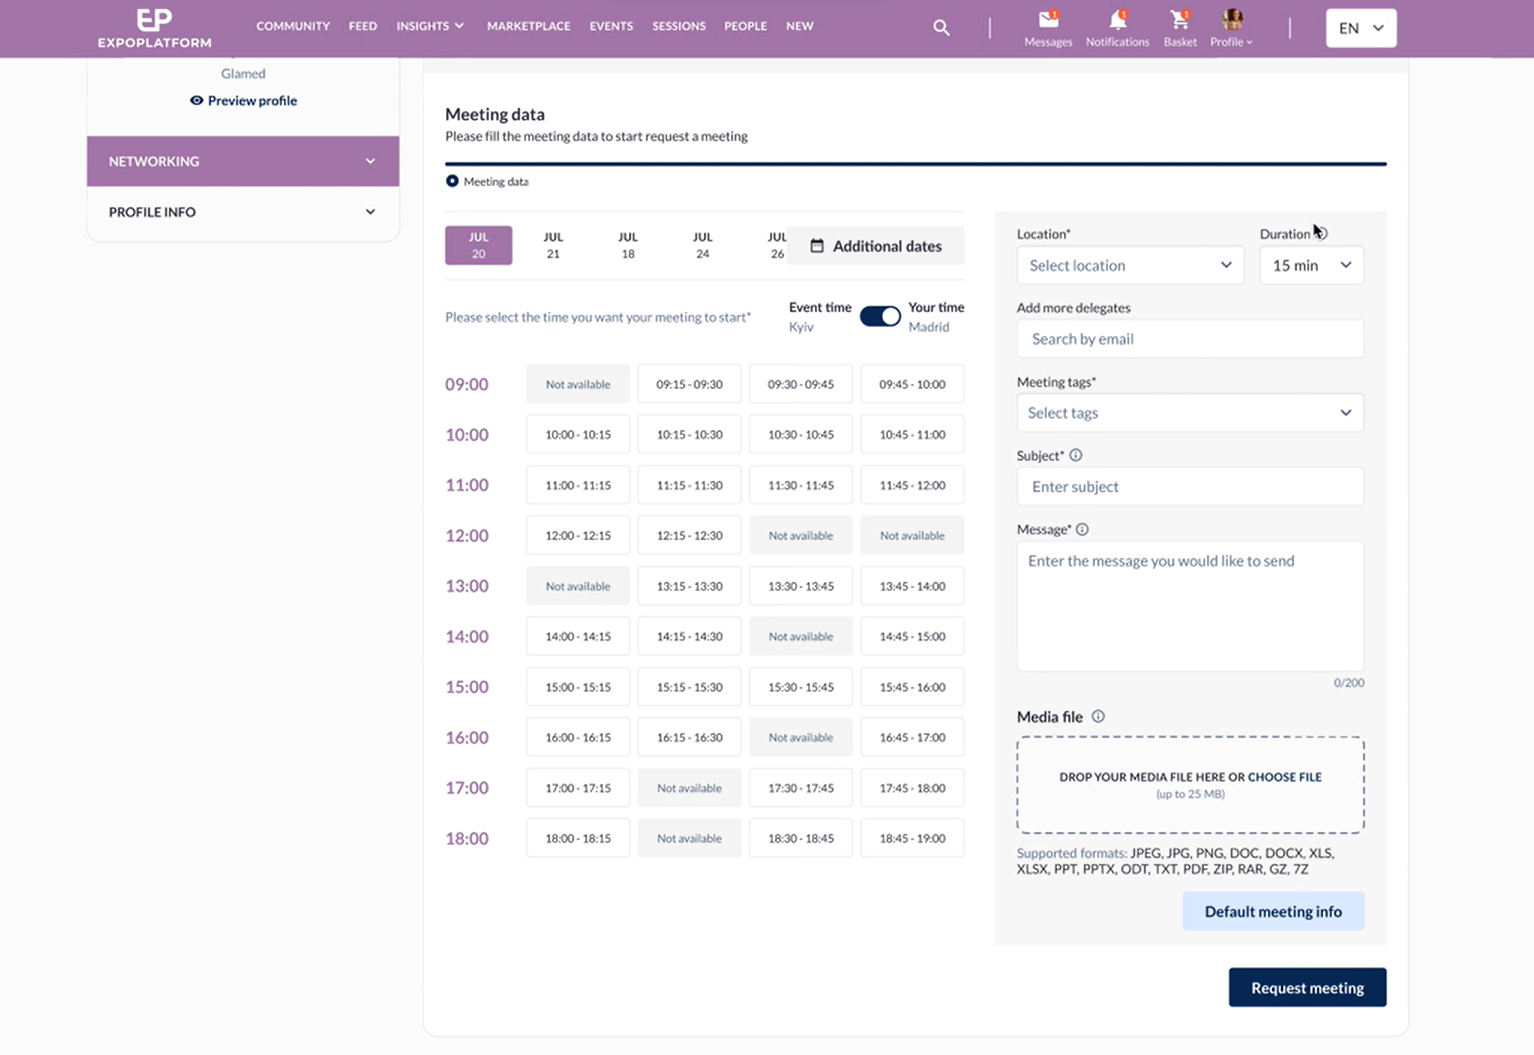
Meeting Edit Page
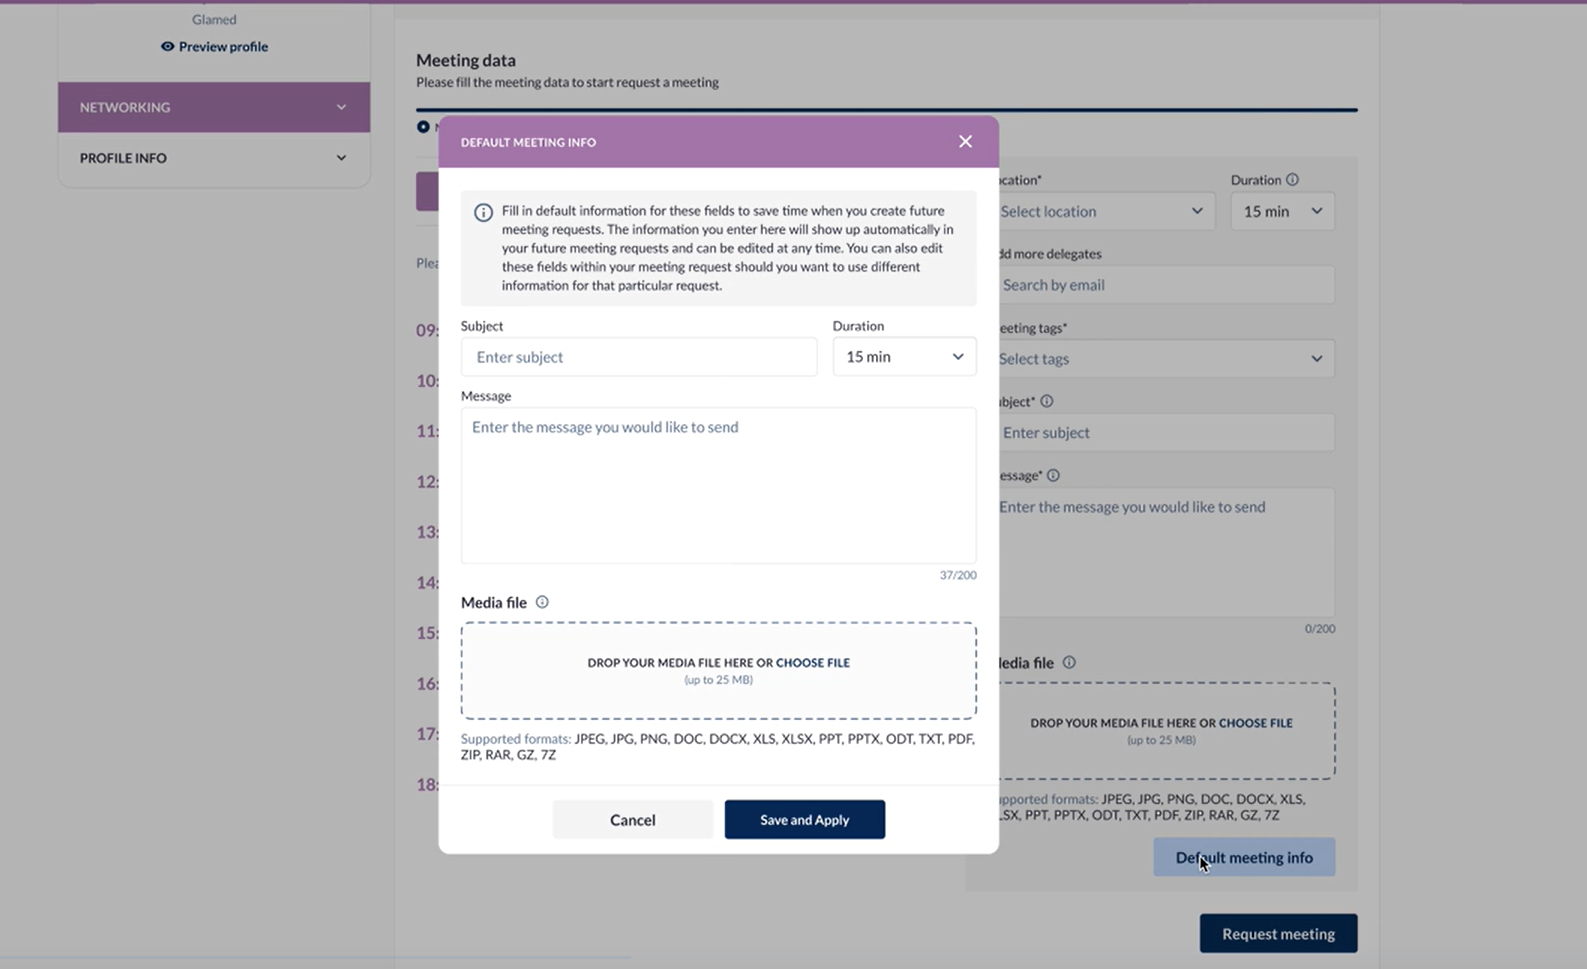
Settings info under Default Meeting Info
While scheduling the initial meeting, users can simply click on the "default meeting info" button.
The field in the default meeting info tab includes Subject, Message, Duration, and Media file
Fill in the details that you wish to get pre-filled while you are scheduling Meetings in future
Hit on the Save button
These details under Default Info can be modified by the user at any time.
Screen Recording on how to add Default Meeting Info
Additionally, users can configure the Default meeting info details from their Profile Info >> Settings >> New Tab Default meeting info.
**This tab is only visible when the new flow for regular meetings is enabled from admin panel Meetings → Settings. To read more: Meeting Settings and Blocked Times
Step to fill in Default Info for the meeting from the Setting tab
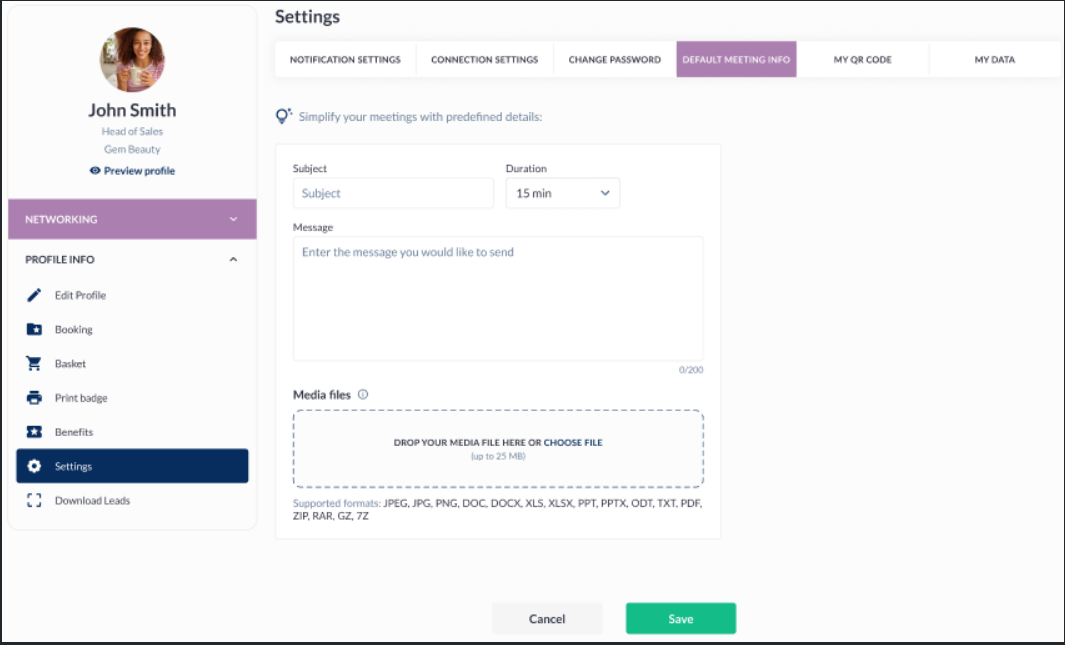
Default Meeting Info under Profile Settings
Navigate to Profile Info → Settings → Default Meetings Info
The field in the default meeting info tab includes Subject, Message, Duration, and Media file
Fill in the details that you wish to get pre-filled while you are scheduling Meetings in future
Hit on the Save button
Pre-Fill Meeting Info option is only available while booking a meeting on Web
