Add/Manage Team Members and their Schedule
As an exhibitor, you have the ability to manage/add team members and manage the meetings and schedules of your team members. This help article provides instructions on how to effectively manage your team members' meetings and their corresponding schedules.
Step 1: Login using your "Exhibitor Credentials"
Step 2: Go to Profile Info → Team Member
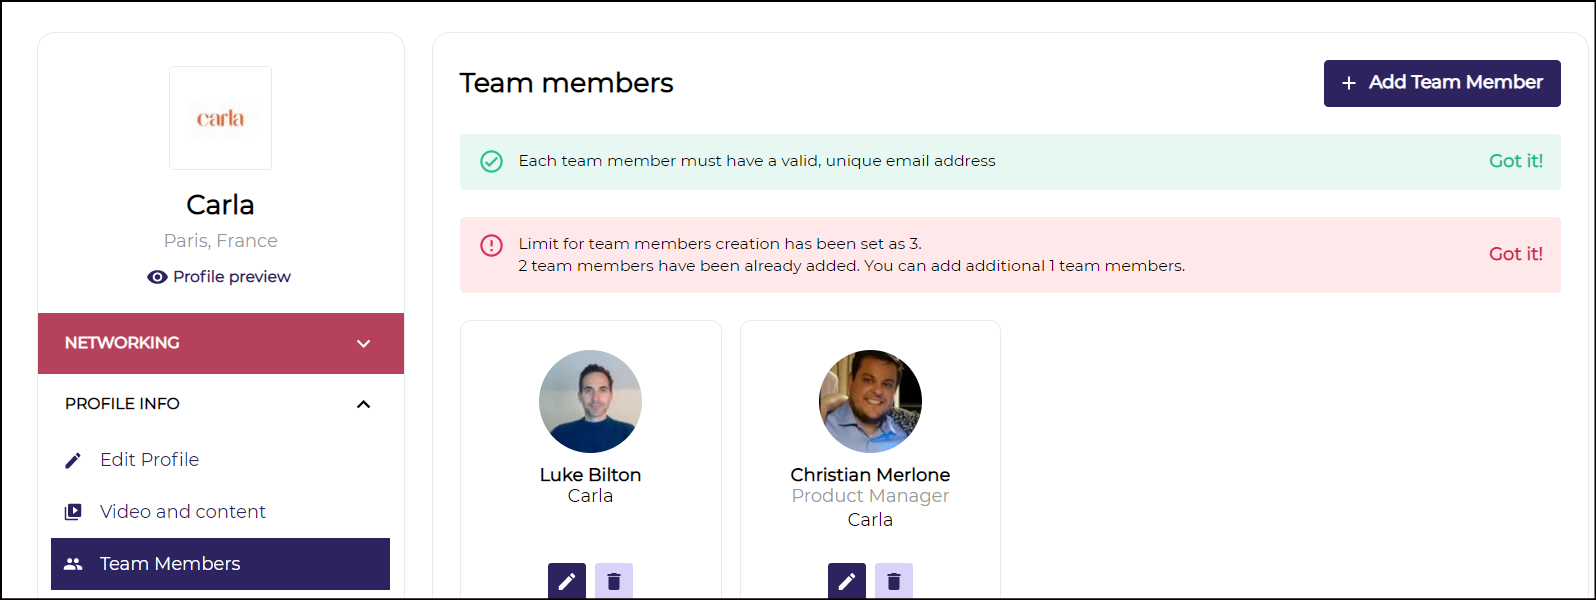
Step 3: Click on Add Team Member → Enter the email address to validate
Step 4: Enter the information of the team member
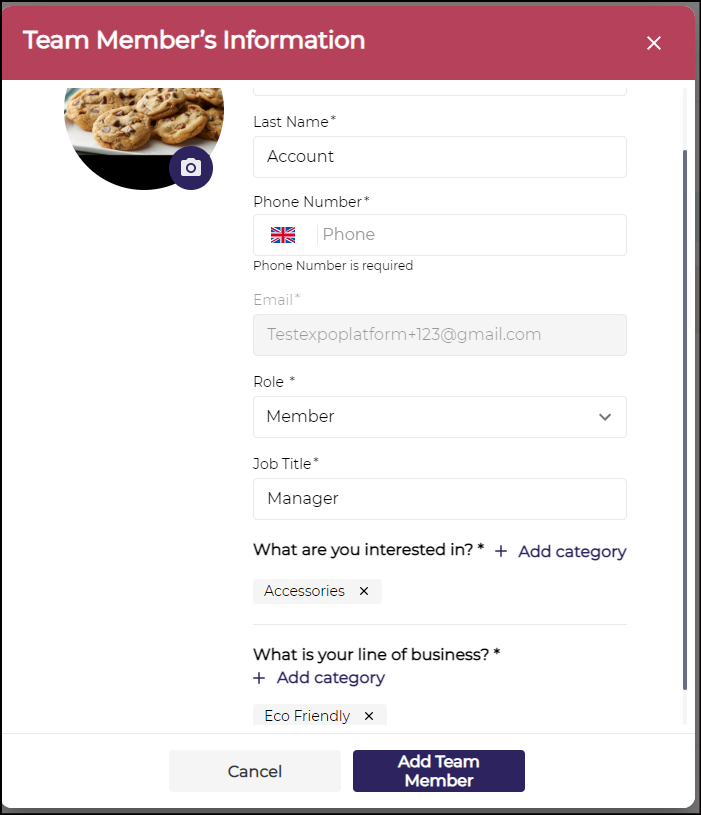
Step 6: Assign a role to that team member as a "Company Team Member" or "Admin"
Step 7: Click on "Add Team Member".
Team members will receive the "Team Member Invite" email. Team members will need to confirm that they are happy to become a team member of the exhibitor.
The exhibitor account will receive a notification that the team member has confirmed the request.
Team Schedule
Exhibitors now have the option to download the Team Schedule either in Excel or PDF format.
Both xls and pdf files include the details of the schedule/agenda of all the team members added to the company, including their personal blocked time details
If the Exhibitor is involved in the Parent/Child Relationship then the Parent exhibitor will also be able to download the agenda of his team members along with his child exhibitor team members as well.
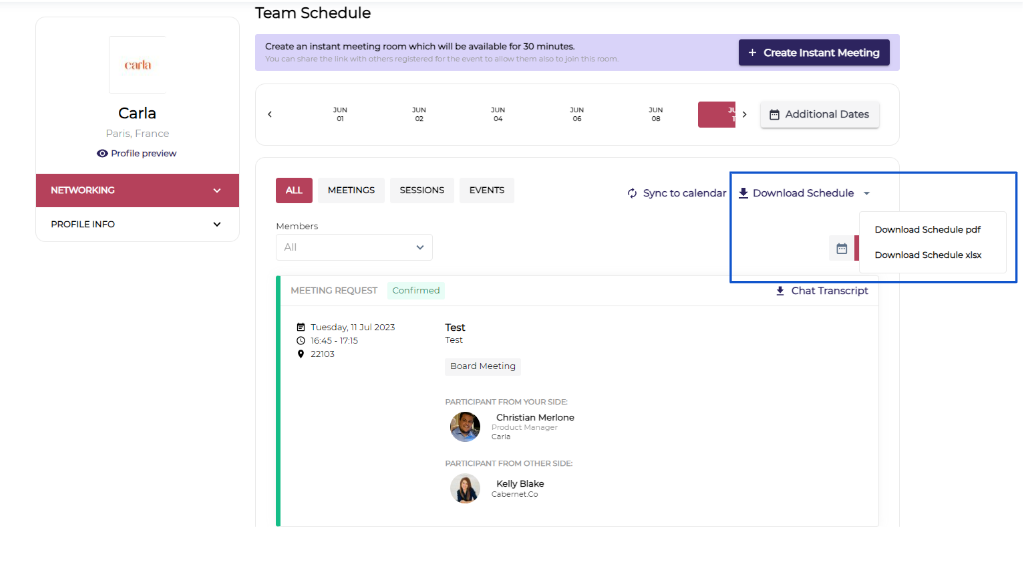
List View
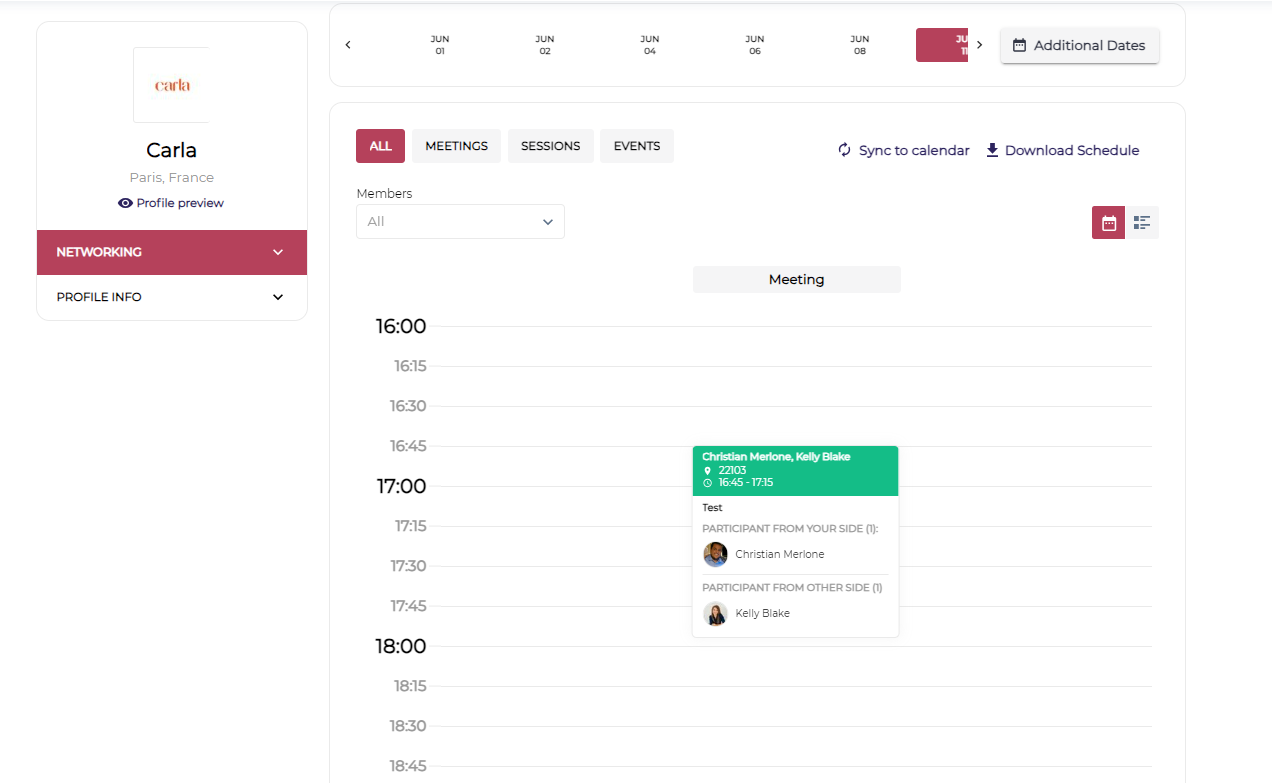
Calendar View
Add Blocked Time (Team Members)
Exhibitors can block time for their team members while they are unavailable for the meetings.
When other users are trying to book a meeting with the team members these time slots will appear blocked/unavailable to schedule a meeting.
Under Networking → Team Schedule → Add Block Time button, allows the exhibitor to block certain times for the day when their team members are not available for the meeting.
Exhibitors will be able to add the Title, Description, Date and Time and Select Team Members while blocking the time.
Date and time fields must be selected first, then team member selector will apear
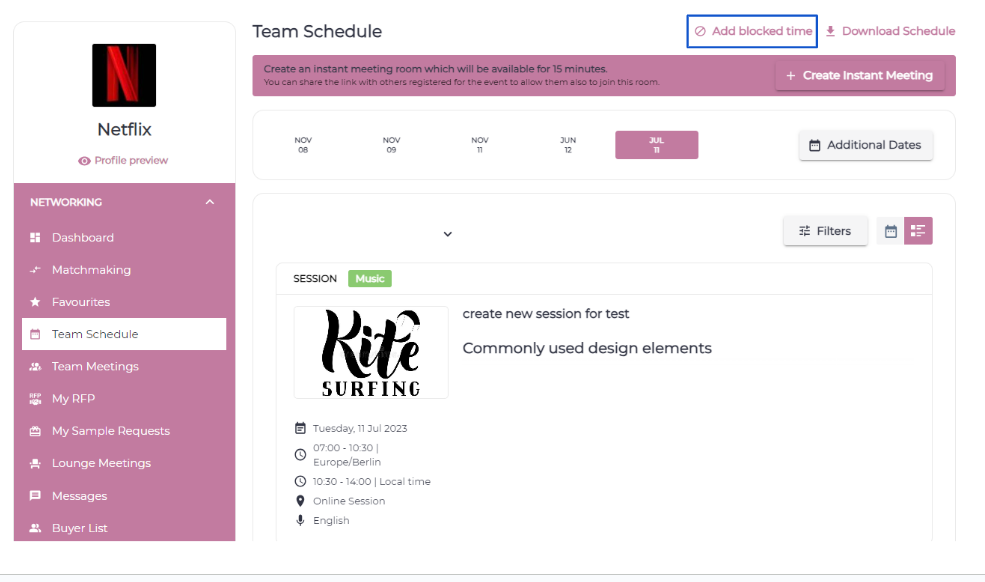
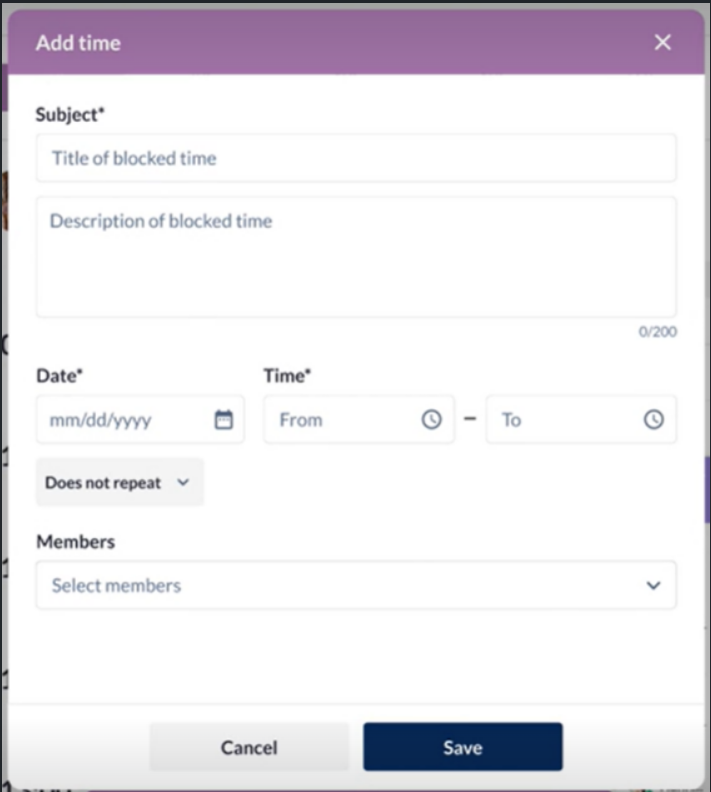
List View
Calendar View
For Exhibitors with Team Members, it would show blocked time cards indicating to which team members it is applied.
When an exhibitor with team members adds/edits blocked time, team members who already have something else blocked for the chosen time (even if only partially) should be displayed as "Unavailable" and cannot be selected.
If the blocked time were created as a bulk action – all team members would be combined into a single card.
If that blocked time was created for every team member separately, there will be multiple blocked time cards with only one team member on a blocked time card
If the team member makes any changes to the blocked time or deletes it from his profile, this is done only for his profile and will not affect to other users.
Manage Connecting Settings for Team Members
Exhibitors can select whether or not their team members can receive and send meeting and messaging requests.
To manage this setting go to Team Member → Click on Settings Icon → Toggle ON/OFF to allow your Team Member to receive meeting or messaging requests.
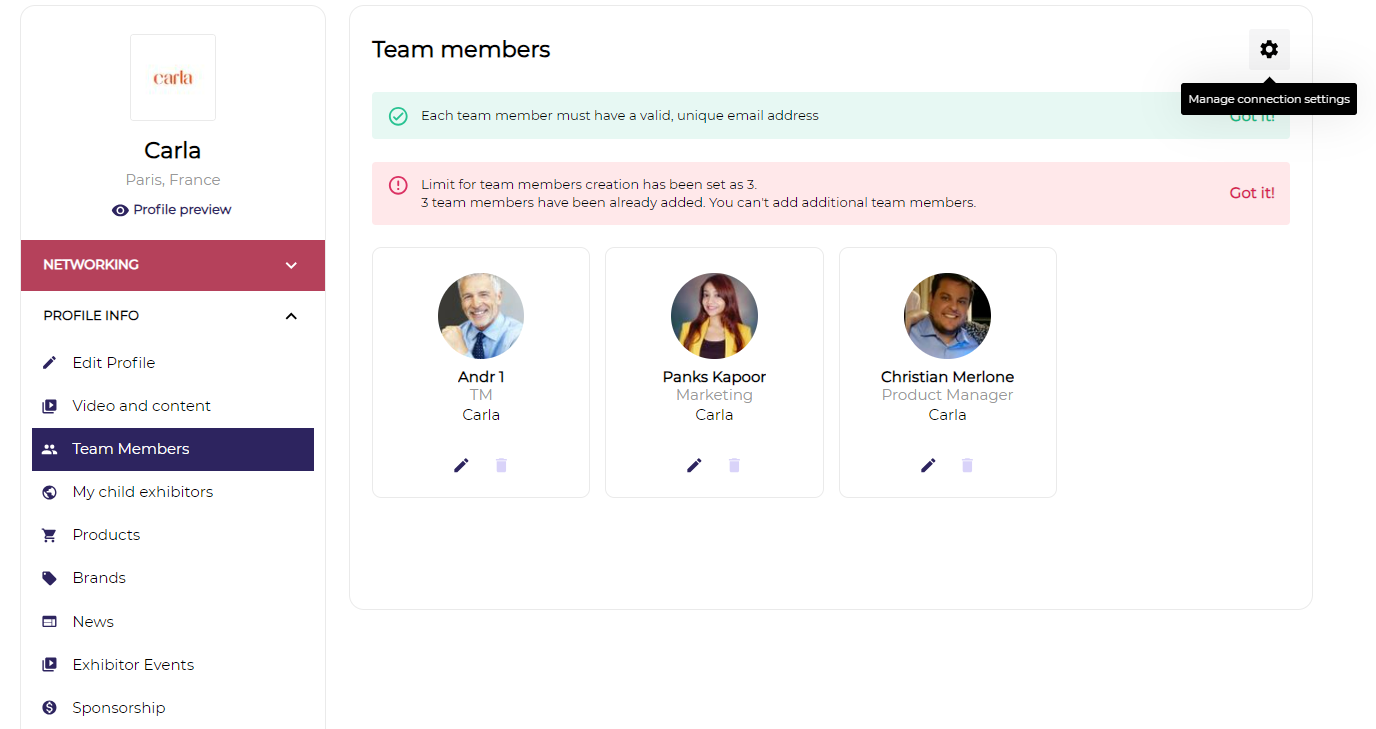
Manage Connection Settings
Exhibitor with no Team Member will not have this setting of frontend
In case of child exhibitor with no team member, it will have No Member Tag
If at backend: Allow exhibitors to manage connection settings of team members“ is ON and “Allow parent exhibitors to manage connection settings of child’s team members“ is OFF.
Then parent exhibitor will see only his team members on “Connection settings“ page
Team Members(both of parent and child exhibitor) from their profile can change/update the connection permission set by the exhibitor company
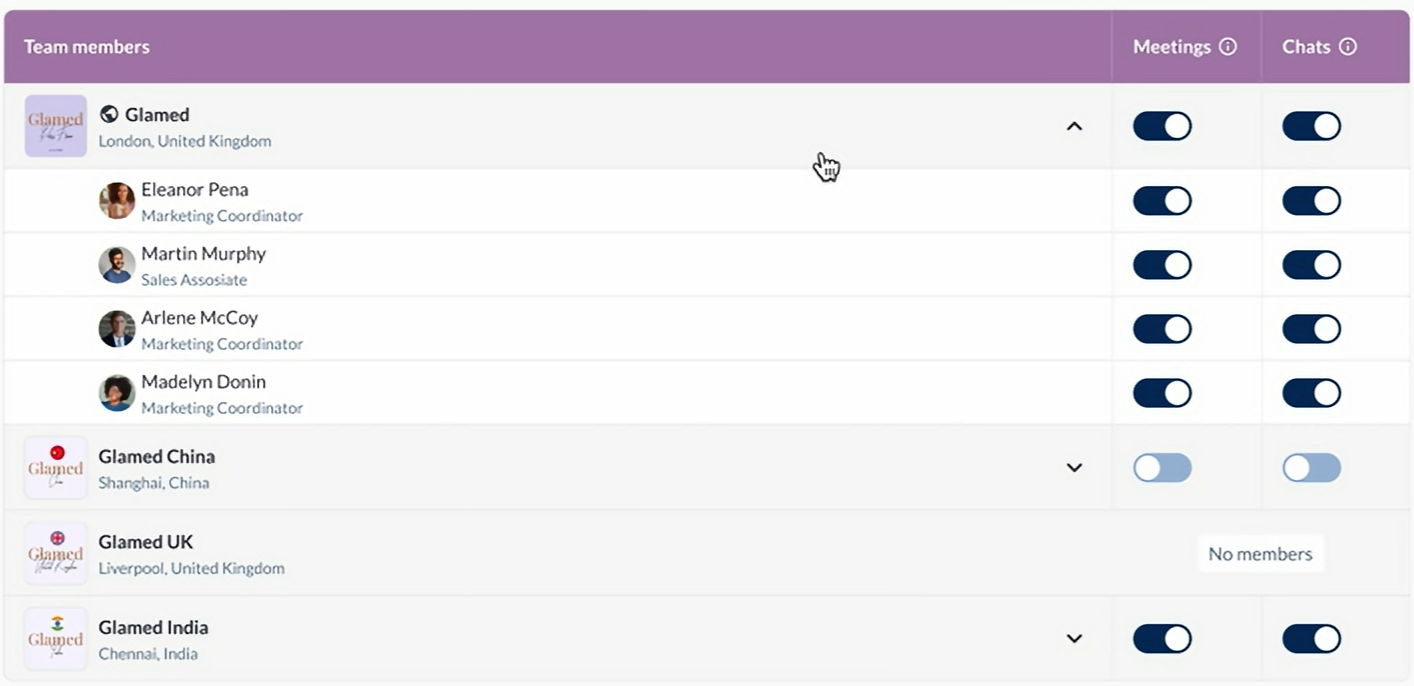
The parent exhibitor has the option to disable settings for the child exhibitor's team members. The child exhibitor can subsequently modify these settings, and the team members itself has the ability to adjust the same settings.
This results in equal decision-making rights at all three levels of control, allowing each party to determine whether team members can have meetings and messages or not.
When the exhibitor disables his team members' ability to hold meetings and/or chats, the team members are notified.
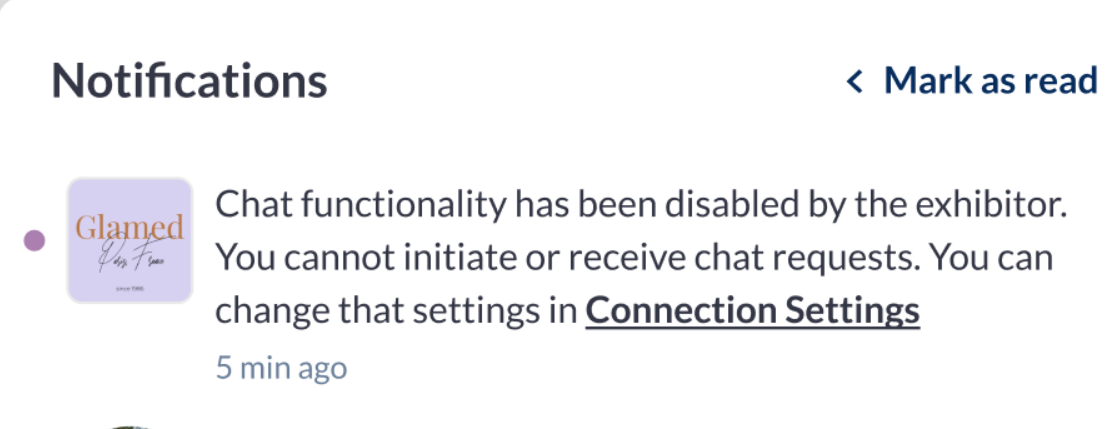
Team Members can click on Connection Settings text to update the settings for their individual profile
Switching off connections for team members would not cancel already confirmed meetings and already existing chats
When a team member's connection settings are switched to "no meetings," and they hover over the "Confirm or Reschedule" button for an incoming meeting request, a tooltip message is displayed. "You can't confirm this meeting due to your connection settings." with a "restricted" icon on the button.
If the participant of the meeting tries to confirm the incoming meeting requested by the Team Member whose connection setting is updated to No Meetings allowed, they will see the error message “You can't confirm meetings with this user because of his connection settings.”
These Connection Settings restrictions also apply to the mobile application.
