Building Exhibitor profile
This article talks about how you can build an exhibitor/company profile on ExpoPlatform. Login as a company, and you will land on the Dashboard page.
Click on Profile Info →Edit Profile: To edit/modify/add information
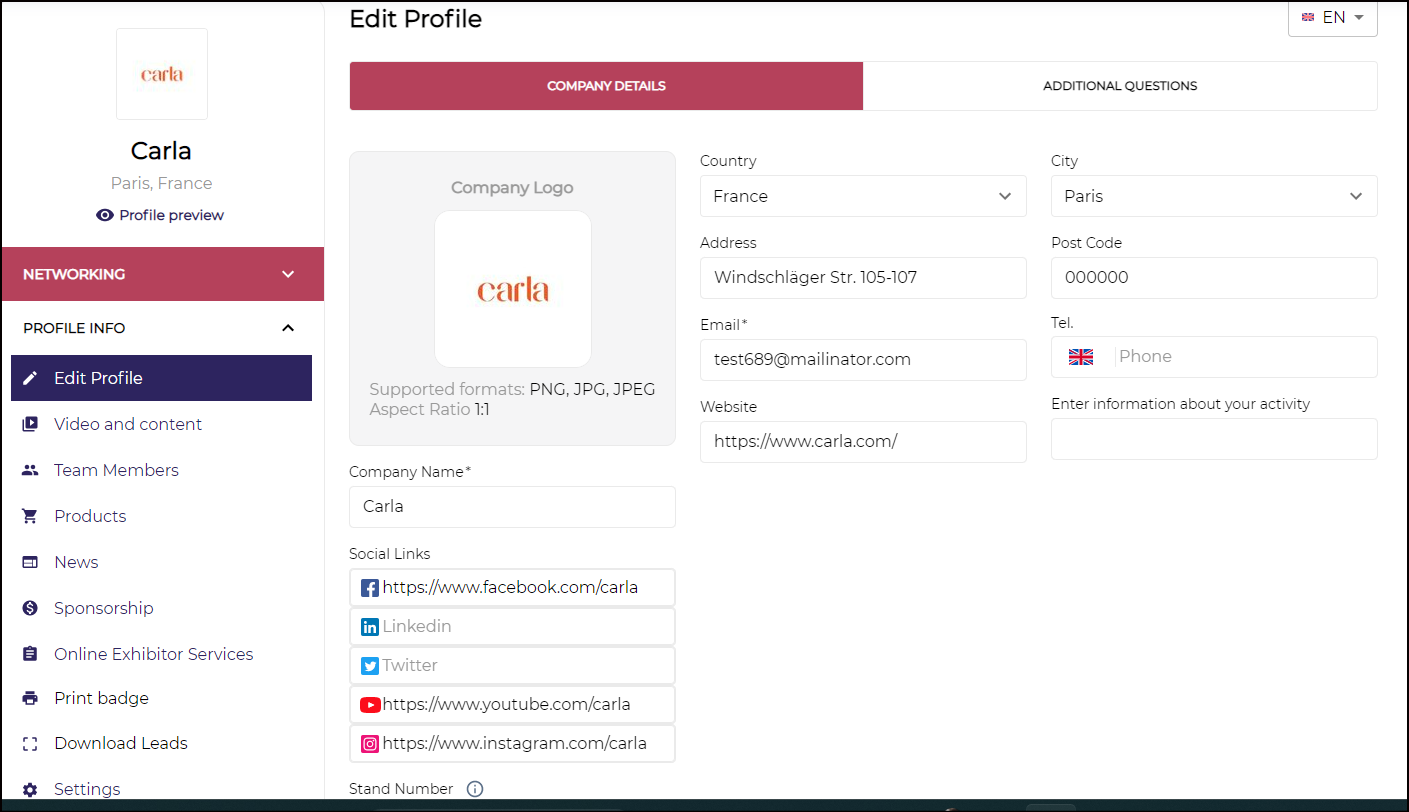
Edit Profile
a) Edit Profile → Here exhibitors can add general info about their company, can add a company logo and other details asked by the organizer
b) Video & Marketing Content: This section allows the exhibitor to add Video & Marketing content of their company. Using this tab exhibitors can upload files such as press releases, brochures, and price lists. Exhibitors can also upload marketing & sales content to boost your profile. If they want them to be displayed in a certain order in their profile, then they need to upload them in that respective order. These documents will be available and can be downloaded by the users browsing the exhibitor’s profile.
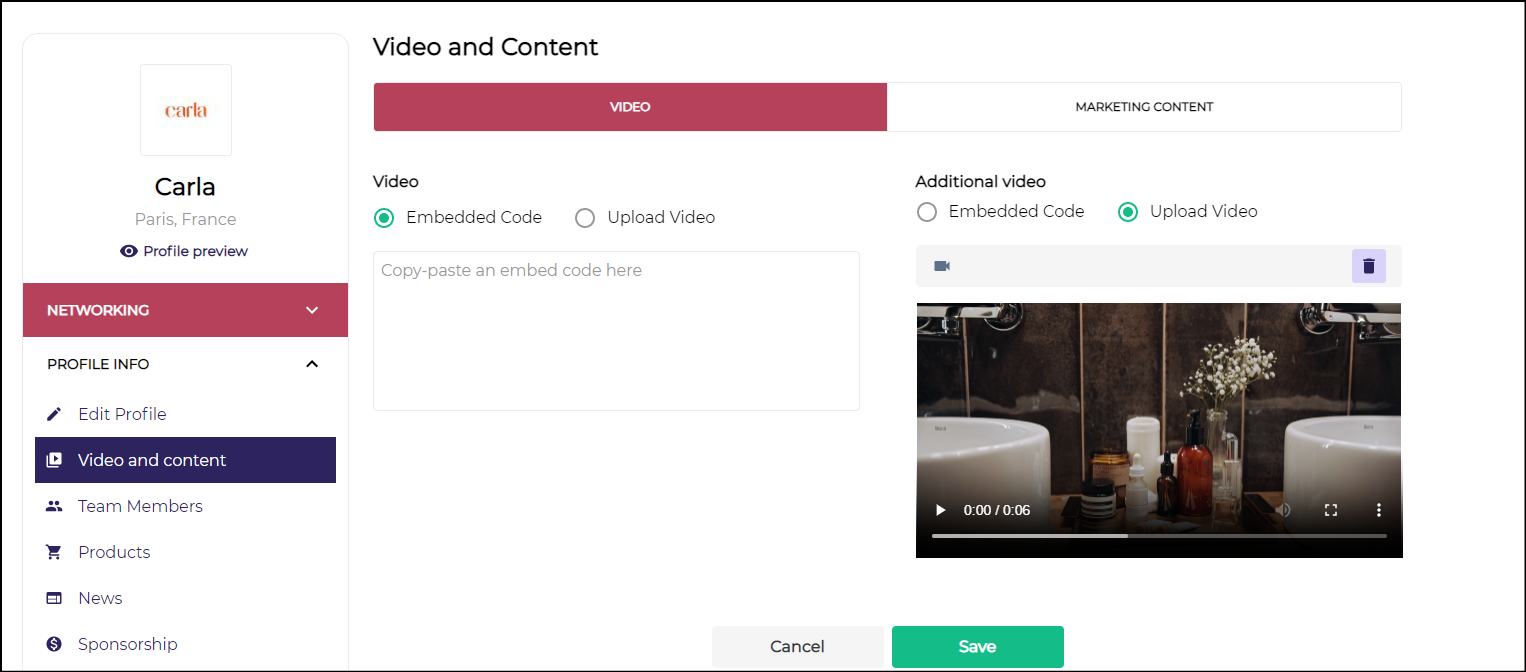
Add Video and Other Marketing Content
c) Managing Team Members → Exhibitors can add/edit/modify the team member from this section.
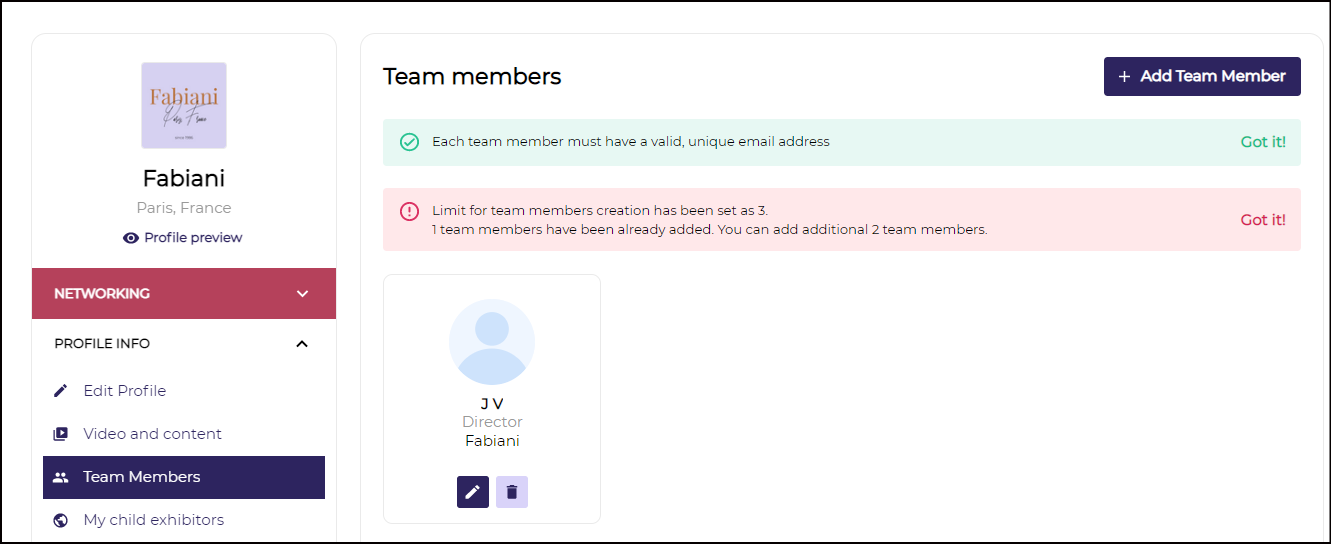
Add Team Member
d) Product: This section allows the exhibitor to add the product catalogue and make it available to the end user. They can mark their product as Active or Inactive also they have the option to mark any of their products as sponsored and they will be visible with a distinct frame on the product page.
Product addition and mark product as sponsor allowance can be controlled by the organizer at the backend
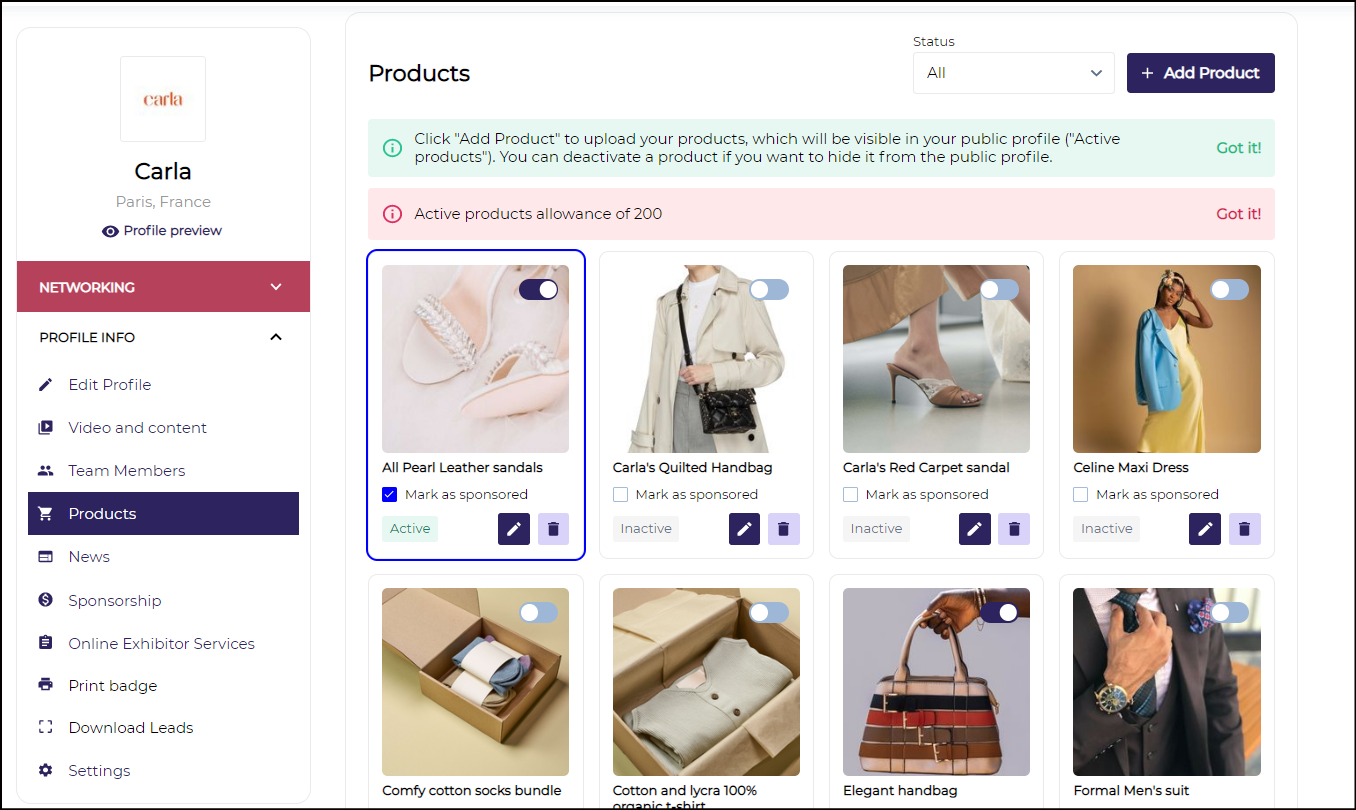
Add Product page
e) Exhibitor News: This section allows the exhibitors to add news articles for the event website blog page, once the article is approved by the organizer it gets published on the News Page.
To add an article, Click on News → Add Article → Add All details like new Image, New Title, Short Description, Author Information etc → Save
Article would be added in Pending Approval state once approve by the organizer will get published on New Page
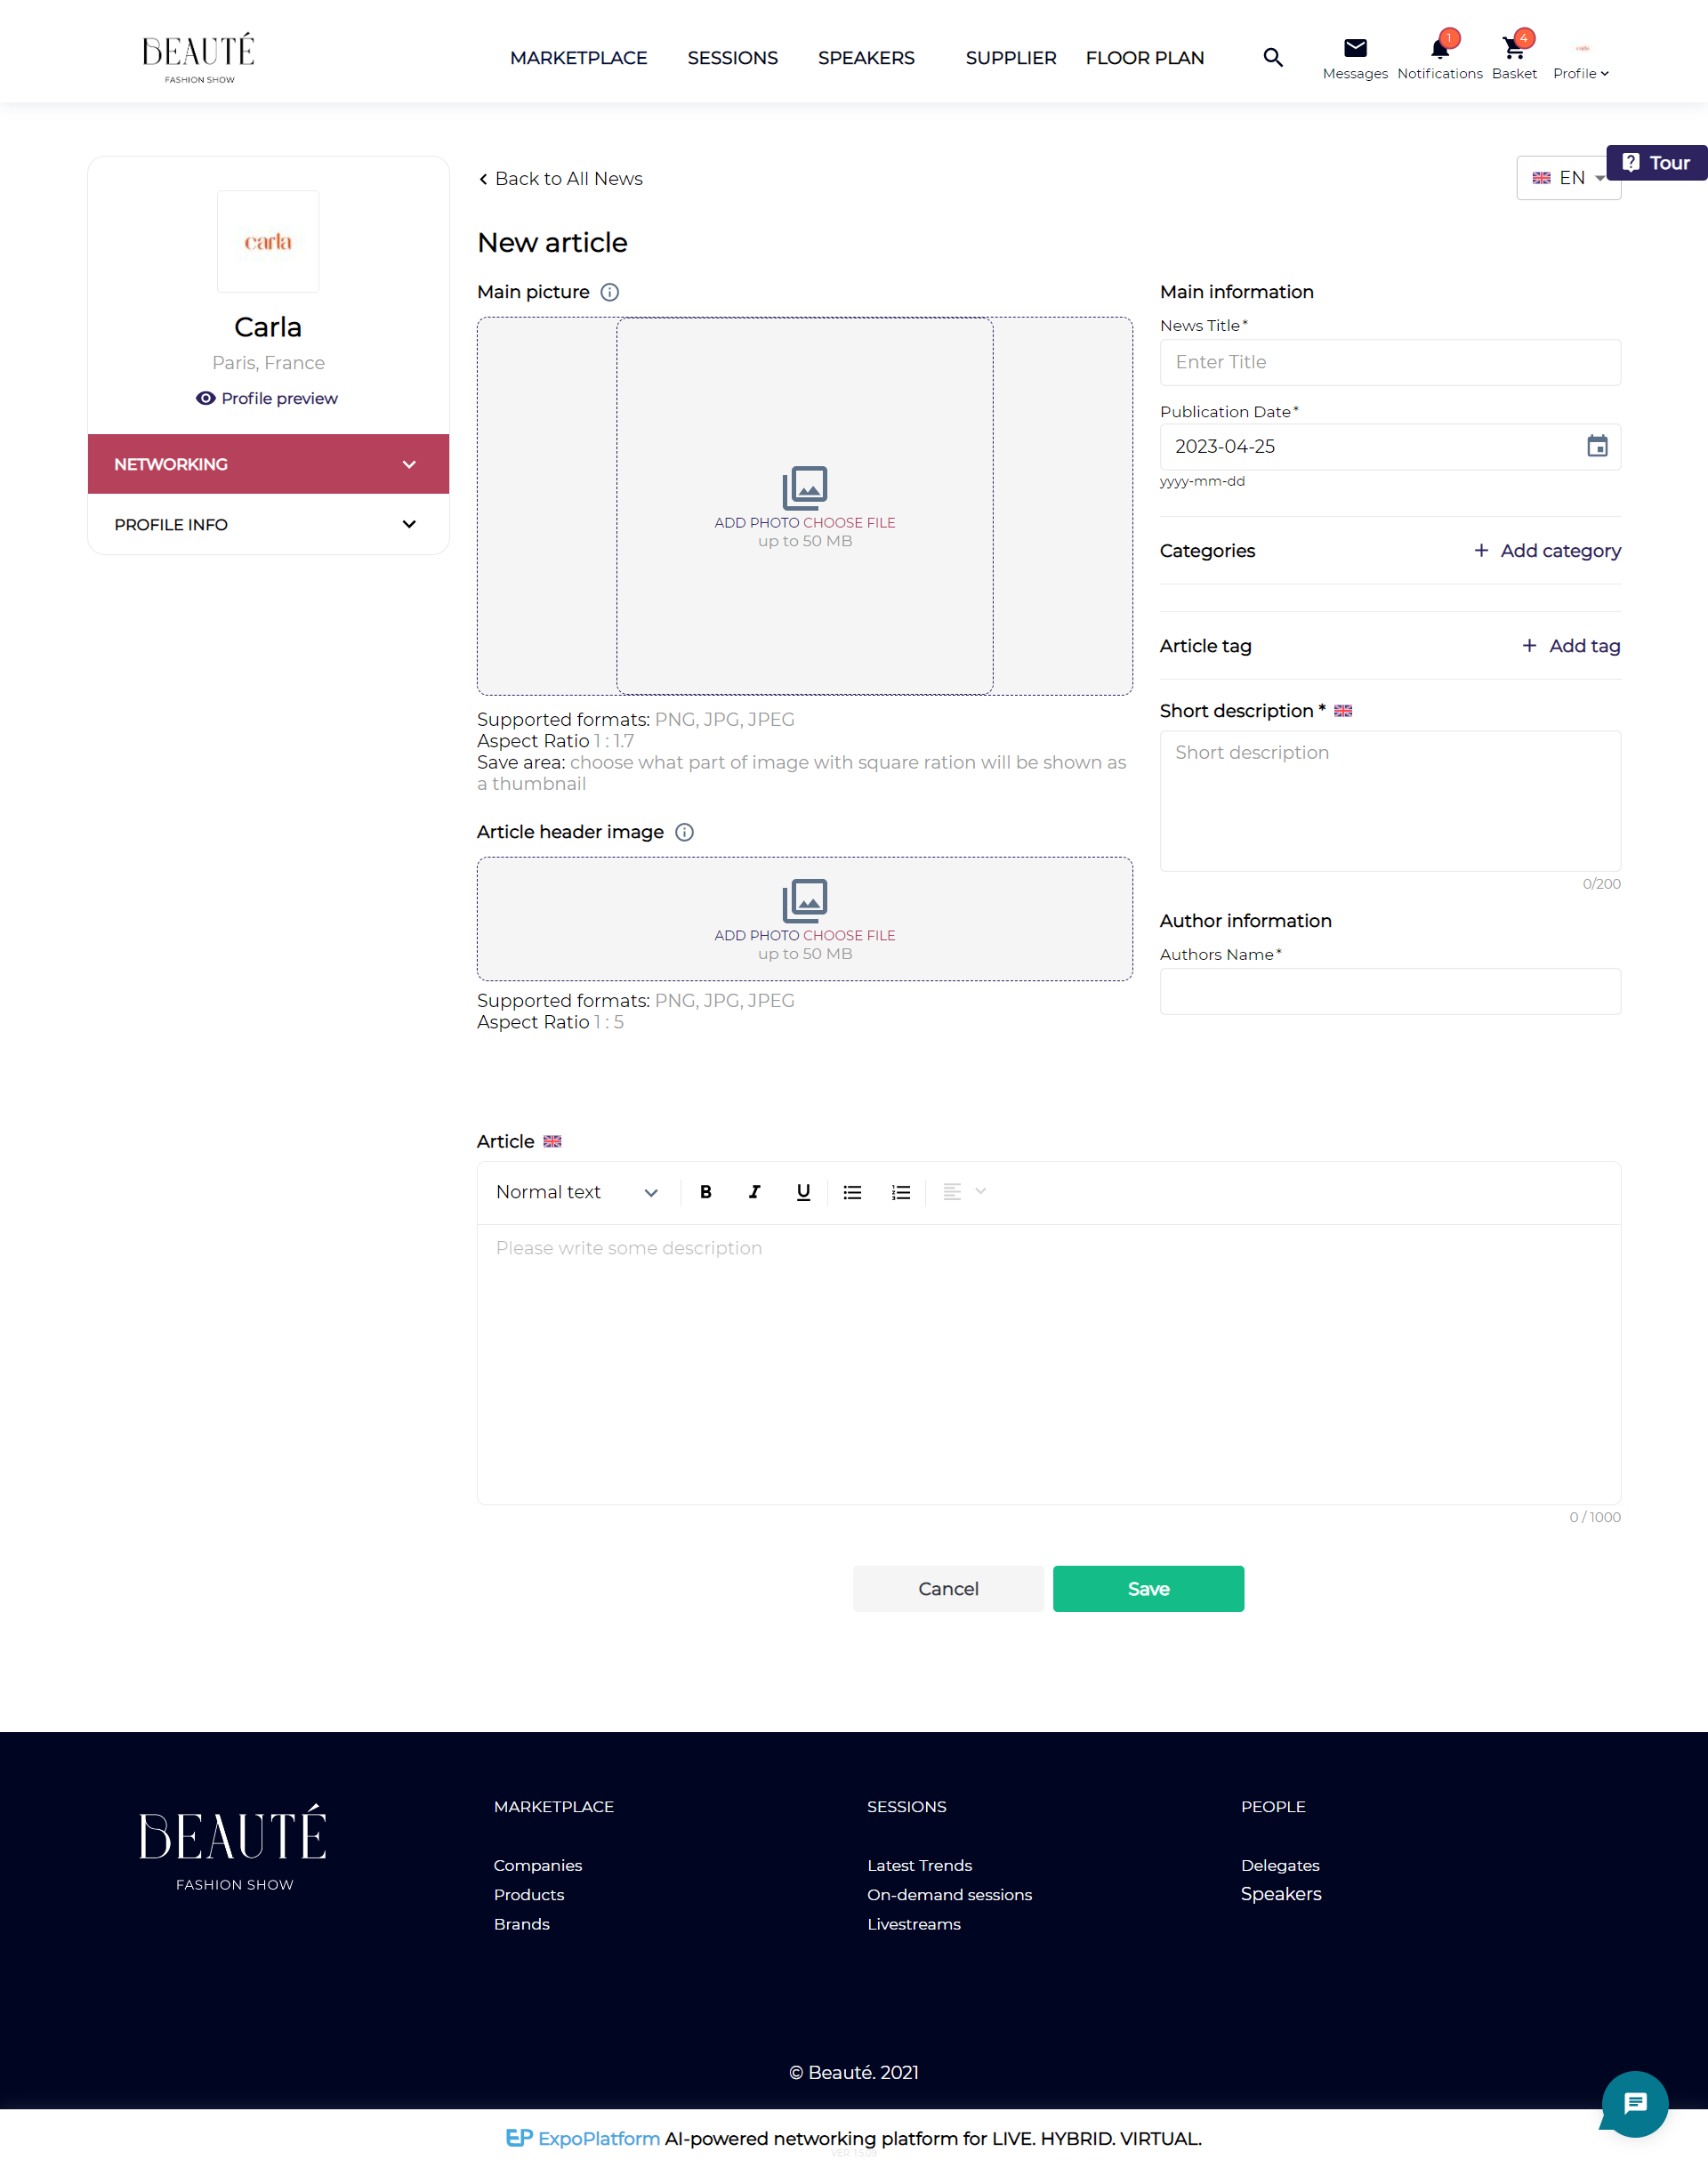
Add News
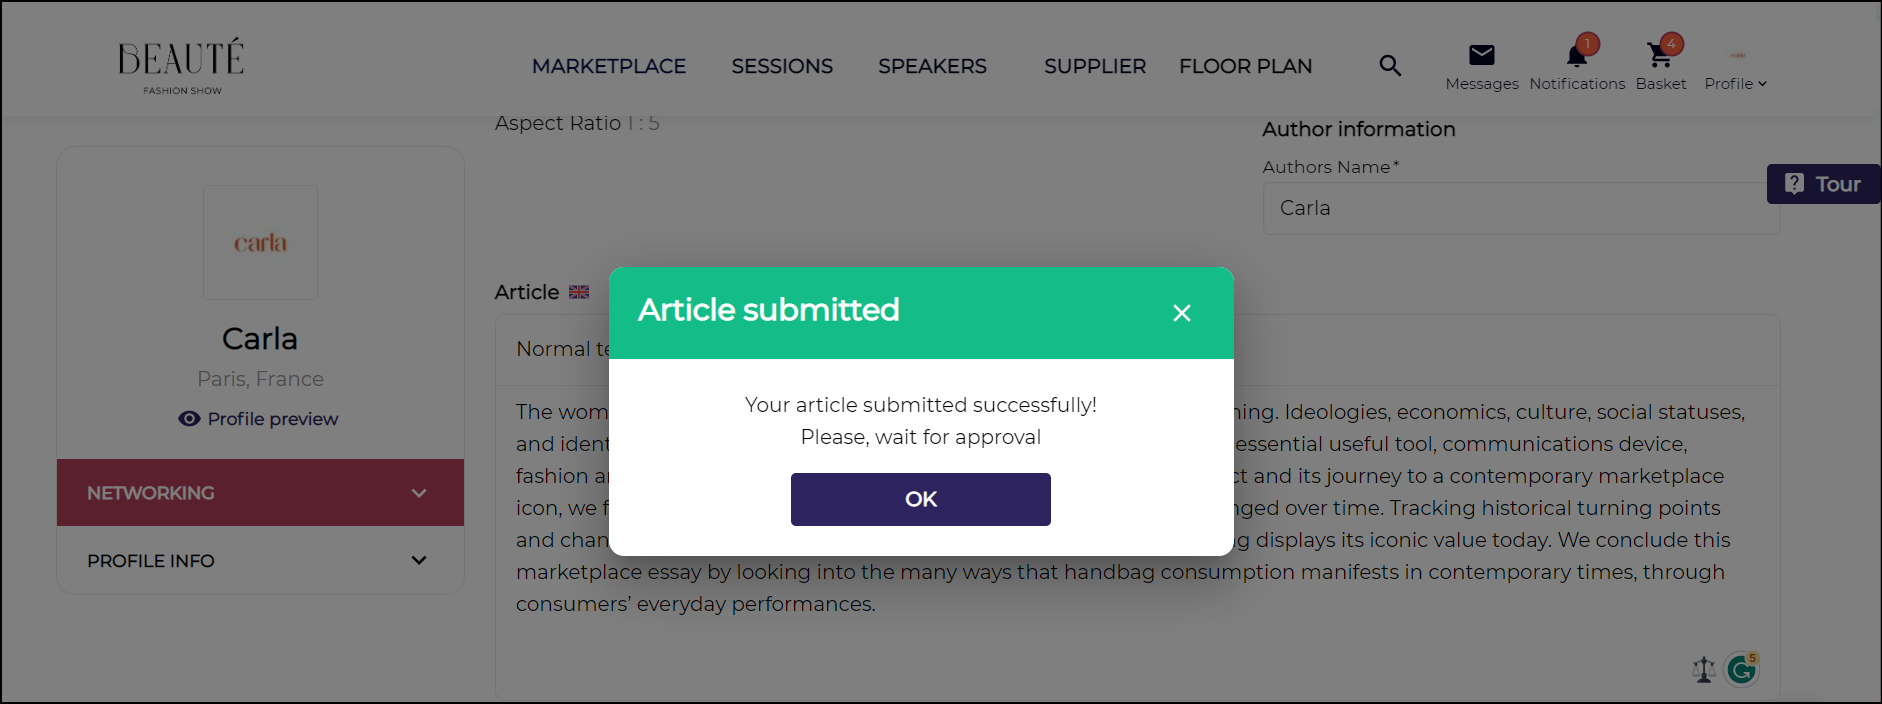
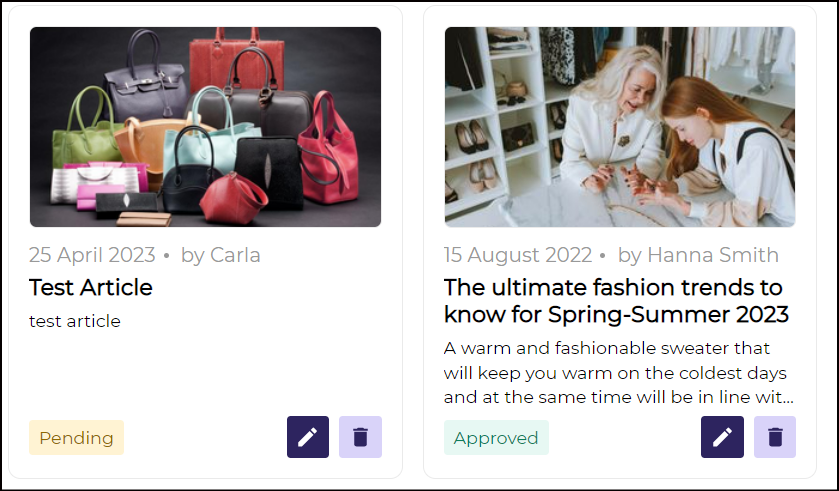
Published Exhibitor News/Articles
f) Sponsorship
i) Public Page Branding: This section allows the exhibitor to add header and background image for the profile on Expoplatform.
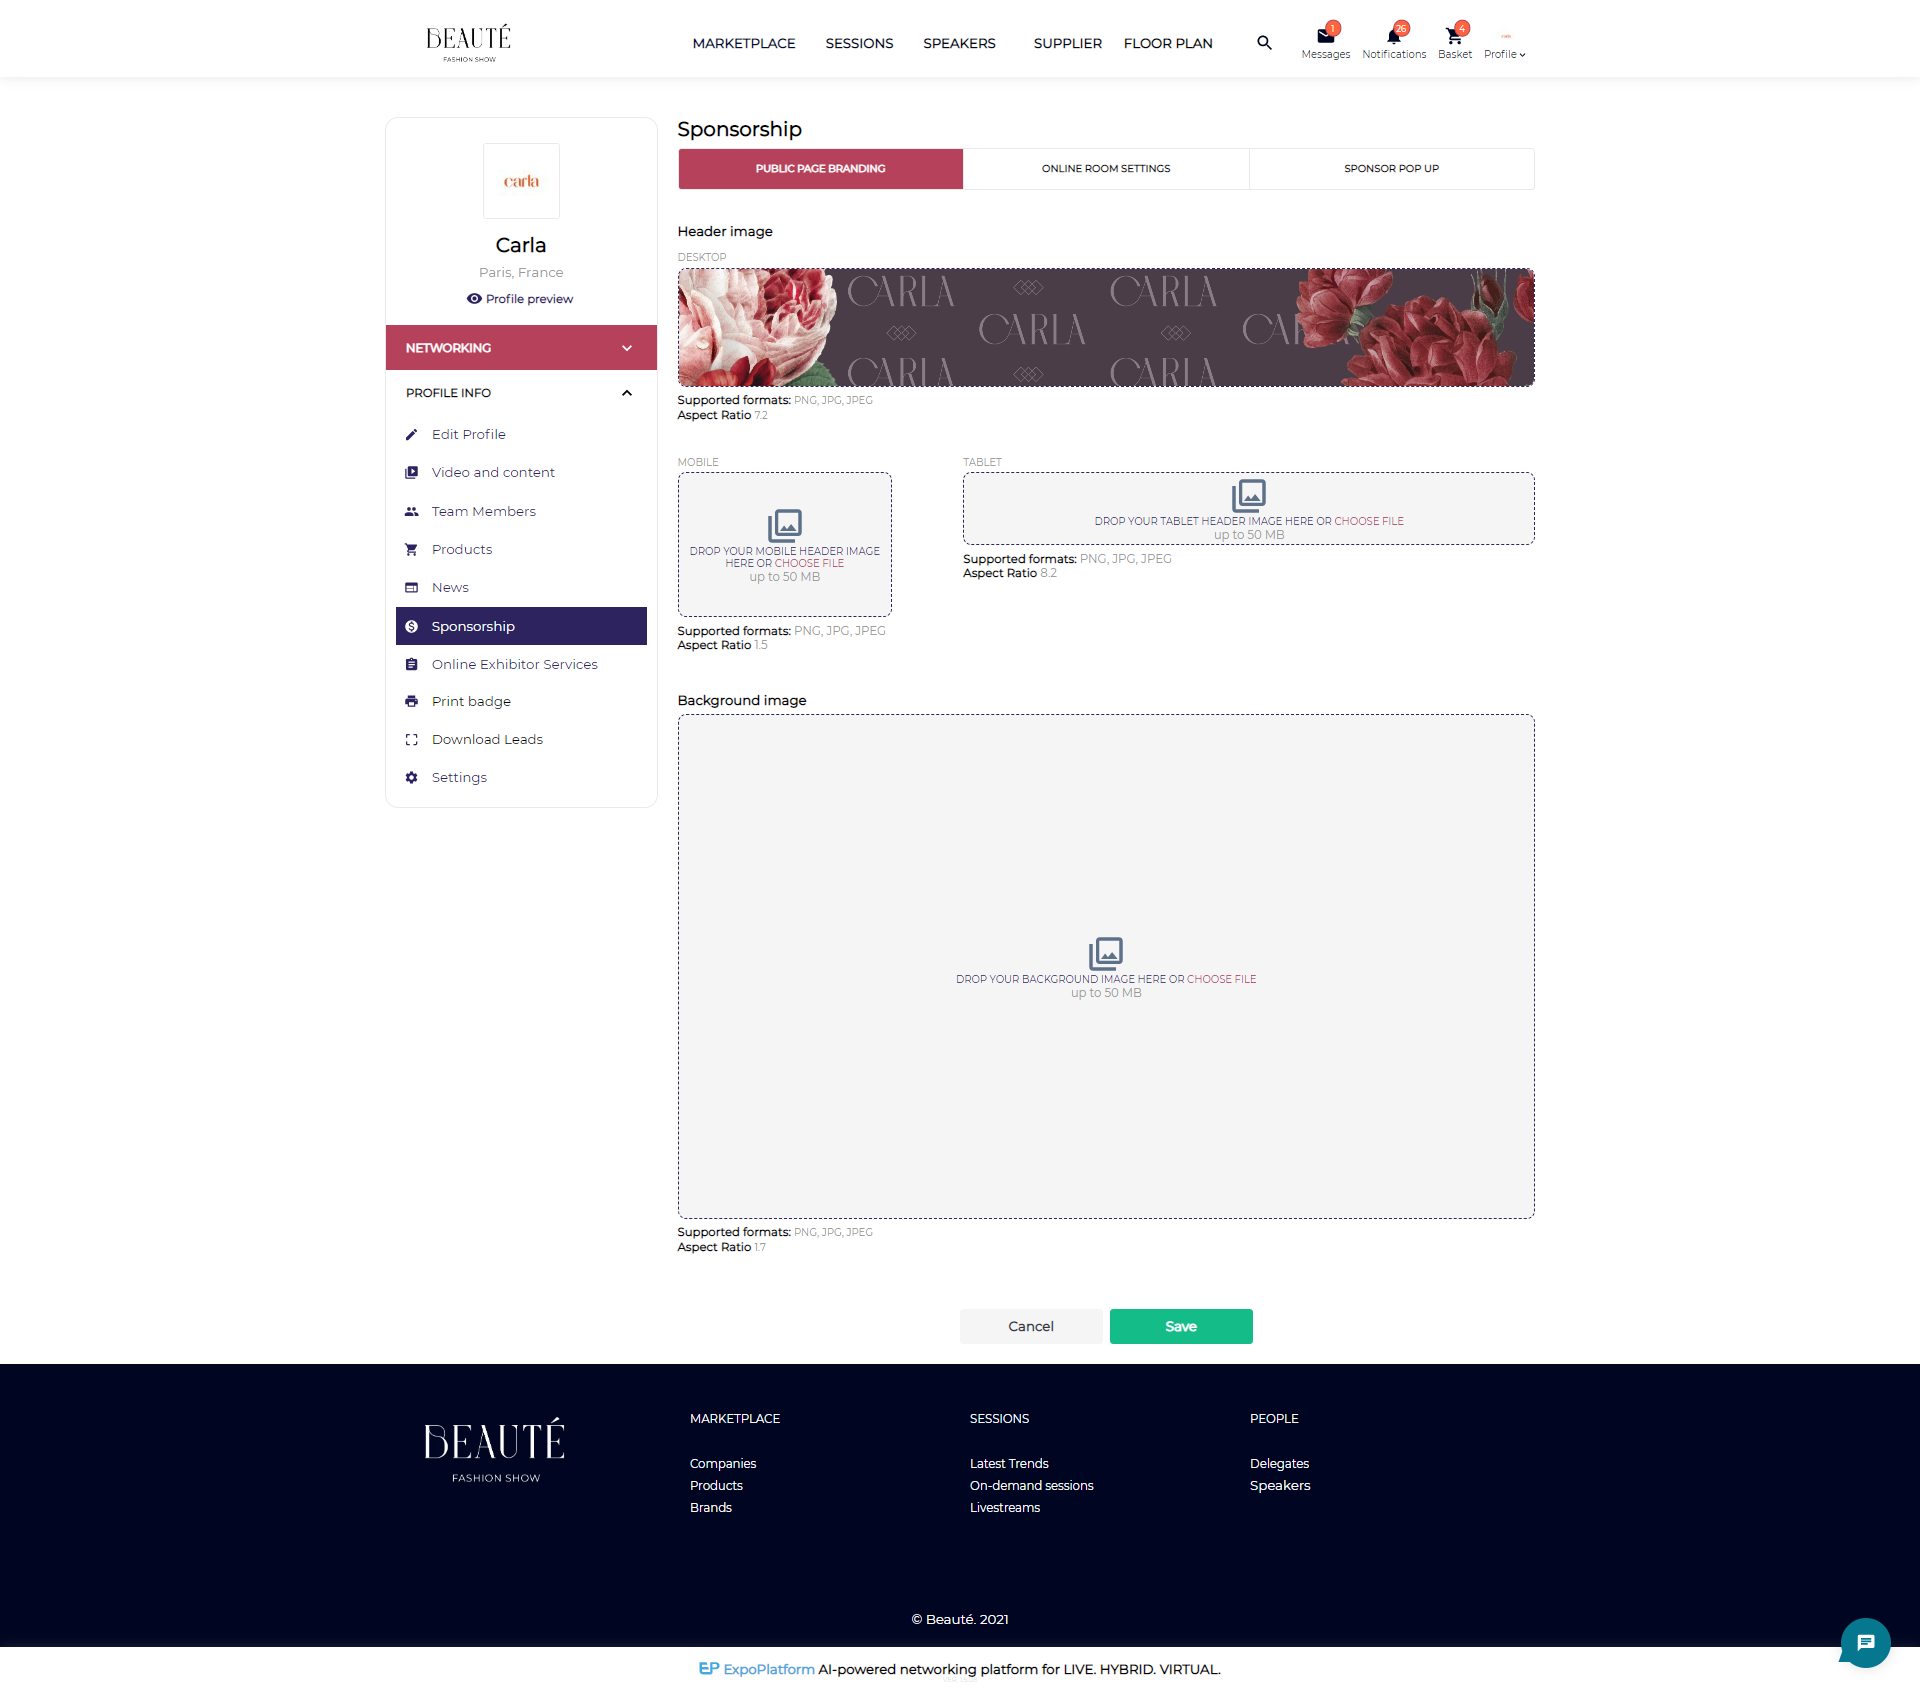
Profile Banner
ii) Sponsor- Pop Up: you can customize all the sponsor pop up settings. On saving this, a sponsor pop up would get displayed when someone opens your page.
This tab has the following settings -
Photo Alignment: Used for aligning the sponsor picture towards center, left or right.
Pop-up Timer: Shows after how much time of opening your event page, the pop should come up.
Button Text & color: Refers to the text & color of a button in the popup which you would like to set, for example - the text of the button could be “Add to Favourites”.
Button height & Alignment: This helps you to set up your button height as well as align left, right or centre.
Text color & Size: Changes the color & font size of the text.
Border Radius & Color: Can set up the border radius & its color.
Hover Button color: This helps you set the color when someone hovers over the button.
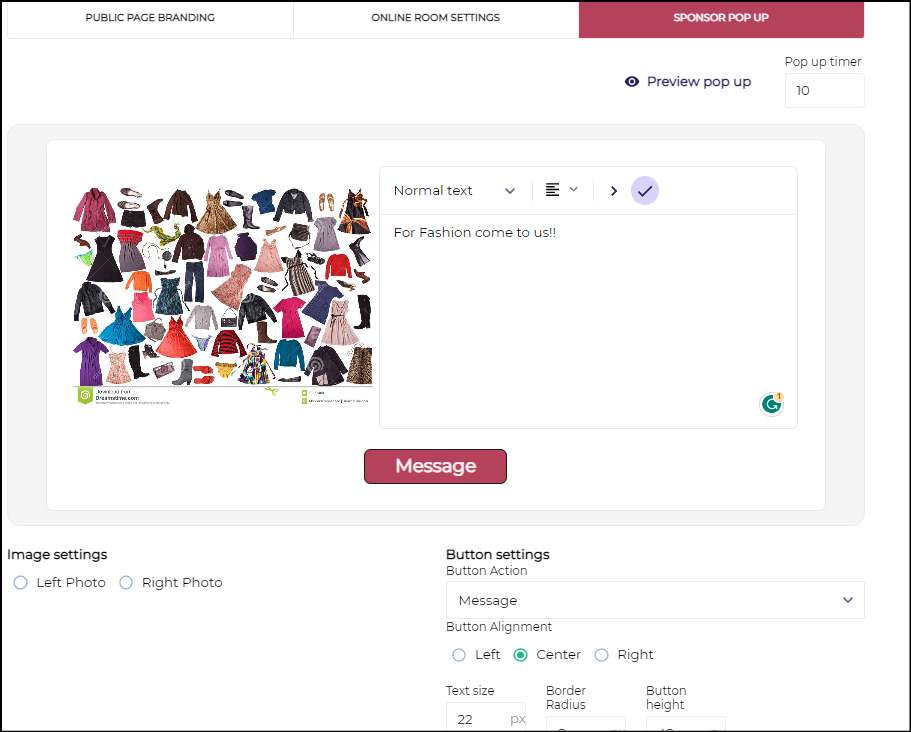
Sponsorship Pop Up
iii)Online Room Settings → One can edit the background Image and choose the text colour here. This option pops up when the particular exhibitor has the functionality to customize Online Rooms
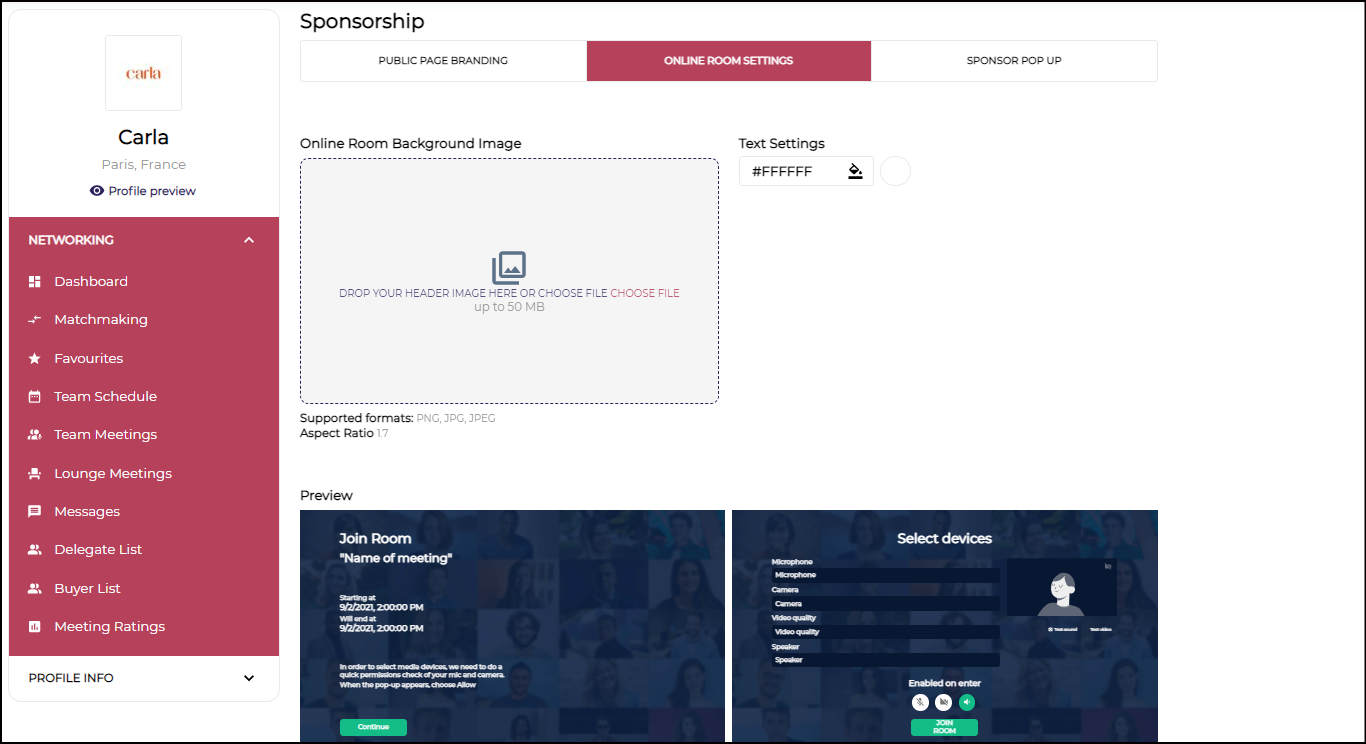
Setting banner for Online Meeting Room
g) Notification Settings → This section help the exhibitor to set if they want to receive meeting or messaging request from the visitor, they can also set the language preference for receiving all kinds of notification in case of multi-lingual event and can download their company QR as well
Change Password → Exhibitors can change their credentials from this section.
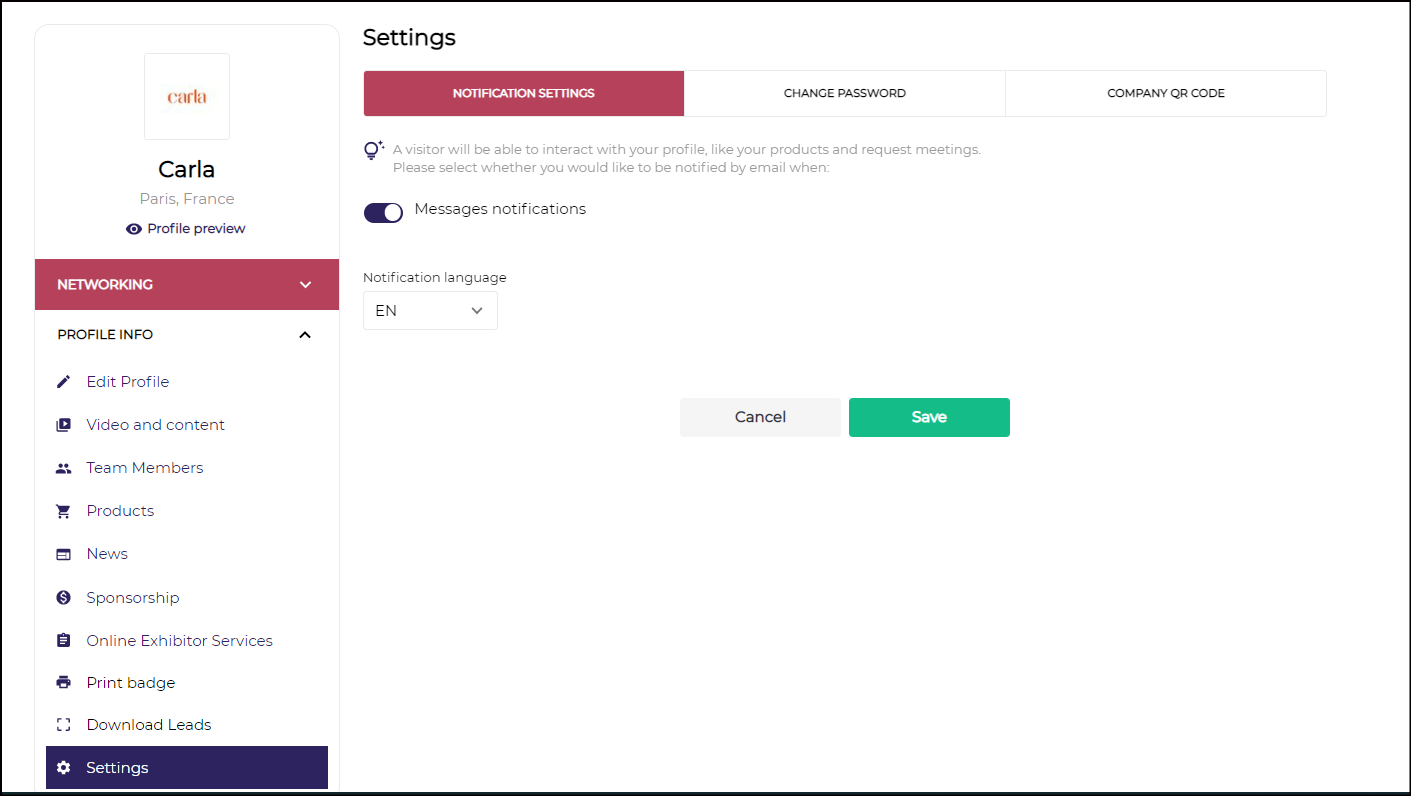
Basic profile settings
