
Participant Category Level Setup
After you have set up the registration form in the registration pipeline there are a few more functionalities which you can manage in the visitor registration setup.
Participant Categories
This page allows the organizer to categorize participants and grant access/benefits to the platform depending on these categories.
Organizers can enable the below settings at the category level
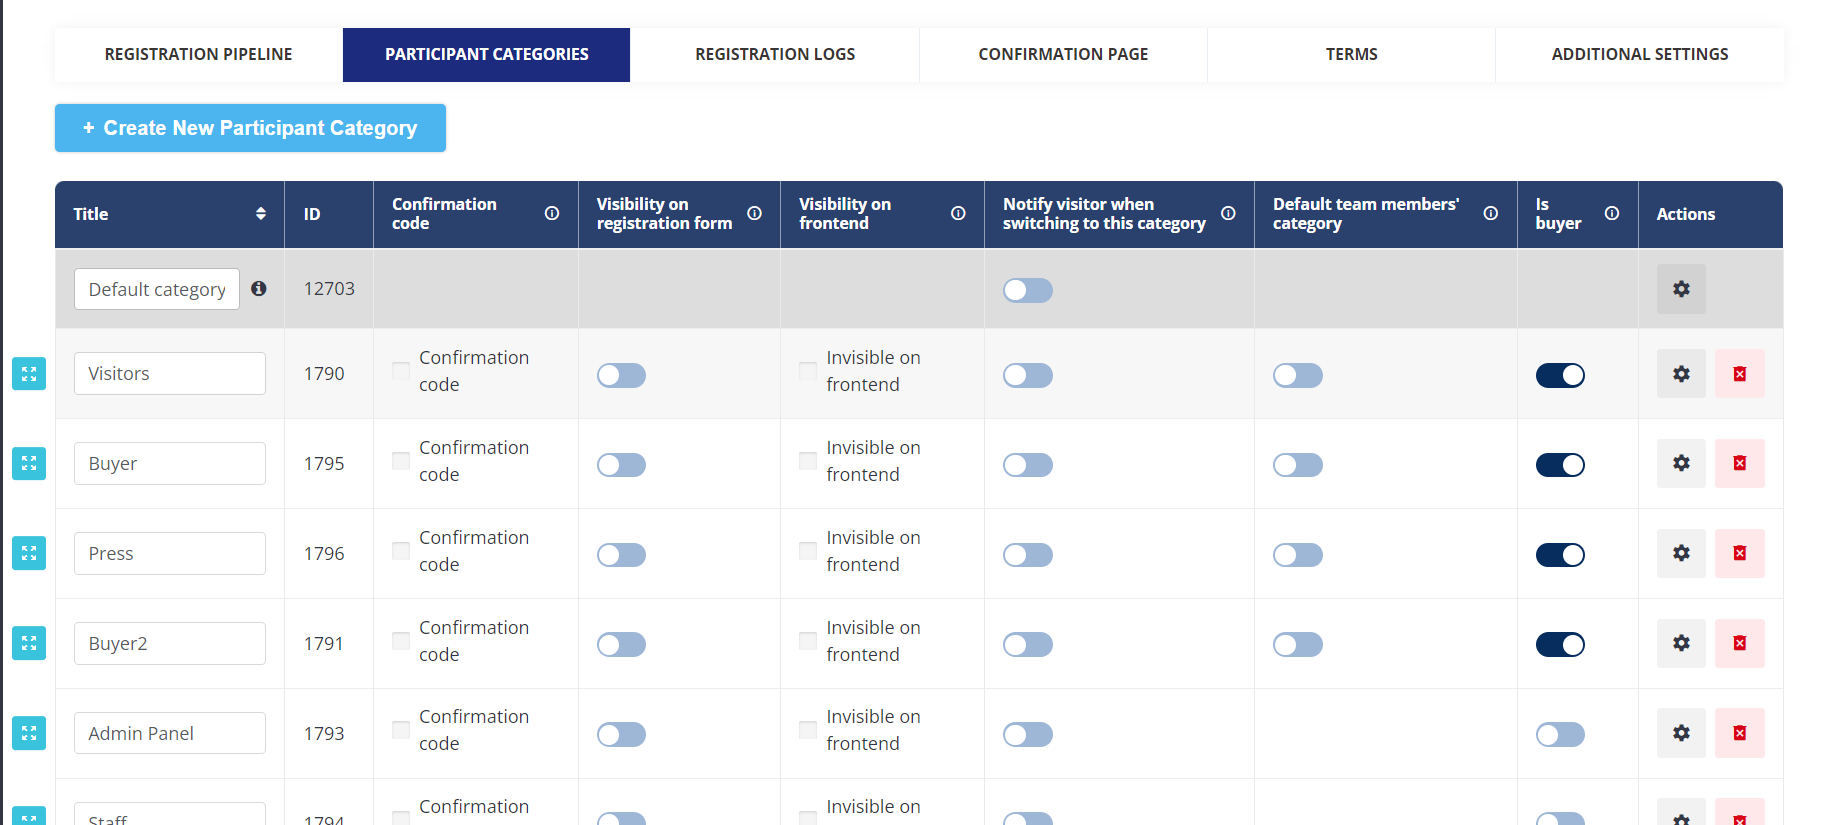
Participant Category Page
Confirmation Code: Organizer can add whether during registration participants should enter a confirmation code to specify their category.
Invisible on the Registration Form: hides the visitor category from the registration pipeline meaning a visitor is not able to see this category during the registration process.
Invisible on Frontend: hides the visitors' category both on Web and Mobile App
On Web it is hidden from
In filters — Participant categories, etc.
Participant Profile — in case “Show in visitor card” option is not enabled for Category field.
Lead Capture — “Download leads“ file.
Mobile App:
In filters — Participant categories, etc.
Participant Profile — in case “Show in visitor card” option is not enabled for Category field.
Scanned me
When we scan the visitor badge
Lead capture
Speaker list
Meetings
Do Not Hide on Badge: If this is checked then the visitor category will be visible on badges only and the rest other places will be hidden
4. Notify visitors if the user category is changed/switched: Organizer can choose whether to notify the visitor when their category is switched or changed
Is Buyer: If this toggle is enabled for any of the participants' categories, then all the users tagged with this category will be visible in the Buyer List under the Hosted Buyer Module and will have all the access as the buyer rather than a visitor
Default Team Member Category: This setting allows event organizers to configure a specific buyer category, as the default category for the team members who are added from the front end by the exhibitors. These team members will appear in the buyer list under the Hosted Buyer Module. Later, these team members can be accepted by the organizers as per the event criteria.
This automation enhances the Buyers list functionality to recognize team members with the "Default Team Members' Category" as buyers and display them in the buyer list
Duplicate Category: The organizer can duplicate any existing participant category, replicating all the settings of the original category including settings in the Setting Pop Up. The duplicated category will be generated with the original category name followed by (1,2,3...N)," where N represents the number of duplications. Organisers can duplicate the default category as well.
All categories are to be sorted by ID, with the latest created ones appearing first. However, organisers have the flexibility to adjust the order of the categories by dragging them to the desired position.
Duplicated category will be available for configuration after you have Saved the changes. This mechanics works the same way as we add new participant category at /admin/registration/categories
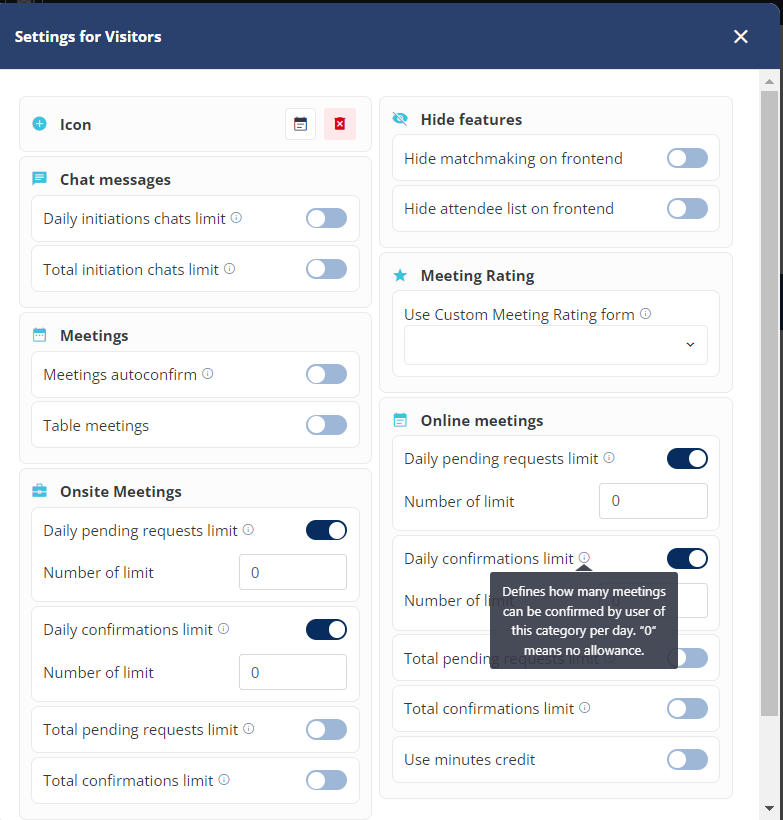
Settings: By clicking on the settings button on the extreme right, the organiser can manage the setting at the user category level.
The setting allows the organizer to restrict the number of chats and meetings at each category level. Organisers may set daily as well as total limitations.
Organizers can also hide matchmaking and attendee lists for a specific category from the front end by just enabling the toggle
Meetings Minimal Request: When enabled, organizers can establish the minimum number of confirmed meetings users must schedule. If this threshold isn't met, the system sends a reminder to the user, prompting them to fulfil the required number of confirmed meetings.
This field doesn’t accept 0 as the value
Visitor Category Settings
When the autoconfirm meeting toggle is Enabled from Meetings → Settings
When no limit is set for user category, then user can have any number of confirmed meetings
When limit is set, number of confirmed meetings can only be as per the defined limit
When limit set and reached and user still tries to book a metting the system throws error message ”Some users you are requesting a meeting with exceeded the online confirmation limit." and meeting request button (“Next step“ button) is disabled.
Confirmation limits are counted for the meeting receiver.
When rescheduling a pending meeting, category limits is not enforced.
When rescheduling a confirmed meeting, category limits is not enforced.
When autoconfirm is Disabled from Meetings → Settings
Pending limits are counted for the side of meeting initiation.
Confirmations limits are counted for both sides of meeting receiver.
During reschedule of pending meeting – category limits is not be applied.
During reschedule of confirmed meeting – category limits is not be applied.
Applies to Online, Offline and Table Mettings
Meeting limits currently do not transition to app. It is planned to be released by end of Q2 (2024)
Participants Default Category
In the Admin Panel, there is a Default Category which will be auto-assigned to the Participant without any custom category
Points to be noted for Default Category
Not Visible Registration Form under Category Field
Can’t be selected as a Buyer
Can’t be deleted from Participant Category List
Not visible on Frontend Filter
Confirmation Code & Category Passcode not applicable
The Settings pop-up can be configured like other categories
While switching the Participant category from Default to Custom or vice versa, Individual level settings will always take precedence over category settings
Benefits
Ease for event admins to control the accessibility for user without a category
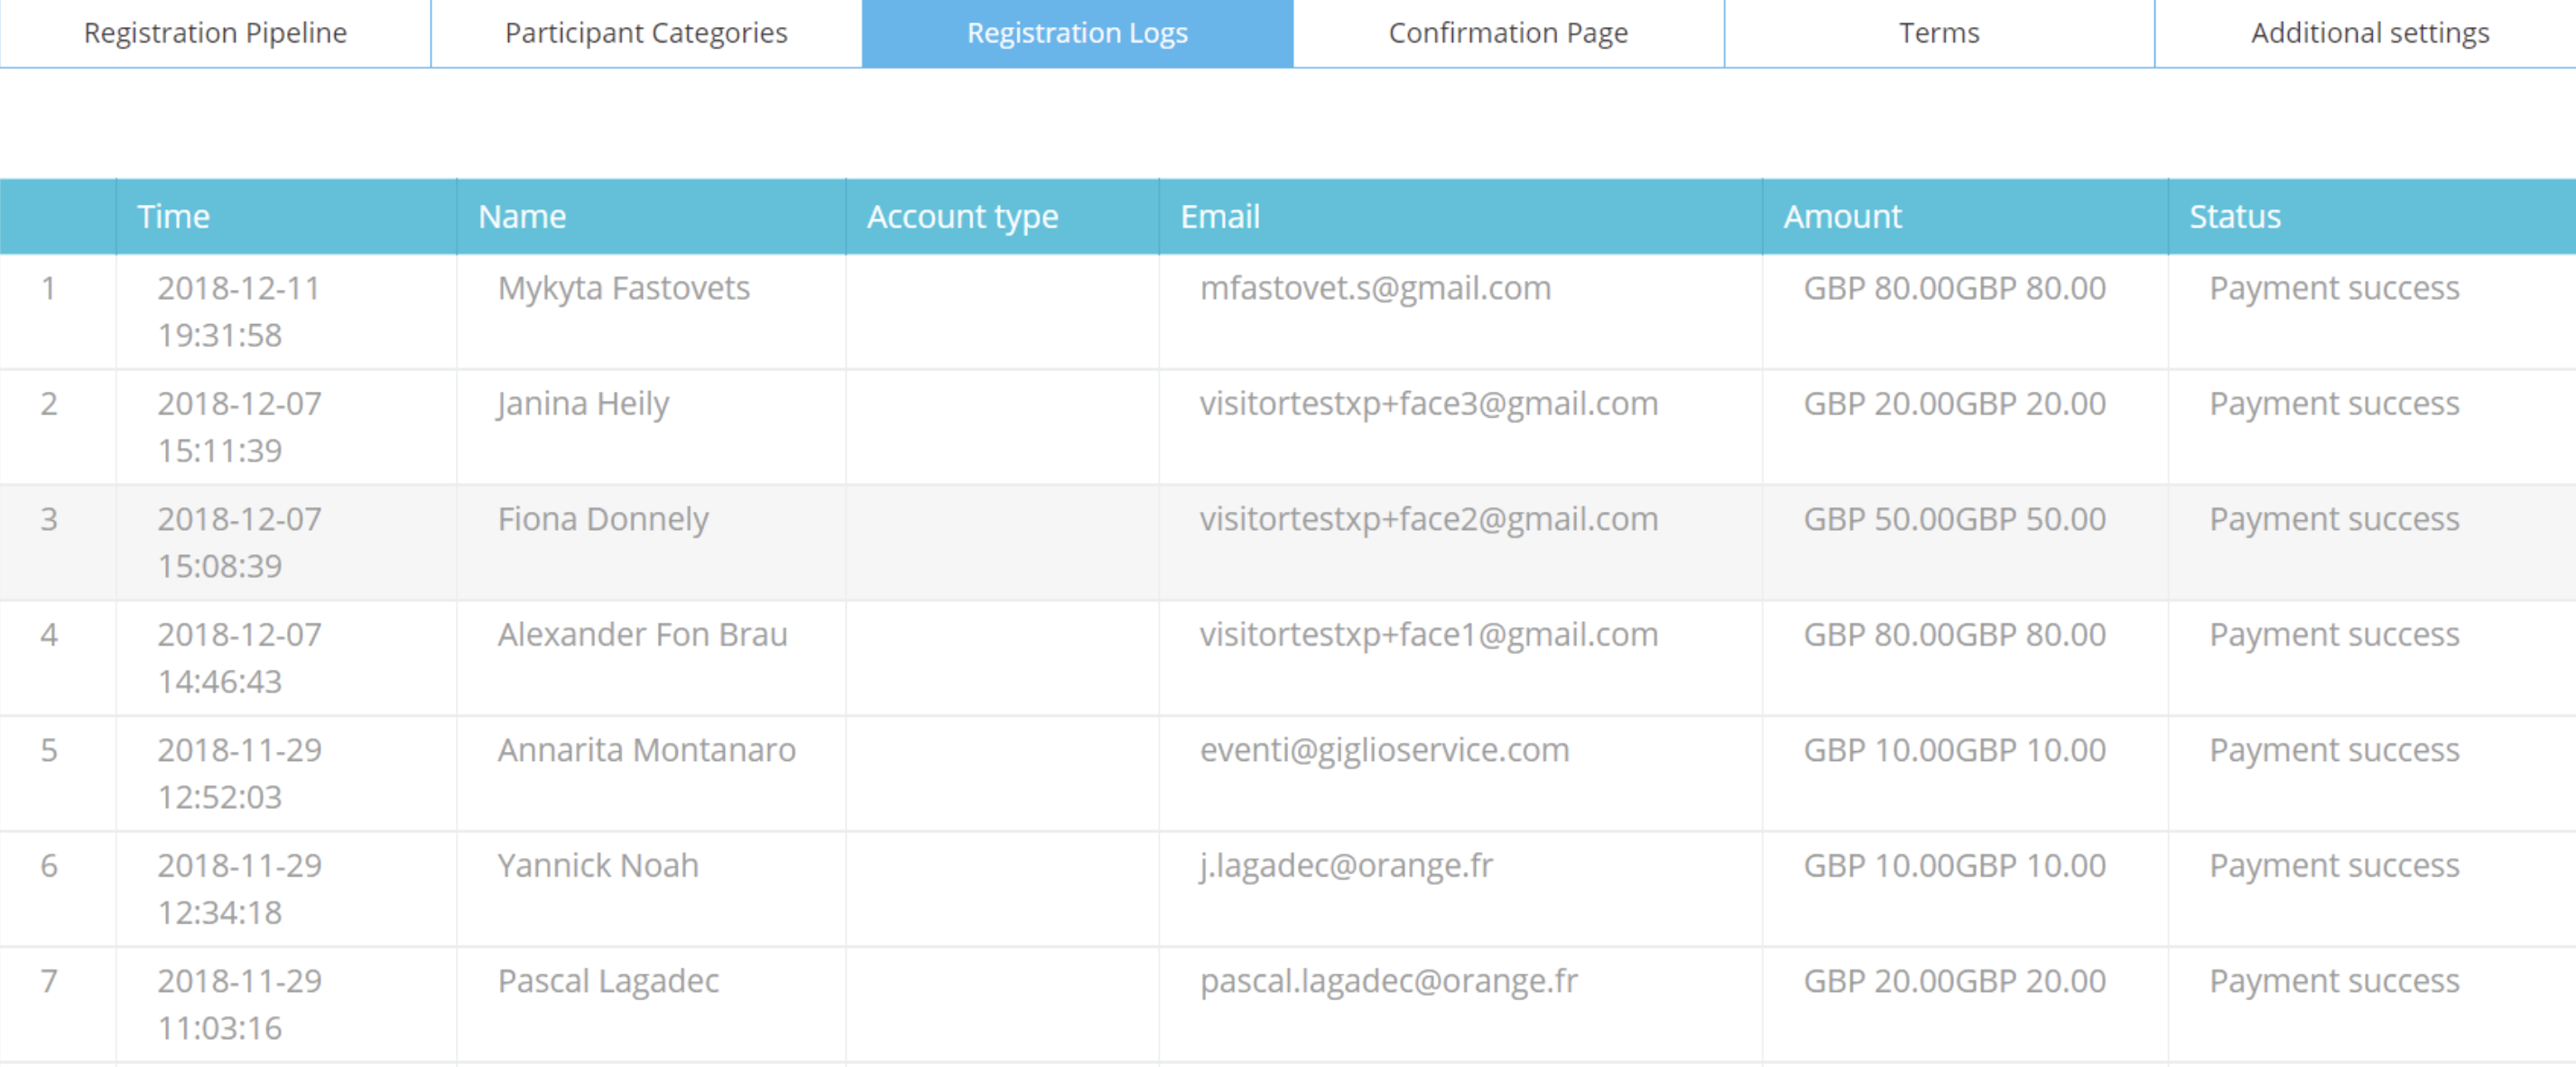
Registration Logs:
This list shows you the participants who have registered for your event. This list also gives statistics such as Time, Name, Account Type, Email, Amount and status of their registration.
Confirmation Page:
From here you can set the page to which the users will land after they have successfully completed their registration. Organizers can add variables to the page to make it more user-specific. Variables that can be included on confirmation page are Badge Bar Code, Badge QR Code, Category and Print Badge link.
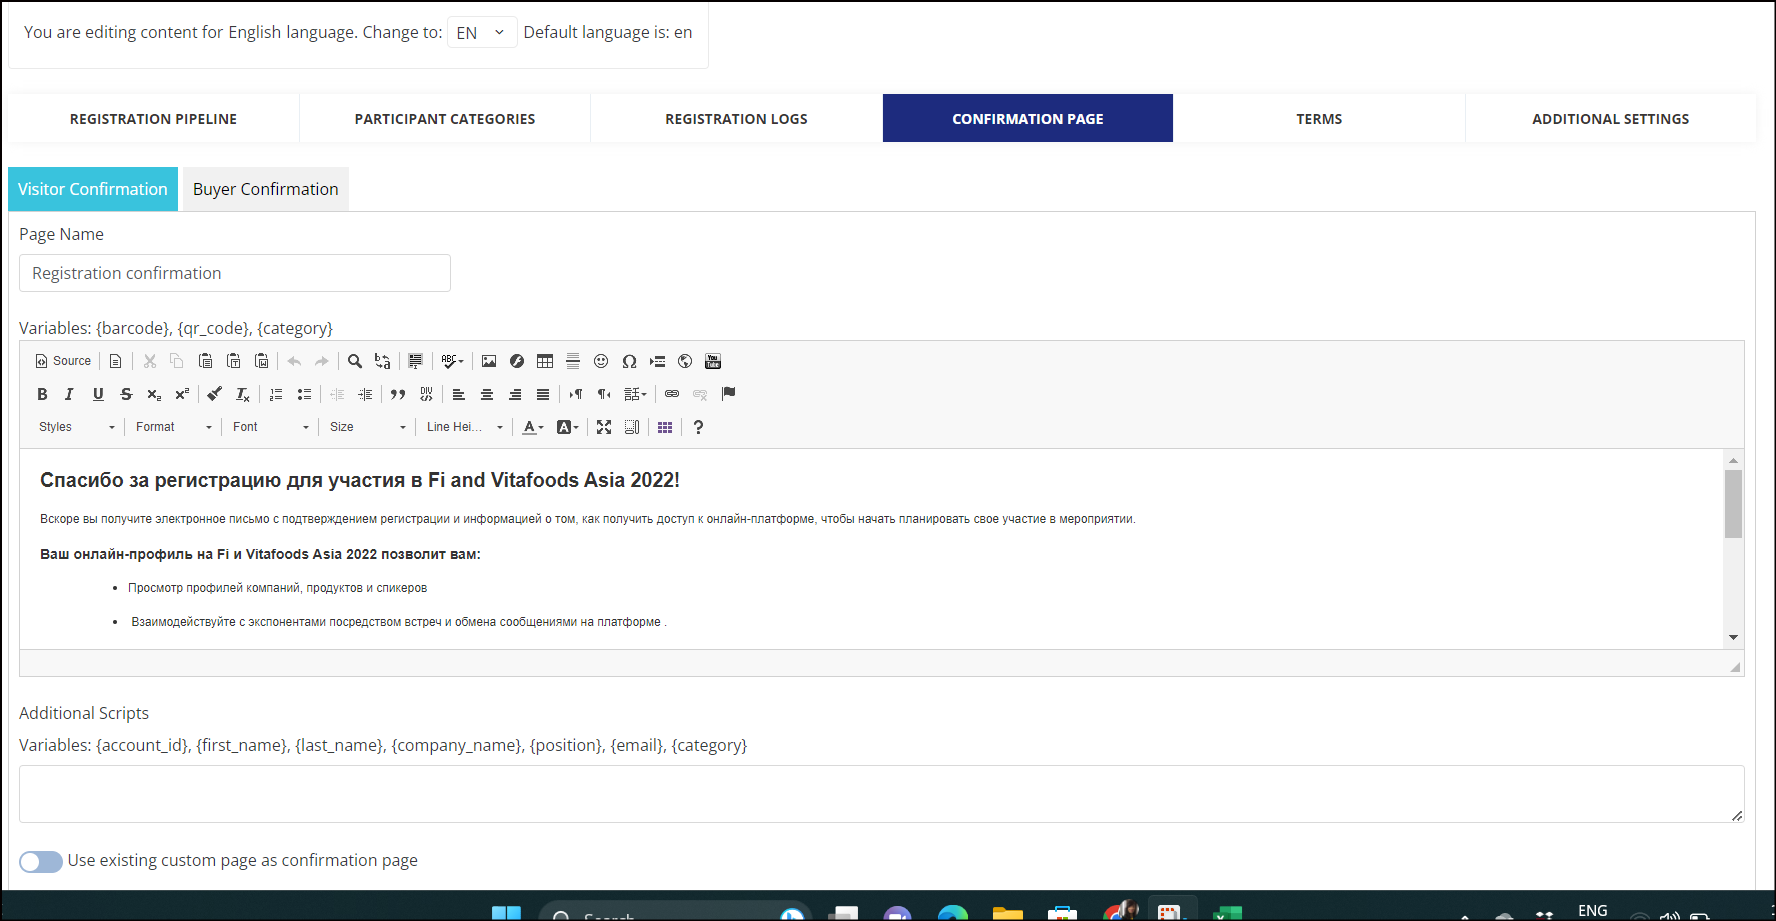
You can also choose an existing page that you have set up on the website builder as the confirmation page. Simply toggle the "Use existing custom page as confirmation page" ON and from the drop-down select the page that you want to set as the confirmation page.

Confirmation Page post registration
Terms:
From here you can add the terms and conditions related to your event that you want visitors to read and accept before registering for the event.
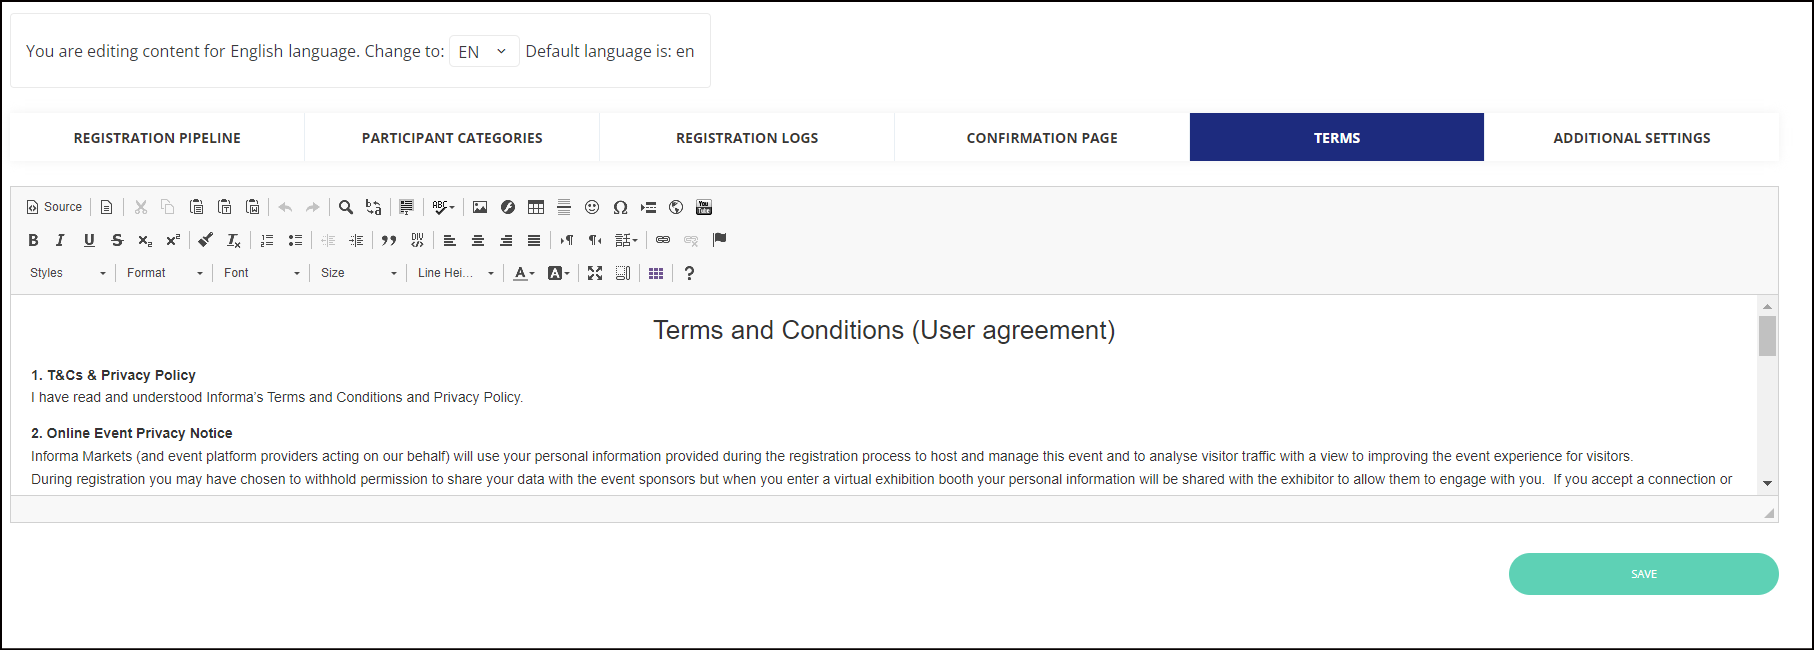
Terms and Condition
Additional Settings: From here you can manage the Additional settings of the visitor registration.