Feature Purpose:
Allows organizer to control what a stand looks like when displayed on the floor plan
Working with this Feature:
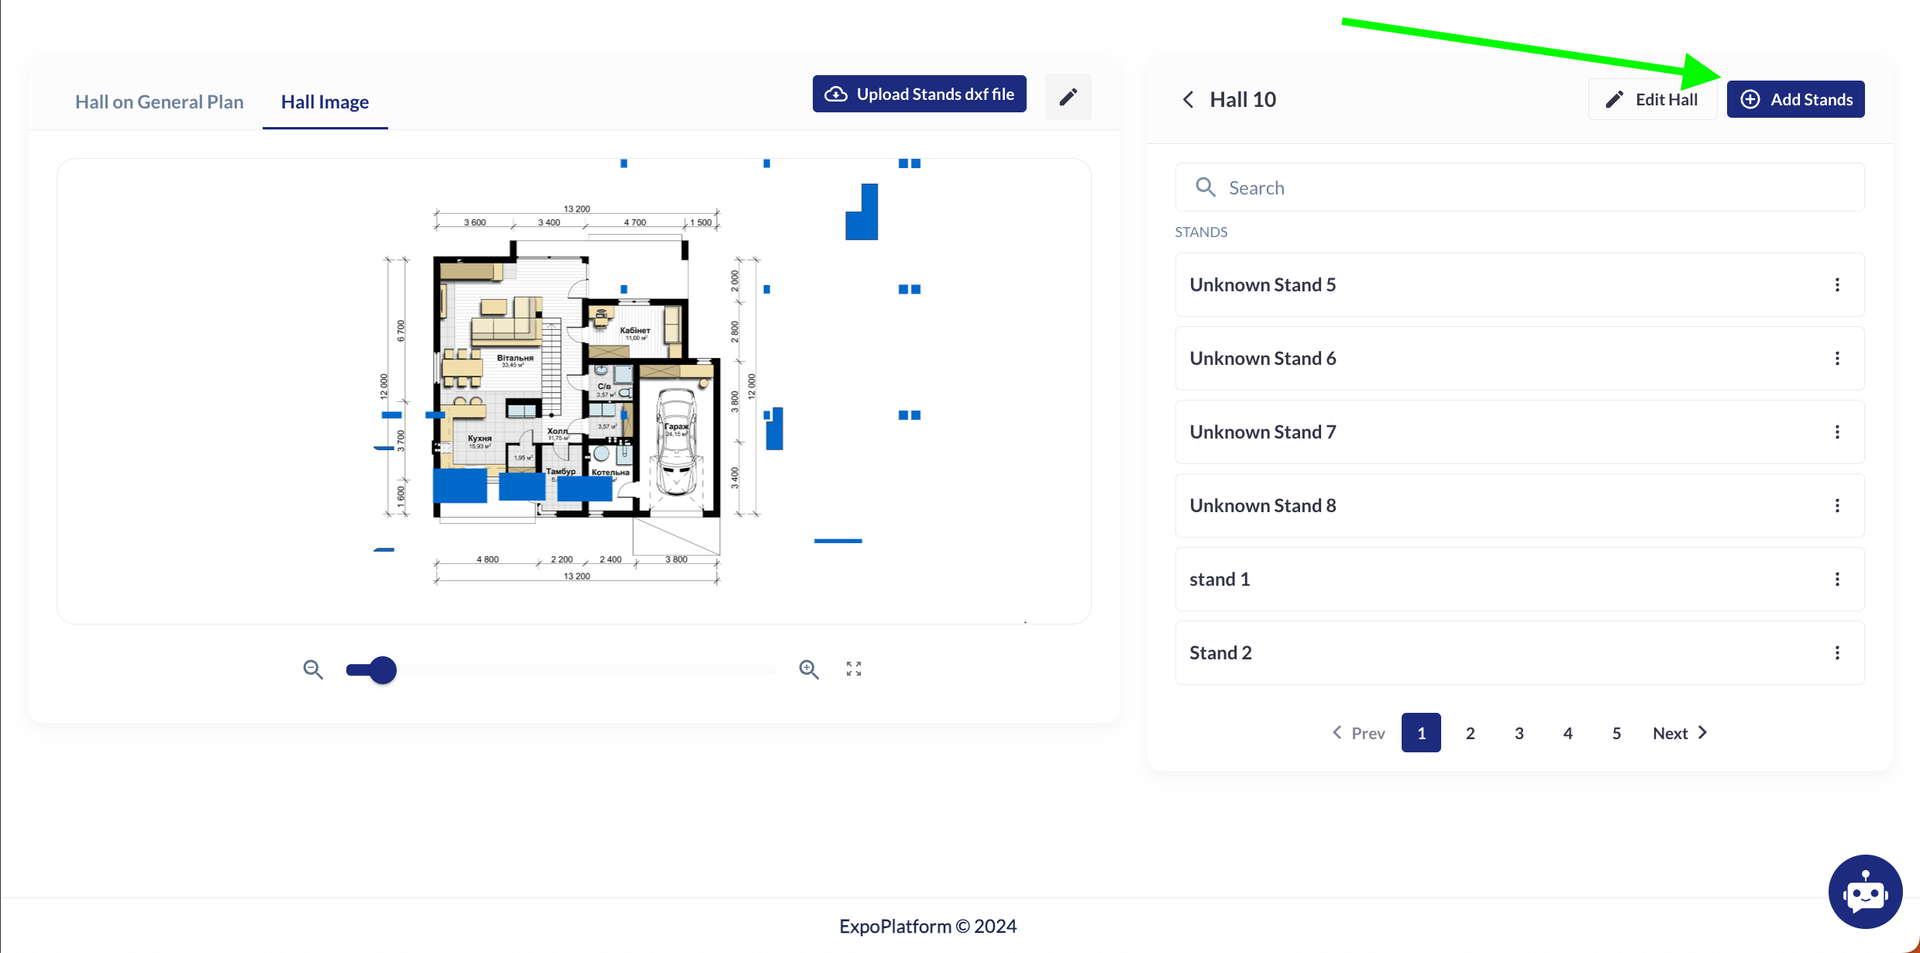
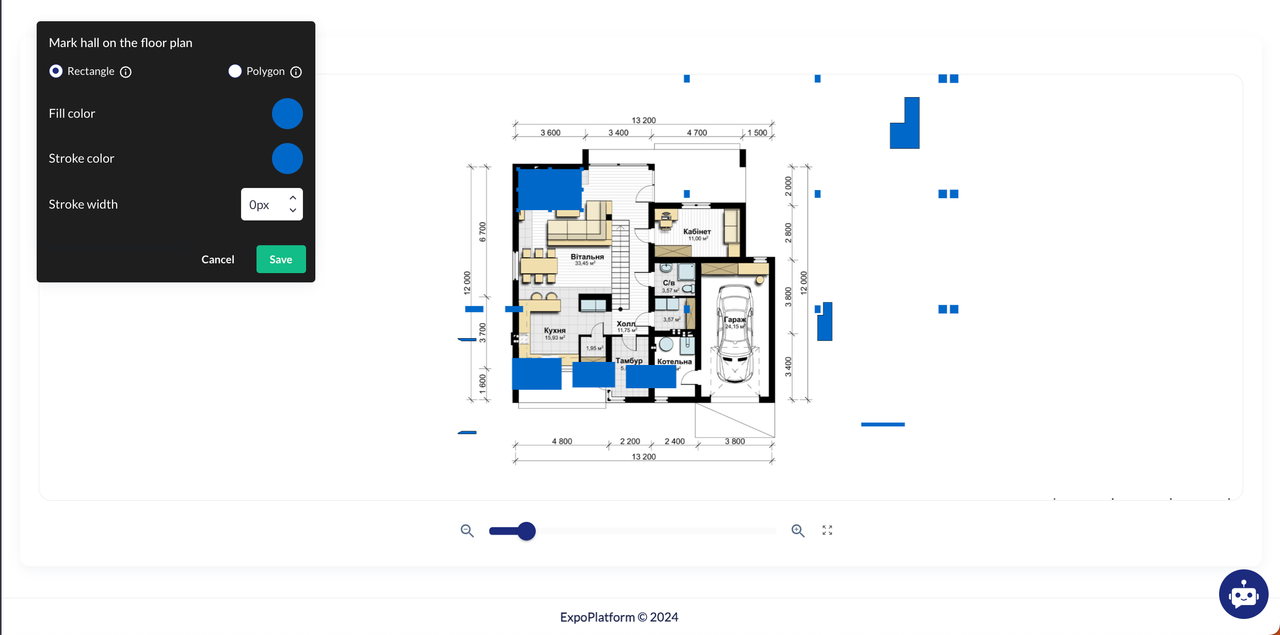
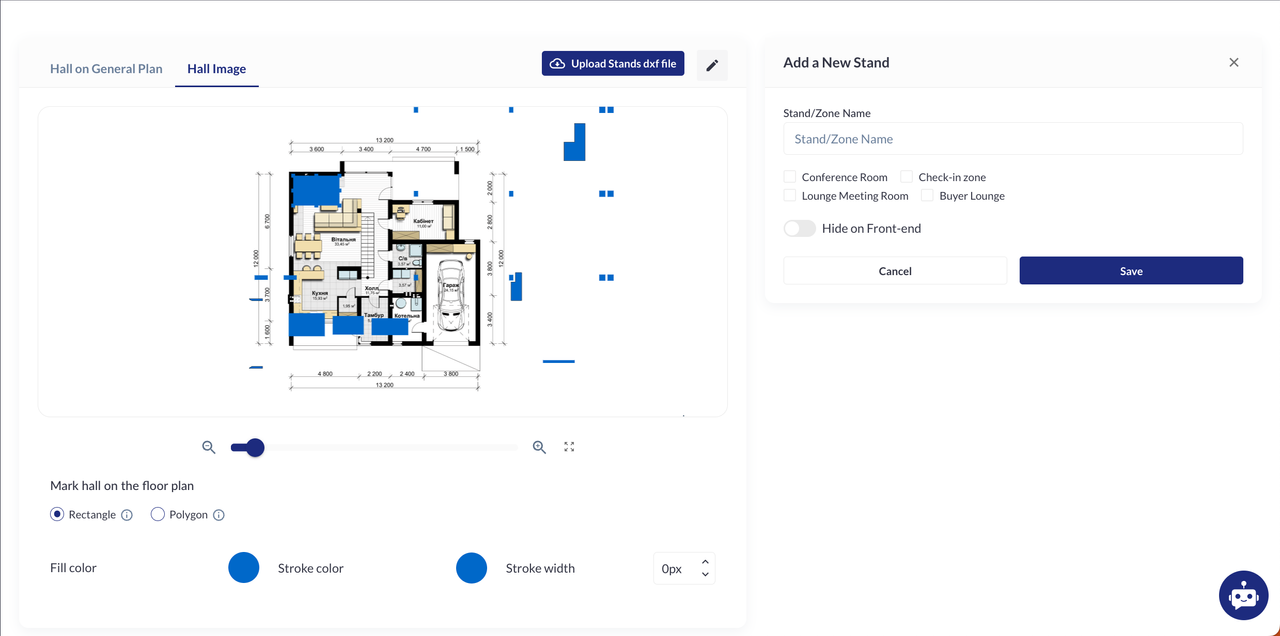
When the user clicks "Add stands," a hall image and a pop-up with two options, Rectangle or Polygon, appears.
The Rectangle option, selected by default, allows marking a rectangular area on the floor plan, which can be resized and moved.
The Polygon option lets users create a stand by placing at least three connected points, with the ability to adjust or remove points.
Marked areas can't overlap, and switching between Rectangle and Polygon removes any previous marking. After marking a stand and clicking Confirm, a Stand settings window appears. Once saved, the stand appears in the Hall panel.
While adding a Hall, the user has several customization options available on the General plan. These include:
-
Fill Color: The user can choose any color by selecting from the color screen that opens, or they can pick from predefined colors conveniently displayed at the bottom of the screen.
-
Stroke Color: Similar to the fill color, the stroke (outline) color can also be customized by selecting any color from the color picker, or the user can opt for predefined colors shown at the bottom of the screen.
-
Stroke Width: The user can set the width of the hall’s outline, starting from 0px.
-
Shape Selector: The user can choose between two types of shapes for the hall:
-
Rectangle: The user can create a rectangle by simply dragging with the mouse across the screen.
-
Polygon: For more complex shapes, the polygon option allows the user to click on multiple points on the screen to form a custom shape with multiple edges.
-
These same settings for Fill Color, Stroke Color, Stroke Width, and Shape Selector are also available when the user is drawing both stands and halls.
User can name the Stand, and set options for the Stand such as:
-
Check-in zone
-
Conference Room
-
Lounge Meeting Room
-
Buyer Lounge
-
Hide on Front-end this Stand
and then Save the changes.
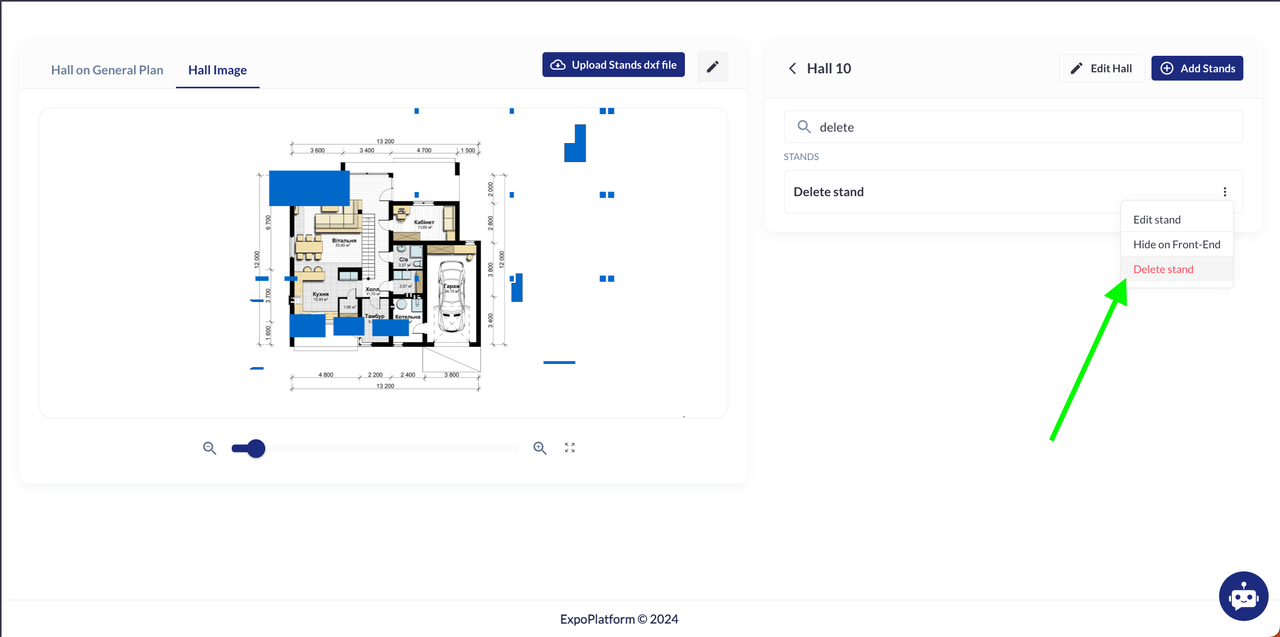
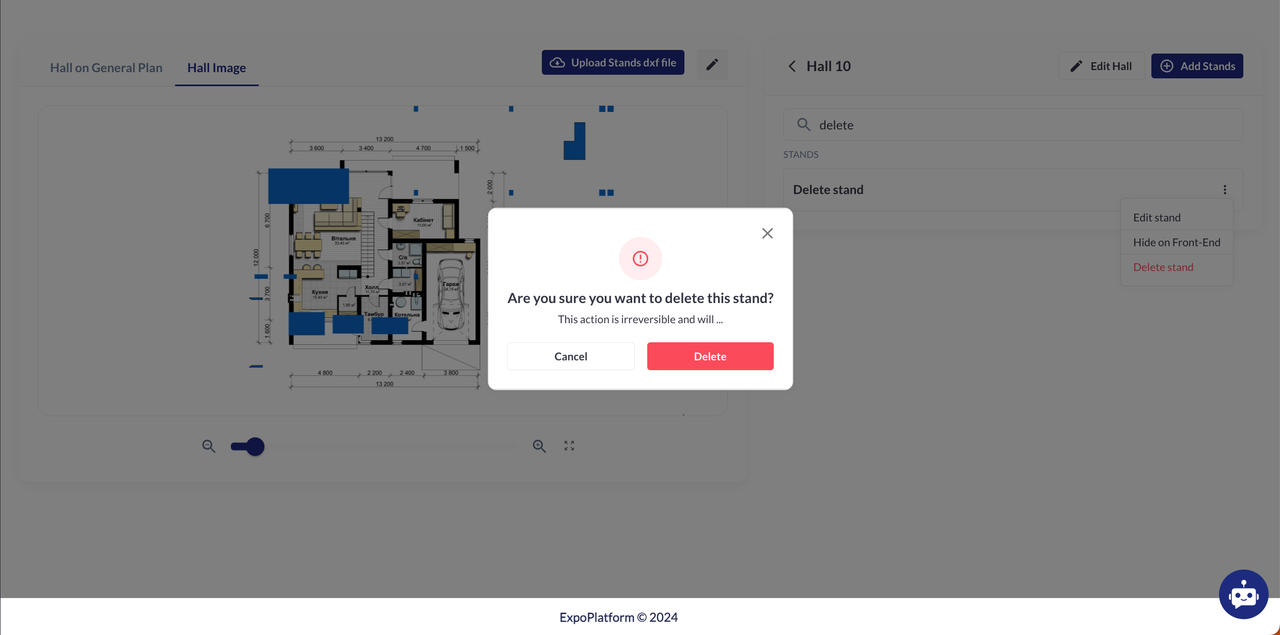
Deleting a stand prompts a confirmation. Clicking "Yes" deletes it; "No" cancels the action.
Stands/zones can be edited or saved with a confirmation message.
If the Hall image is deleted, the stands/zones remain hidden but reappear when a new Floor plan image is added.