
Participants
This section offers a roster of attendees, showcasing their respective companies, payments made, and an option to Bulk Print Badges. The page provides various actions that organizers can perform on participant profiles.
You can filter attendees by selecting a category from the dropdown box. Moreover, this feature can be employed for badge printing based on attendee types. It also allows searching for those who have not printed badges and manually adding new attendees by clicking the "New Participant" box.
.png?inst-v=8531b658-bb1f-4fa3-8a3e-3bf9395329ca)
Participants Tab
Filters: After applying any filter, whether standard or custom, it persists even when the page is refreshed, navigated to another page, or closed. The only action that clears the filters is clicking the "Clear Filters" button.
Assign Admin: In the Admin Panel organizer has the option to assign event admins to Visitor profile.
Admin Panel Setting: From visitor edit page organiser can assign the event Admin to each user
Assigned Admin is also one of the options available for filtering the data as well on Admin Panel
Event Admin data can be imported using Participant import file for bulk upload
When someone is registered through the admin panel by clicking Add New Participants, they will receive an activation email immediately as organiser saves the Profile.
Users added directly from the Admin Panel are always created with the Active Status
For detailed information about the attendees, simply click on their name, and the information will be displayed.

Participant Edit Page

Total number = All individual accounts (dynamic number, changes - as filters are applied)
Total active visitors = All active visitors - Exhibitor Team Members
Total registered visitors = Registration count of all visitors (summation till date) - Exhibitor Team Members
Enable toggle from General → Settings to keep a check on Fake email used to create an account on EP.
Admin Panel → Management → Participants, shows the warning message for use of fake email address for any account creation

Export QR code
Organizers can export participants' QR codes based on their category and status in pdf format.
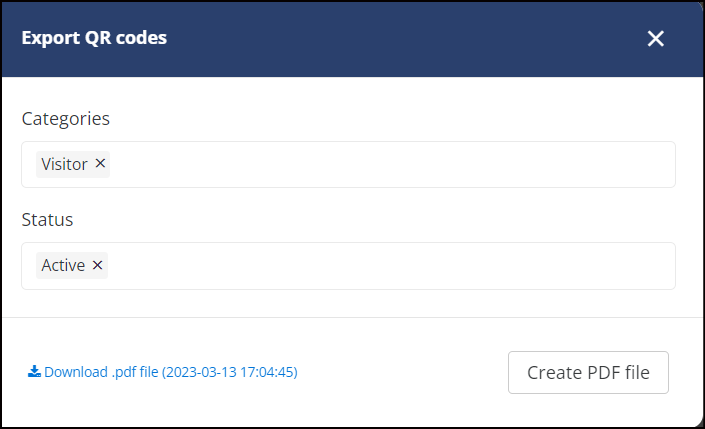
Exporting QR code: Admin Panel
Batch Send Activation Emails
Also, there is an ability to send activation emails to a required number of visitors using Batch Send Activation Emails:

While clicking this button system gives you options to choose a group of users with a particular category or status:
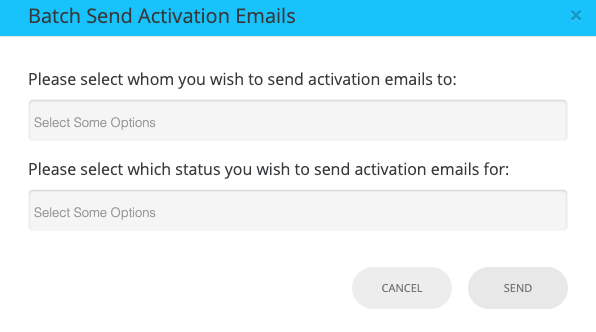
Batch Send: Activation Email
All attendees differ according to their statuses. To outline the particular meaning we have created a separate article: Registration Statuses
Bulk Print Badges
The bulk Badge Print feature on the Participants Tab allows the organizers to download the badges in bulk for printing purposes.
Bulk Print Badges
Simply click on the Bulk Badge Print tab, and it will generate a file with the file name Get Batch File (2023-09-13 11:59:03) along with the date and time stamp when the file is downloaded.
Upon clicking the file generated, it opens in a new browser tab, displaying one badge per page along with the date & time of download. The link to the batch file with badges & Page counter.
The Bulk Badge Print feature works seamlessly with both standard and custom filters, or even without any filters applied.
The number of badges in the generated file always matches the number displayed in the Total Members field.
Once the file generated, Print badge status of all participants is set as printed.
If the organiser wants to regenerate the links to the files for printing badges (for example, if there are more badges included) they can click on the button Batch print badges.
Actions
This section gives the organiser quick access to the below functionalities for that particular user
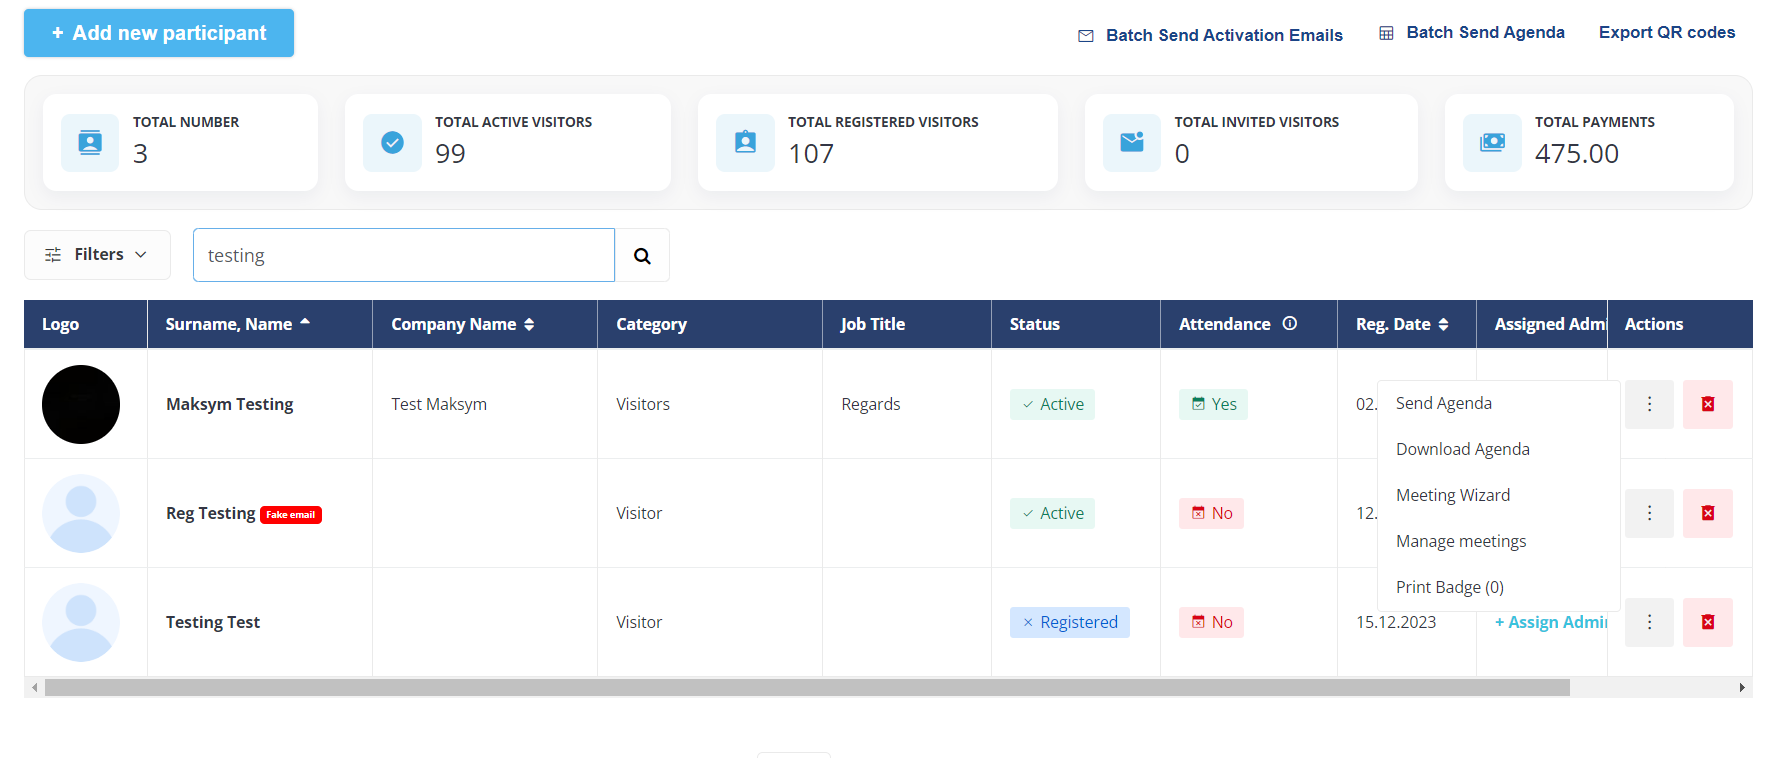
Actions
Send Agenda: The Organiser can send an agenda to this user by clicking on the Send Agenda button under Actions
Download Agenda: The organiser can download the agenda for the select user from the Action button
Meeting Wizard: This setting allows the organiser to schedule the meetings between the users from the admin panel by clicking on the meeting wizard option under the Action button on the extreme right of the screen. To read more Meeting Wizard
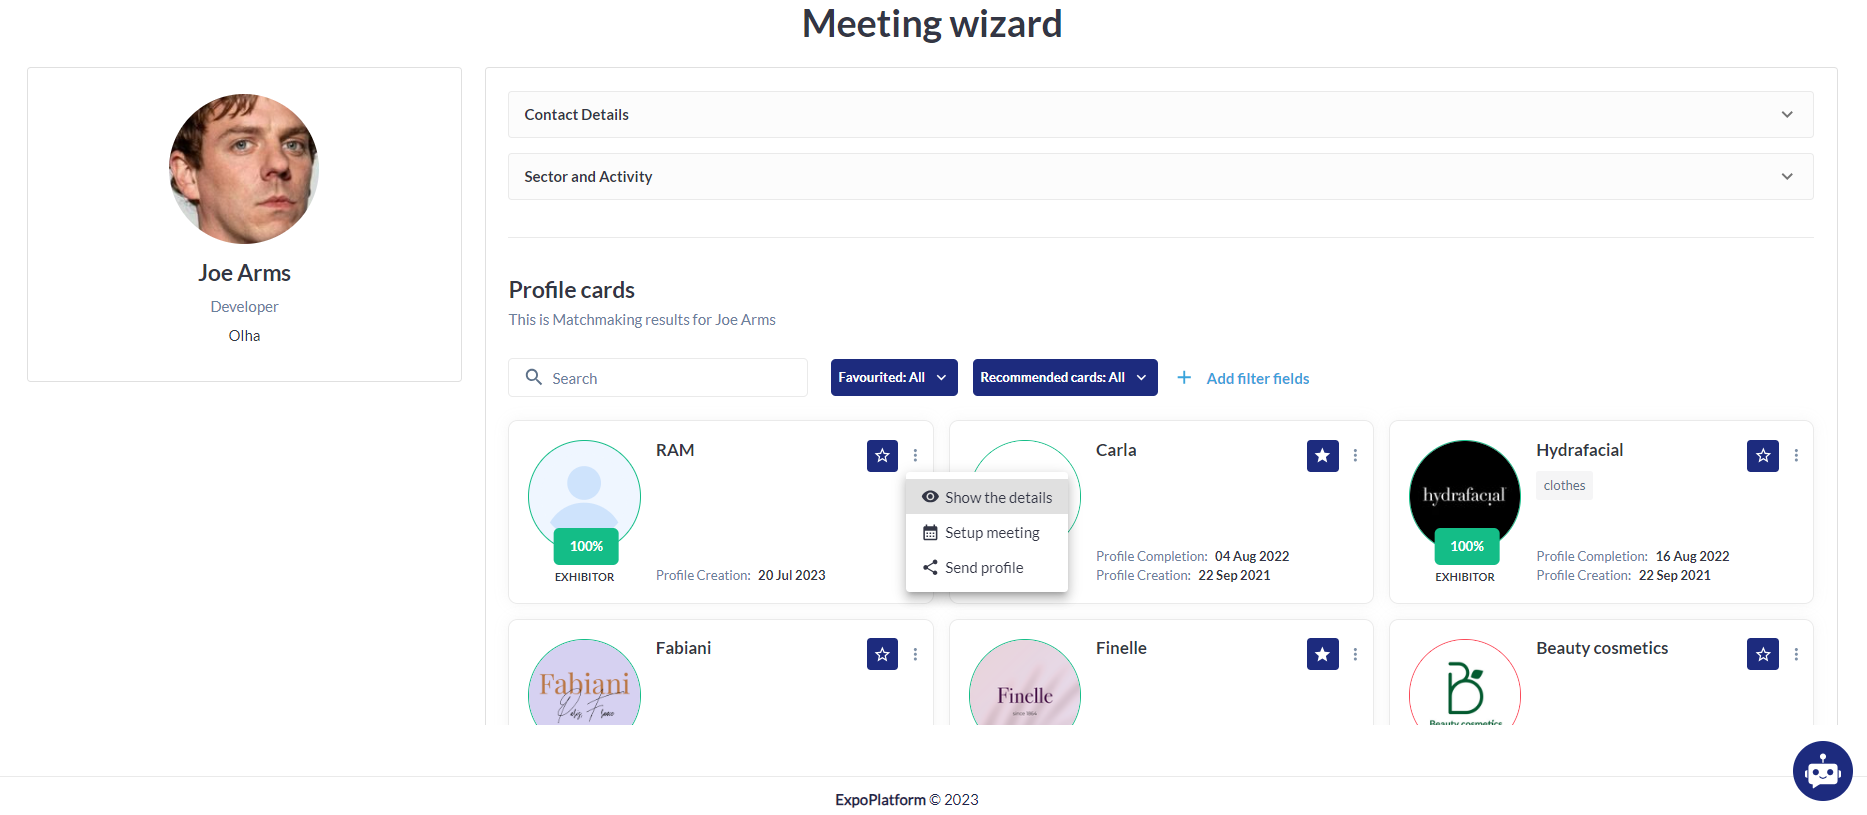
Meeting Wizard
Steps to schedule Meetings using Meeting Wizard
When the Organiser clicks on Meeting Wizard he is redirected to the Meeting Wizard page from where he can schedule the meeting between the participants
Organiser can filter the profile based on Favourited and recommended profiles for the user.
Organiser can also user standard and custom filter to filter out the data on this page
Click on the 3-dot button on the profile of the user → Click on Setup Meeting → Select if you want to book a table meeting(if enabled for the user) or a regular meeting
Fill in all the meeting details and Schedule the meeting
These meetings are tagged as created by the Organiser and are already scheduled with confirmed status
Manage Meetings: From the Action button on the Participants List page, organizers can access all scheduled meetings, (Confirmed, Pending, Incoming, and Cancelled)for the user.
Print Badge: This setting allows the organiser can download the badge for the user directly from the Action button on the extreme right
Customer Service: This setting under the Action button allows organizers to directly impersonate any user profile from the Participant list page, eliminating the need to navigate to the user edit page on the admin panel first.