Feature Purpose:
This feature allows you to view all checked-in participants in your speed networking session in real time.
Working with this Feature:
Once you start to check people into the session, you’ll be able to see who has been checked in by navigating to “Networking & matchmaking → Speed Networking → Speed networking session”.
-
Until the first participant has checked-in, this page will be empty. After that, newly added participants can be viewed instantly after check-in by refreshing the page.


Page consists of:
-
“Back to speed networking” button – redirects user to the general speed networking page.
-
Page heading with the current session name
-
“Session settings“ button – opens a pop-up with all the session settings from the session edit page. Data in the pop-up can be edited and saved, except particular fields that become disabled after the time set in the field has alrady been reached.
-
Timeline with counters
-
Refresh without reloading button – It’ll refresh the content without reloading the page.
-
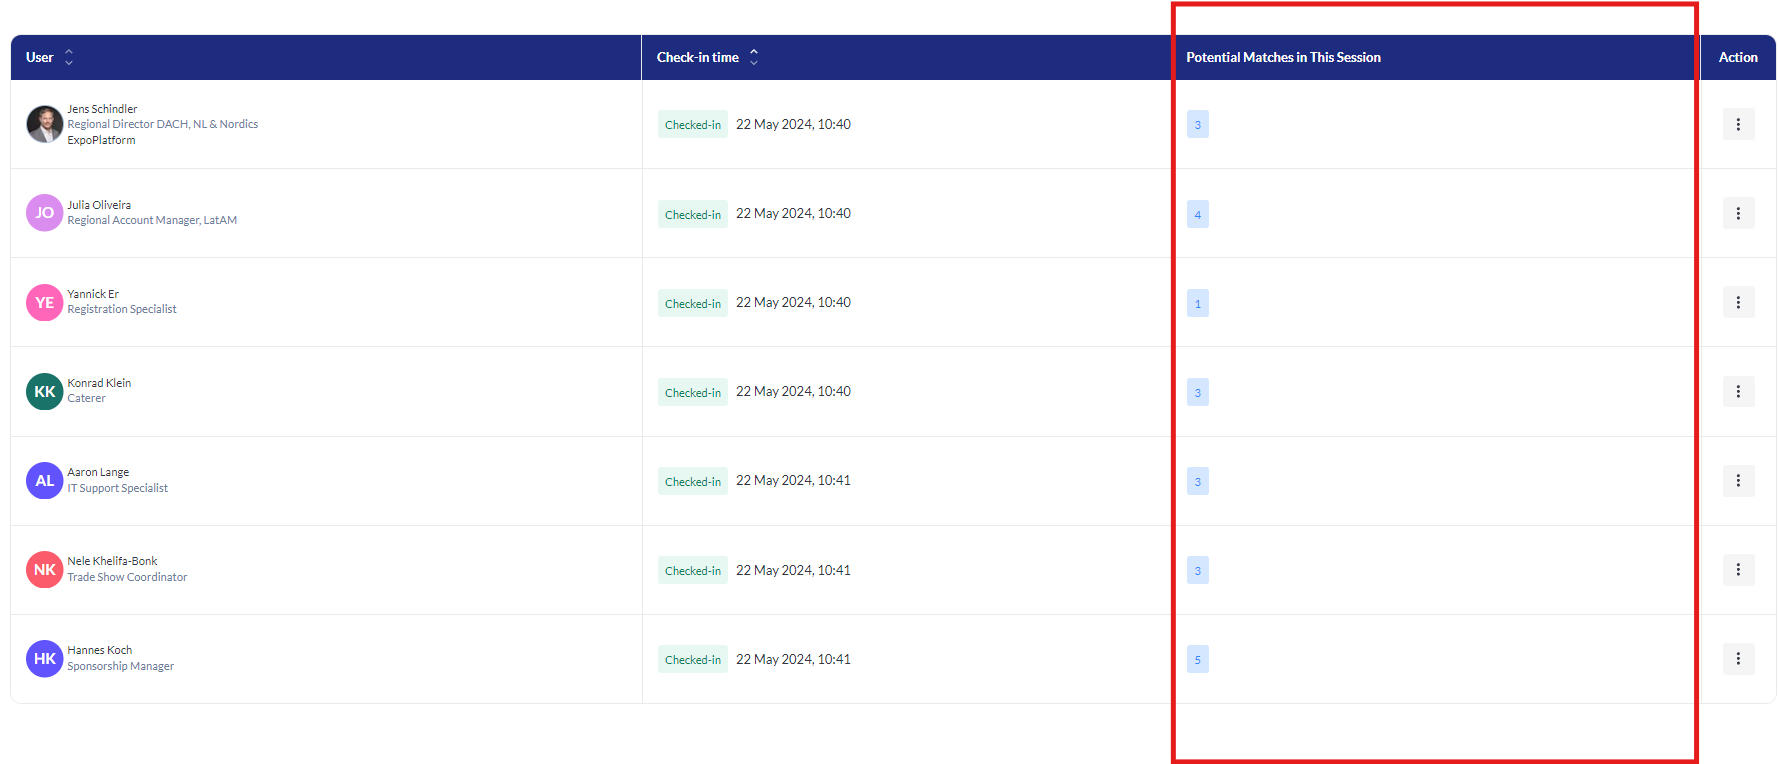
Check in table with participant and check in information
-
Search field: Use this field to find users by entering their name.
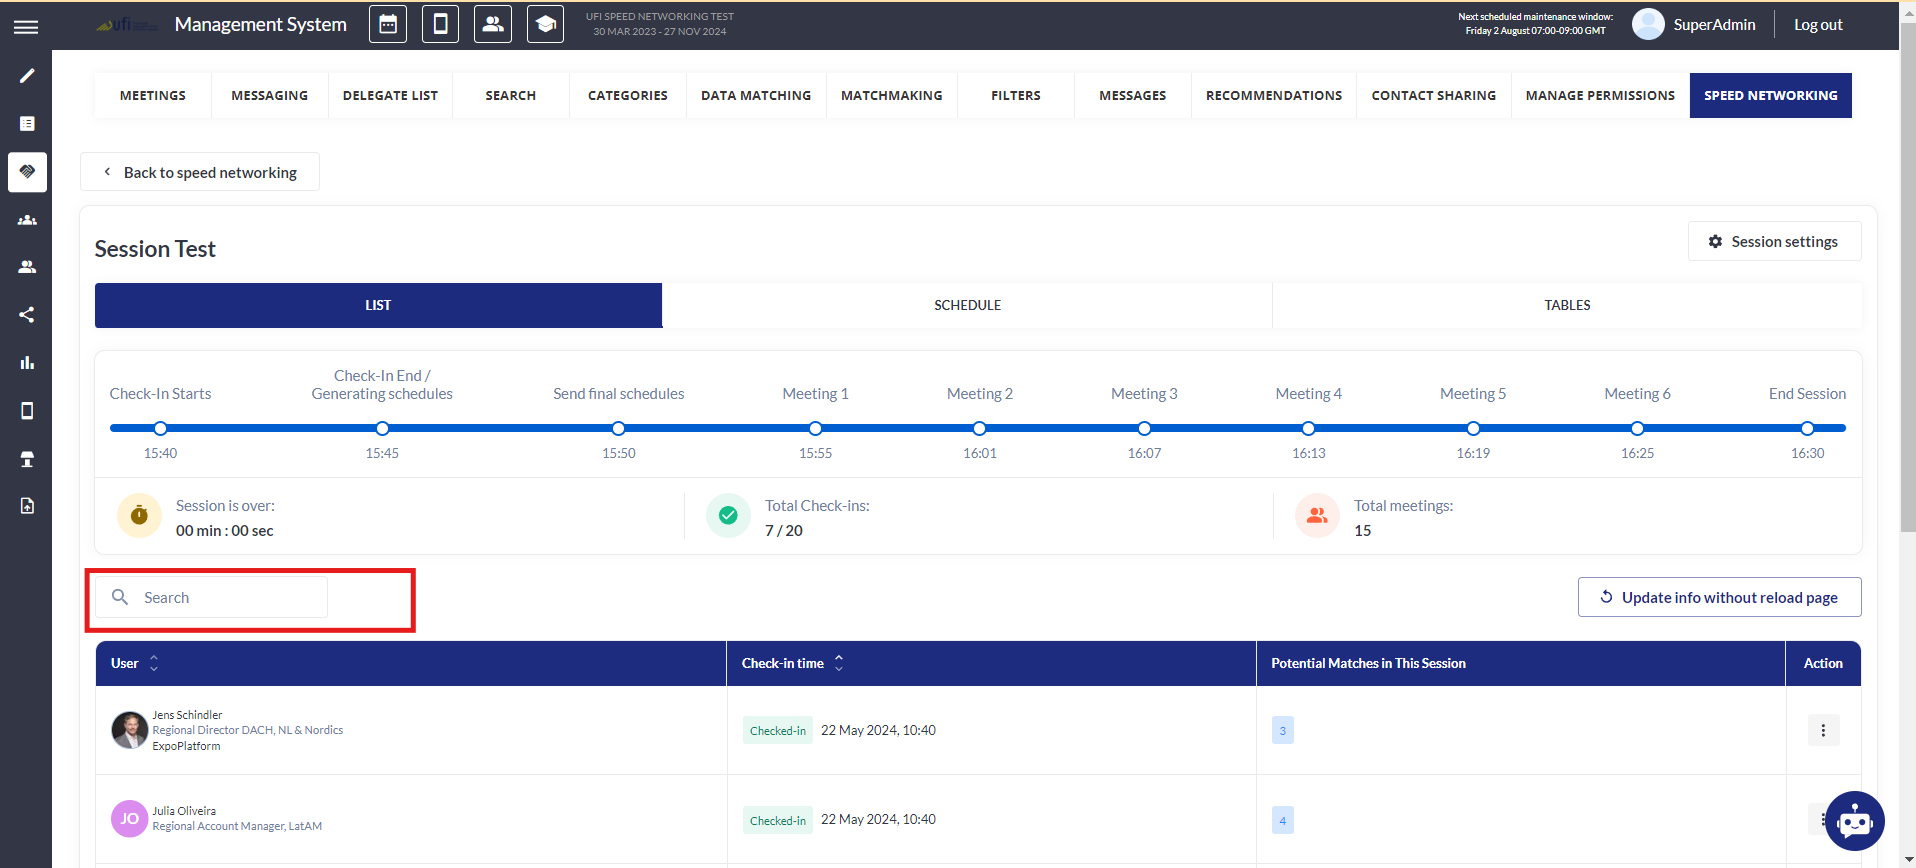
Checked-in list
The list of people on the list is based on data from the check-in app, which is used to scan a user’s badge to add that user into the speed networking session.
Note that attendees cannot be added to the session if check-in is attempted outside the designated check-in period, which is defined by the “Check-in start” and “Check-in end” times in the session settings.
Information will be updated on page refresh.
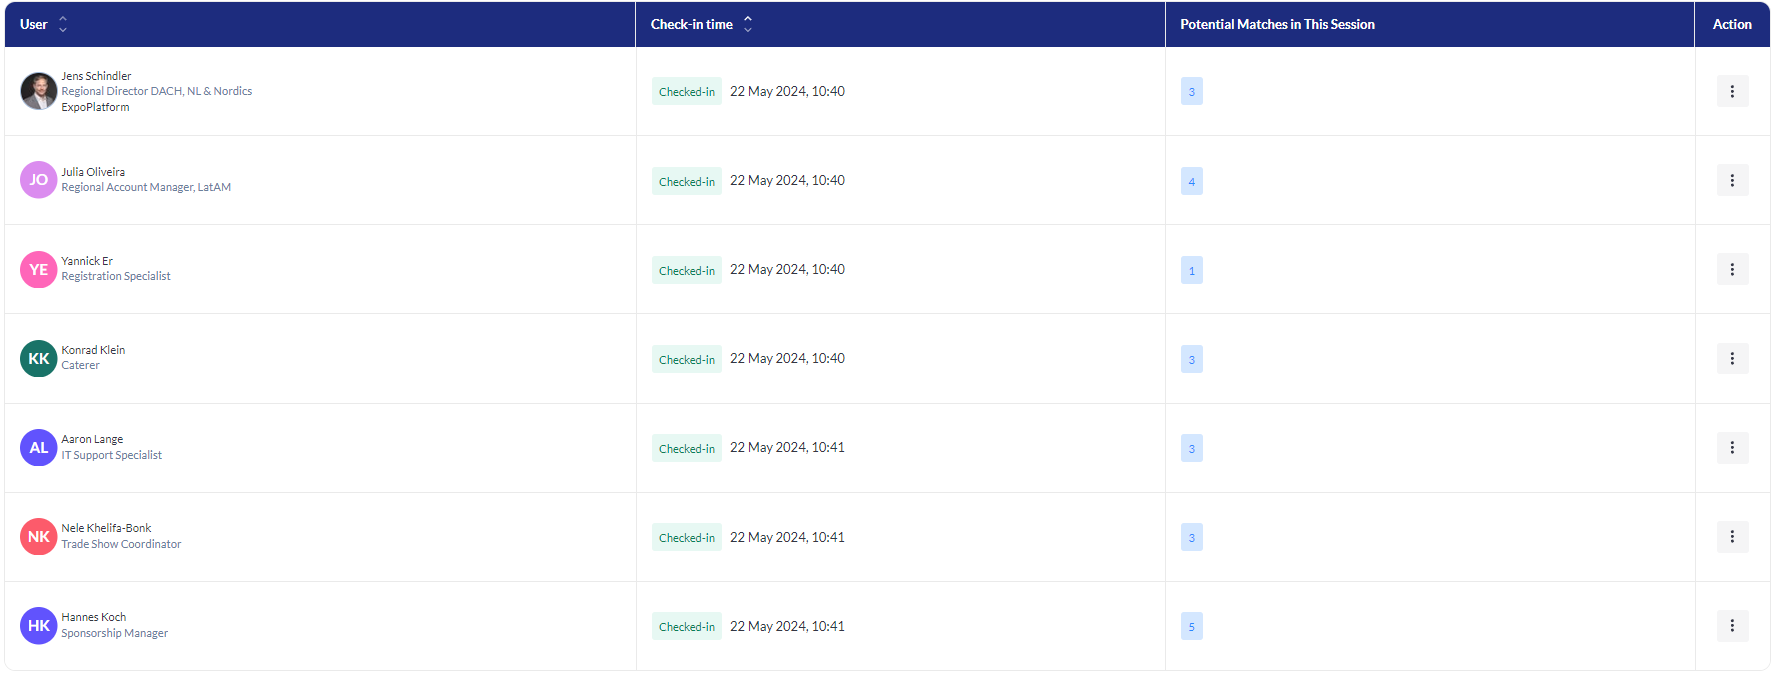
For each user the following data is shown:
-
User
Shows: Photo, Name and Surname, Job title, Company name.
Data in the column can be sorted in alphabetical ascending and descending order. Default sorting in the table is by user in ascending order (A-z).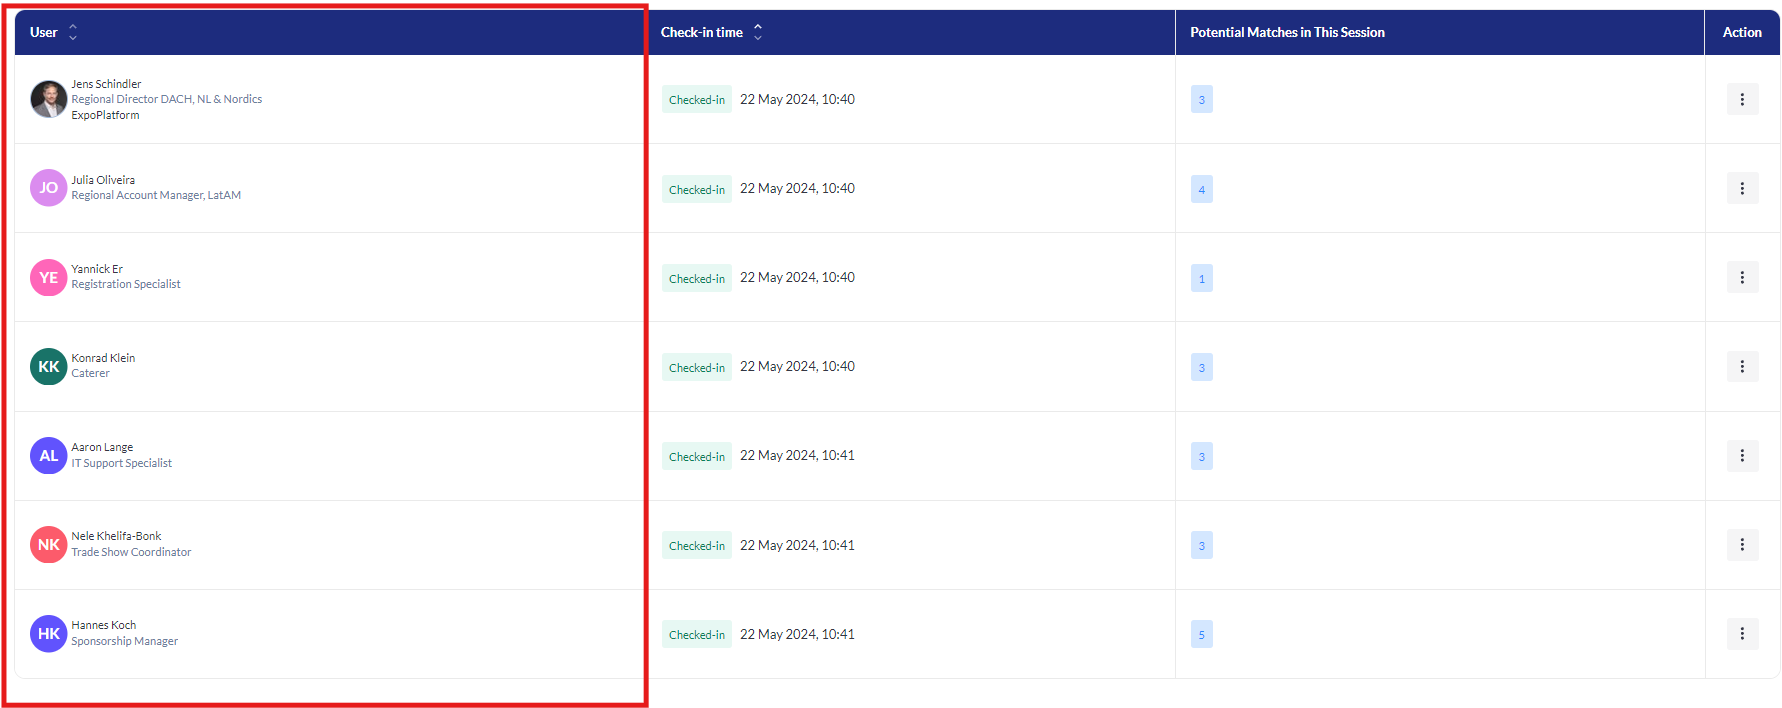
-
Check-in time
Date and time the user checked-in, shown in the same timeone set on “Time system“ setting at event general settings /admin/general/settings..
Data in the column can be sorted by check-in time – ascending or descending.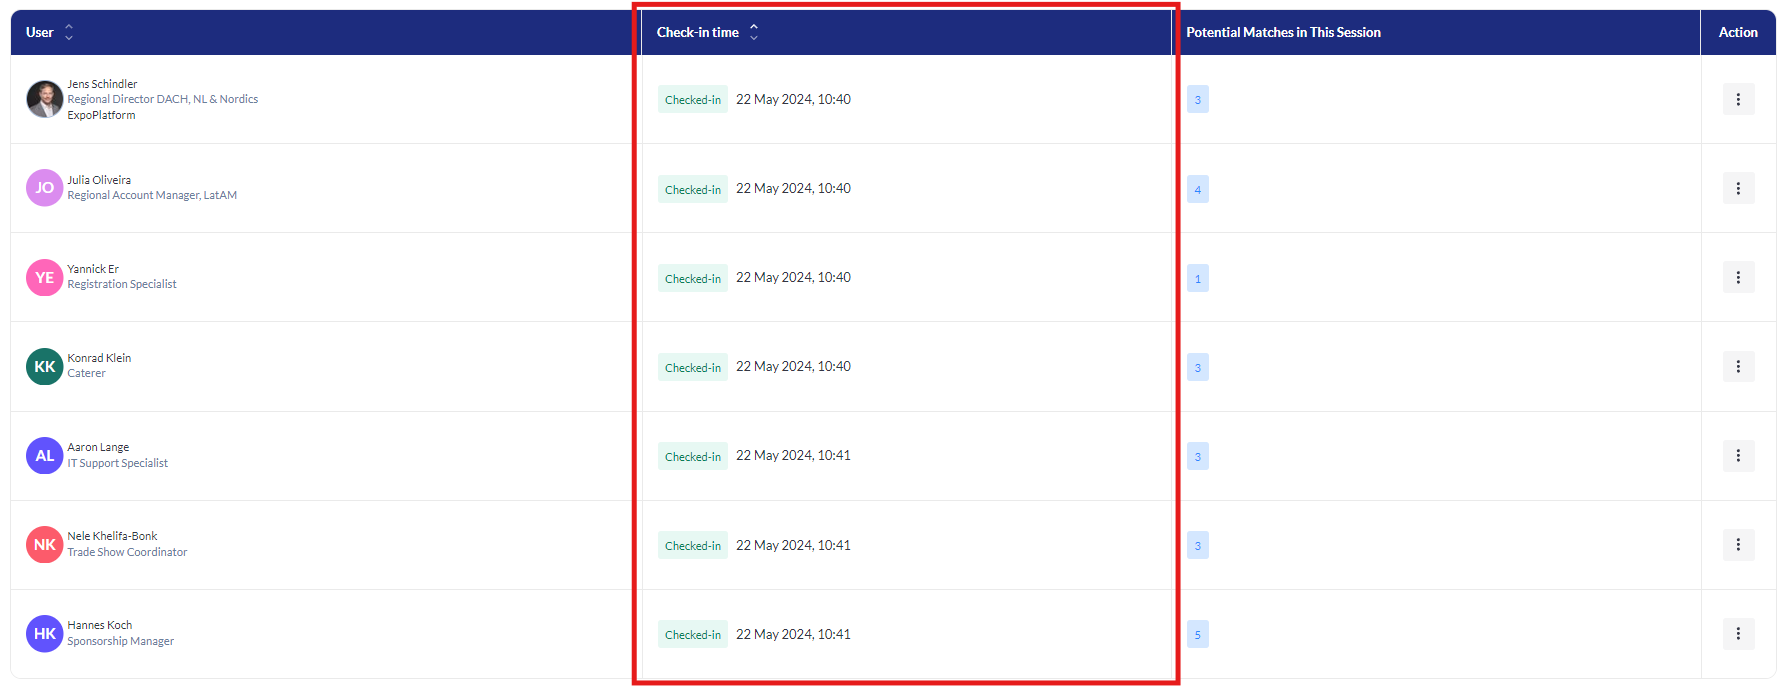
-
Potential Matches in This Session
This column shows the number of potential meetings that could be generated between this user and all other users according to their matchmaking preferences (interest and activity categories). This number is calculated using participant data; likes and dislikes are not taken into account in this number.
Information is updated on page refresh.
-
Actions
This column contains a three-dot “Actions“ button.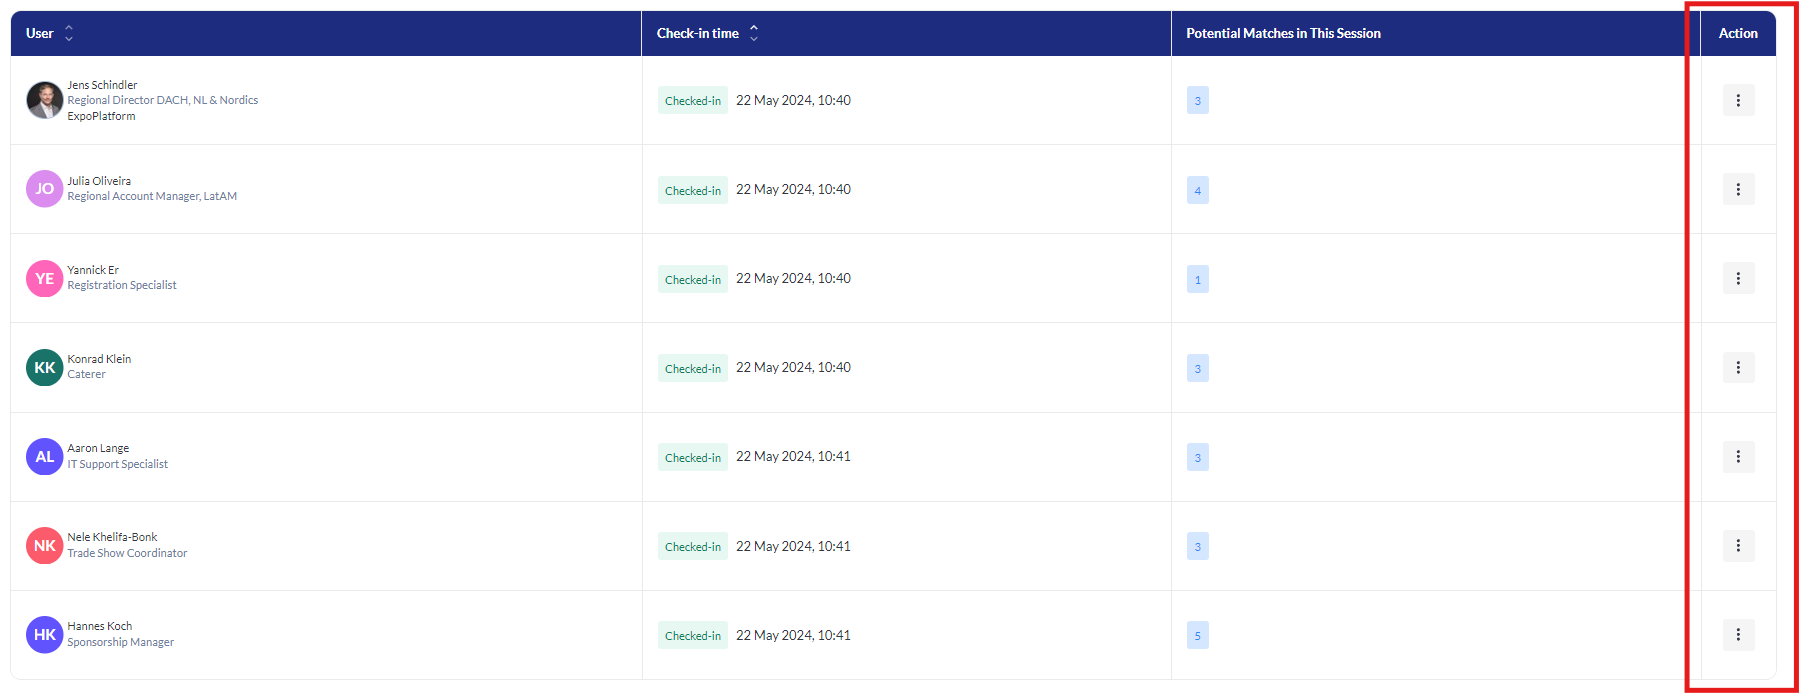
Actions button
When user clicks on the button, a window with options “Show QR code” and “See Schedule“ appears.

-
Show QR code
-
When user clicks “Show QR code”, then a “QR Code“ pop-up should appear. By scanning the QR code you’ll have access to that specific user’s view.
-
-
See Schedule
-
This option is active after the meeting schedules have been generated. The button redirects to the “Schedule“ tab with a highlighted line with meetings of that respective participant.
-
-
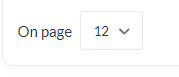
Users per page
By default you can see only 12 users per page, but you can change this on the bottom of the page and show up to 60.
Troubleshooting:
If you are not able to see the slots, or if anything is looking off on this page, please clean your browser cache.