Feature Purpose:
Provides organisers with the ability to setup a walk-in speed networking session
Working with this feature:
Requirements
There are several requirements in order for the speed networking session to work properly as follows.
1. Participant Data
Required: Name, Surname, Email, Activity Category and Interest Category
Nice to have: About me, Social links, Job Title, Company Name
2. Interest and Activity Categories
All event participants need to have interest and activity categories selections in order to be matched with other participants. Categories must first be populated in Networking & Matchmaking → Categories and then interest and activity categories will need to be populated for each potential speed networking participant via import or via registration on ExpoPlatform.
3. Badge data
Participants will be added to the speed networking participant pool by having their badge scanned. You can use EP’s badge or you can use your own badges, but if using external badges this data will need to exist in EP. To use external badges you need to have the qr code data as string (text) and then to import this as participant external ID. In case of any doubt, reach out your TAM or support@expoplatform.com..
4. Floorplan Requirements
Go to Management → Floorplan to set up “Conference Hall” and “Check-in Zone” If you’re not using our floorplan, any image can be added to create a hall.
For speed networking check in zone, the hall created needs to be set as “Conference Hall” and “Check In zone”

5. Email setup:
Users will receive 3 emails. One when they check in to confirm that they’re checked in, one with their personal schedule sent at the time you will specify in the setup and one 10 minutes after the end of the session asking them to rate the session .
These emails can all can be setup under Meeting Formats > Speed Networking > Email templates
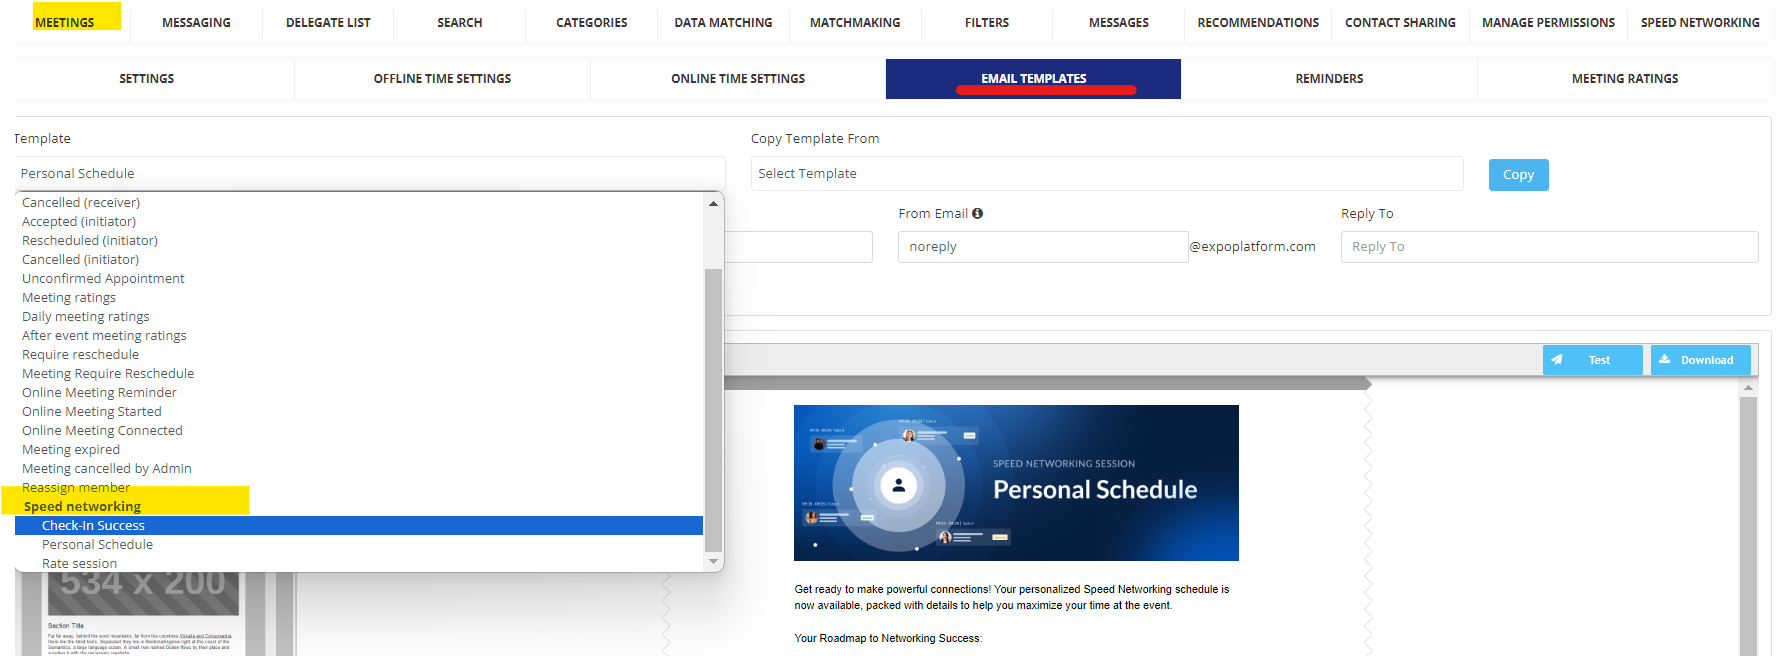
On the check in and rate session email it is required to add the {USER_INTERFACE} variable. This will be a link redirecting users to their personal interface. Without this variable in the check in email, users won’t be able to review and see their matches.
On the Personal Schedule the {SESSION_MEETINGS} variable is required for the meetings list.
Please note, you can also customize the banner at the top of the email and the email footer.
Setting Up the Speed Networking Session
-
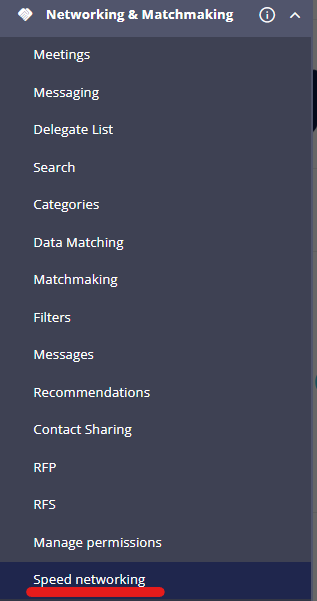
To set up the session you first need to navigate to Meeting Formats > Speed Networking
-
Click on create new session

-
Fill out the session form with details such as session name, time, date, etc. :
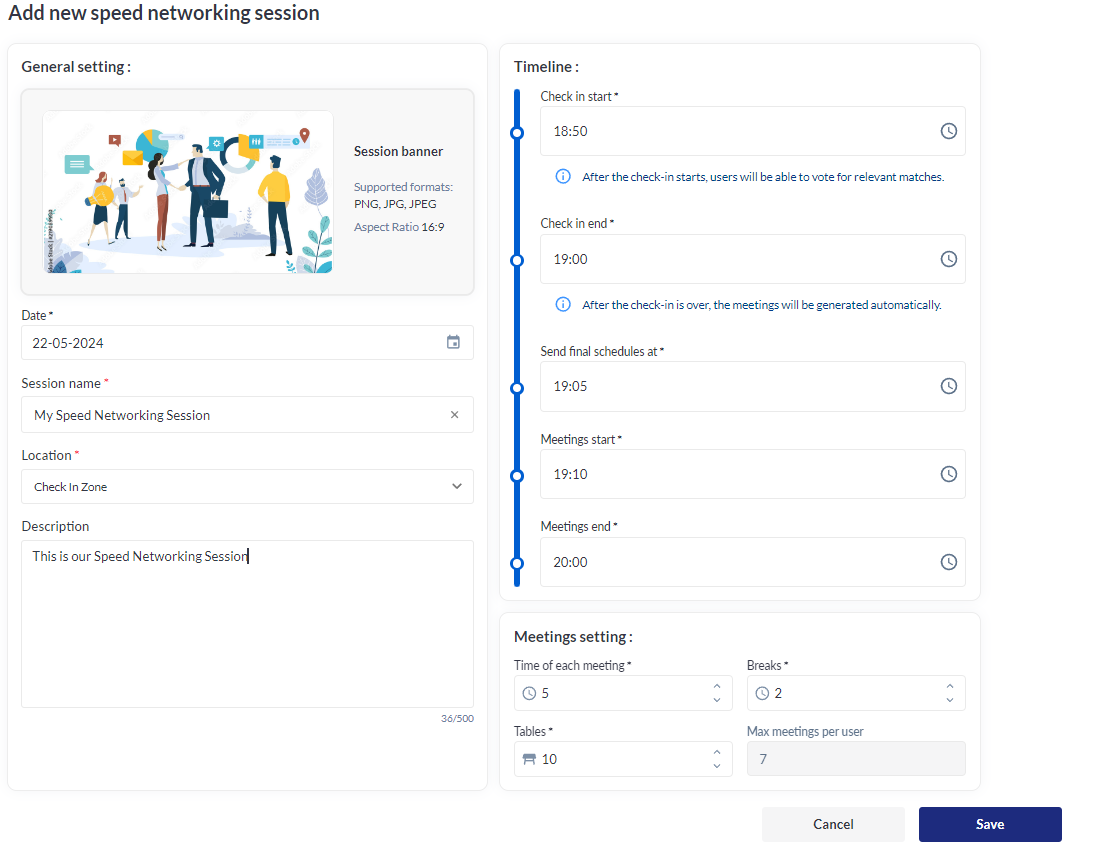
In the General Settings part of the form on the left:
-
Add Session Name
-
Location → Check in one for the speed networking session.
Needs to be the hall marked as Conference Hall and Check in Zone as discribed on the floorplan requirements on this article.
In the timeline part of the form on the right enter:
-
Time that check-in will start → Beginning at this time, users scanned at the session will receive the check in email and will be able to review their matches
-
Check in end → At this time, users will have completed voting for their matches and all of the meetings will be generated
-
Send Final Schedule at → This is the time when the email with the meeting list should be sent
-
Meeting Start → Meetings will start at this time
-
Meeting end → Meetings will end at this time
In the meetings settings part of the form on the right enter:
-
Time of each Meeting → Duration of each meeting
-
Breaks → Amount of time between the end of one meeting and the start of the next so people can move to their next meeting
-
Tables → Number of tables you have for the speed networking session
-
Max Meetings Per user → Calculation of the maximum number of meetings per user, according to the settings.
Check in End and Send final schedule stage must last at least 5 minutes.
The matches happen between 2 particpants so it’s important to set enough tables to accommodate all participants
Calculated Fields
To find out how many meetings a user can have in a given time period, we consider the following:
-
Session Duration: The total time available between the start and end times of meetings.
-
Meeting Time: The length of each individual meeting.
-
Breaks: The time needed between meetings.
Based on these factors, the system calculates how many meetings can fit into the available time, including the necessary breaks between them.
The send final schedule time must be set between check in end time and first meeting start time
Editing the Speed Networking Session:
To edit a session that you’ve already set up:
1. Click on the 3 dots on the session card
2. Make the required changes
3. Save the session
Limits on editing a speed networking session:
-
Session meetings settings fields cannot be edited after “Send final schedules“ time has been reached.
-
Session timeline settings fields cannot be edited after their respective time has been reached
-
After “Send final schedules“ time has been reached, “Meetings start” and “Meetings end” fields cannot be edited
Checking participants into the session
This is done using the ExpoPlatform Check-In app to scan participant badges.
-
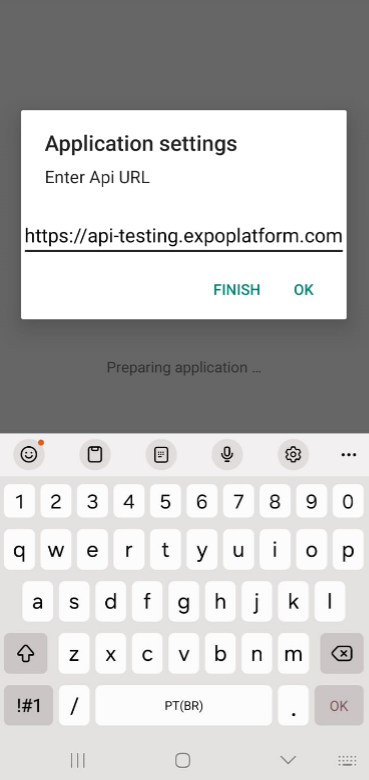
Once you’ve downloaded the app from the stores, add the URL from your admin panel without the last “/” as shown in this example: https://api-testing.expoplatform.com
-
Select your event and log in with your admin credentials (the same credentials you use for logging in into the ExpoPlatform admin portal)
-
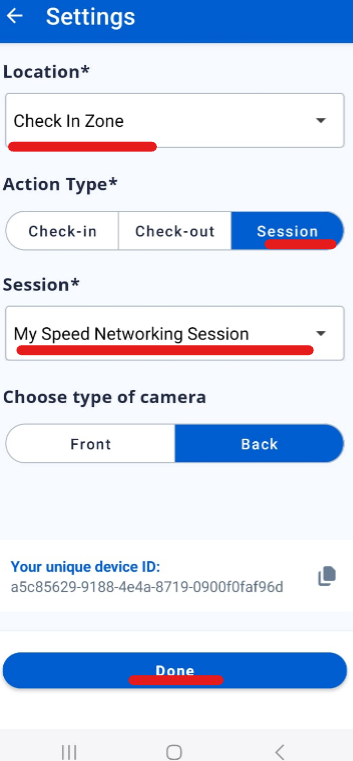
Select the location that you set up
-
Choose action type = Session
-
Select the correct session
After this setup you can start scan people into the speed networking session.
Troubleshooting:
Issue: Speed Networking is not shown under Meeting Formats
What to check: Check if that speed networking has been turned on in both Global Module Management and in the event module management. By default this setting is toggled to OFF.
Issue: External Badges cannot be scanned
What to check: Ensure that the correct QR code/bar code details have been added to ExpoPlatform as outlined in the requirements section above
Issue: Badges are not being scanned
What to check: Check if the settings of the check in app are correct as described here
Make sure you have the latest app version by navigating to your store and checking for updates.
Issue: A user has no matches
What to check: Check that the user’s interest and activity fields have been populated
Issue: I am not seeing the action Session on the check in app.
What to check: Check if the hall was marked as Conference Hall and Check in Zone as discribed on the floorplan requirements on this article.