The Edit mode allows organizer to change generated meetings or create new meetings manually.
There are 4 rules of manual meeting creation:
-
User can’t have a meeting with himself
-
User can’t have a meeting more than once within same column (since he can’t participate in more than one meeting simultaneously)
-
A manually created meeting between a Buyer and a Meeting Sponsor becomes a sponsored meeting with a respective mark on it
-
During meeting creation, Buyer meetings and Exhibitor sponsored meetings limits are ignored, so Organiser can create meetings over the limit, even Sponsored meetings
To enable the edit mode of the tables table, click the “Edit“ button. When enabled:
-
The “Edit“ button transforms in the “Editing“ button
-
The “Users“ window appears
-
Drag elements appears on the user cards in the “Tables“ table
-
The Deletion drop zone appears
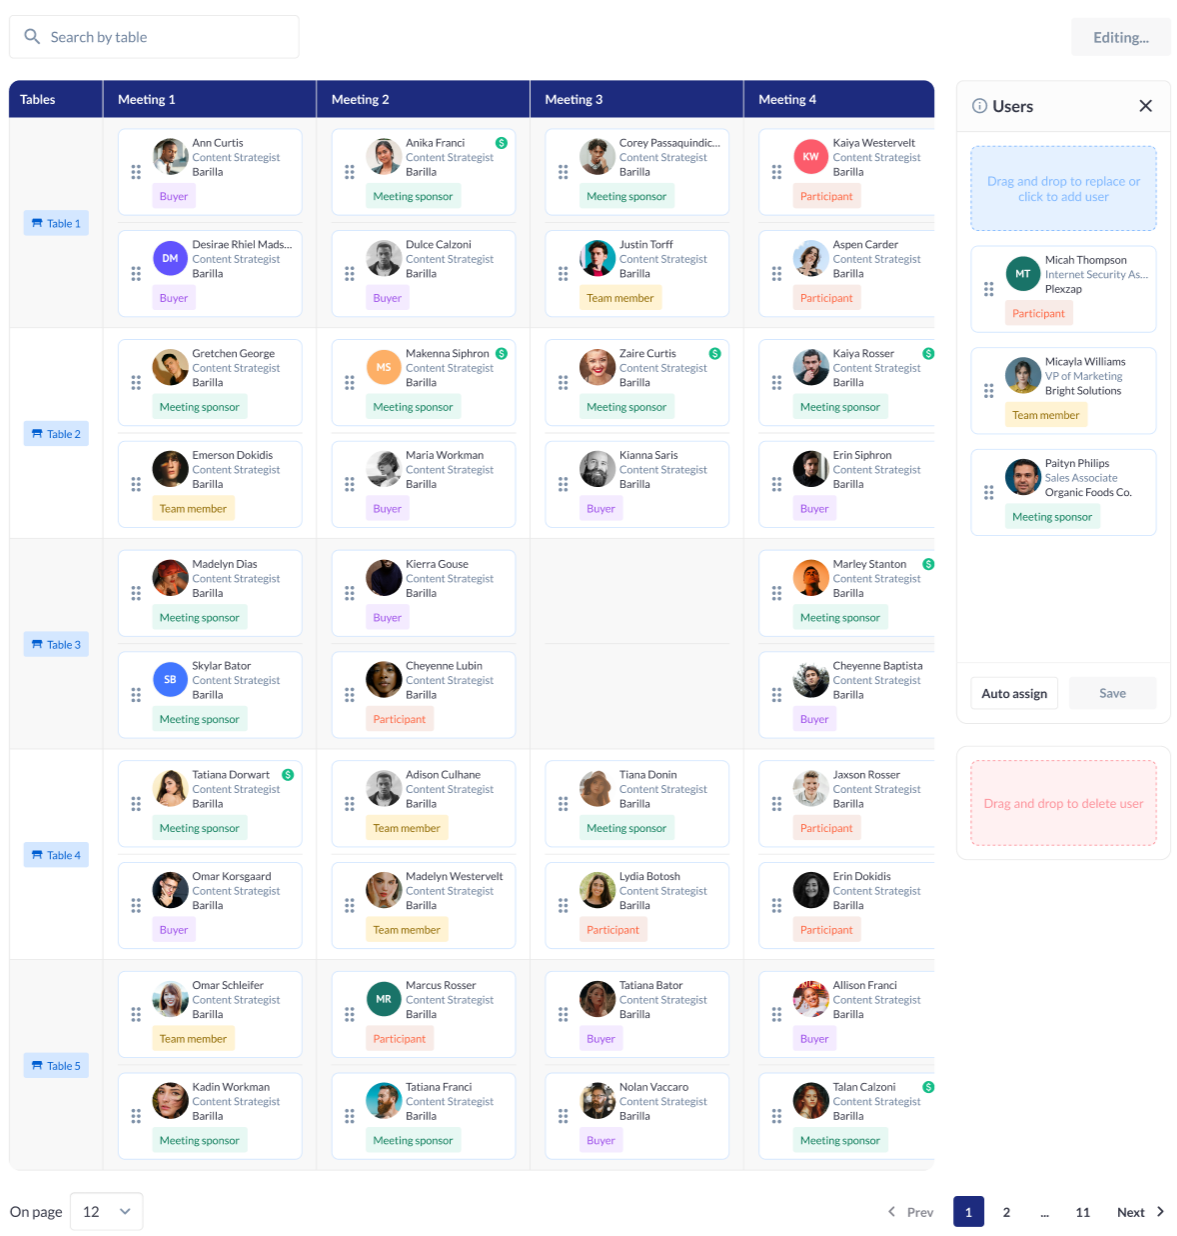
“Users“ window
-
The window consists of:
-
Title
-
Tooltip with the text “To re-arrange, simply drag & drop“
-
“Close“ button
-
Blue drop zone that serves as a buffer
-
Buttons “Auto assign“ and “Save“.
-
-
The “Auto Assign“ button automatically assigns cards in the buffer to not taken slots in the table.
-
The “Close“ button exits the edit mode without saving any changes.
-
The “Save“ button saves all changes and exits from the edit mode.
-
User can’t click the button while the buffer is not empty.
-
Changes can’t be saved if there is at least one uncompleted meeting participants pair.
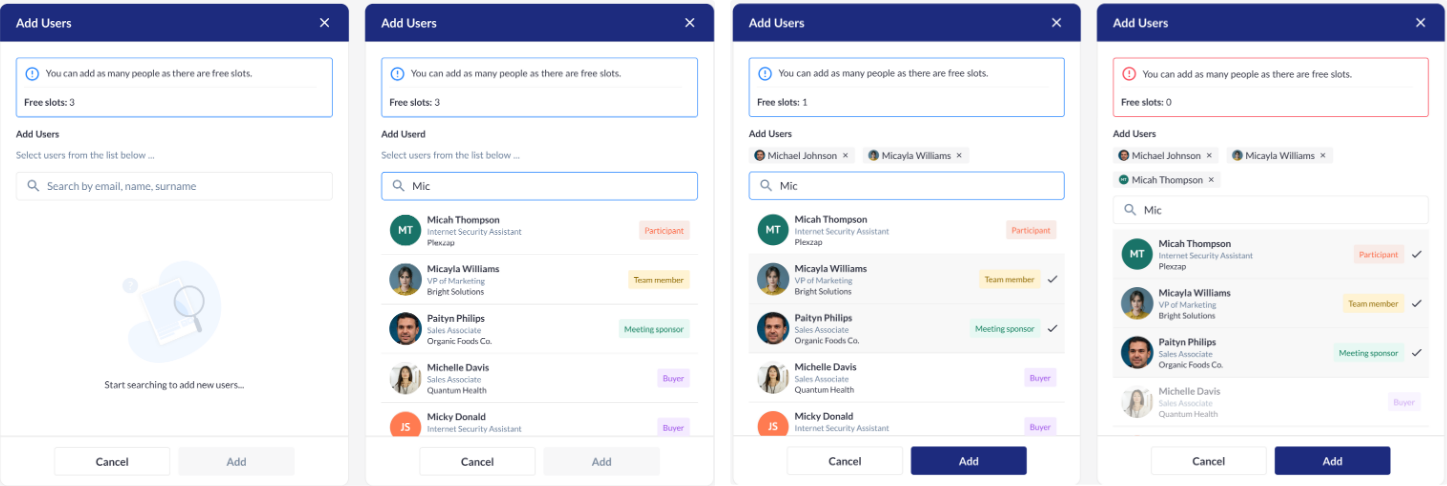
“Add Users“ pop-up
-
The Blue drop zone also can be used for adding more user cards to the buffer. When user clicks on the blue zone, the “Add Users“ pop-up appears.
-
This pop-up has a counter of the maximum number of cards that can be added: user can’t pick more users than the number of empty meeting slots, including deleted users.
-
Options in the pop-up appear only after search request has been entered
-
Search applies throughout the session participants with blue-coloured statuses (according to the Pre-registered list).
Deletion drop zone
-
Organiser can delete a user card from the table. it is important to note that deletion of one card doesn’t mean that that user won’t have any meetings at all.
-
To delete a user card, the card should be dragged and dropped into the red drop zone.
-
After this, a confirmation pop-up with the buttons “Cancel“ and “Delete“ will appear.
-
If user clicks the “Cancel“ button, user card returns to its previous place – table or buffer.
-
If user clicks the “Delete“ button, user card to be removed. Organizer can return the card using the “Add Users“ pop-up.
Deletion of one card from the table doesn’t mean that that user won’t have any meetings at all