Overview:
The Mailing Lists tab allows you to create, or upload, custom email lists of people to whom you want to send emails. These lists can then be viewed on this page and used in Email Sender campaigns.
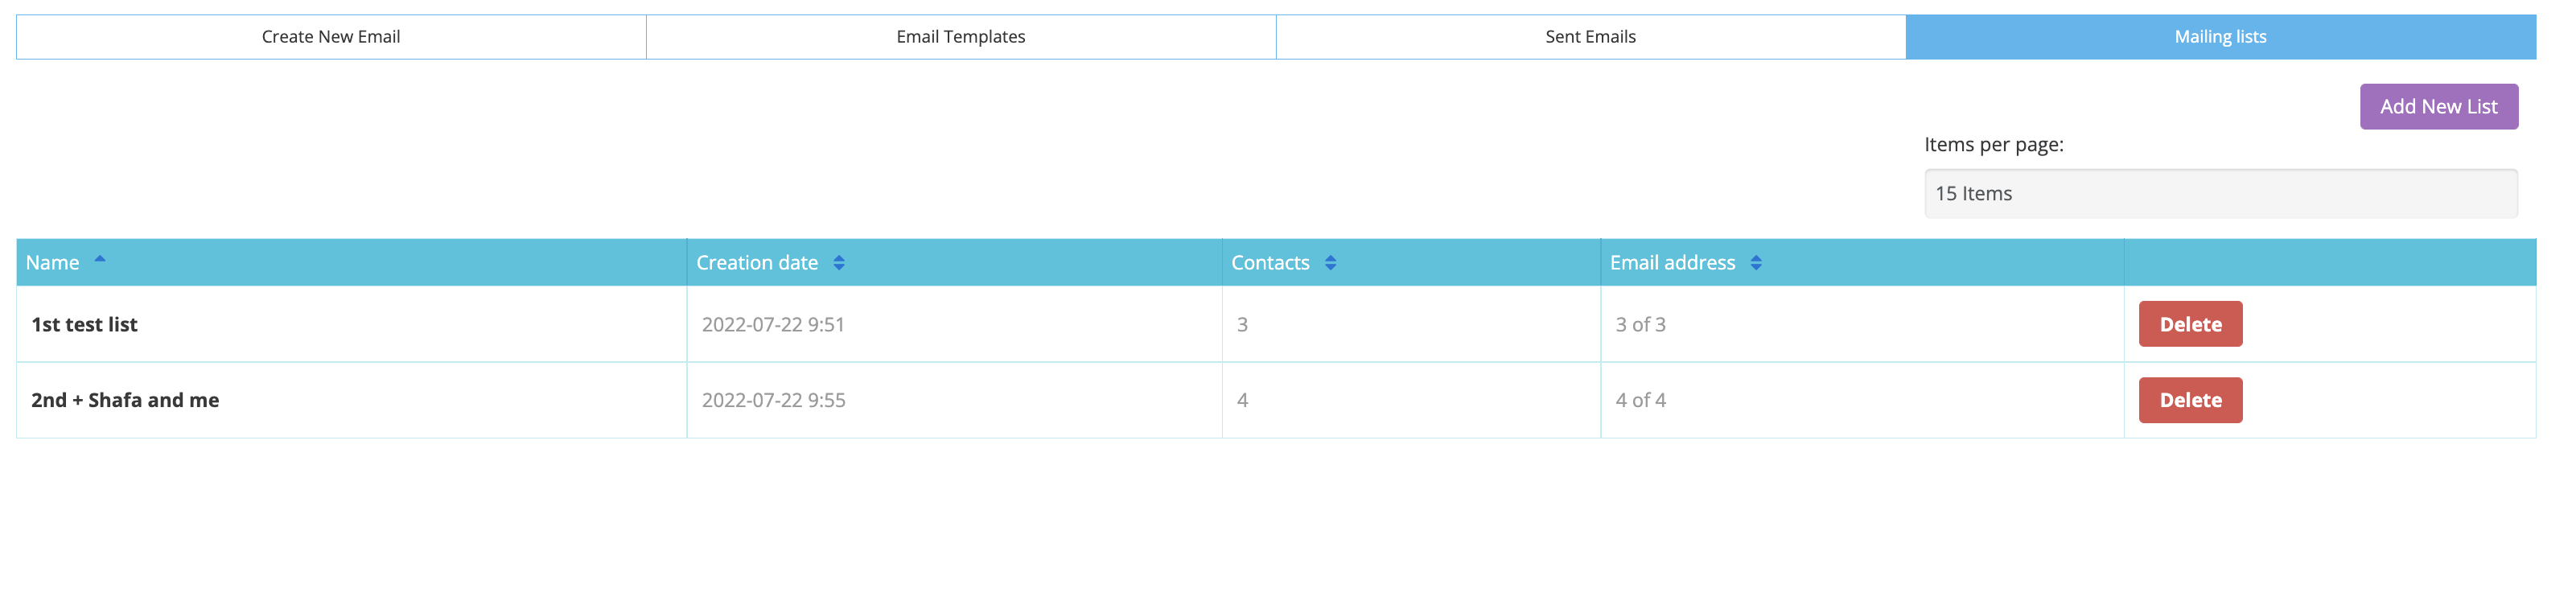
Below, you’ll find an example showing two mailing lists that have already been created.
Elements of this page are:
-
Add New List Button: A purple button at the top right that allows the user to create a new list manually or by uploading an .xls file.

-
Items Per Page Dropdown:
-
A dropdown menu to select the number of items displayed per page.
-
Table Header:
-
Name: The first column, listing the names of the lists. Includes a sort indicator.
-
Creation Date: The second column, showing the date and time when each list was created. Includes a sorting option.
-
Contacts: The third column, showing the number of contacts included in each list. Includes a sorting option.
-
Email Address: The fourth column, displays the number of email addresses in each list. Includes a sorting option.
-
Delete Button: A red button to delete this specific list.
Elements of the Add List page are:
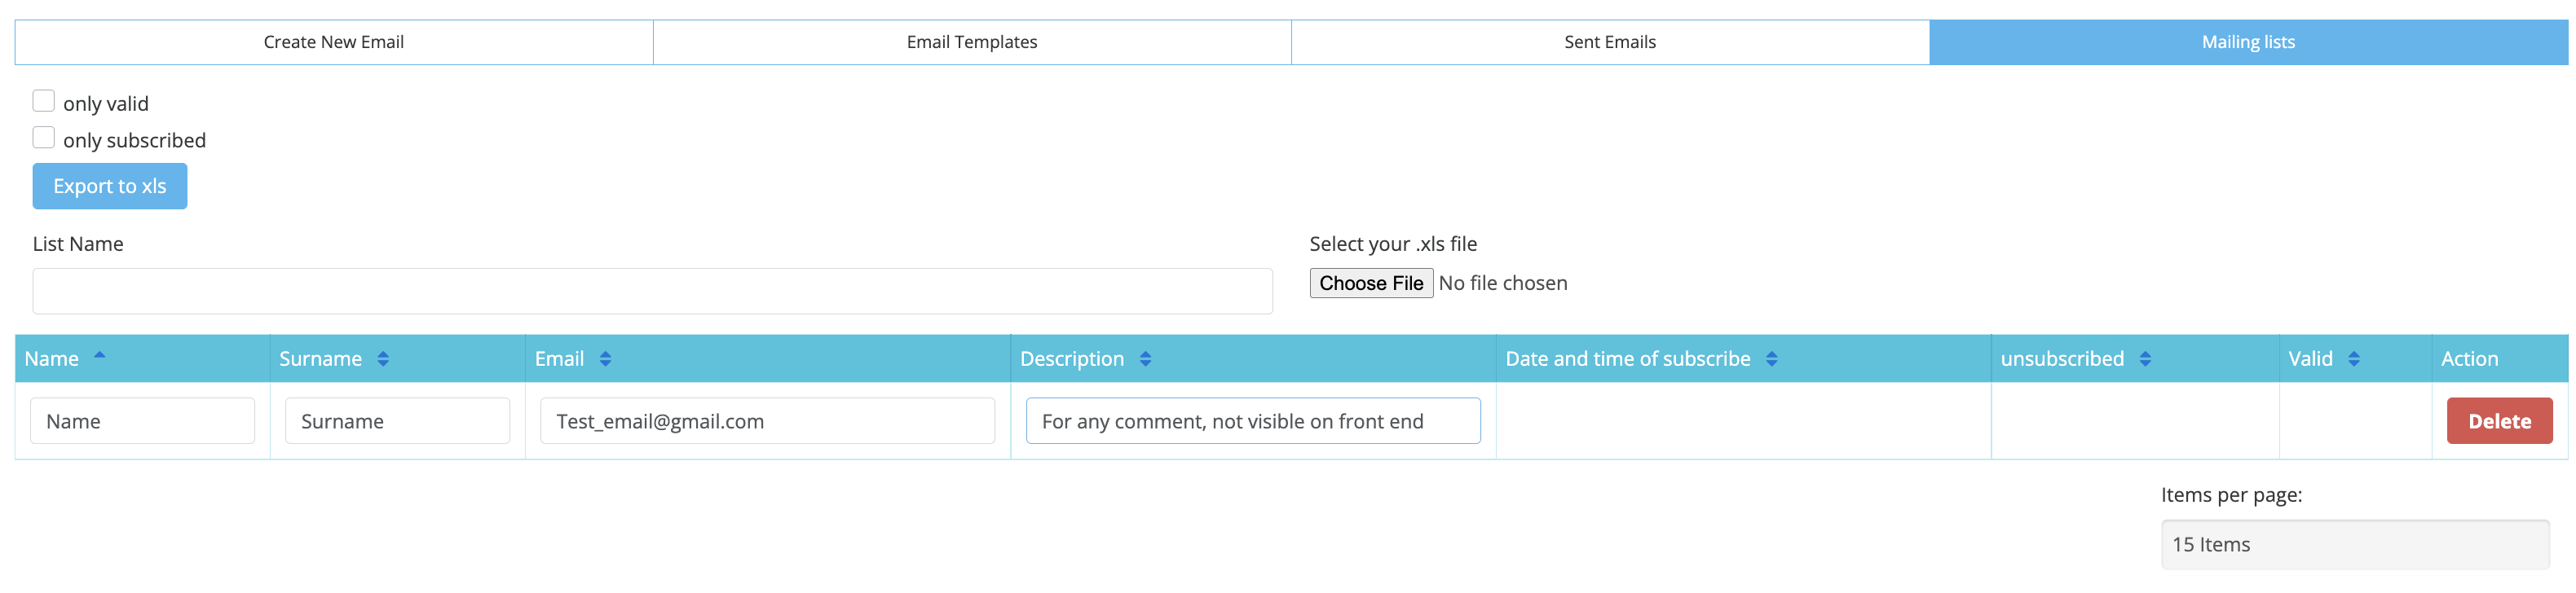
In the image above, you can see an example of adding a new contact. The Name, Surname and Email fields should all be filled in. The description column can be used as an internal comment field, but its information won’t be displayed on the platform. The other columns will be automatically populated by the system.
Header Section
-
Checkbox Filters:
-
Only valid: A checkbox to filter and display only contacts with valid email addresses.
-
Only subscribed: A checkbox to filter and display only contacts who didn't unsubscribe from emails.
-
Export to XLS Button:
-
A blue button to export the current contact list to an Excel file.
-
List Name Input Field:
-
Displays the name of the contact list being edited. The field may allow renaming.
-
File Upload Section:
-
Select Your .xls File: Allows users to choose and upload an Excel file for adding or updating contacts.
Table Header
-
Name: Column for the first name of each contact. Includes sorting functionality.
-
Surname: Column for the last name of each contact. Includes sorting functionality.
-
Email: Column displaying the email addresses of the contacts. Includes sorting functionality.
-
Description: A blank column, for adding descriptions for each contact. Includes sorting functionality.
-
Date and Time of Subscribe: Displays the date and time each contact was added to the list. Includes sorting functionality.
-
Unsubscribed: Indicates whether a contact has unsubscribed (Yes/No). Includes sorting functionality.
-
Valid: Displays whether the email address is valid (Yes/No). Includes sorting functionality.
-
Action: Column with a Delete button to remove individual contacts from the list.
Bottom Section
-
Add Contact Button:
-
A purple button labeled Add Contact with a “+” symbol, likely to add a new contact manually.
-
Items Per Page Dropdown:
-
Allows users to select the number of rows displayed per page (e.g., “15 Items”).
-
Save Button:
-
A green button labeled SAVE to save changes made to the contact list.
Required fields in the .xls file are Name, Surname, and Email. Other fields like Description, Date of Subscribe, Time of Subscribe, Subscribed, and Valid are automatically generated after upload.
Some variables like Barcode, QR, print badge, and Activation Link variables can be used in the email but only for those accounts that already exist on the platform. Otherwise, these details won’t be shared with a custom list of users who don’t exist, and the variables won’t be pulled.