How to add an event admin?
Event Admins are the members of the organizing/show team with access to the admin panel/backend, allowing them to configure and manage event settings. Organizers can grant access to specific modules based on the responsibilities of each event admin, preventing overlapping actions and minimizing the scope of errors.
This article will illustrate the steps involved in creating event admins for your event.
How to add Event Admin
Login to your environment on Admin Panel
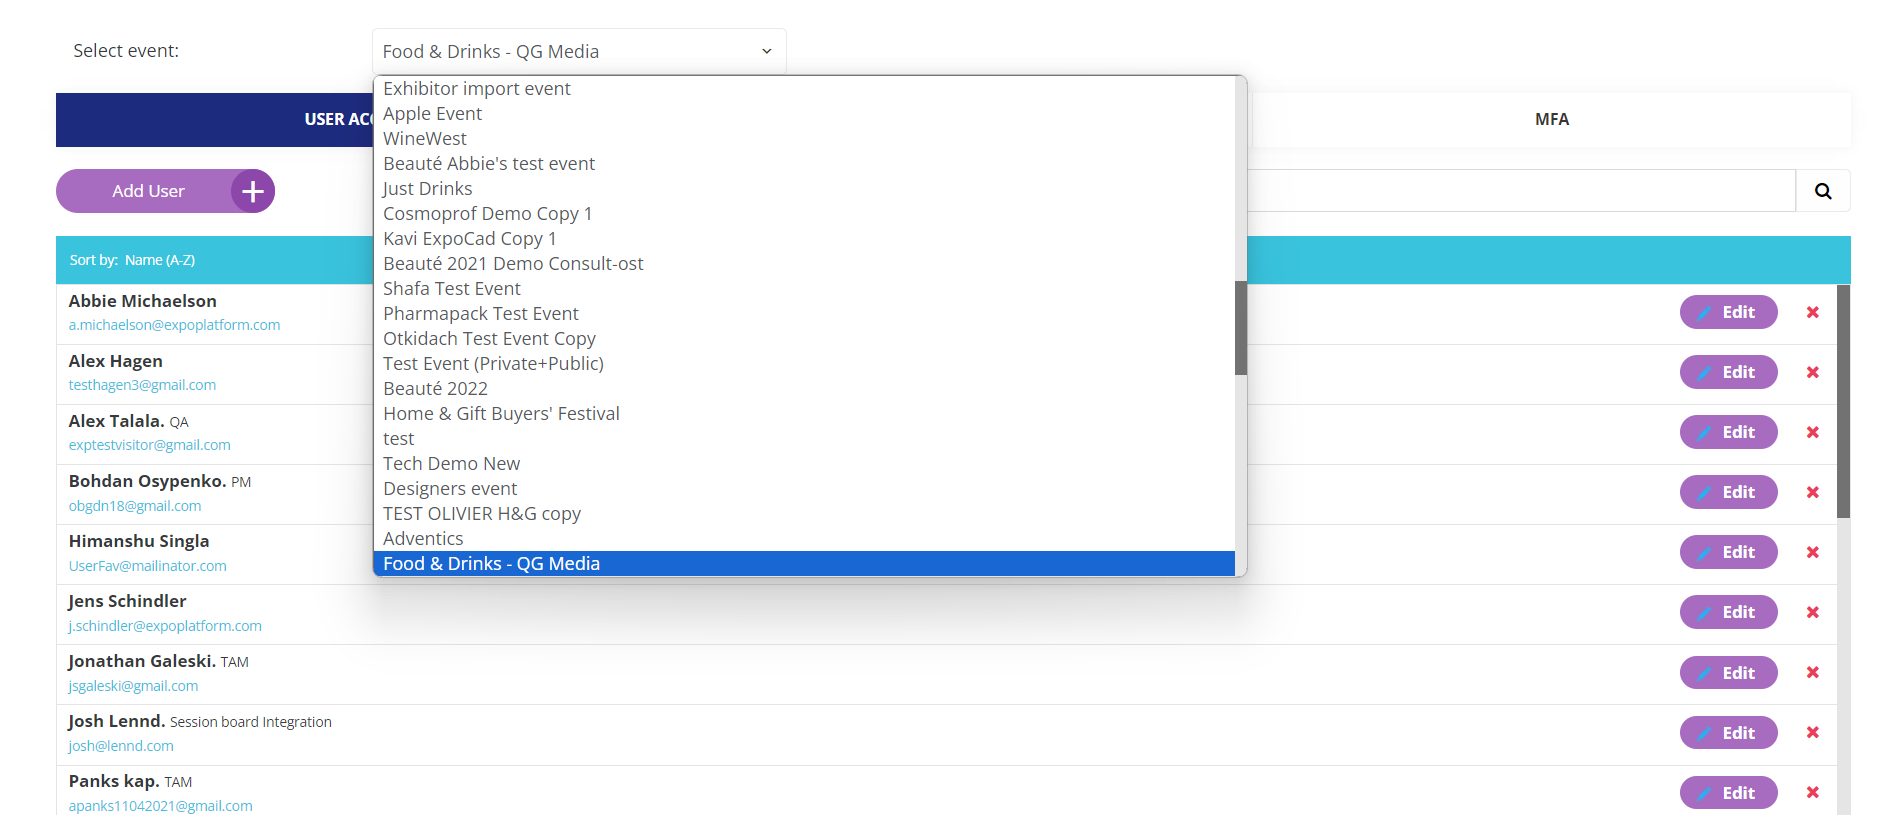
Navigate to Accounts from the top navigation

Adding Event Admin
Now select the event from the drop-down list for which you wish to add the event admin and click on Add User. It will redirect you to the User Access page

Select event to add event admin
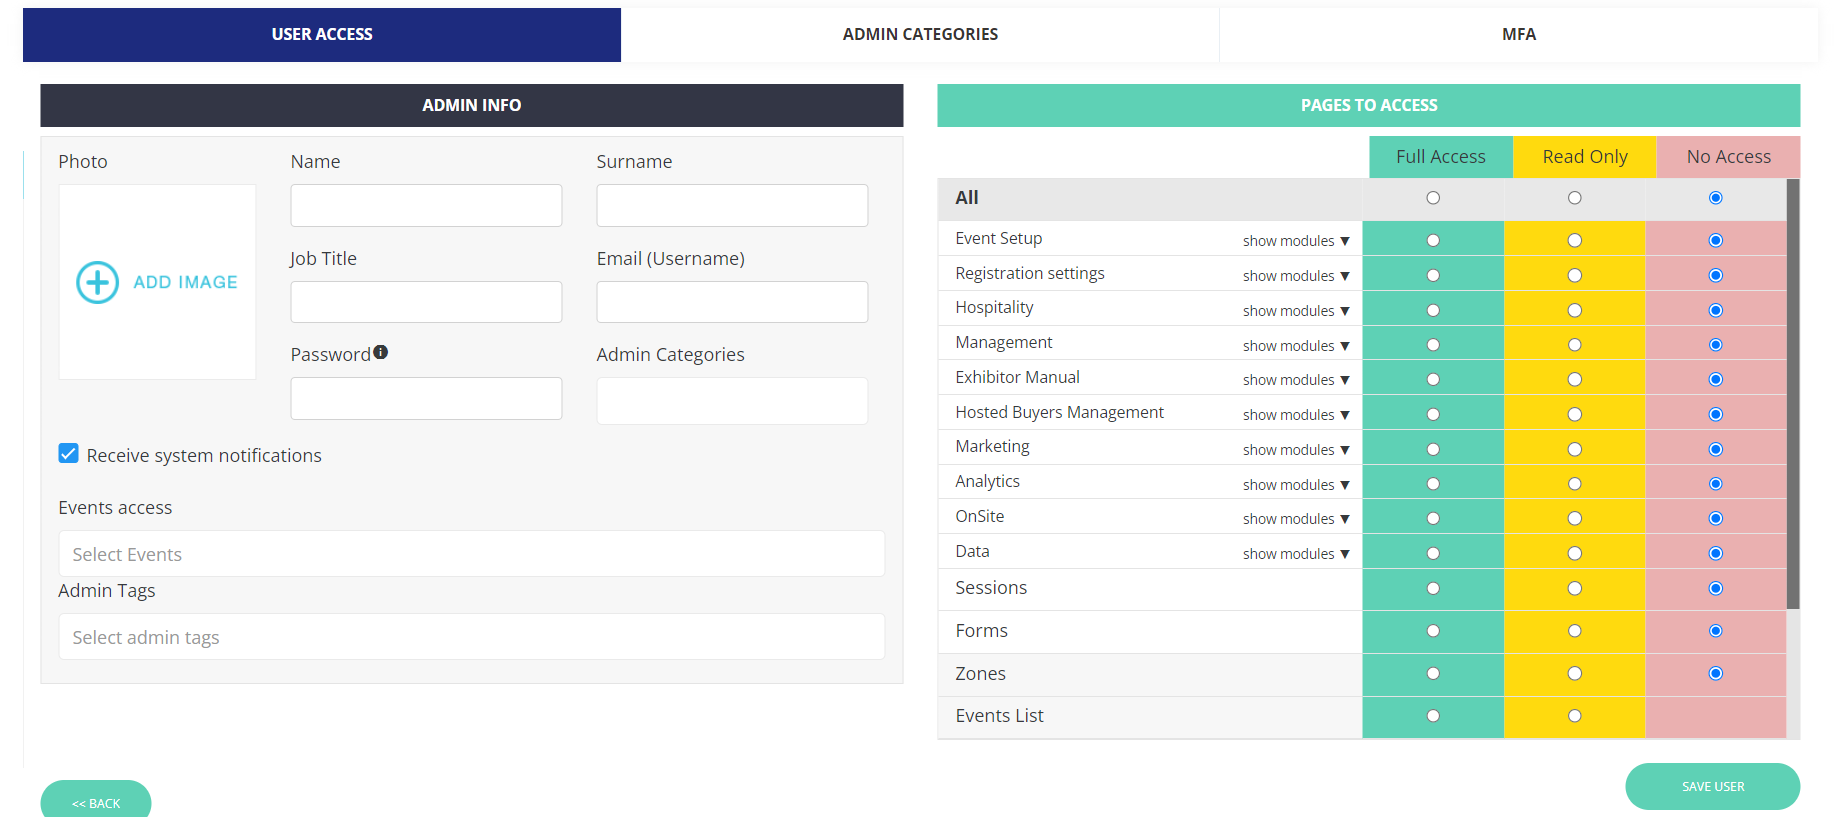
Now fill in all the details as shown below in the snippet.
Name, Surname, Email and Password are the mandatory fields.
Password Parameter
Must consist of 8 characters,
Must contain one uppercase letter
Must contain one lower case letter
Must contain one number
Must contain one special character (no restrictions on which special characters are allowed)

Best Practice
It is recommended to use dummy email as the Admin email so that the organizer can use their actual email address for event registration.
Access to the frontend of the events can be granted to the user by tagging those events in the Event Access tab.
Event Access here means access to the event frontend. Event Admin can login to the event website of the tagged using his admin credentials
You can also assign Admin category and Admin Tags to the user.
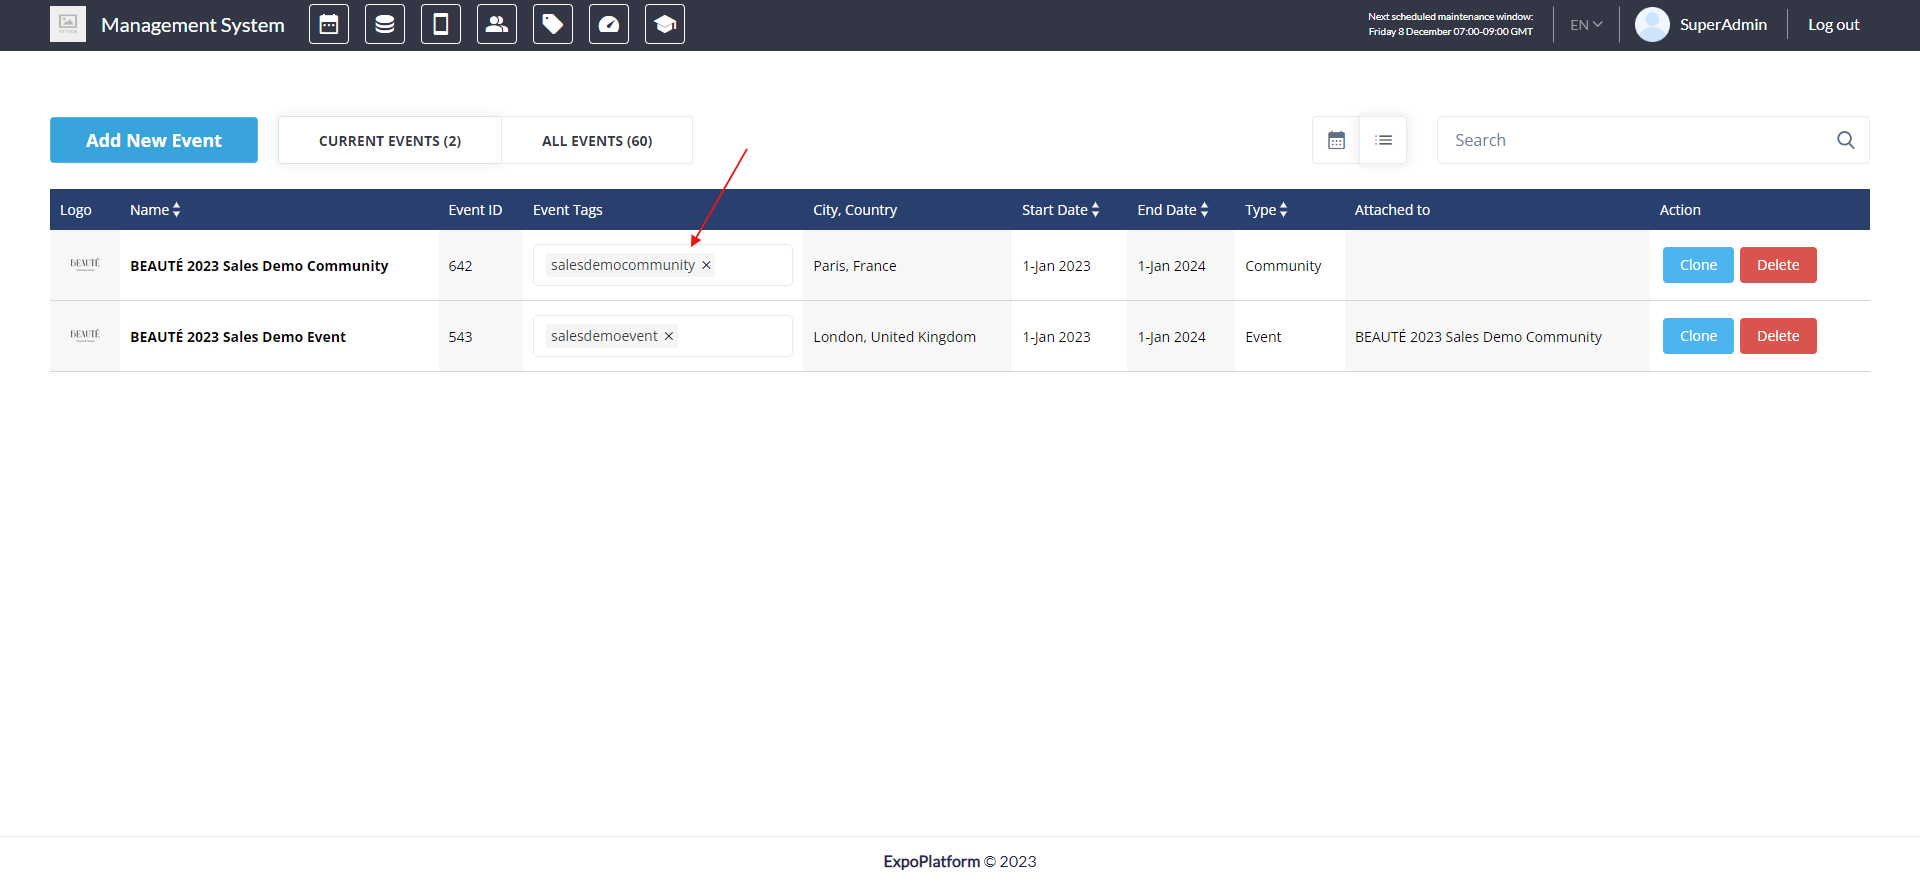
Admin Tags is used to restrict the access to event backend(admin panel). They can be created by adding the tag under the Event Tag column on list listing page
You can create Admin Categories under the Admin Categories tab, just click on Add Category → Enter the category name → Click on Save.

Creating Event Admin Category
These categories will be accessible in the Admin Categories field on the User Access page as a dropdown list.
Organizers also have the option to provide full access, read-only access, or no access to any module, depending on the user's responsibilities.
After adding all relevant details click on the Save button.

