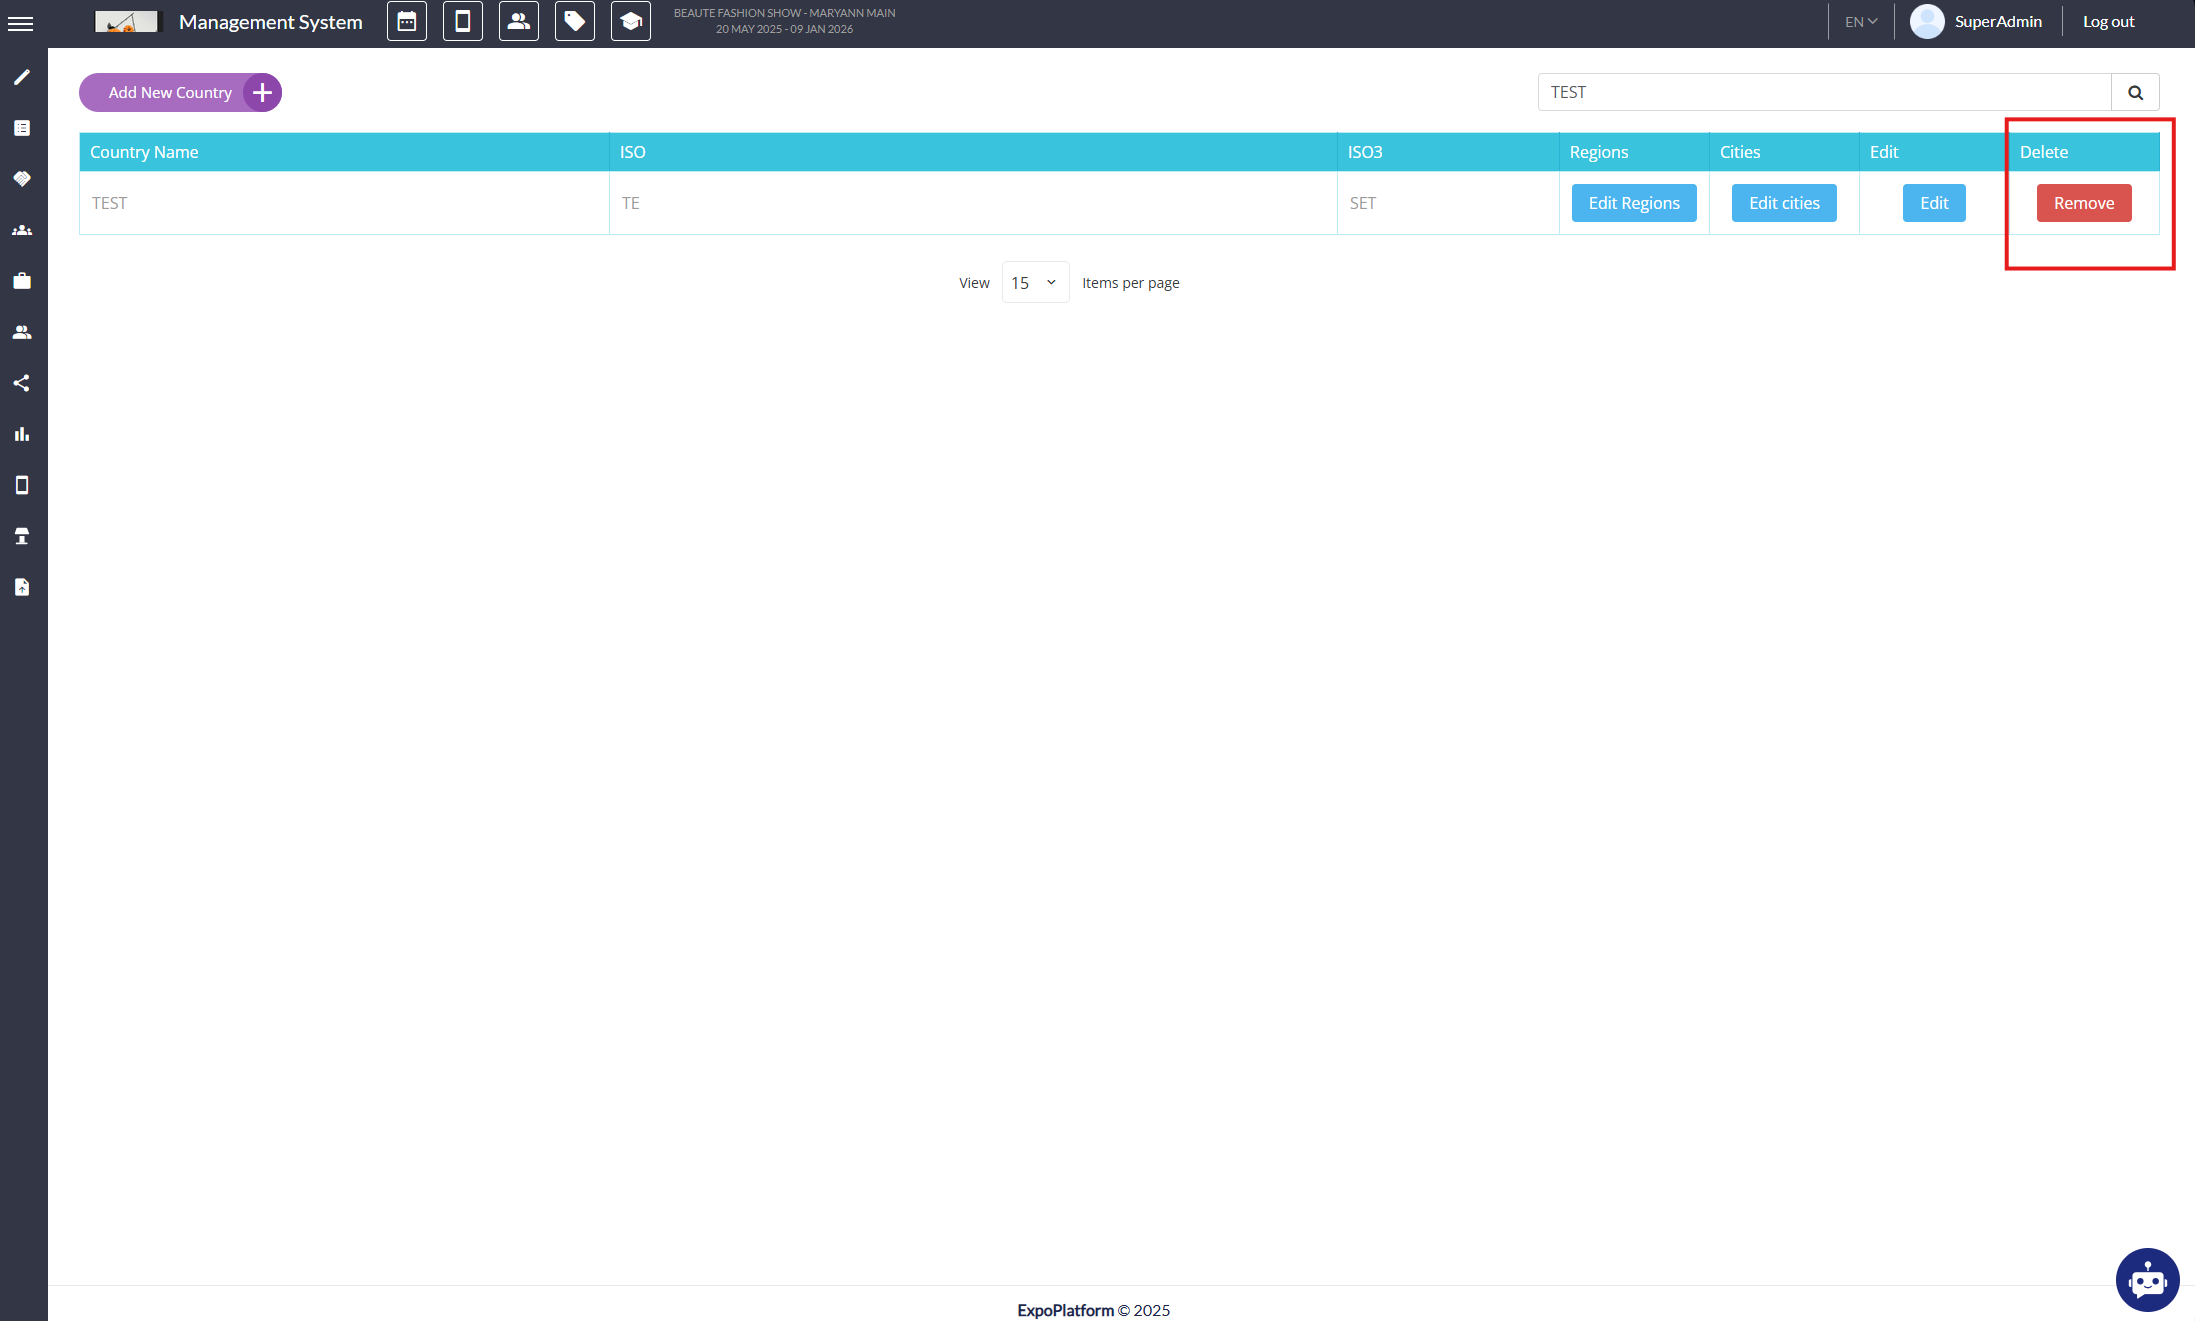
Country management
Feature Purpose:
The Country Management feature in ExpoPlatform allows organizers to manage how the platform behaves for users based on their country. This is particularly important for international events that need to accommodate regional compliance laws (like GDPR), enable country-specific content visibility, configure pricing and taxation, and manage user journeys for various locales.
Here’s what the feature enables:
Localized Event Experiences: Create more relevant and tailored user journeys depending on a participant’s country.
Legal and Regulatory Compliance: Apply region-specific compliance settings, such as GDPR or tax laws.
Country-Based Filtering and Segmentation: Target audiences by country across different modules including communications, content access, and ticket sales.
Optimized UX for Multinational Events: Automatically adjust languages, currencies, and available services by region.
Working with this Feature:
1. Accessing the Country Management Panel
Steps:
Log into the Admin Panel.
Navigate to Event Setup in the left-hand menu.
Click on Country Management.
This will display a list of all countries currently enabled for your event.
Screen recording illustrates the full path inside the Admin Panel, with “Country Management” highlighted in the navigation menu.
2. Adding a New Country
You can expand your event’s reach by including more countries.
Steps:
Click the “Add Country” button at the top right of the Country Management page.
A form appears asking for:
Country Name
Country Code (ISO format) When you see terms like ISO, or ISO3(Three-letter country code), they’re referring to standardized country codes defined by the International Organization for Standardization (ISO) — specifically from the ISO 3166 standard.
Example:United States - US
Configure any access restrictions if needed (see below).
Save the country.
This country will now be available in dropdowns across the platform (e.g. in registration forms).
Screen recording illustrates adding Country modal form showing all editable fields.
3. Editing Existing Country Settings
Already added countries can be updated as regulations change or based on event strategy.
Steps:
Click on the country name in the list.
Update its configurations
Click Save to apply changes.
Screen recording shows the Edit Country view showing current configurations, with City and Region fields being edited.
4. Deleting Countries
You may want to remove a country that is no longer relevant for your event.
Steps:
Click the Remove button next to the country.

Select Remove.
Confirm the deletion.
Please note: Removing a country might impact attendees who selected it during registration or whose visibility rules were tied to it.
5. Applying Country Filters in Other Modules
Once countries are added, you can apply filters across modules. Here's how the Country Management feature integrates across the platform:
(a) Registration Forms
You can configure registration forms to:
Show specific fields only for certain countries (e.g. TIN Number for Brazil)
Trigger region-based logic (e.g. display GDPR consent for EU countries)
Limit registration availability to specific countries or categories
In building registration forms, please select the predefined country, city, state/region, and nationality, field. Simply drag and drop those fields in your grip of choice.
Screen recording highlights registration form editor with conditional country logic applied to a field.
(b) Content Visibility & Access Control
Country settings can be used to:
Show or hide event content (sessions, exhibitors, documents, products) based on the user’s country
Customize which sessions are accessible to certain countries (e.g. for licensing reasons)
Prevent users from some countries from accessing services due to sanctions or legal restrictions
(c) Ticket Sales and Pricing
Allows you to:
Enable or restrict ticket types based on user country
Configure tax-inclusive pricing depending on local laws
Apply different pricing strategies by region (e.g. discounted tickets for LATAM)
(d) Communication and Email Campaigns
You can:
Segment email audiences by country
Send localized communications (e.g. a reminder email in Spanish to all users in Spain)
Avoid sending communications to restricted countries
Troubleshooting
Below are common issues users might face when working with Country Management and how to resolve them:
1. Country Not Appearing in Dropdowns
Possible Causes:
The country hasn’t been added via Country Management.
The country has been added but not published or saved.
Solution:
Go to Country Management and check if the country exists and is active.
Add the country if it doesn’t exist.
Save any pending changes.
2. Participants Can’t Register From Certain Countries
Possible Causes:
Country is not enabled for registration in the form builder.
A filter is blocking specific countries.
Solution:
In Registration Form Builder, check conditions on any form fields or the form as a whole.
Confirm country isn’t filtered out by mistake in form logic.
3. Content Isn’t Visible for Users in a Certain Country
Possible Causes:
Country-level access control has hidden the content.
User profile doesn’t have the correct country assigned.
Solution:
Check content visibility rules.
Make sure the attendee profile reflects the correct country (Admin Panel > Users > View Profile).
4. Language Is Incorrect for Certain Countries
Possible Causes:
Default settings were not configured correctly in Country Management.
System is defaulting to user browser language.
Solution:
Edit the affected country’s settings to ensure correct default language and currency are set.
Inform users to manually select their preferred language from their profile or top bar if needed.
