
Campaigns
Below are the steps on how we can create Campaigns under the Marketing module:
STEP1: Go to Marketing → Campaigns.
STEP 2: Create an Email template that needs to be sent out as part of the campaign by clicking on Template List → New Template
Once the email template is created and saved it will redirect the organizer on the Template List Page.
The system shows waring message if the changes made to the template is not saved or you are trying to save the empty email template
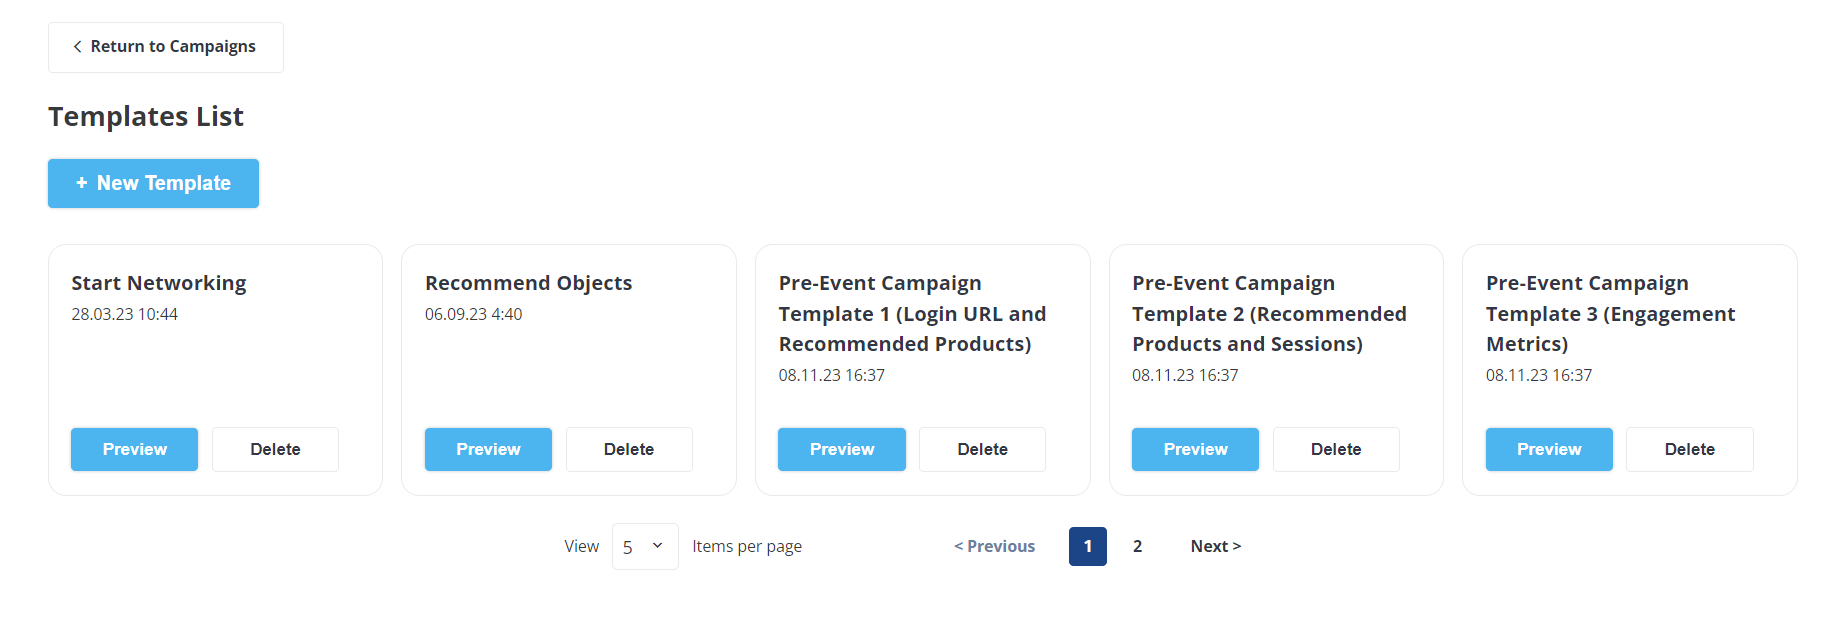
Template List
Read More about how to create an email template: Email Builder Introduction
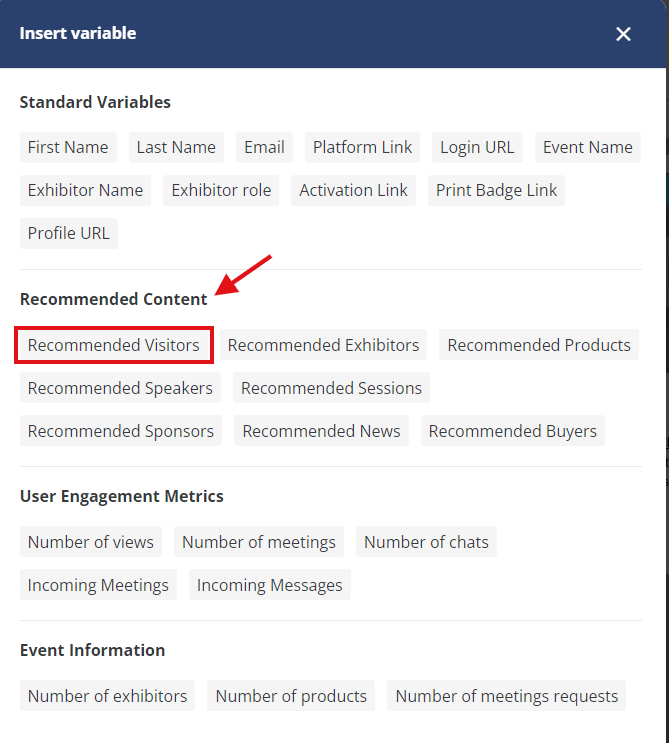
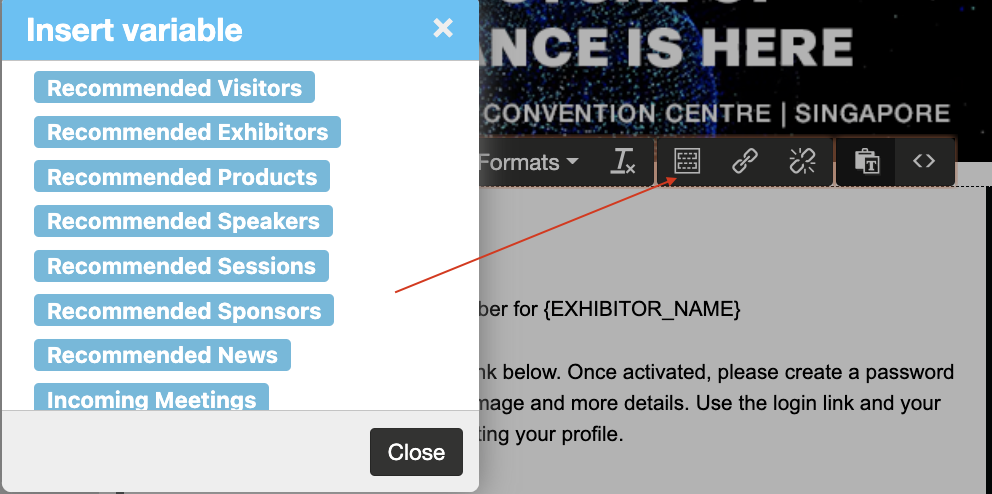
Variables available for campaign email template
To facilitate accessibility for organizers, the variables have been organized into categories such as Standard Variables, Recommended Content, User Engagement Metrics, and Event Information.
Campaign Variable
The Campaign Email Template includes variables that display the number of exhibitors, products, meetings and meeting requests, views, and chats when added to the email template.
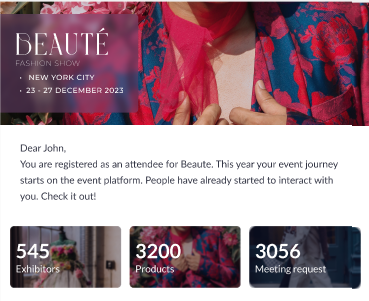
The information for these variables is taken from Analytics/General/Dashboard
The number of products variable displays the count of only active products
The number of exhibitor variable displays the count of active exhibitors and not those exhibitors who are pending activation
The number of meetings variable displays the count of confirmed meetings specific to that user
The number of meeting requests variable displays the count of all meetings(pending, confirmed and cancelled) for the entire show
The number of chat variable displays the count of chats specific to that user
The number of Views variable displays the count of profile views for that very user
Incoming Meeting variable displays the count of incoming meetings for that very user, In case there are no incoming meetings it shows No Incoming Meeting to that user. When user clicks on incoming meetings he is redirected to My Meetings >> Incoming meeting tan on frontend
Incoming Message variable displays the count of messages received but not replied, by default it shows 4 incoming messages, when the user clicks on any of the incoming messages he is directed to the Message tab on frontend
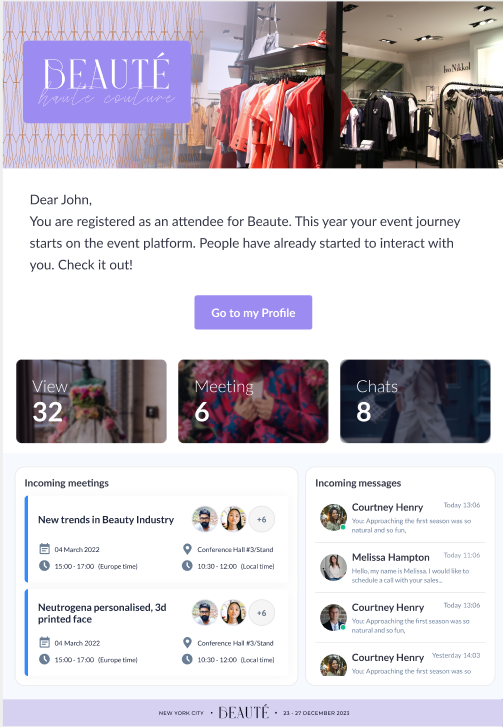
Incoming Meeting and Message Variable
If Allow visitors to manage reception of meeting requests and messages is turned on for visitors and the visitor turned off receiving messages, he/she will get the screenshot below.
If the module My Messages if turned off for the recipient (it can be for Buyer, Partyicipatns or Team members section, depending on who is the recipient for the email), there is no variable/card at all in the email
Profile Url Variable: If added in the email, redirect the user to the dashboard page (/newfront/profile/dashboard) on the frontend
Recommended Variable
Recommend Variable
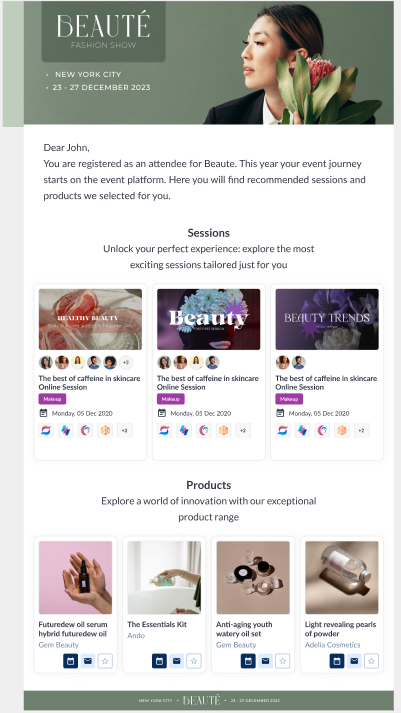
Email with recommended variables
When adding the recommended variable to the email template, keep the following points in mind:
The number of recommended objects displayed in the email will depend upon the limit under the setting/gear button placed next to the Insert Variable option on the email template draft /admin/campaigns/template/0
The recommended objects will be unique for each user
If the user clicks on the Meeting, Message and Favourite buttons for the recommended object in the email, that particular action is performed and the user gets redirected to the relevant page on the front end.
Based on the restrictions/settings applied to the recommended object (products and exhibitors)profile, the interaction buttons will function accordingly.
Settings | Meetings | Message | Notes/Exceptions |
|---|---|---|---|
Allow exhibitors to manage the reception of meeting requests and messages | If allow user to request meeting is disabled, message displayed is This account denied receiving meeting request | If allow user to send message is disables the message This account denied receiving meeting requests is displayed | |
Limits Set for categories (participant) | If the daily/total limit to schedule a meeting is reached the Next Button on meeting schuding page will be disabled | When user clicks on the message icon on email, he is directed to the community page and message displayed You used your chats initiations limit! | |
Permission matrix (interactions are forbidden between the participant (initiator) and exhibitor(receiver) categories) | Message displayed ‘You can’t make an appointment with this account'. The Next step is blocked on the meeting scheduling page | Message displayed 'You can’t have a chat with this account' | In case of the View permission is turned off between visitor’s and exhibitor’s categories, the exhibitor cards will not be shown in the email. If the participant, received the email and View permission was turned off later, upon clicking on this card, user will be directed to the main/community page of the event with the notification You don’t have access to this profile. |
Module management (If Meeting/Message/My Favourite button is disabled) | Interaction button is hidden on the object card in the email | The interaction button is hidden on the object card in the email | Favourite Button is also hidden if My Favourite is turned off from Module Management |
Disable meetings/messages without team members is enabled | Message displayed 'You can’t make an appointment with this account' | Message displayed 'You can’t have a chat with this account', |
For recommended sessions, if any session is marked as not visible to the specific user categories then those sessions will not be visible in the email as well.
Select the settings button in the email template draft box to specify the number of top results to be shown for each recommended variable and incoming meeting/message
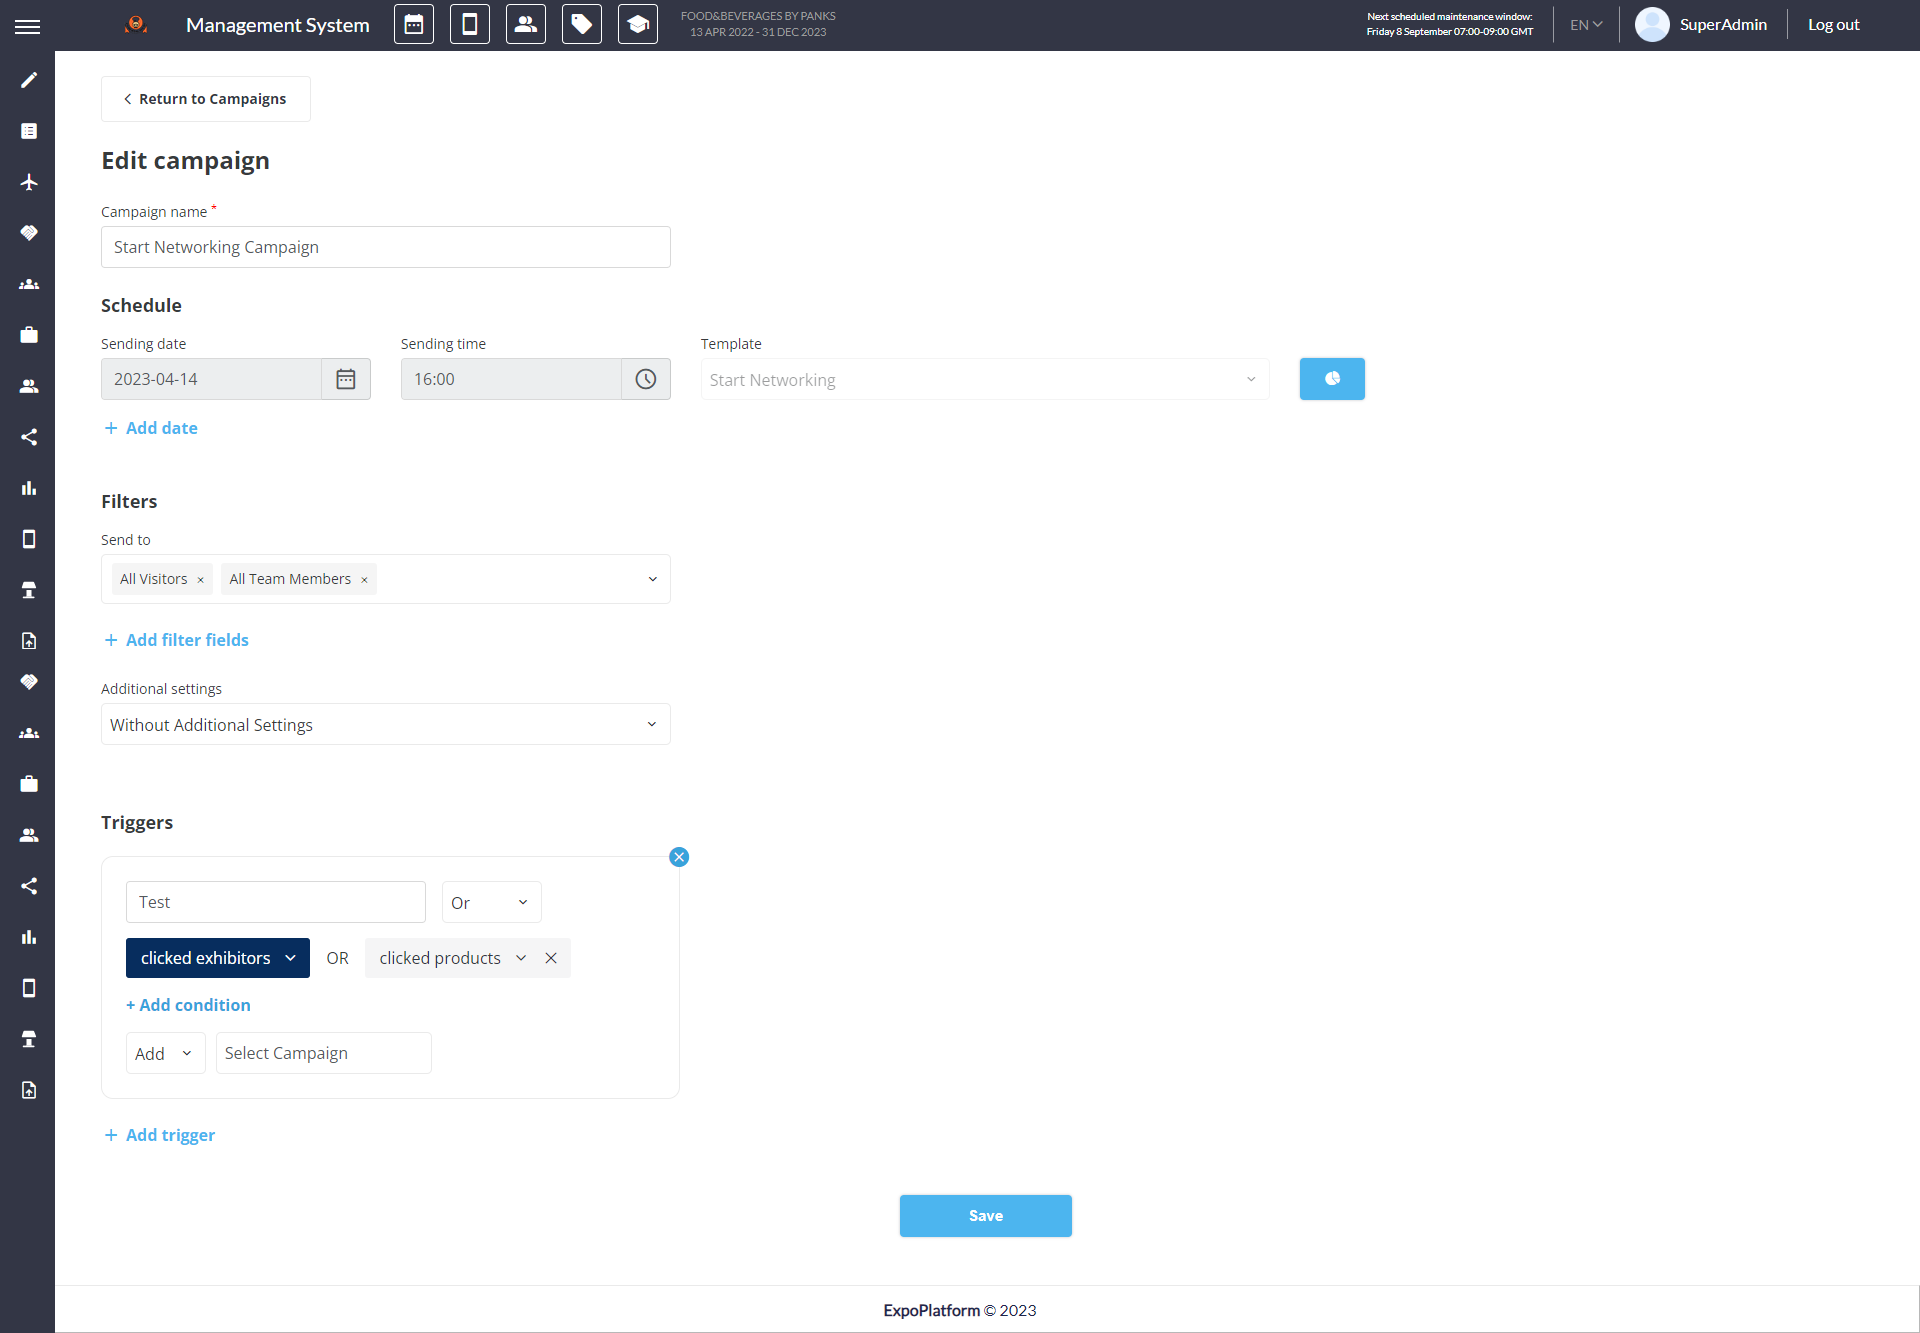
STEP 3: Once you have drafted the email, go to Campaigns and click on ‘New Campaign’
STEP 4: Name the campaign, select the email template, and set the date and time for the campaign to be sent
Under Filter select the audience type to whom the campaign should target like Visitors, Exhibitors, team members etc.,
Organizers can use the Add Filters for more refined data to send the campaign
Additional settings have filters like participants who have activated or not activated their profile, only participants with Incoming meetings and confirmed lounge meetings which are basically used for Live events.
Standard Variables When adding the standard variables to the email template, please keep in mind that, they will not work for a custom mailing list.
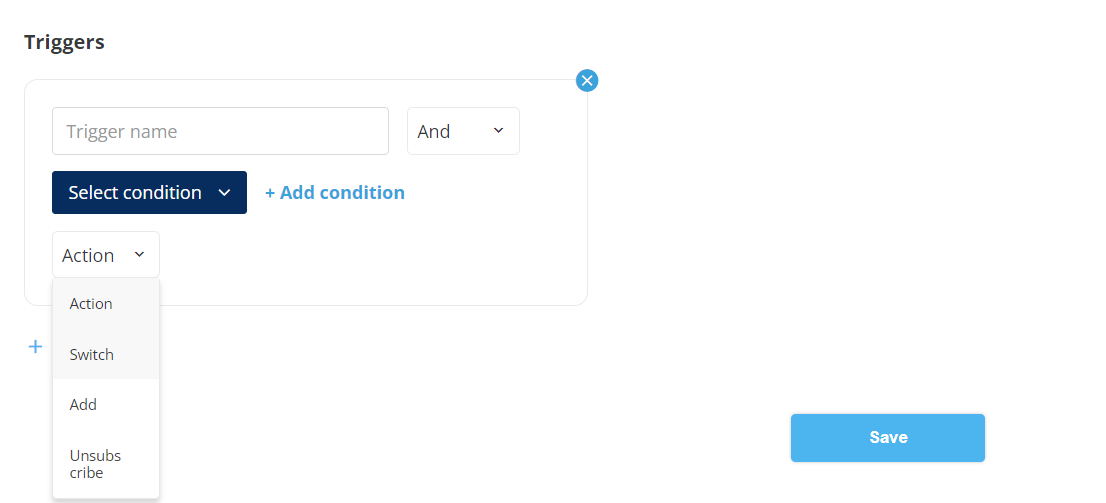
Triggers:
Indicate the trigger name and choose one of the options:
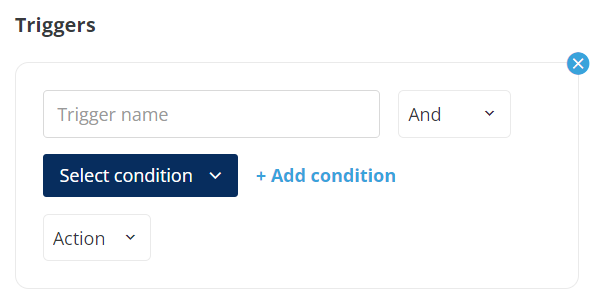
Creating Triggers
“AND” when both conditions should be met
“OR” when one of the conditions only could be met.
Choose the Condition that should be executed by the end user to apply a trigger.
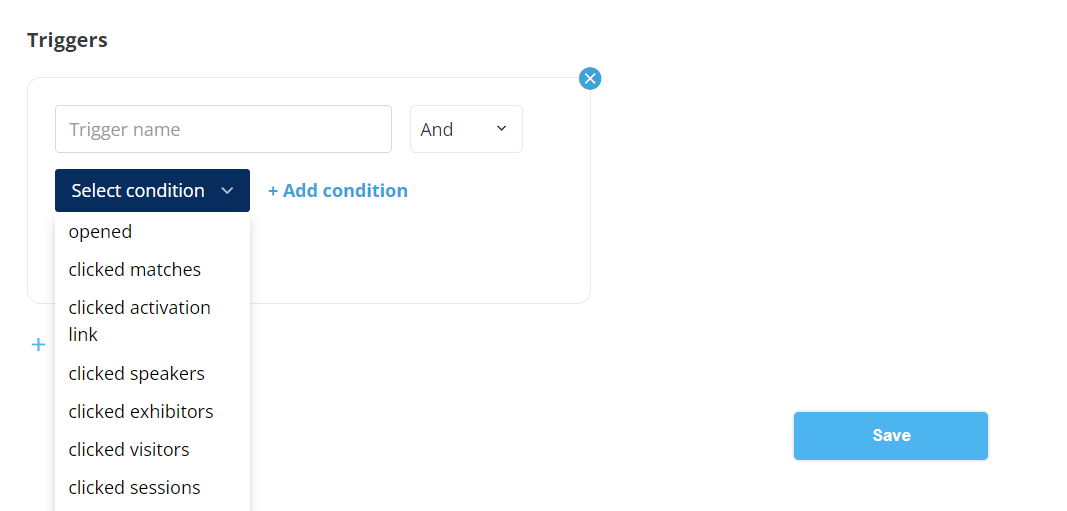
Adding Trigger Conditions
Be aware that the email must contain the same condition as we put in the trigger, in our case the template “Wimbledon” must contain a variable that corresponds to the trigger.
You will find those variables when you set up the campaign email. You can see the example below:
Once the end-user clicks on the condition the trigger will be applied. There are 3 possible actions:
Switch: The end user is out from the present campaign and joins the selected campaign (2 check)
Add: The end-user remains in the present campaign and joins the selected campaign
Unsubscribe: The user has unsubscribed from the present campaign
Viewing/Exporting
After you have created the campaign and saved, the organizer will be redirected to the Campaign List Page. From this page, the organizer can perform certain actions for the campaigns like
Duplicate
Show Statistics
Export Campaign Data
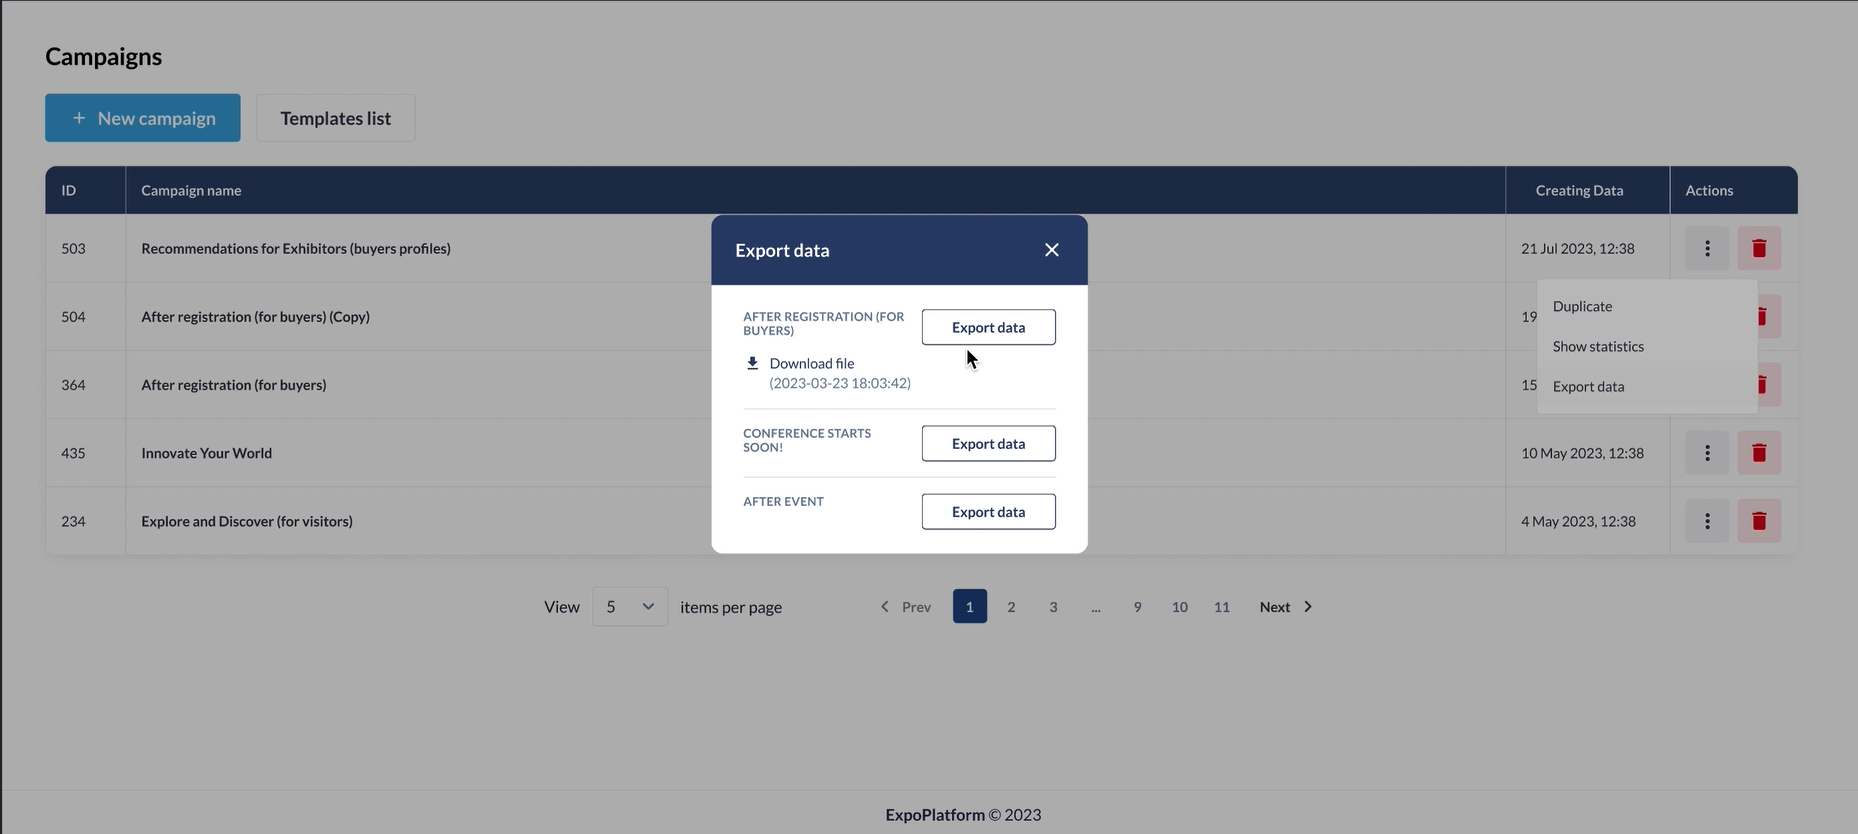
Campaign List Page
Here is the short video that shows the overall working of the campaign