Feature Purpose:
Allows you to define the relevant hall options (multiple or single) for the event
Working with Feature:
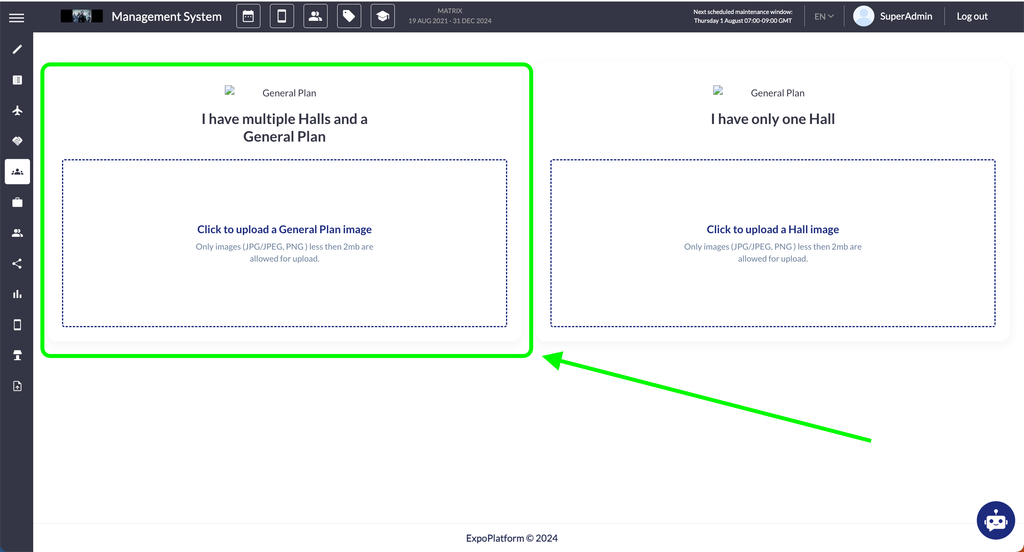
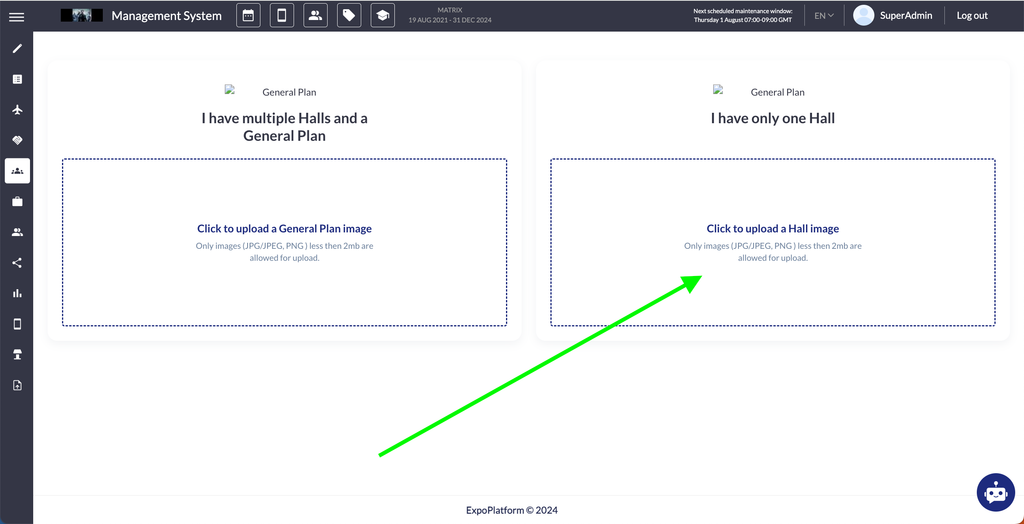
In the Admin panel - Management - Floor Plan, users have two options to specify the hall/s details they need:
-
Multiple Halls with a General Plan
-
Single Hall
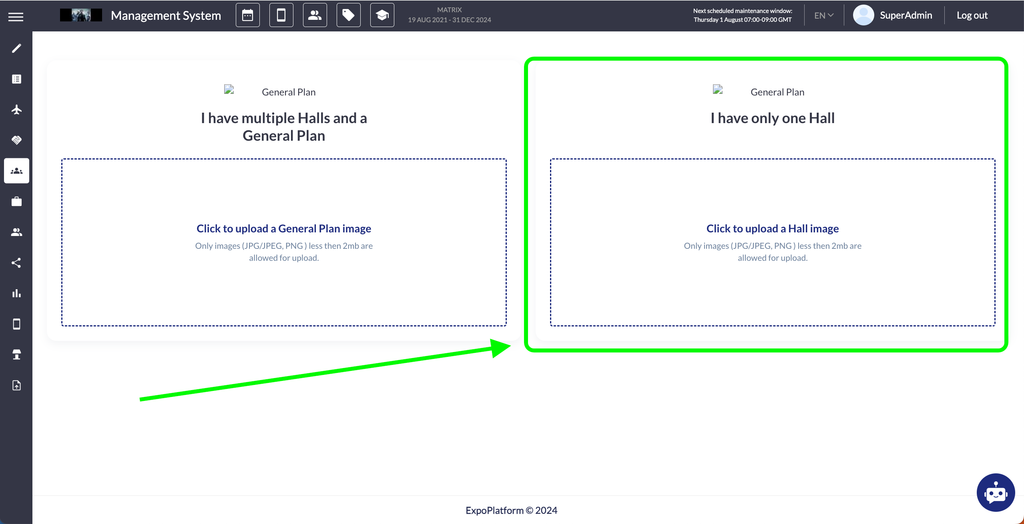
This part of the documentation focuses on the second option, where the user has only one Hall:
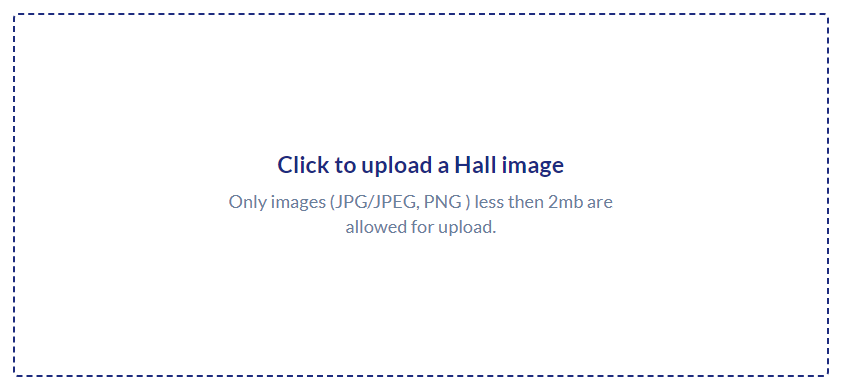
1. Single Hall Flow
-
User can drag the Hall image into the dotted box or click to select an image from the device storage:
-
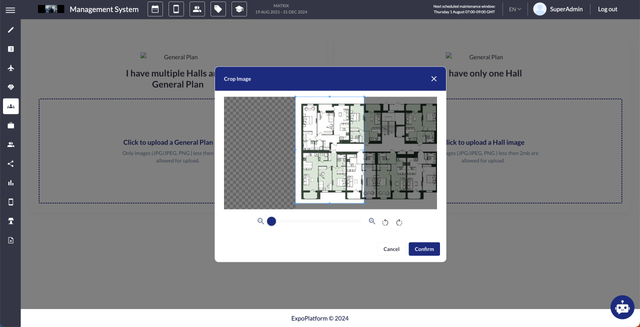
After selecting the image, the user can customize it by:
-
Changing the image scale
-
Cropping the image
-
Rotating the image in 45-degree increments
-
-
Finally, user can confirm the image.
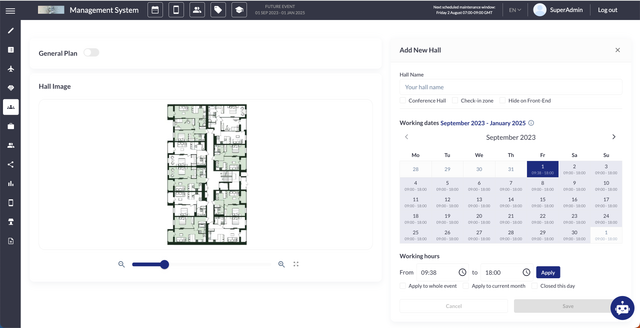
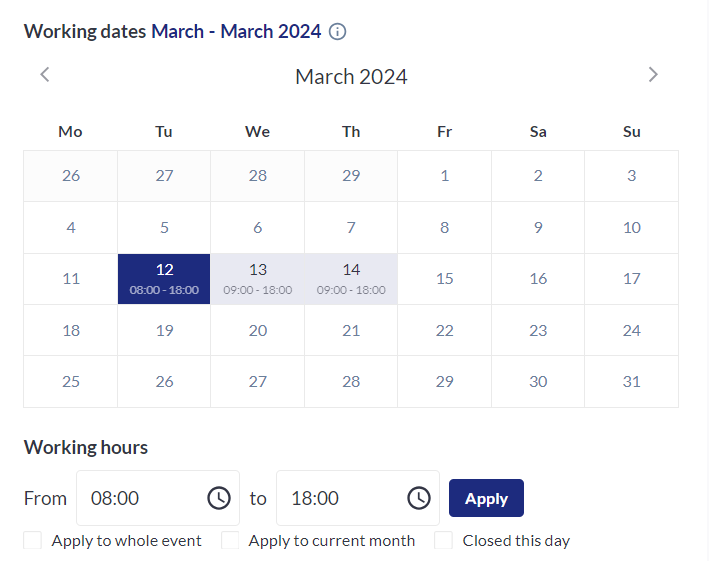
On the next screen you have the ability to add details about the Hall including customizing the working dates and working hours:
In the Admin panel - Management - Floor Plan, users have two options:
-
Multiple Halls with a General Plan
-
Single Hall
This part of the documentation focuses on the first option, where the user has multiple Halls and a General Plan.
2. Multiple Halls with a General Plan Flow
-
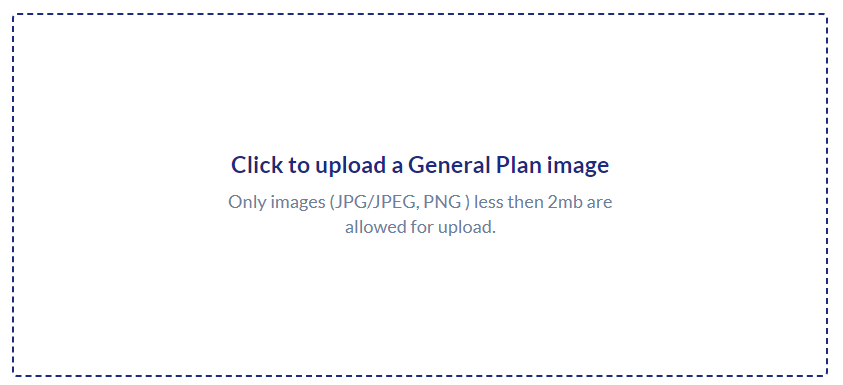
The user can drag the General Plan image into the dotted box or click to select an image from the device storage:
-
After selecting the image, the user can customize it by:
-
Changing the image scale
-
Cropping the image
-
Rotating the image in 45-degree increments
-
-
Finally, the user can confirm the image.
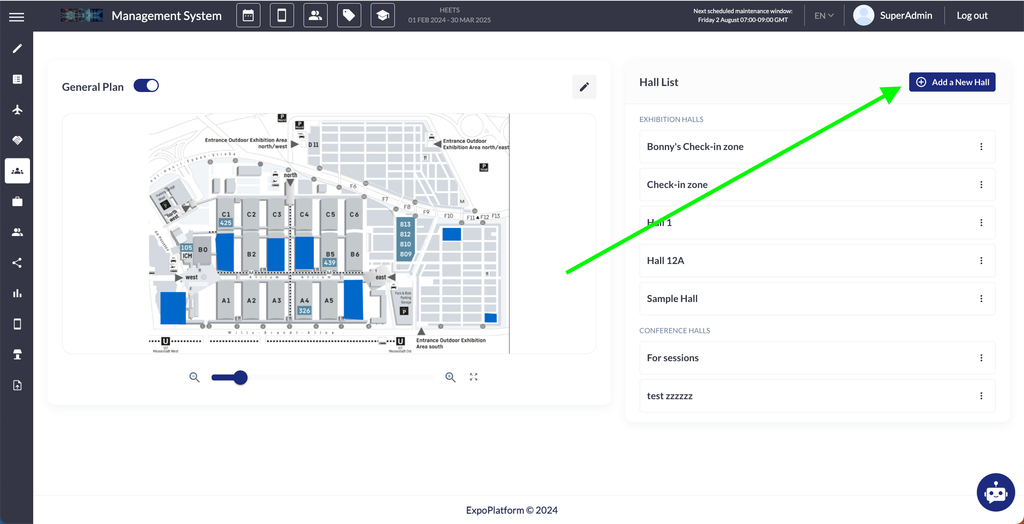
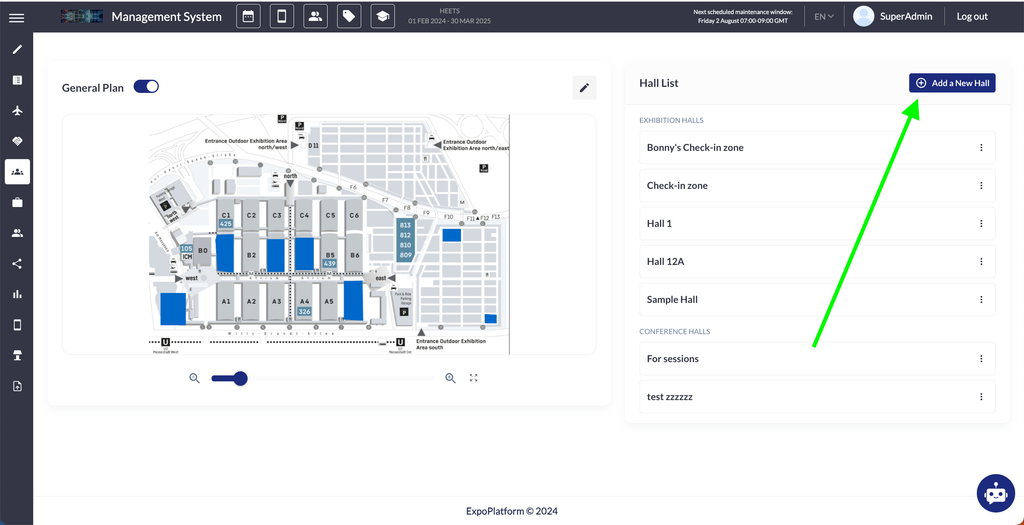
On the right side of the screen “Add a New Hall” button appears which provides the ability to add a new Hall, one General plan and an image:
In the Admin panel - Management - Floor Plan, users have three options for uploading Hall images:
-
Multiple Halls with a General Plan: After adding a General Plan image, the user has the ability to upload individual Hall images.
-
Single Hall: The user can add an image of a single Hall.
-
Single Hall with Later Addition of a General Plan: if user initially selects the single Hall option and later decides to add a General Plan, they can then add additional images for the second, third, etc., Halls after turning the General plan toggle on and uploading the General plan image, like on the example below:

Troubleshooting:
-
Please always check if you have provided the relevant time/date settings for the hall selected to ensure meetings/sessions locations are working properly and necessary locations are available and successfully attached:
-
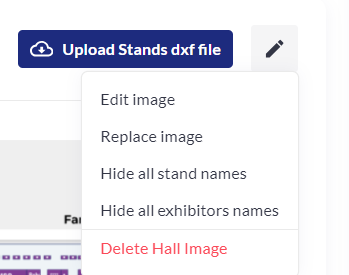
You always have the option to replace/edit the existing hall image if needed, just open the respective Hall and make the necessary change via the “Pencil” icon:
-
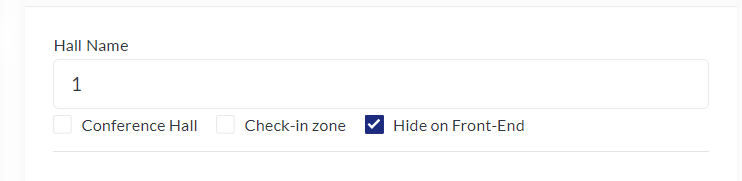
In case for some reason the Hall is not visible in the frontend, ensure that it hasn’t been hidden in the backend via the Hide on Front-End setting: