Feature Purpose:
The “Other Location” feature on our platform enables organizers to specify custom meeting locations for their event. Organizers can create and name these locations according to the specific needs of the event, ensuring flexibility and relevance to the event requirements.
Working with this Feature:
To activate the “Other Location” feature for regular meetings, go to the admin panel and navigate to Networking & Matchmaking > Meetings > Settings. Here, you can enable the “Allow Other Location” toggle.
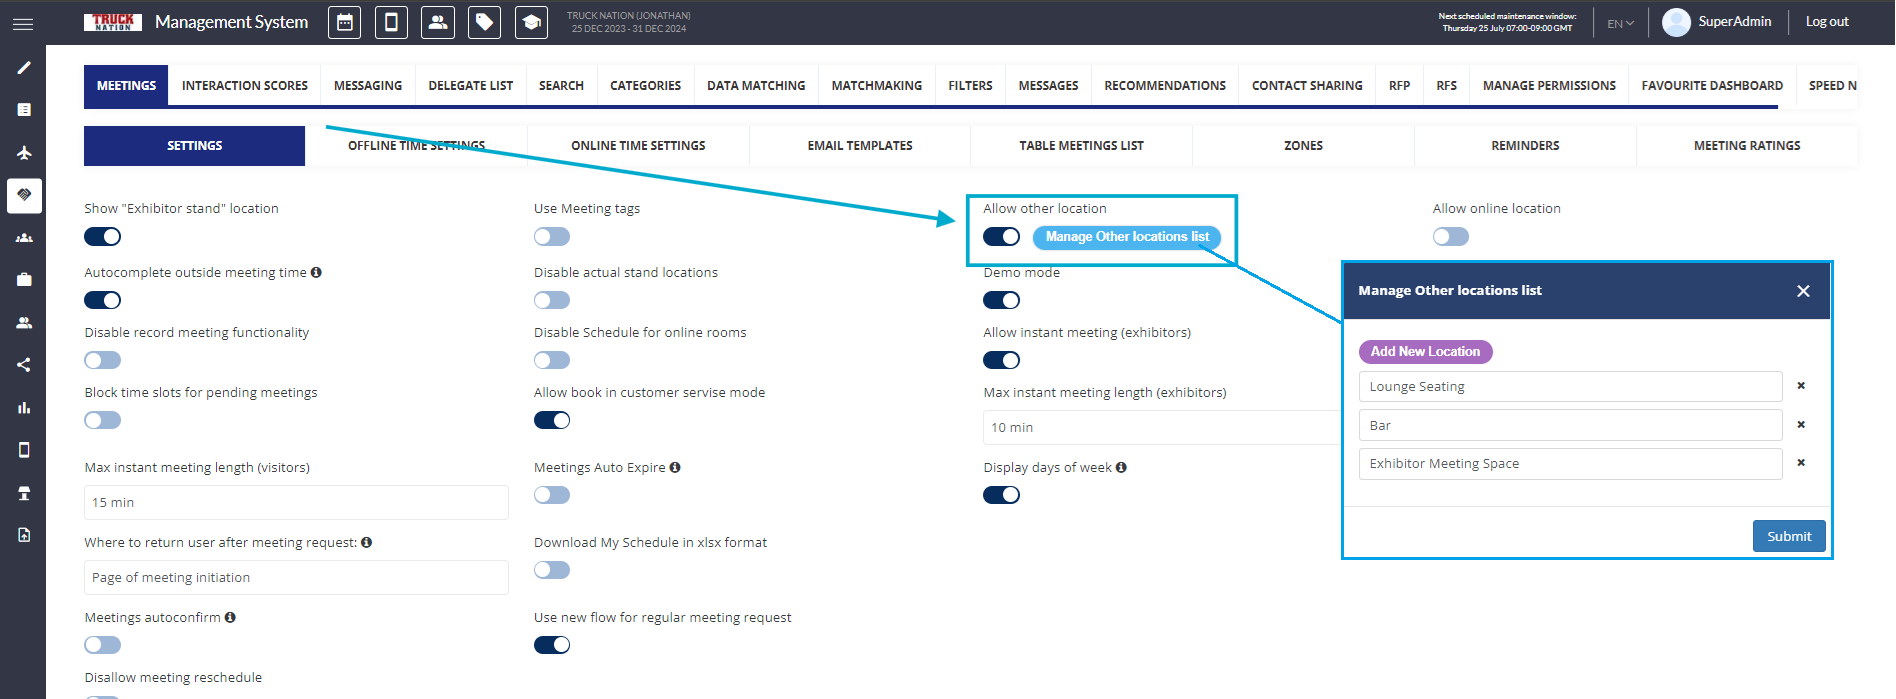
Note: You can create and rename multiple custom locations using the “Manage Other Locations List” functionality.
Once the “Allow Other Location” setting is enabled, the “Other” option will appear in the “Location” field on the frontend.
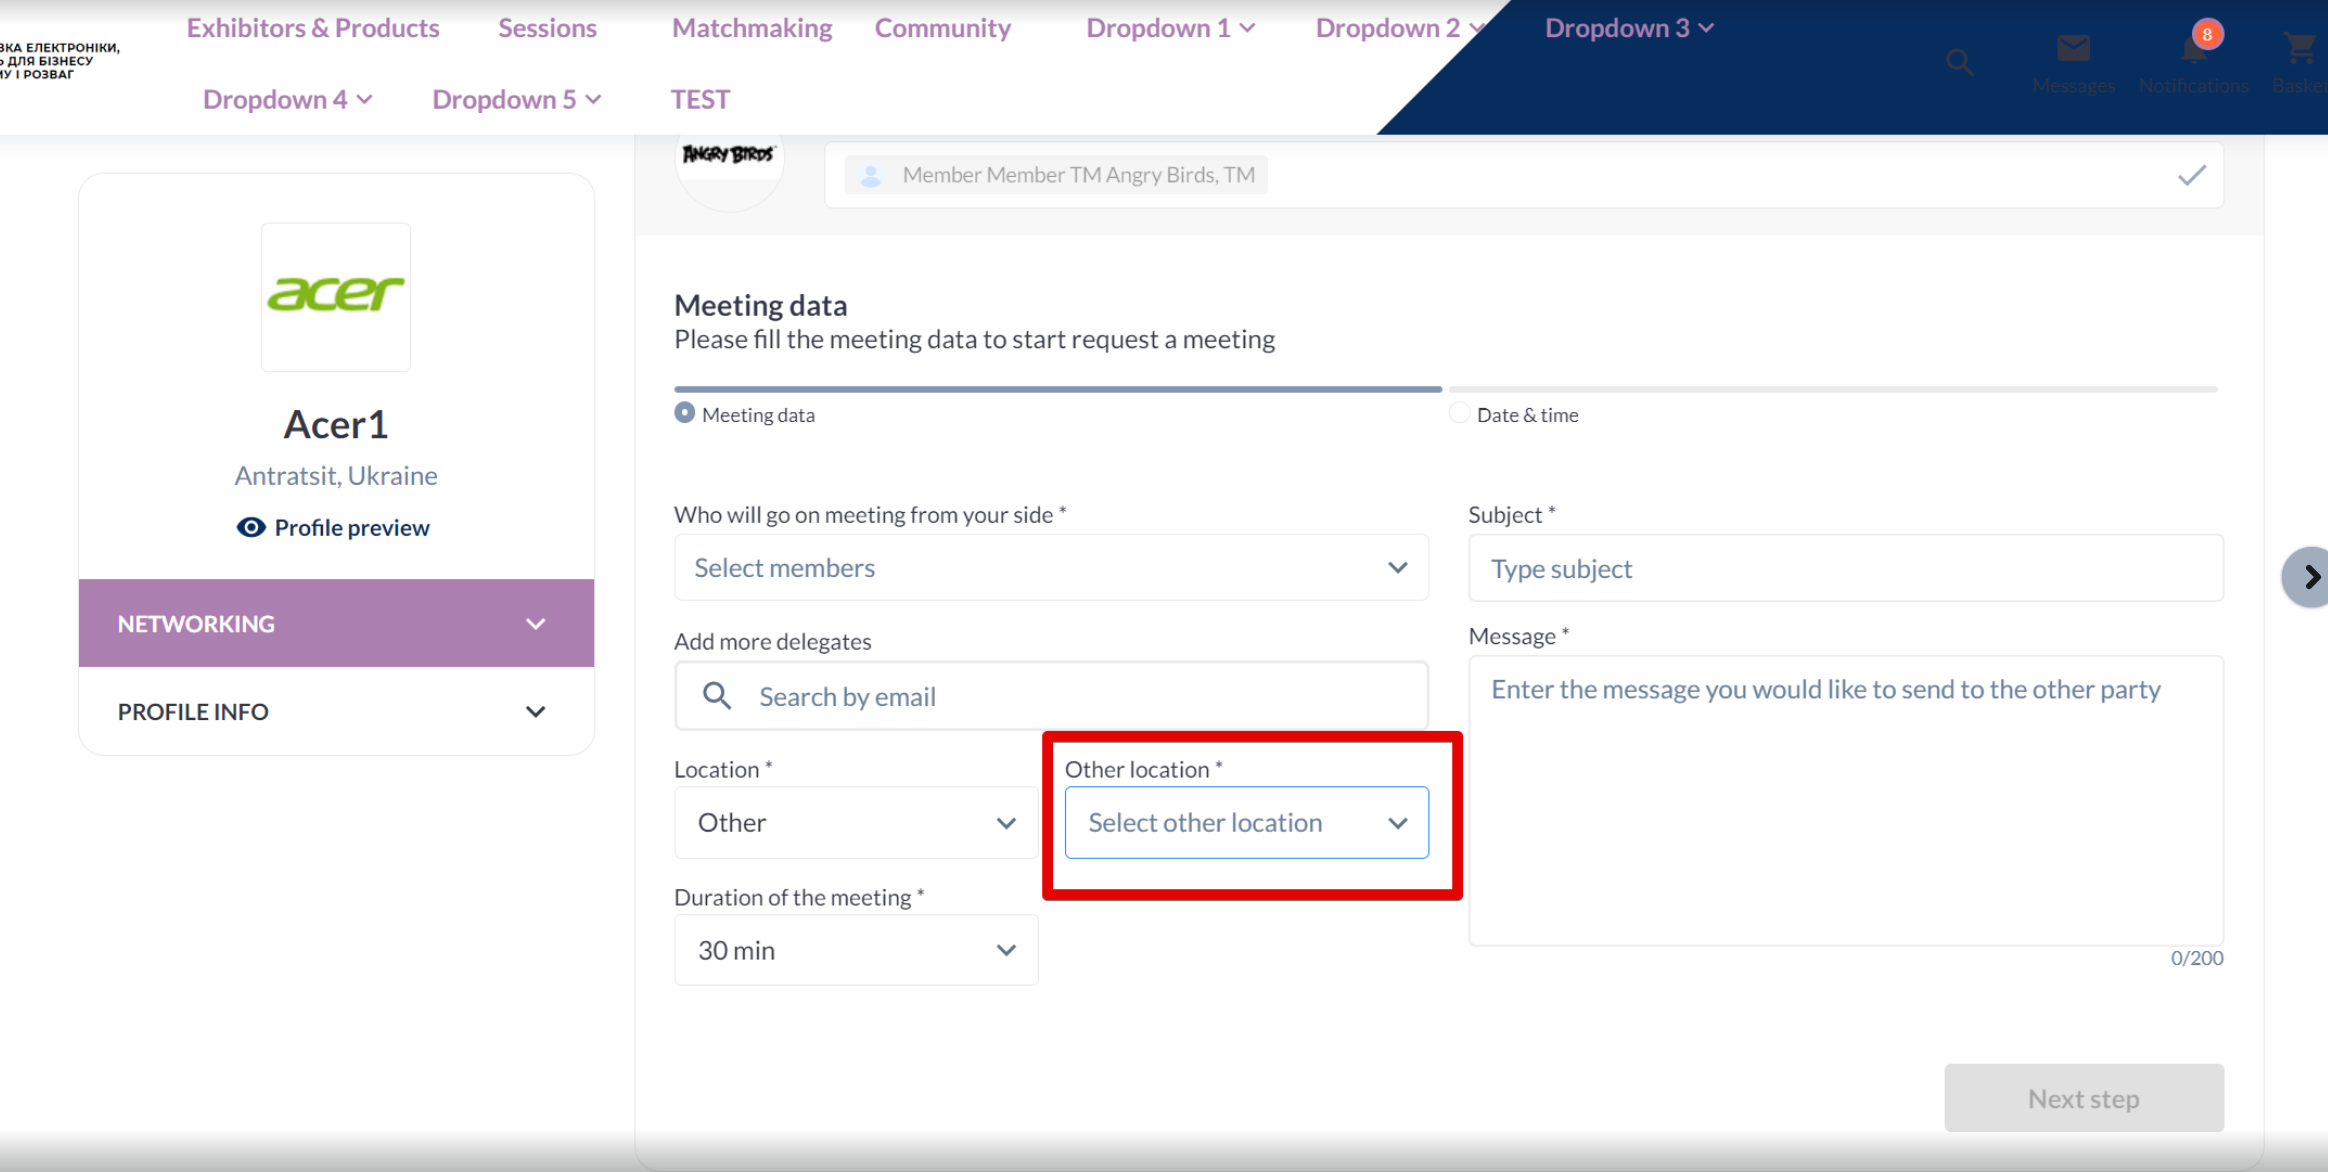
When users select “Other” on the frontend, if custom locations have been configured in the “Manage Other Locations List” in the admin panel, an additional required field labeled “Other Location” will appear. Users must select a location from this field to proceed with the meeting creation process.
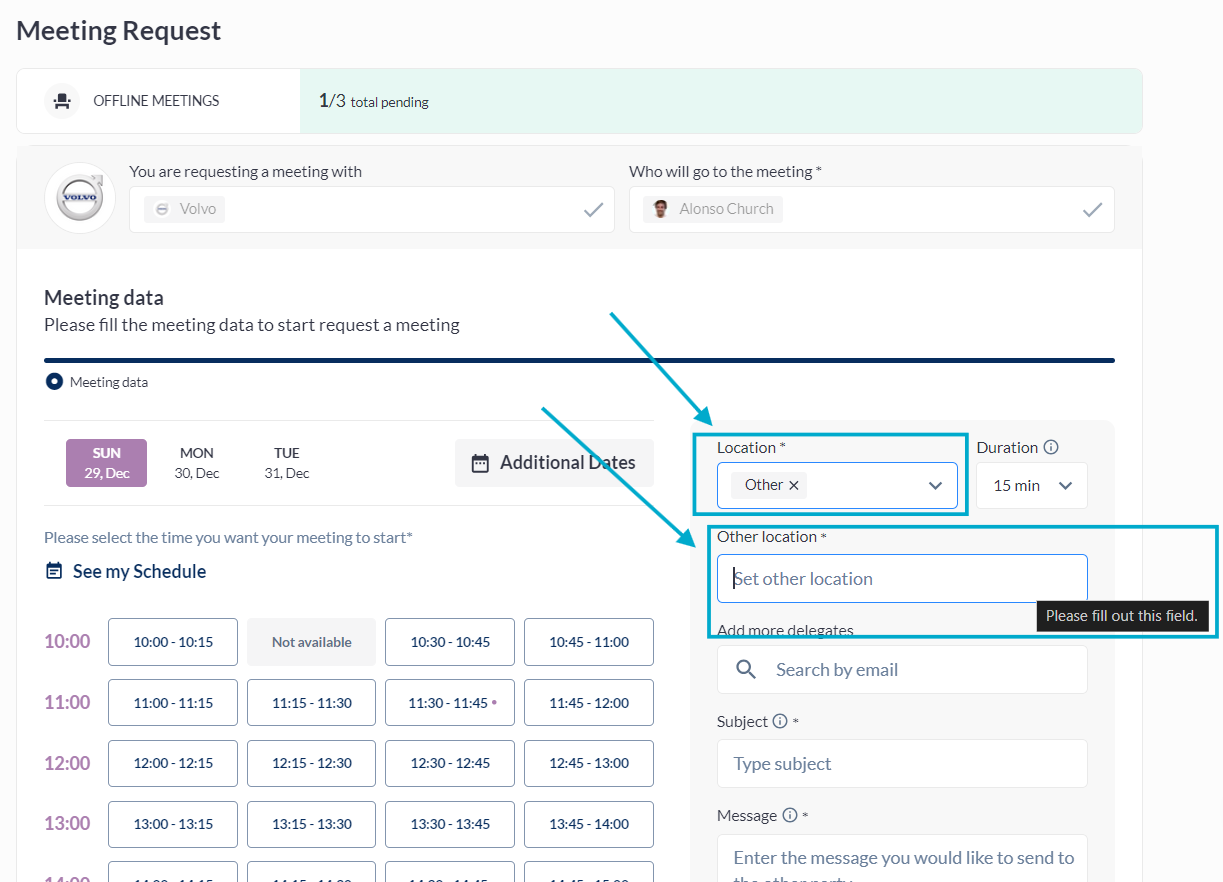
If no additional locations are proposed by the organizer in the “Manage Other Locations List” pop-up, the “Other Location” field will switch to an input field, allowing users to manually enter a location.
In both cases—whether a location is selected from the list or entered manually—the “Other Location” field is required and must be completed to proceed. (Example below)
Troubleshooting:
-
“Other” Option Not Appearing:
-
Ensure the “Allow Other Location” toggle is enabled in the admin panel.
-
Verify that there are no restrictions or permissions blocking the feature.
-
-
“Other Location” Field Not Displaying or Not Required:
-
Confirm that custom locations are properly listed in the “Manage Other Locations List.”
-
Check if the frontend is properly reflecting changes made in the admin panel.
-