Feature Purpose:
The Ticket Purchasing feature in ExpoPlatform enables attendees to select and purchase during the registration process, or purchase tickets directly from their event profile after they’ve laredy registered. This feature ensures a smooth and secure purchasing experience, offering a variety of ticket types and payment options.
Key Benefits:
-
Allows attendees to purchase tickets quickly with minimal friction.
-
Provides admins with complete control over ticket configurations, descriptions, and payment settings through the Admin Panel.
-
Ensures discount codes and promotions can be applied accurately during ticket purchase.
Working with Ticket Purchasing
Accessing Ticket Purchase Options
-
Navigating to the Registration Page or Attendee Profile:
-
Attendees can access ticket purchasing options either:
-
Directly from the Registration Page when they register for the event.
-
Through their Attendee Profile after logging into their event account.
-
-
-
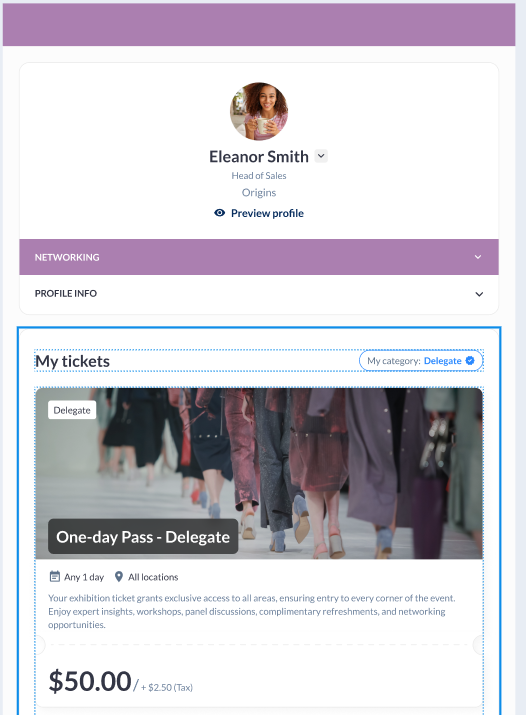
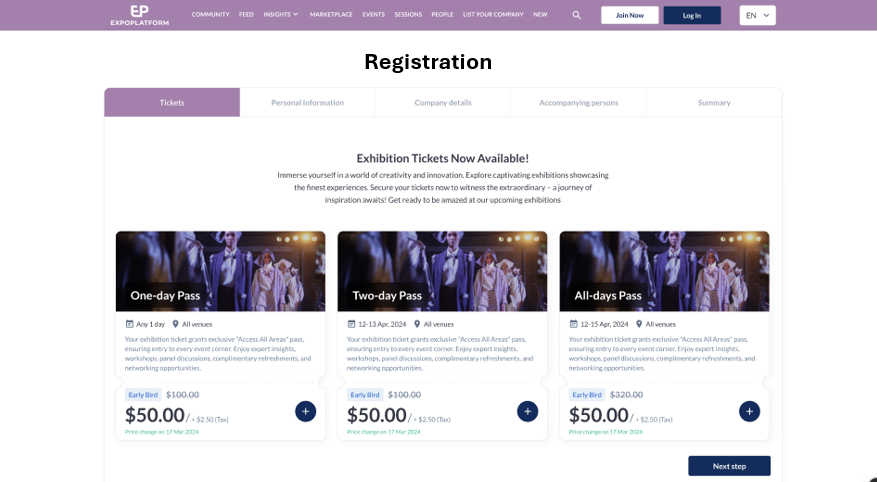
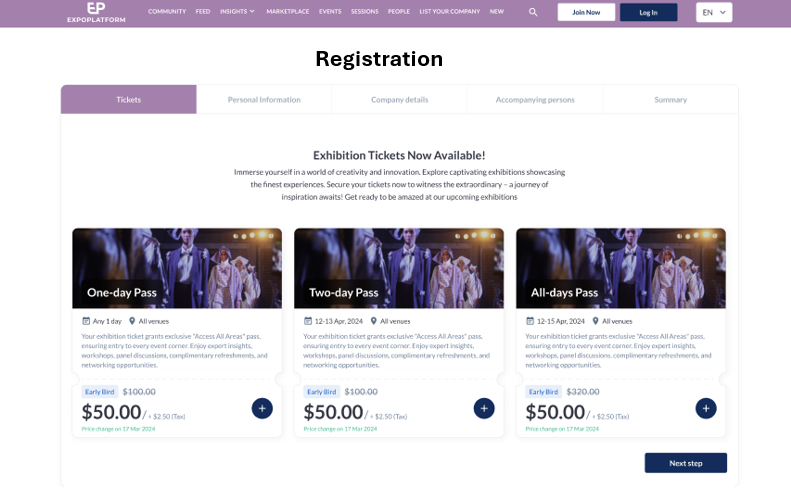
Viewing Available Tickets:
-
Tickets are displayed on the Tickets Page aligned with the design in the Ticketing Tab of the Admin Panel.
-
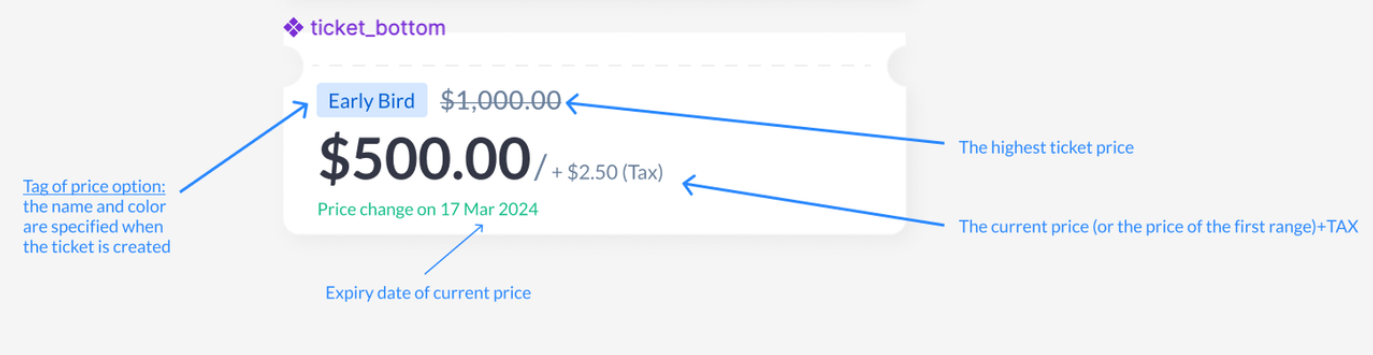
Each ticket displays its name, price, description, and any applicable terms of use.
-
If no description is provided in the Ticketing Settings, tickets are displayed immediately below the registration tabs without spacing.
-
Selecting a Ticket for Purchase
-
Choosing a Ticket Type:
-
Select the desired ticket type from the list displayed.
-
Multiple ticket types can be configured by the admin, E.g:
-
Standard Tickets
-
VIP or Premium Access Tickets
-
Session or Workshop-Specific Tickets
-
-
-
Reviewing Ticket Details:
-
Attendees can click on a ticket to view detailed information, including pricing and any available benefits.
-
Additional details such as refund policies, terms, and special instructions may also be displayed if configured in the Admin Panel.
-
-
Adding the Ticket to Cart:
-
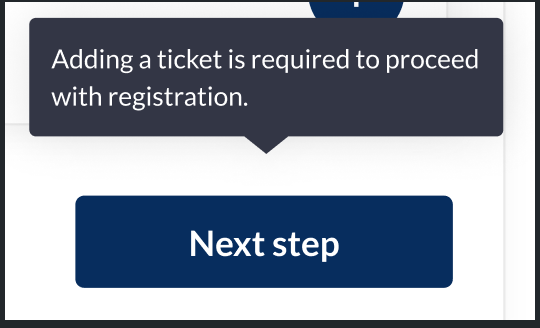
Attendees can click on “Add Ticket” to proceed with the selected option.
-
A confirmation snackbar appears indicating that the ticket has been successfully added to the cart.
-
Pricing Structures
Fixed Price: A set cost per ticket type.
-
Dynamic Pricing: Prices may change based on demand or registration phase.
-
Discounts & Promo Codes: Admins can configure discount rules (e.g., percentage off or fixed amount reduction, i.e Early Bird Ticket: Discounted tickets available for a limited time before regular pricing applies.)
-
Free Tickets: Some categories may be eligible for free access.
Purchase Limits & Restrictions
-
Single Purchase Limit: Users can buy only a set number of tickets per transaction.
-
Category-Based Access: Some tickets may only be available to specific user groups.
-
Time-Limited Sales: Admins can set start and end dates for ticket availability
Applying Discounts and Promotions
-
Accessing the Discount Code Field:
-
During the checkout process, attendees can enter a promo/discount code in the designated field.
-
This field is usually located just before the Proceed to Payment button.
-
-
Applying a Discount Code:
-
Enter the discount or promo code in the provided field.
-
Click “Apply Discount” to validate and apply the code.
-
The system dynamically updates the ticket price after a valid code is applied.
-
-
Handling Invalid Discount Codes:
-
If the discount code is invalid, an error message is displayed, prompting the user to recheck the code.
-
Admins can configure discount rules, validity periods, and applicable ticket types in the Discounts Tab under the Admin Panel.
-
Ticket Status
ExpoPlatform uses different statuses to indicate the availability of tickets. Each status helps users and admins track the current state of tickets. Here’s a quick overview:
1. On Hold
-
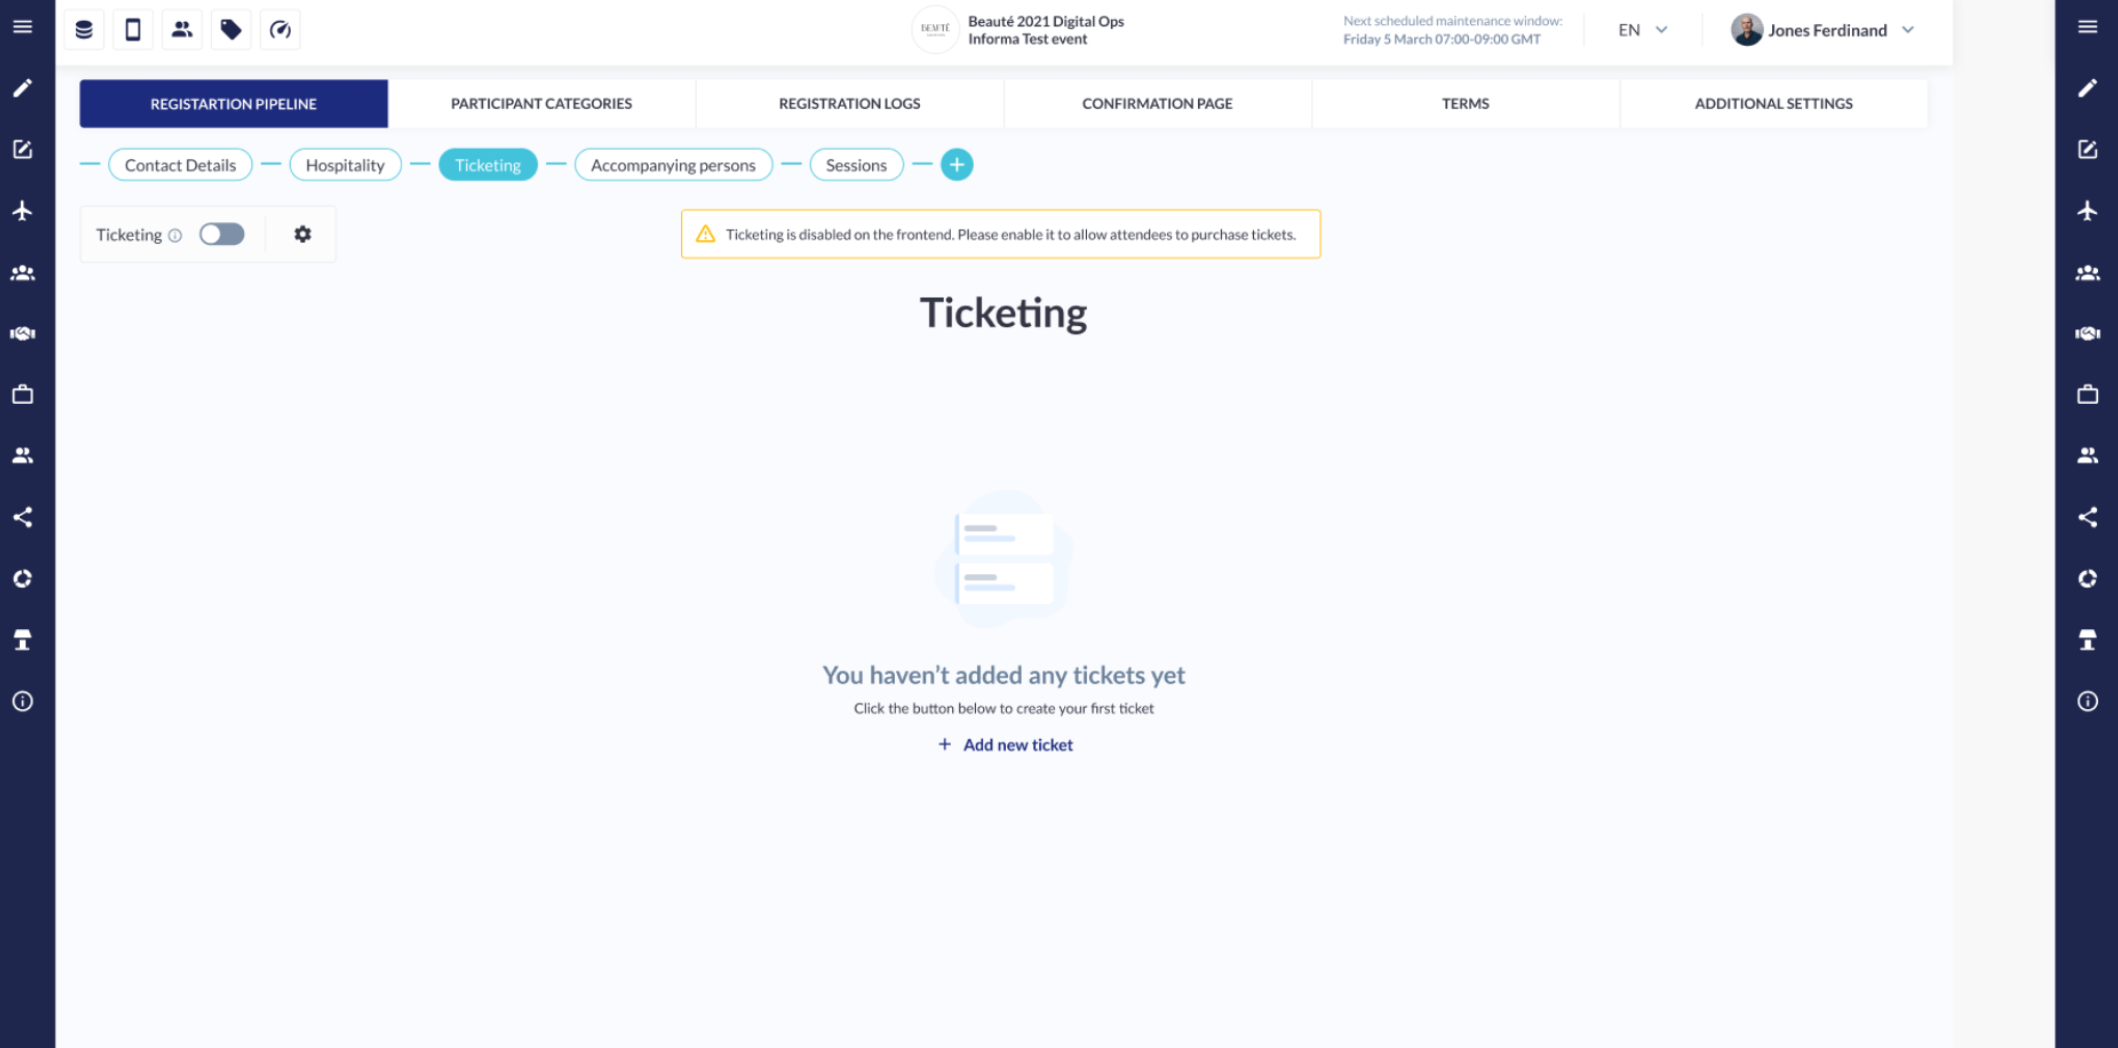
Description: Tickets are held when ticketing is disabled on the frontend. These tickets are not visible to users except for those already purchased.
-
When It Applies: When ticketing is disabled by the admin.

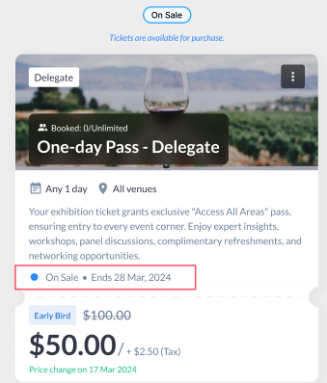
2. On Sale
-
Description: Tickets are available for purchase with a specified end date for sale.
-
When It Applies: When tickets are live and available for purchases.
-
Screenshot shows the "On Sale" status.
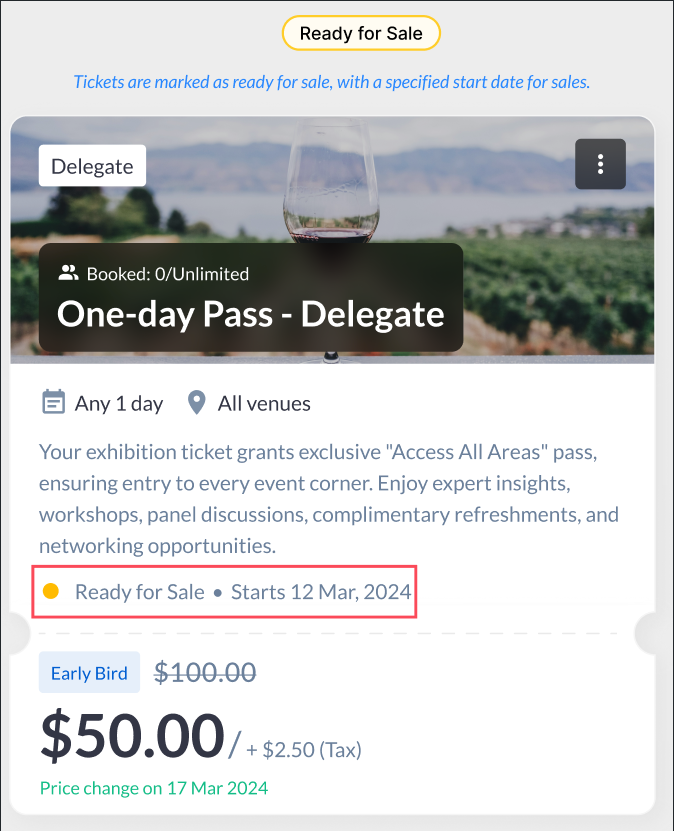
3. Ready for Sale
-
Description: Tickets are not yet available, but will be soon. The start date for sales is specified.
-
When It Applies: Before the sales start date.
-
Screenshot shows the "Ready for Sale" status and start date.
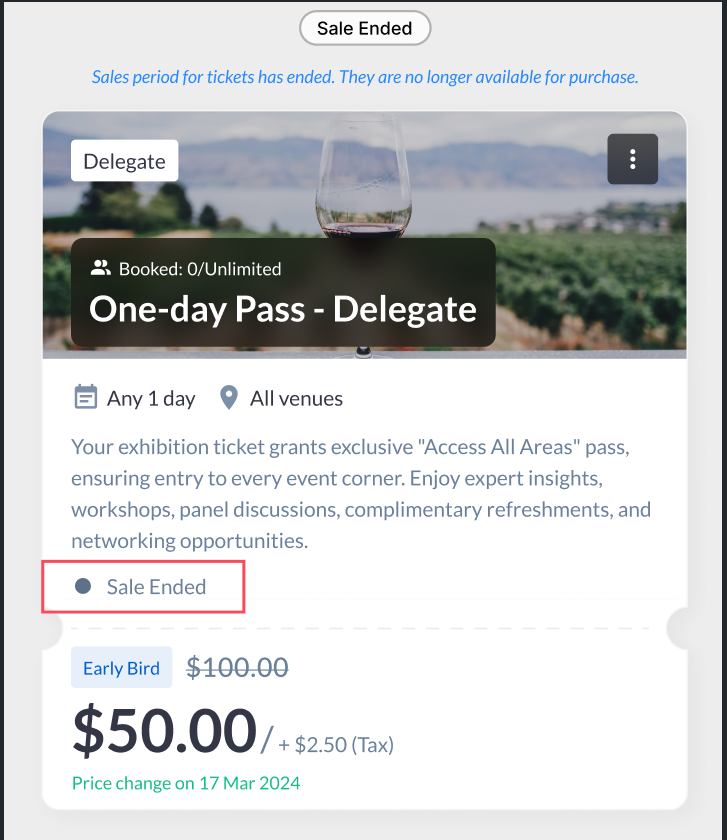
4. Sale Ended
-
Description: The sales period has ended, and tickets are no longer available.
-
When It Applies: After the sale end date.
-
Screenshot shows the "Sale Ended" status.
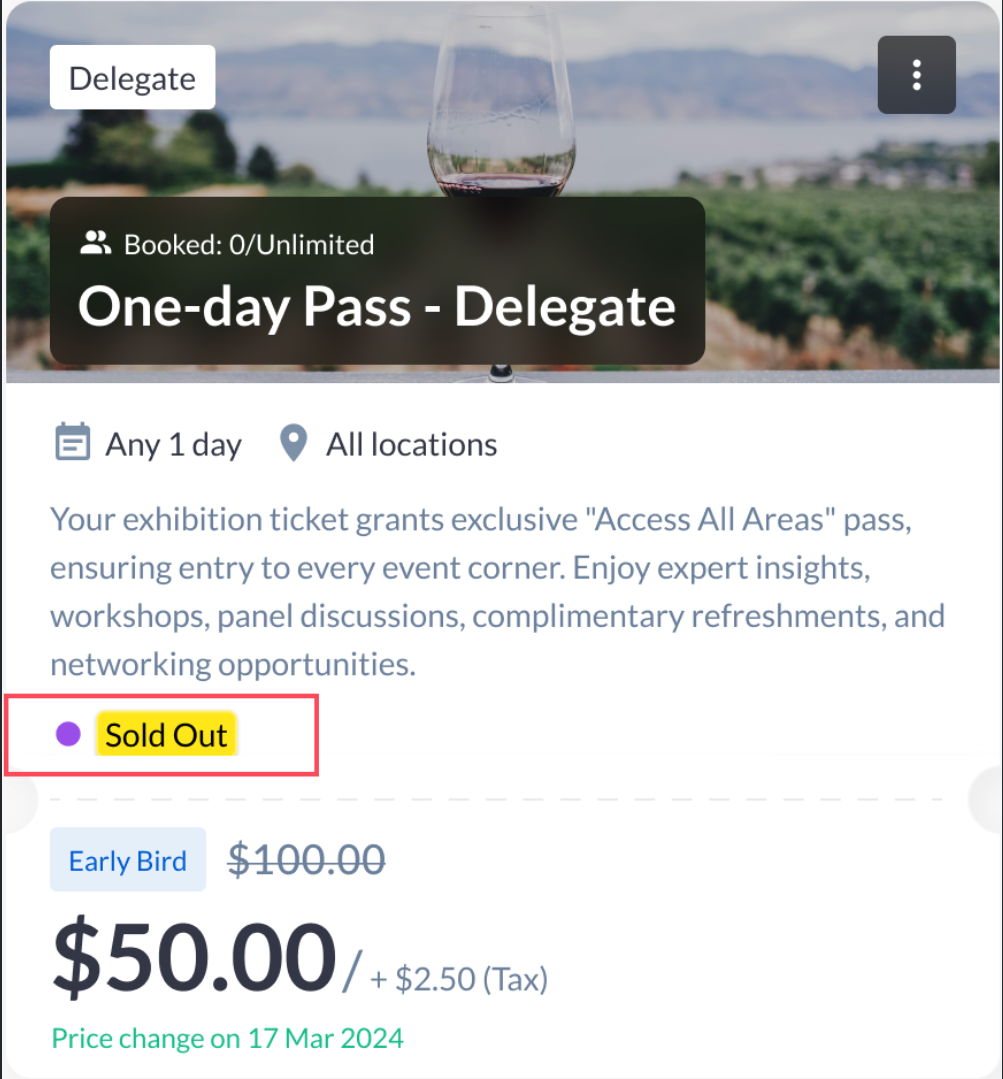
5. Sold Out
-
Description: Tickets are no longer available due to a full sell-out.
-
When It Applies: When the ticket's quantity is exhausted.
-
Screenshot Shows the "Sold Out" status.
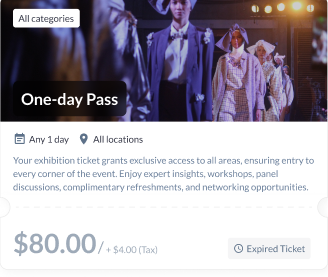
6. Expired
-
Description: Tickets are no longer valid after a certain time has passed (e.g., after the event starts or after a specific date).
-
When It Applies: After the event has ended or the expiration date has passed.
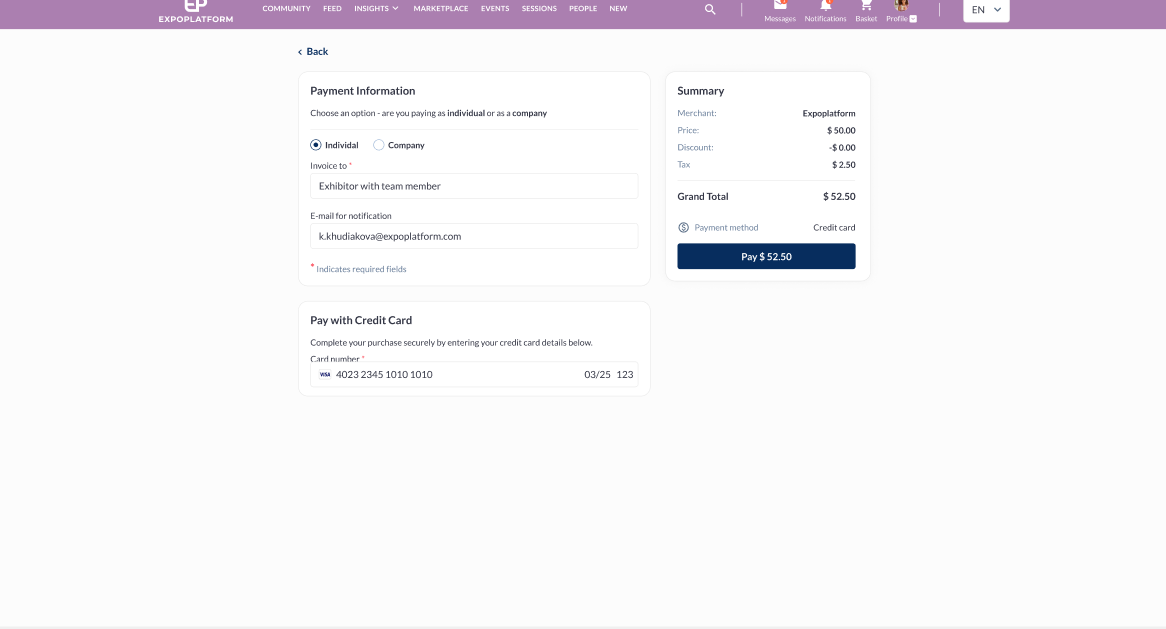
Proceeding to Payment
-
Reviewing Ticket Summary:
-
After selecting the ticket(s), attendees are directed to a summary page displaying:
-
Selected ticket type(s) and quantity.
-
Applied discounts or promotions.
-
Total amount payable.
-
-
-
Selecting a Payment Method:
-
Available payment methods depend on the configuration set by the admin in the Payments Section of the Admin Panel.
-
Supported payment options may include:
-
Credit Card
-
PayPal
-
Bank Transfer (if enabled)
-
-
-
Confirming Payment:
-
Click on “Proceed to Payment” to initiate the payment process.
-
Attendees are redirected to the payment gateway for secure transaction processing.
-
-
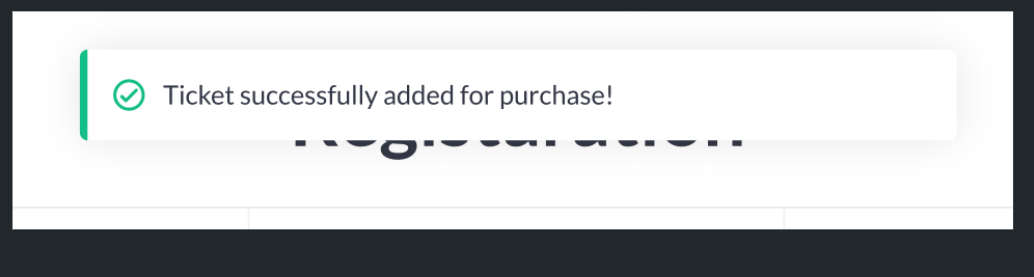
Successful Payment Confirmation:
-
Upon successful payment, a confirmation snackbar is displayed:
-
“Ticket successfully added for purchase!”
-
An automated confirmation email is sent to the attendee with the ticket details
-
Screenshot below shows the ticket successfully added status
Screenshot shows Ticket checkout and Payment Page :
Troubleshooting:
Ticket Not Visible During Registration
-
Verify that the ticket is enabled and published in the Ticketing Settings under the Admin Panel.
-
Check for any restrictions applied to the ticket type, including participant categories or registration periods.
-
Ensure that ticket visibility settings allow participants to view and purchase the ticket.
Screenshot displays the Admin Panel with ticket configuration and visibility settings:
Discount Code Not Applying Correctly
-
Verify that the discount code is valid and configured for the selected ticket type.
-
Check if the discount code has expired or exceeded its maximum usage limit.
-
Ensure that the correct format of the discount code is being entered.
Payment Errors or Failed Transactions
-
Review payment gateway logs for any failed transactions or connectivity issues.
-
Confirm that the payment gateway settings are correctly configured in the Payments Section.
-
Check if the selected payment method is active and supported for the event.
Ticketing Not Visible
-
Issue: Tickets are not showing on the frontend.
-
Possible Causes:
-
Ticketing is still in the "On Hold" or "Ready for Sale" status.
-
The admin has not enabled ticketing.
-
-
Resolution: Ensure ticketing is enabled and tickets are in the "On Sale" status.
2. Sold-Out Tickets Not Marked Properly
-
Issue: Sold-out tickets are still visible for purchase.
-
Possible Causes:
-
The ticket quantity was not correctly updated after the sale.
-
-
Resolution: Check ticket quantities and update them in the admin panel to mark tickets as sold out.
3. Tickets Not Being Created
-
Issue: Admins cannot create tickets.
-
Possible Causes:
-
The "Ticketing" feature is not enabled.
-
There is a system glitch preventing the creation of tickets.
-
-
Resolution: Enable ticketing in the admin panel and refresh the page.
4. Sales Period Not Reflecting
-
Issue: Tickets show as available outside the configured sale period.
-
Possible Causes:
-
The sale start or end dates were incorrectly set.
-
-
Resolution: Verify and update the sale dates in the admin panel to match the intended sale period.