Feature Purpose:
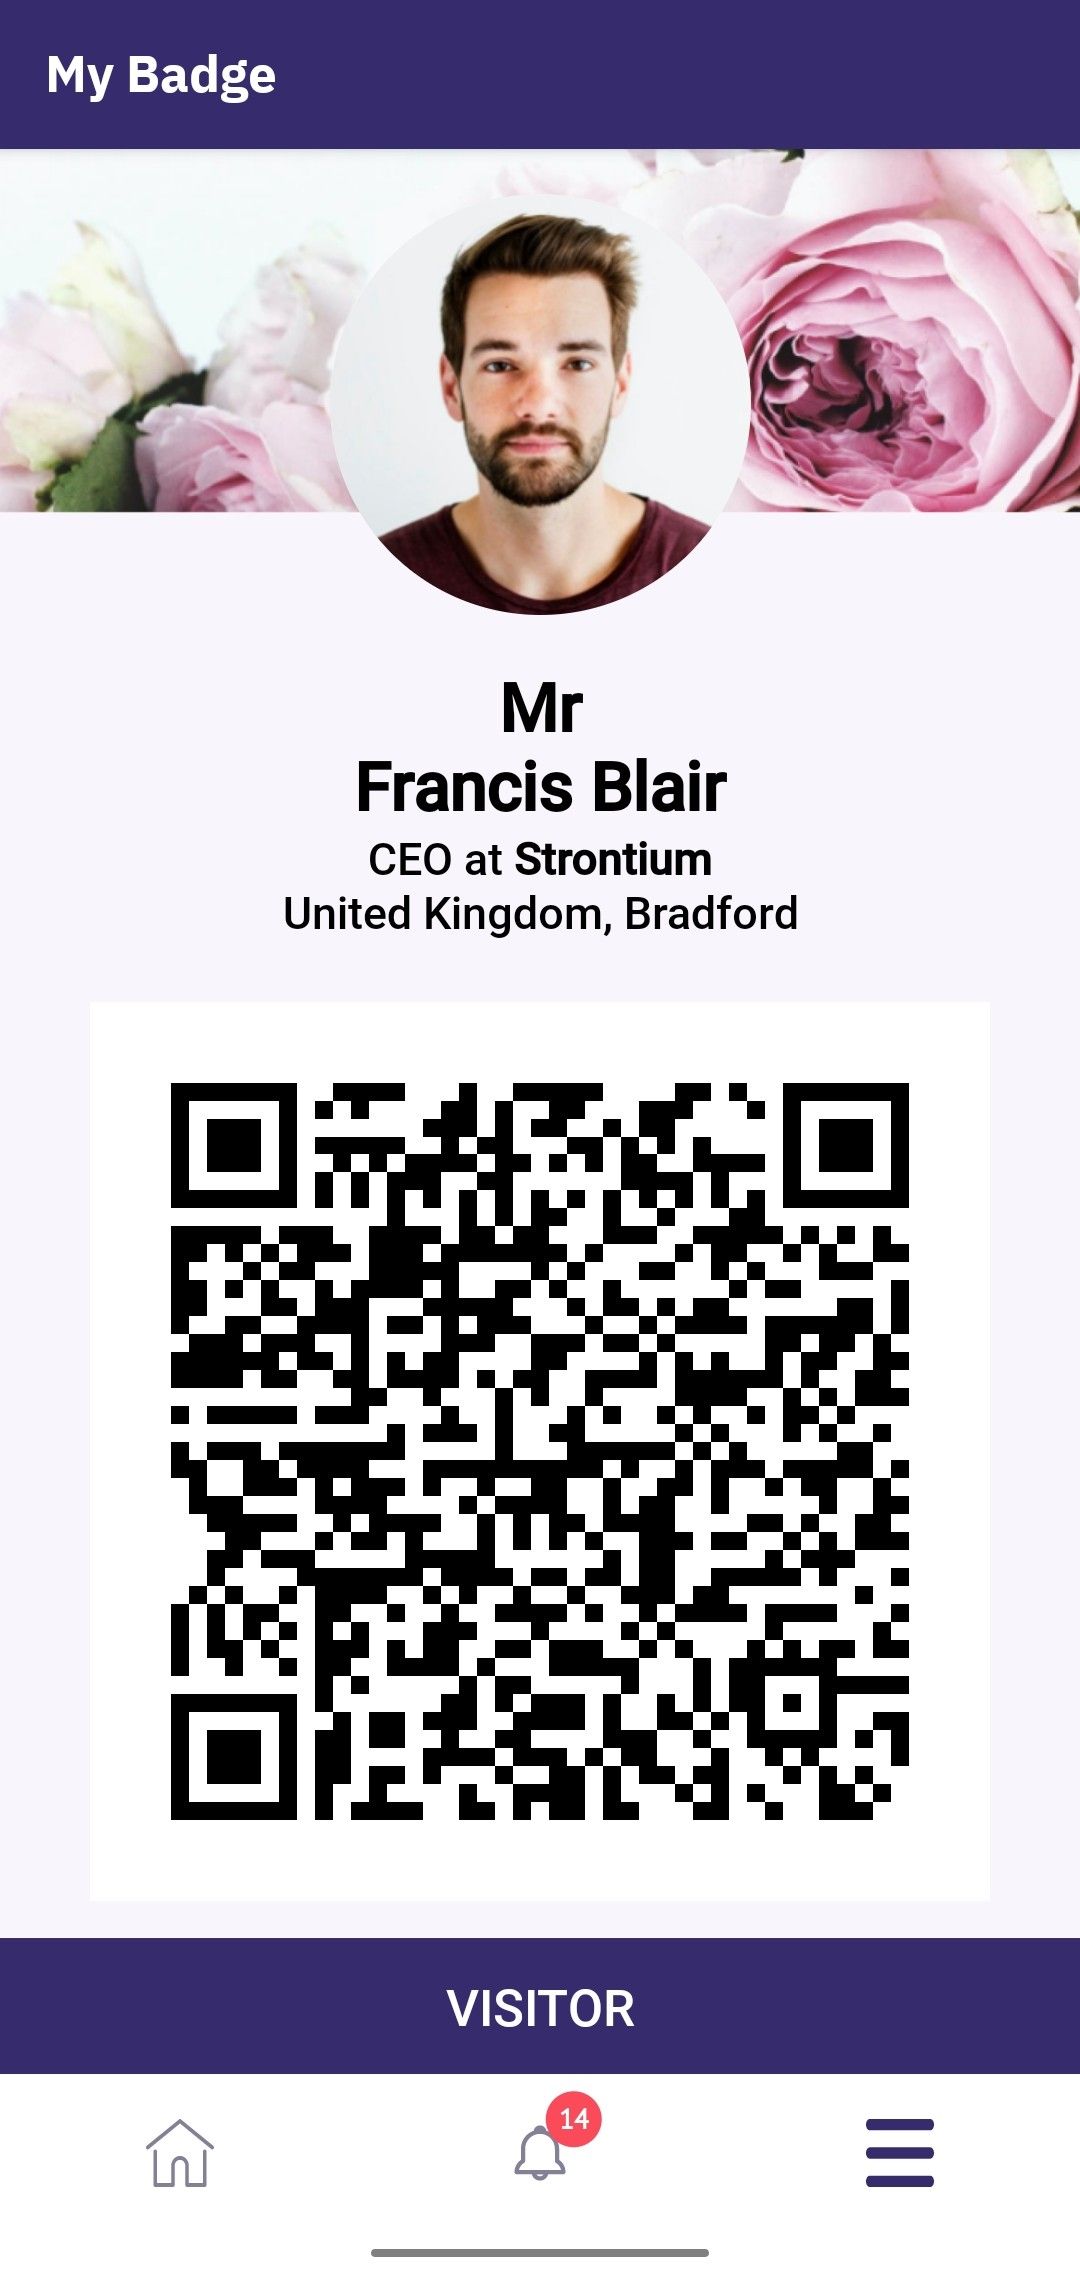
Allows organizers to create the digital badge that will be shown in the event mobile app, which allows the user's badge to be scanned immediately through the lead scanning feature of the event mobile application and through the EP check-in app, eliminating the need for the participant to carry a printed badge.
Working with this Feature:
Digital badge is a completely custom page and the setup can be managed in Admin panel under Registration settings > Badges > Digital badges
Digital badges can include all predefined fields from the registration form, both system fields and all custom fields from registration form. and other elements such as colour can also be managed.
System Default Fields
-
Photo
-
Mr. / Mrs.
-
Full Name
-
Job Title
-
Company Name
-
Country
-
City
-
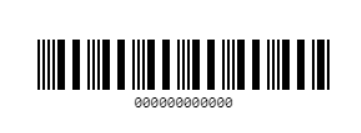
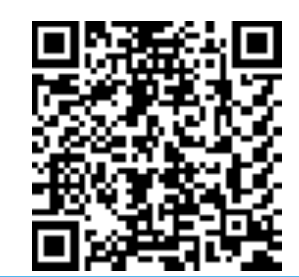
Bar Code, QR Code, Both or None
-
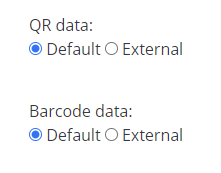
QR data can be either default or external
-
External barcodes supported formats are ITF / CODE128 / CODE39/EAN-13
-
-
Category
-
Background image
Setting Up Digital Badges:
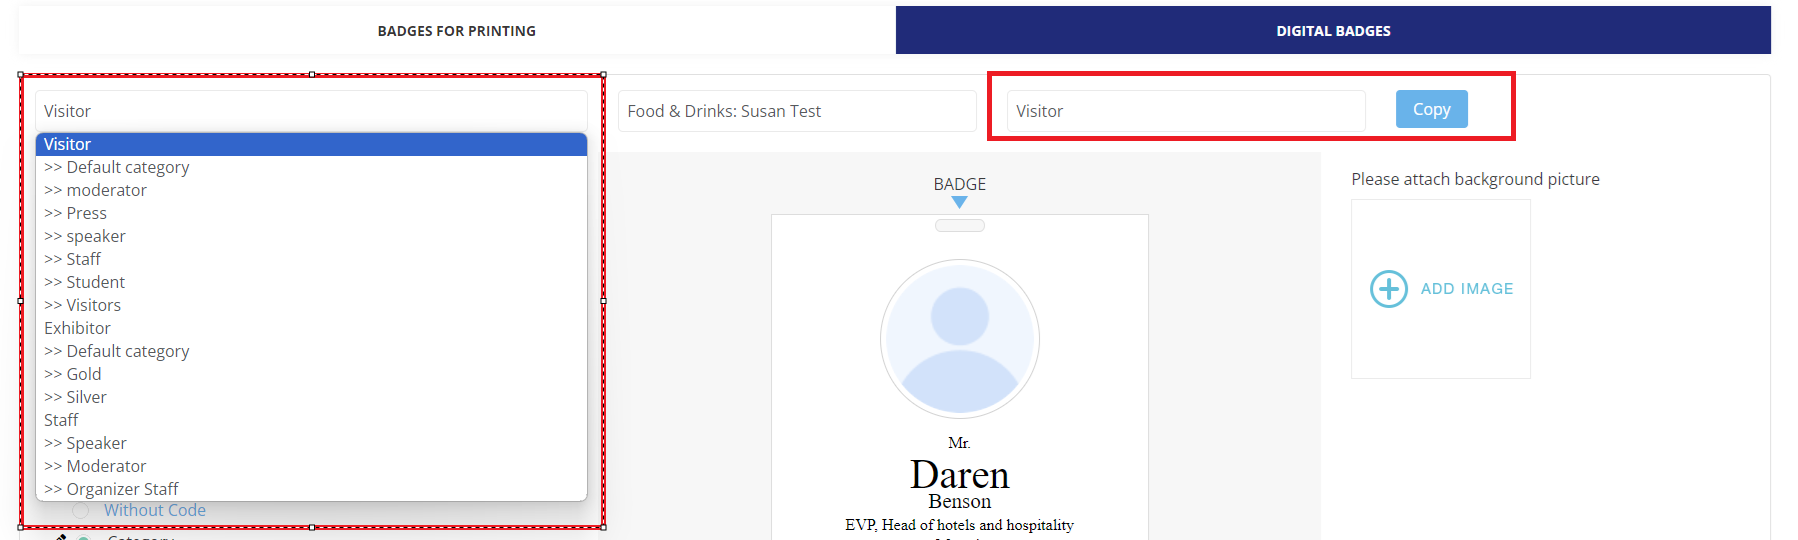
On the admin panel, navigate to Registration Settings → Badges → Digital Badges → Create and Save badges for all categories.
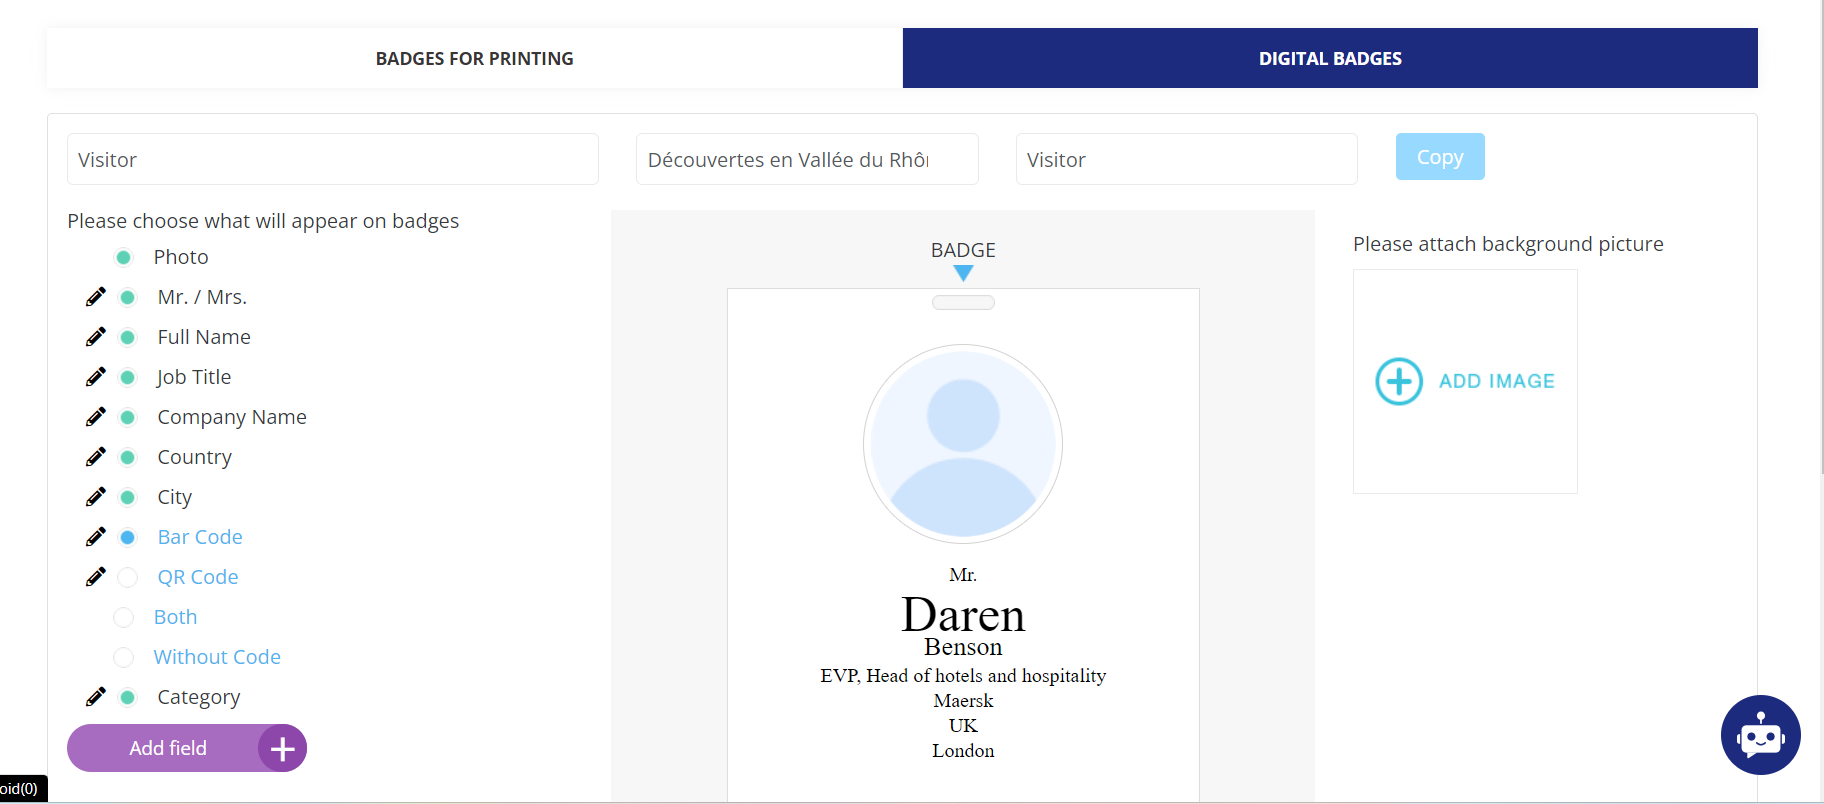
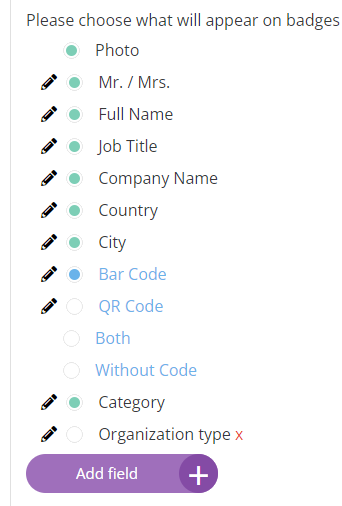
In the list, you have access to most of the pre-defined fields from the database and registration forms:
-
Photo
-
Mr. / Mrs.
-
Full Name
-
Job Title
-
Company Name
-
Country
-
City
-
Bar Code /QR Code: single / both / without code
-
Category
-
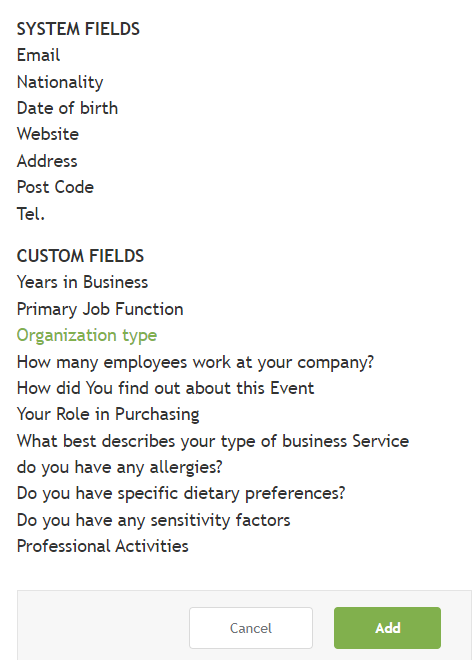
Add fields(allows to add any field from the registration pipeline/contact details section: custom marketing questions, custom fields, etc.)
-
Color
-
Barcode data
You can check/uncheck the radio button to indicate which elements will be part of the digital badge.
Elements that can be customized have a pencil icon indicating that additional options are available
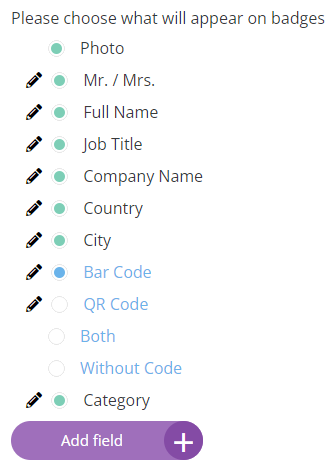

Fields that are not shown in the list can be added using the purple “Add field” button.
A list of additional fields will be shown and you can then click on the fields you’d like to add. Each clicked field will turn green to indicate it’s been selected and after you click the green Add button you’ll see these additional fields at the bottom of the list. Please note, you must then also click the radio button to confirm that a particular field should be displayed on the badge.
If you later change your mind simply click on the red x to remove that field.
Please be sure to set up a badge for each of your categories. To make this easier you have the ability to copy the badge setup you’ve done from one category to another as shown below.
Configuring the Code(s) that are Displayed:
ExpoPlatform currently supports 2 types of badges - Barcode based and QR based.
External QR or barcode comes into the picture when registration is happening outside of ExpoPlatform and organizers want to use the badge from the 3rd party platform to as the digital badge in the event mobile app.
In this case, the visitor details tagged to a particular badge on the 3rd party platform are passed to ExpoPlatform in the respective fields via external_barcode or external_qr code. The badges on EP are then configured using these values and since these values now exist in the ExpoPlatform database, attached to a specific record, these values are now recognized by the EP event mobile app, and EP check-in app, and can be used for scanning and lead generation.
If you plan to use external bar codes or external QR codes, you must be sure to click the relevant radio button to indicate this. By default the default code option is on.
Important Notes:
-
Please note that the only customization option available for our digital badge is the choice of color and the choice of first name, last name on one or two lines. Any other alterations or modifications beyond color variations are not currently possible.
-
Duplicated fields are not available for digital badges
-
Margin options are not available for digital badges. Field position remains in the same location whether or not the picture field is used
-
Background image:
-
The overall size of the background should be 378 X 658 pixels
-
Other sizes can be used: 1592 x 2330 pixels or 661 X 958 pixels
-
Keep the banner portion within 428px of the top portion of the background.
-
-
Optional animated, colored ring:
-
An optional, animated colored ring can be enabled using the toggle named “Ring around QR code” under
/admin/appbuilder/feature/2. -
This toggle is off by default and when turned on an animated, colored ring will be displayed around each digital badge QR codemaking it much harder for someone to use a screenshot of a badge for unauthorized entry or scanning
-
The ring color is set via the color picker at
/admin/badges/digital. You can assign different colors for different attendee categories. -
The ring is purely a visual enhancement and does not overlap or distort the QR code area.
-
A new parameter
qrRinghas been added to the/getexhibitionendpoint to support this feature.
-
Troubleshooting:
-
A particular category may have additional settings that are managed in the registration categories settings) so it’s important to check these as well
-
The Speakers/ Moderators roles have their own digital badge managed in same place
-
If someone is a team member, but doesn’t have his own category he’ll have the digital badge of his exhibitor