Feature Purpose:
The Hosted Buyer Automated Filters feature is designed to enhance the efficiency of managing buyer forms by automating the categorization and processing of buyer forms. This feature allows event organizers to set up specific criteria that determine how each buyer’s form is handled, streamlining workflow and ensuring that buyers are categorized accurately.
Working with this Feature:
-
Automatic Notifications
When a buyer’s status changes based on the applied filters (Accepted, Pre-Accepted, Pre-Rejected, Rejected), the organizer receives an email notification if the Buyer Filter Auto Status Notification is enabled. This feature ensures that organizers are kept informed about the status of buyer applications in real-time.

-
Adding a new filter:
In order to create a new filter, please follow the below steps:
-
Initiate Filter Creation:
-
Click on the “Add New Filter” button to open the filter creation form.
-
-
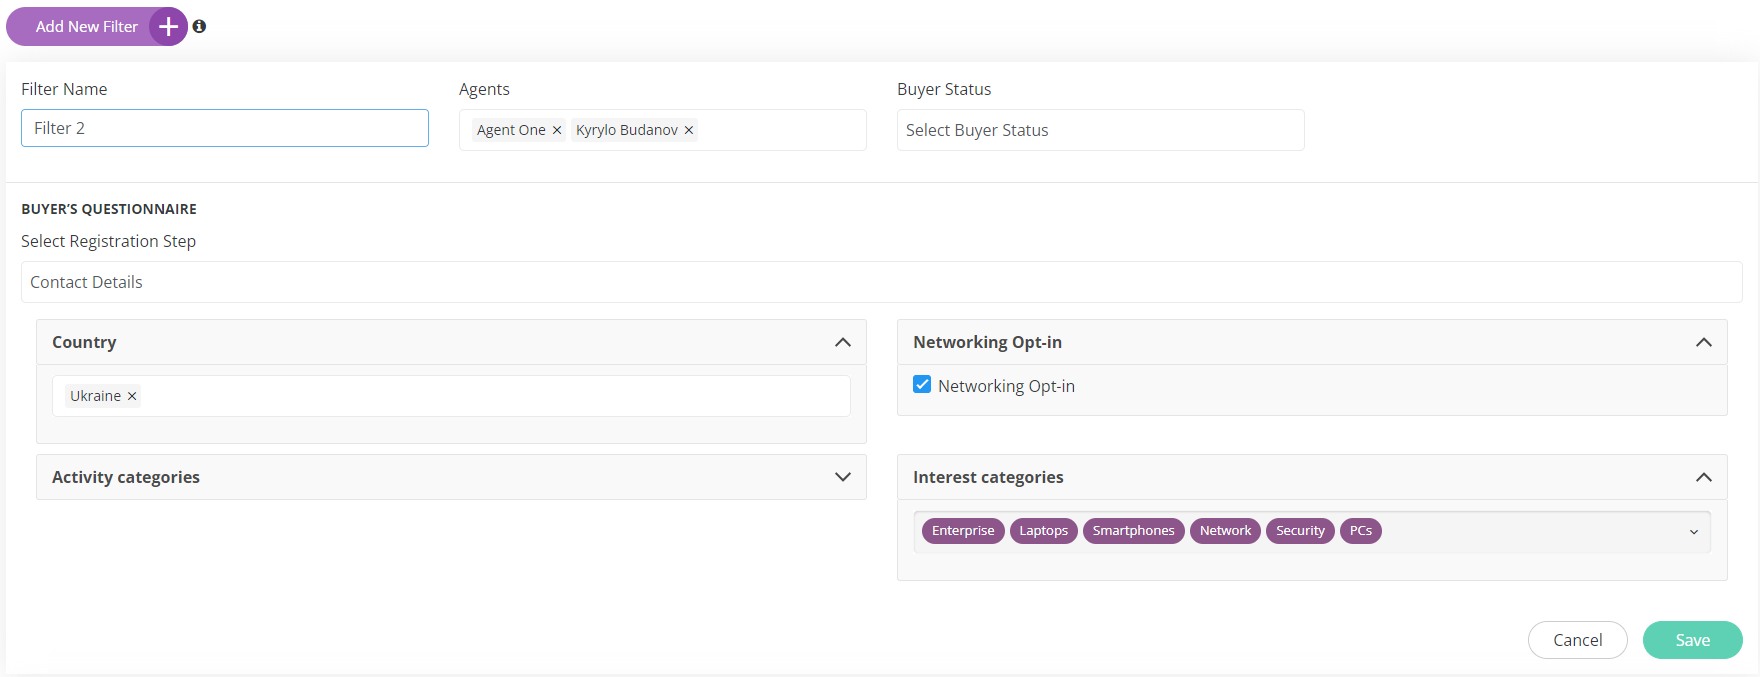
Filter Creation Form Fields:
-
Filter Name: Enter a descriptive name for the filter.
-
Agents: Select the agents associated with the buyer application. Multiple selections are allowed.
-
Buyer Status: Choose the status of the buyer that the filter will apply to (e.g., Accepted, Pre-Accepted). Note that only one status can be selected.
-
Buyer Category: This field appears if “Accepted” or “Pre-Accepted” is selected in the Buyer Status field. It defines which category will be assigned to the buyer. Categories can be managed at
/admin/hostedbuyers/categories. -
Buyer’s Questionnaire: Select specific fields from the buyer registration form. The form is divided into sections similar to the steps in the registration process. Organizers can choose the answers that will match the filter criteria.
-
-
Saving or Discarding Changes:
-
Click “Save” to apply the new filter.
-
Click “Cancel” to discard changes and exit the form.
-
-
Editing an Existing Filter : Please follow the steps for mofifying the existing filters:
-
Initiate Edit Mode:
-
Click the “Edit” button next to the filter you wish to modify.
-
-
Edit Filter Form:
-
The form that appears is pre-filled with the current details of the filter. Modify the necessary fields as needed.
-
-
Saving or Discarding Changes:
-
Click “Save” to apply the changes to the filter.
-
Click “Cancel” to exit the form without saving changes.
-
Deleting a Filter : Please follow the steps for deleting the existing filters:
-
Initiate Deletion:
-
Click the “Delete” button next to the filter you wish to remove.
-
-
Confirmation:
-
A warning pop-up will appear to confirm the deletion. This step prevents accidental removal of filters.
-
Troubleshooting:
Question: If as an organiser I have a 100 VIP buyers whom I don’t want to approve one by one manually, is there any automatic system of doing so?
Answer: Yes, you can use Hosted Buyer Automatic filter to do so, you just need to register the 100 buyers with any Agent unique reg link and need to apply “Accepted” filter associated with that Agent udner Hosted Buyer>>Filters.