Exhibitor Edit Page/Account
This article describes how an organiser can edit and manage the Registration Info and Security Settings for the exhibitor account.
Registration Info
A new tab Reg info is added on the Exhibitor edit page, which lists all the fields added to the exhibitor registration pipeline. Apart from this, it has the following other features
Depending on how many tabs were added (and enabled) in the Registration pipeline the same number of tabs will be visible on the exhibitor edit page
Ability to pick Registration form language (Multilanguage) by choosing from the drop-down setting. By default, the language in the manager panel will be selected
The layout of the reg info will depend upon the grid type used in the exhibitor reg pipeline
Can upload/replace logo from the exhibitor edit page
Registration Infor Page
Security
The Security tab consists of Exhibitor’s Password Change and Login Information of the exhibitor.
Security: Exhibitor Edit Page
Exhibitor Password: This allows the organiser to change and send the new password to the exhibitor by clicking on send to exhibitor email. The organiser can click on the Save button if he wants to create and save the password without the intention of sending the email to the exhibitor.
The organiser is able to send the password even if OTP authentication is enabled
If the password created doesn’t meet the requirement the system shows an error.
Login Information: This section consists of a table that captures the login information for the exhibitor showing the Date and Time of login along with the IP address and Device version of the app or browser. It also captures the source of login like Customer Service or Exhibitor Login
Login actions that are done via the integrations - SAML 2.0 Login Authorization, Reach5 and IRIS - are also counted.
Exhibitor Level Settings
This tab enables the organiser to manage the exhibitor-level settings.
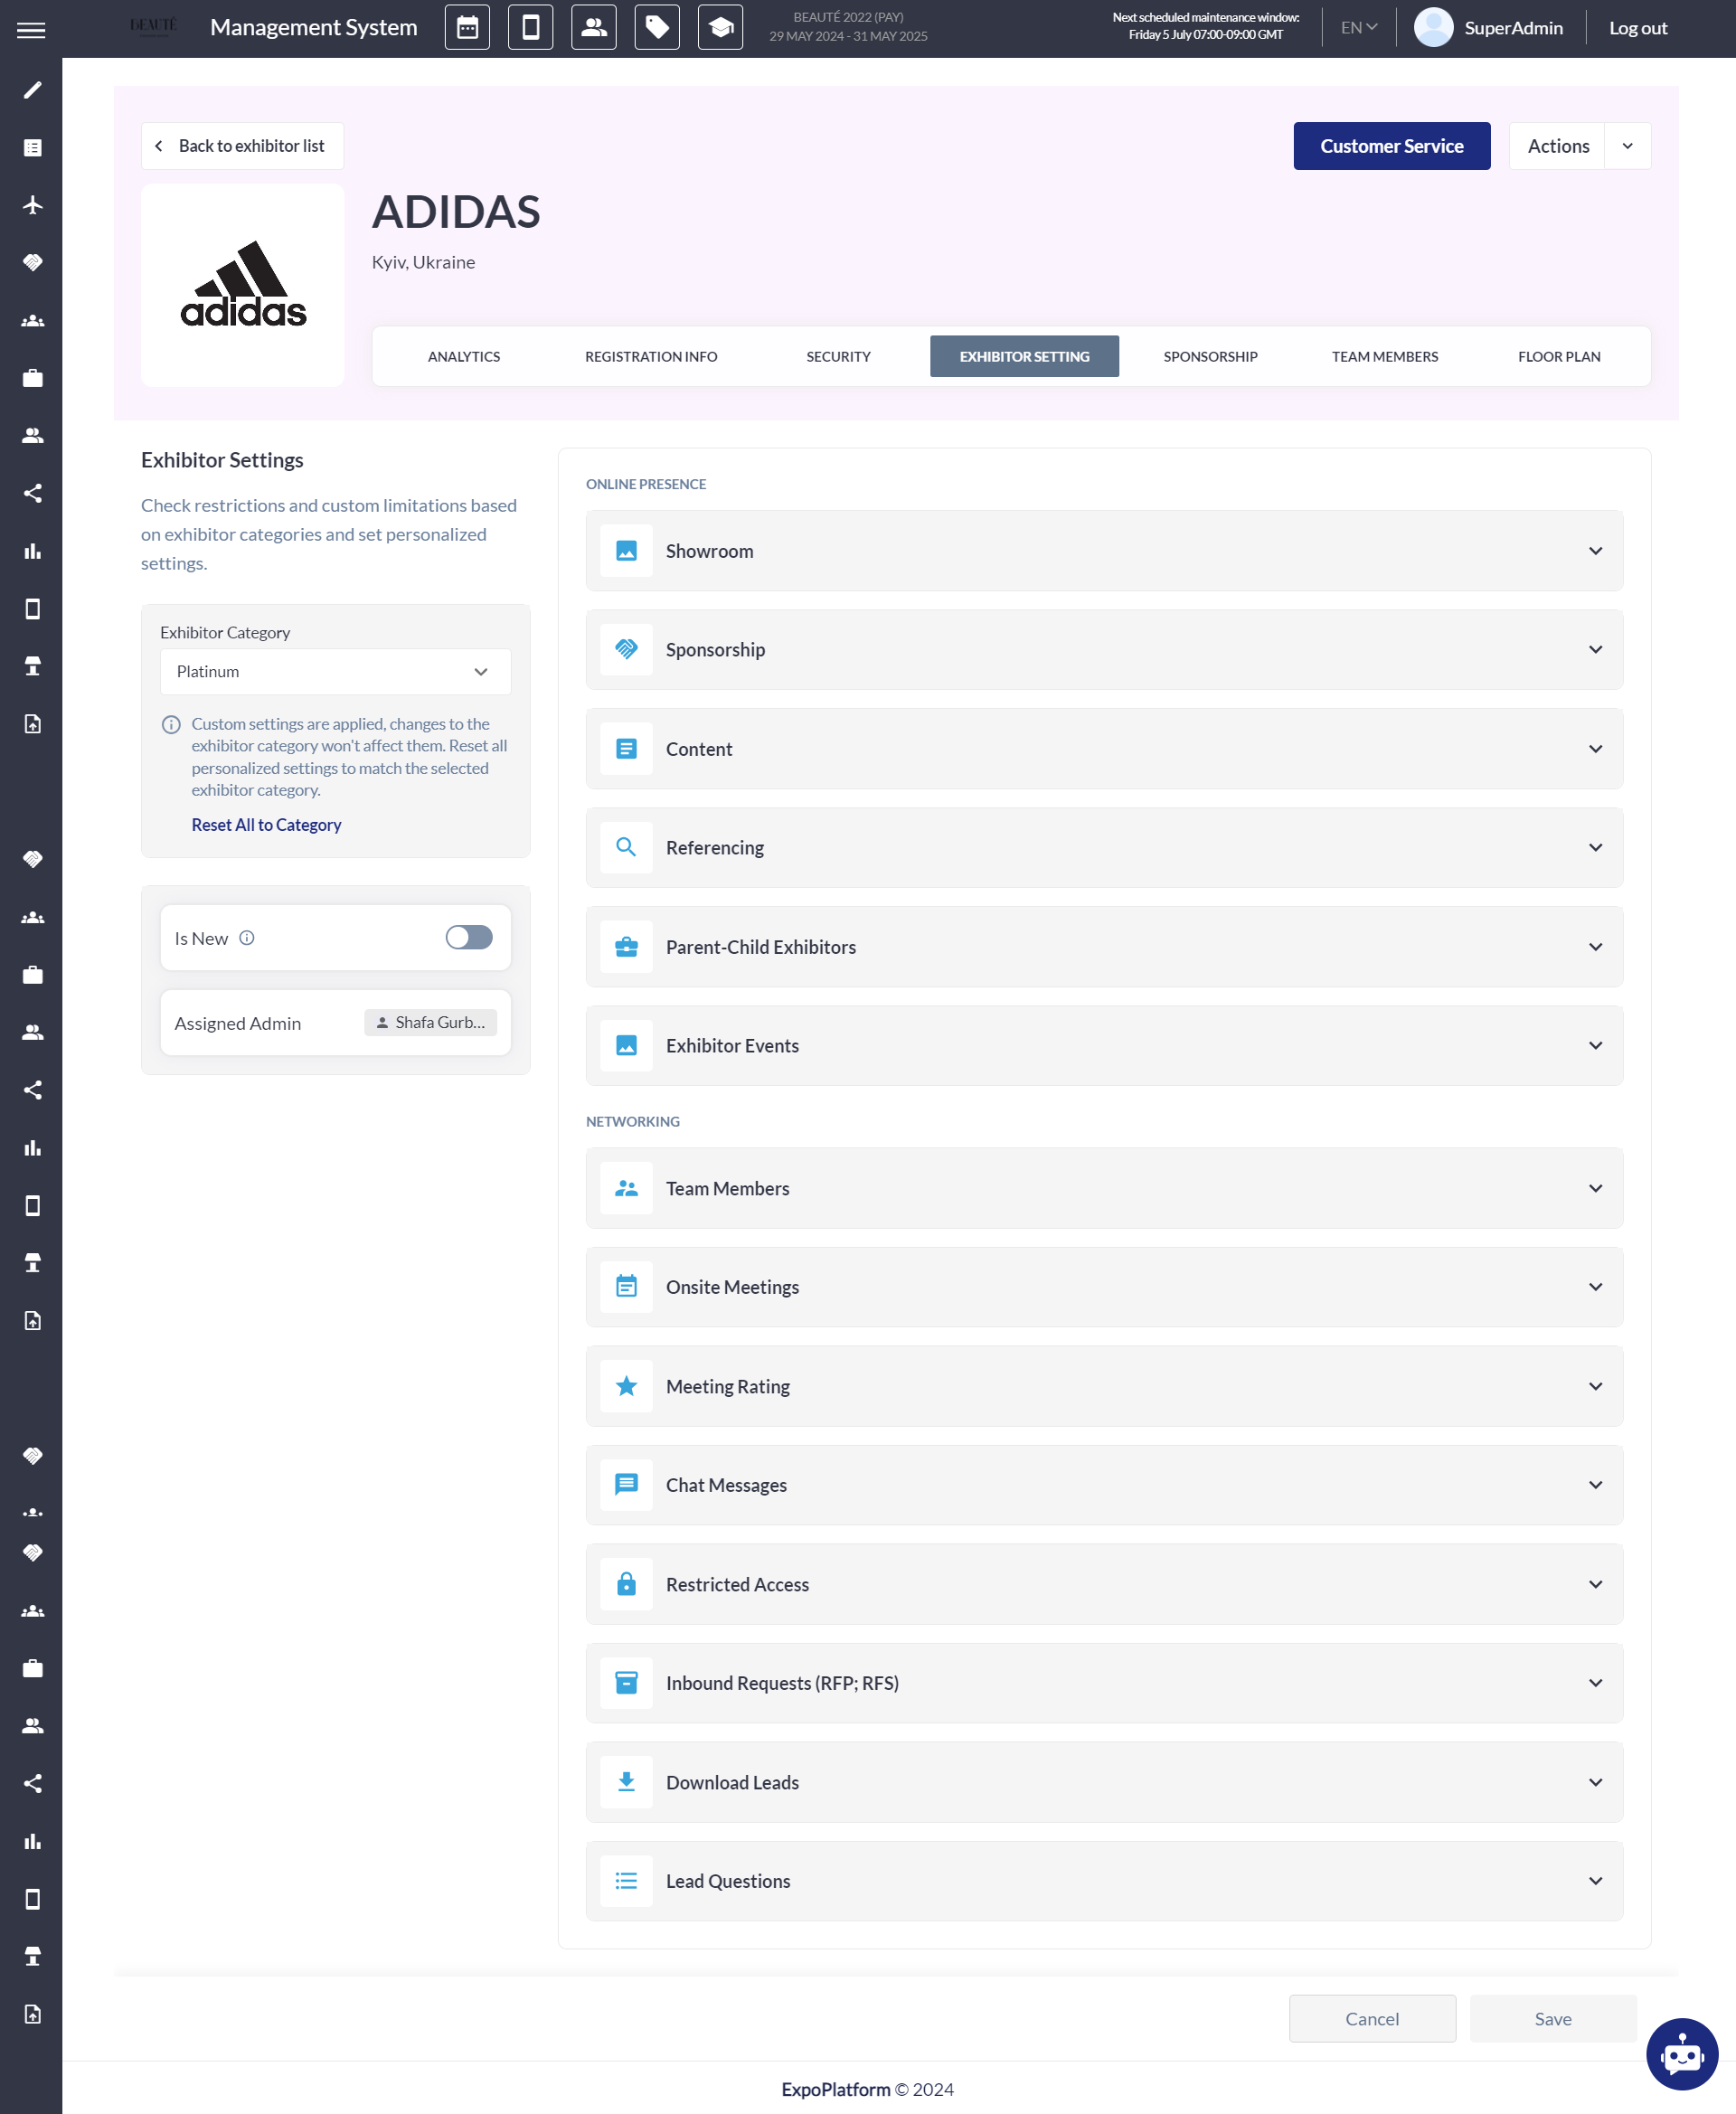
Exhibitor Level Settings
Few of the existing exhibitor-level settings have been renamed. Below is the list of settings that have been renamed
Old name | New name | New tooltip |
|---|---|---|
Do not allow Team Members | Allow Team Members | – |
Do not allow video | Allow video | – |
Do not allow additional video | Allow additional video | – |
Do not allow active products | Allow active products | Turn toggle ON to allow exhibitors of this category to have active products |
Do not allow marketing content | Allow marketing content | Turn toggle ON to allow exhibitors of this category to have marketing content |
Do not allow news | Allow news | Turn toggle ON to allow exhibitors of this category to have news |
Two new tabs, Video and Download Leads added to the settings block, where Video defines if the exhibitor is allowed to add the video to their profile and Download Leads define whether the exhibitor and his team members can download leads.
Settings that are applied at the global exhibitor level, with no control at the category level but with control at the individual exhibitor level, when the Global setting is OFF, the options will be hidden from the Exhibitor edit page.
Organiser can change the category of the exhibitor from the Setting tab
The organiser has the option to set all the exhibitor settings based on the exhibitor category selected by clicking on Reset All to Category
If no custom changes are applied at the exhibitor level: The system shows message: All settings are synchronized with the exhibitor category.
If Custom changes are applied: The system shows the message Custom settings are applied, changes to the exhibitor category won't affect them. Reset all personalized settings to match the selected exhibitor category.
The main container tab is divided into Online Presence and Networking like we have it under Exhibitor Category (/admin/registration/ecategories) and can be set similarly as we do it at category level
Sponsorship
This tab describes how the sponsorship opportunity can be managed at the exhibitor level. If the sponsorship is disabled for the exhibitor this page shows the message “Sponsorship is disabled”.
How to enable sponsorship for the exhibitor
To enable Sponsorship click on Exhibitor Setting/Sponsorship on the left panel of the screen, it will redirect to the Exhibitor Settings Tab to enable Sponsorship for the exhibitor
Under Sponsorship click on the On button to enable the sponsorship
Enabling Sponsorship
This page is divided into 2 section
Sponsorship
Banner: We can upload banners like previously on all pages. The banner card has a toggle that turns the banner on and off to manage its visibility.
Hovering the cursor on the image placeholder allows the organiser to upload the image for all devices.
Once the banner is uploaded, the organiser gets an option to either replace or delete the banner.
The system displays a green checkbox if the image is uploaded correctly and a warning icon if a certain image is not uploaded when the banner is enabled.
Uploading Banner
Sponsor video for online room entrance: Likewise, organizers can upload videos for online room entrances. The system also lists the supported formats for video uploads.
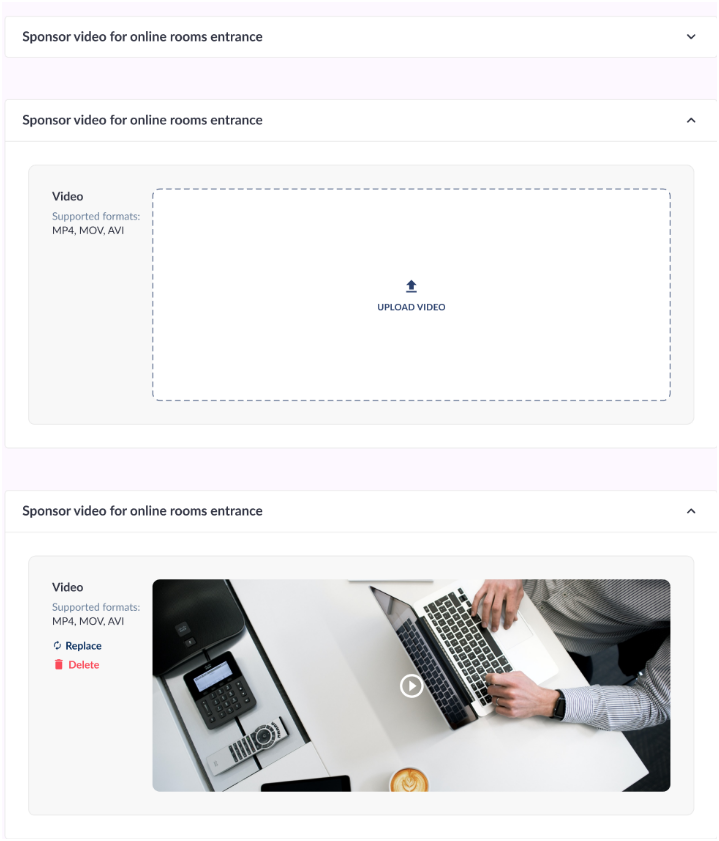
Sponsorship video
Team Member
This section defines how the organiser can manage and add exhibitor Team Members. All team member data will now be visible under the team member tab on the exhibitor edit page. The organiser can add, edit, delete and view the profile of the team members from this section.
Exhibitor Account: Team member
How to manage and add Team Members for the exhibitor
To manage the number of allowed team members, the organizer can click on "Exhibitor Setting/Team Member" on the left panel. This will redirect them to the Exhibitor Setting tab, where the organizer can edit the team member limit.
The table on the screen displays the details of the team members added for the exhibitor, including their roles and Lead Capture allowance.
The Action tab allows the organiser to Edit, Delete, Print Badge and View the Profile for that member.
If no team members are added or allowed to be added, this section will be blank. All team members in the table are listed in ascending alphabetical order (A-Z).
Team Member search is possible by name, surname, email or job title.
The team member adding form includes not only the 6 default fields but also all fields from the visitor registration form with the "Use for team member creation" parameter checked.
The contact person section allows the organiser to add the details of the contact person for account and invoicing purposes.
Floor Plan
This section allows the organiser to manage the Stand location for the exhibitor. A new tab Floor Plan is added to the Exhibitor Edit page
This page is empty if Floor Plan is not enabled under Management Floor Plan.
Exhibitor Settings: Floor Plan
Organisers have the ability to perform the below task
Search Hall from the Hall tab drop-down menu and switch between different halls created on the floor plan
Can search Stand via using the Stand name
Can Add/Delete the stand for the exhibitor from the Stand search tab
The added stand is shown on the stand block on the right side of the screen
The selected stand gets highlighted on the floor plan image
Can select stand directly from the hall image and once added it is shown under the stand column on the right-hand side of the screen
Can choose to show a stand on the Floor plan from the Stands Column.
If a stand is deleted, it disappears from the list, and the Exhibitor is no longer related to the deleted stand.
In the case of ExpoFP Floor Plan, we will still have this tab/page but it will not show the floor plan image, just the stand details will be displayed
Analytics
A new tab Analytics has been added to the exhibitor edit page, which gives detailed analytics of that very exhibitor and its team members.
General Graph Description
If the exhibitor is deleted from the event his stats are not included in measuring an average value per exhibitor
There are no time limitations/filters by dates, the graph shows the time period since when the exhibitor was added
If any object (like chat or product) is deleted, all stats about this object are deleted also in analytics.
When a user unfavorites an exhibitor, the favourite should be deducted from their count in our graph.
The Analytics page shows stats for the following actions
Leads
Profile Stats
Incoming Meeting SOurce
Meeting Request
Products
Top Performers
Lead Capture
Chats
Event Activity
Content
Analytics Tab
Leads:
Shows the total leads generated by this exhibitor, split into Offline and Online leads. It also shows correlated values in average per Exhibitor
Offline action includes badge scanning or any action taken onsite at the event whereas Online action includes favouriting a profile, Scheduling a meeting, Viewing a profile etc.
It also shows the lead generation sources
Lead generation sources display the unique actions taken by users.
By unique action, we mean that even if a user performs the same action multiple times, it is only counted once. For example, if a user favourites an exhibitor’s profile, unfavorites it, and then favourites it again, the system will count it as just one favourite.
e. The system displays the average number of leads per exhibitor for the event, allowing admins to compare an individual exhibitor's lead count with the event average.
f. Exhibitor leads come from actions taken on their profile as well as from their team members' activities.
Leads
Profile Stats
The system accurately displays the date an exhibitor was first added to the platform.
The system calculates and displays the number of matches found by the Matching Mechanism
Potential matches include both visitors and other exhibitors
The category is displayed with a standard icon and a system-assigns random colour.
There is a quick redirect functionality to the Settings tab for changing the category by clicking on the pencil icon on category tab
Displays the Profile completeness chart
Profile Stats
Incoming Meeting

Incoming Meeting
a. The system displays the sources of incoming meetings for the current exhibitor same as the Meetings tabs on Analytics page
b. If no meetings have originated from a particular source, that source is not displayed in the list.
c. The system allows sorting by "All," "Web platform," and "Mobile app"
d. On hover, a tooltip displays the detailed data related to the source, such as the number of meetings generated from that source.
e. Meetings of an exhibitor also include those of their team members.
Meeting Request
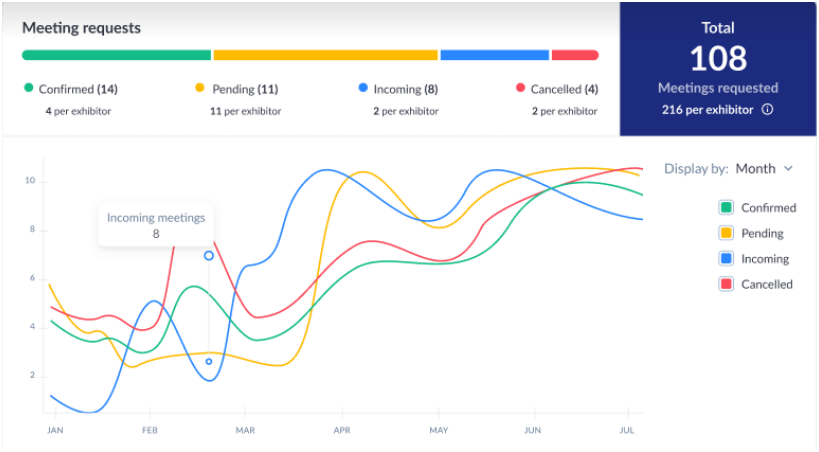
Meeting Request
a. The system aggregates and displays the total number of meeting requests associated with the exhibitor and all their team members.
b. The graph shows the progression of total meeting requests over time for the exhibitor, capturing the dynamic nature of meeting requests.
c. It includes both regular and table meeting stats
d. When the autoconfirm setting is applied, pending meetings are excluded from the total counts and graphical representation
Product
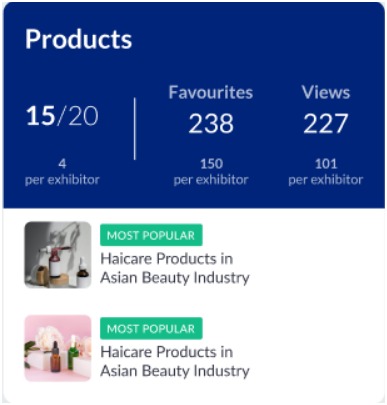
Product
a. The system displays the number of active products with the set limit for the exhibitor.
b. Display how many times products have been favourited and viewed, ensuring only unique actions
c. Displays 2 Most Popular Products based on the number of times the product is favourited
d. If products have an equal number of favourites, the product that reached the top first will be listed.
Top Performers
Top Performers
a. Display the average number of actions performed by all team members of the exhibitor at the event, providing insights into the exhibitor's overall engagement level.
b. Display the top four performers among the exhibitor's team members based on the sum of all recorded interactions.
Lead Capture
Lead Capture
a. The system displays the categories chosen during lead scanning
b. Display the rating (number of stars) assigned during lead scanning in the app
c. Show the type of lead captured during scanning (Old/New) (Contacted/Not Contacted)
d. Include a correlated average value per exhibitor at the event for both the number of scans and the types of leads captured
e. If Lead Capture is disabled, the entire section displaying scan statistics is hidden
Chats
Chats
a. This section displays the total number of chats for that very exhibitor
b. Also, displays the total number of messages and the average number of messages per chat
c. Shows correlated average values per all Exhibitors at this event.
d. Hovering the cursor over the bar graph shows the number of chats initiated on that day, week or month.
Event Activity
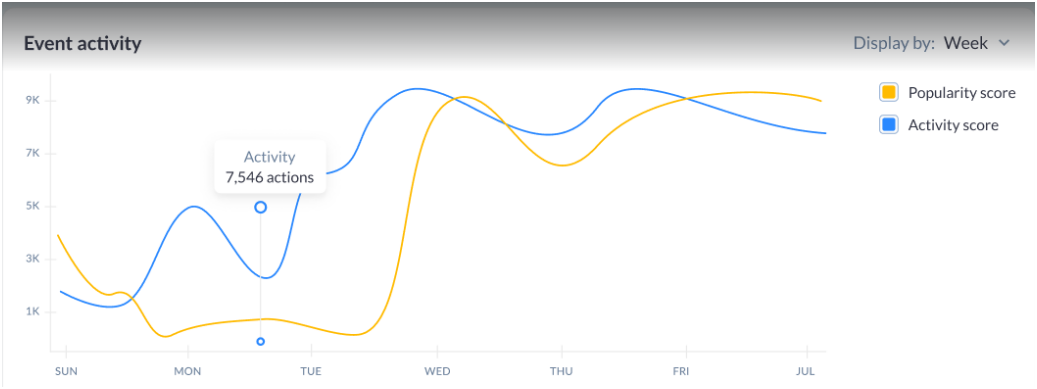
Event Activity
a. Shows dynamic of Activity and Popularity score over time for the exhibitor and its team members.
b. This graph is not shown in 2 cases - all values in admin/interaction Score (Activity and Popularity score) are 0, or the Leaderboard module is turned off from module management
c. Hovering a mouse cursor over a specific point on the graph, shows the exhibitor’s score at that point.
Content
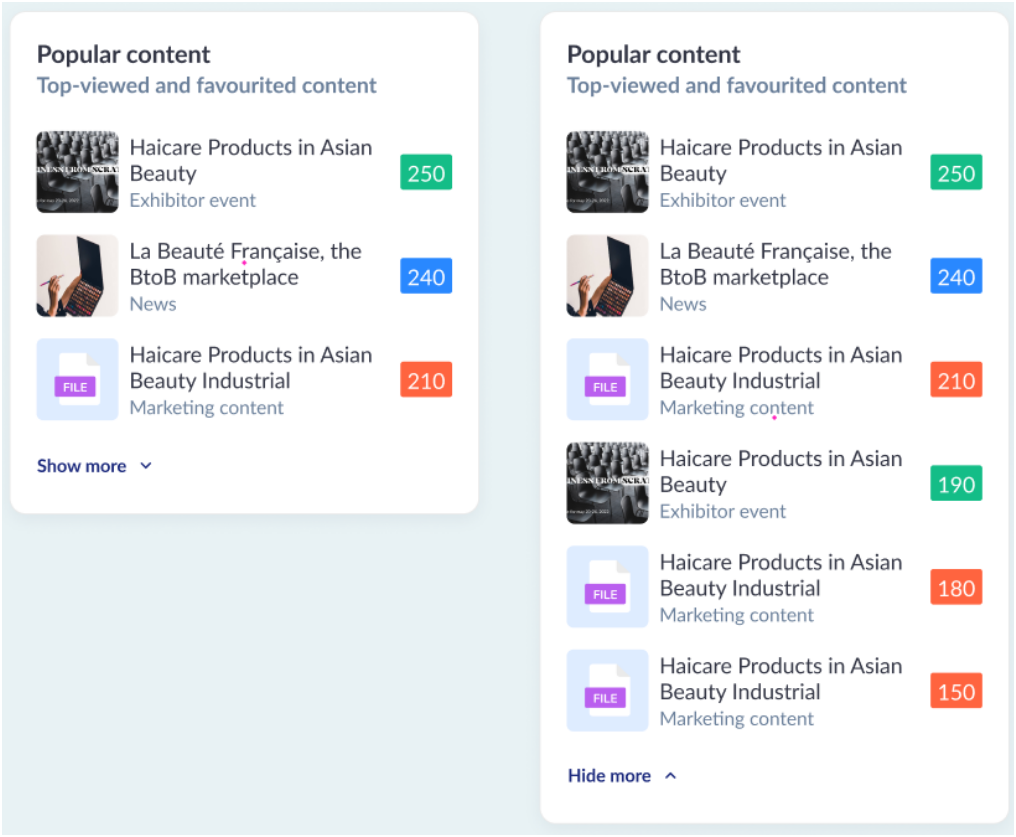
Content
a. Shows top Exhibitor News (views), Exhibitor Events (booked) or Downloaded Content for the Exhibitor ranked by the values.
b. It shows the top 3 content for the exhibitor, the organiser can click on Show More to see the top 6 popular content
