Feature Purpose:
This feature allows you to manage the different areas where people can check in. These areas are shown as cards on the screen and can be based on the floor plan or created manually.
Working with this Feature:
-
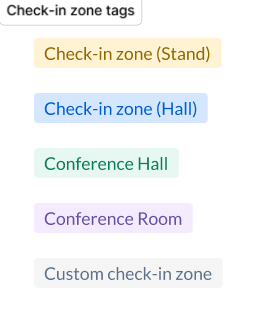
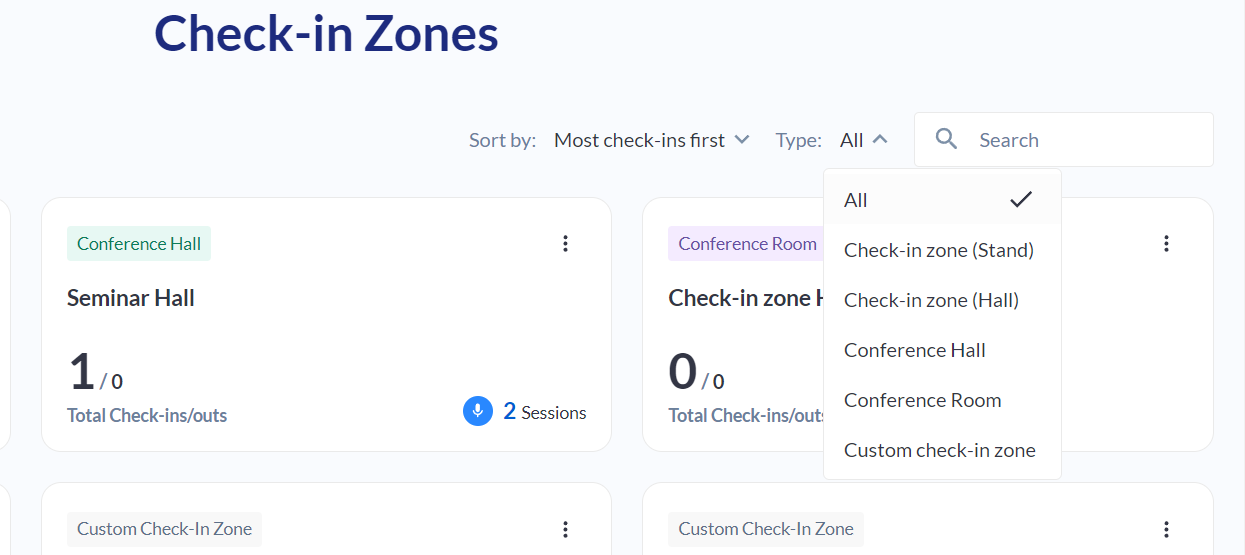
Viewing Zones: You'll see a list of tags representing different check-in zones. These tags are color-coded to help you identify different types of zones.
-
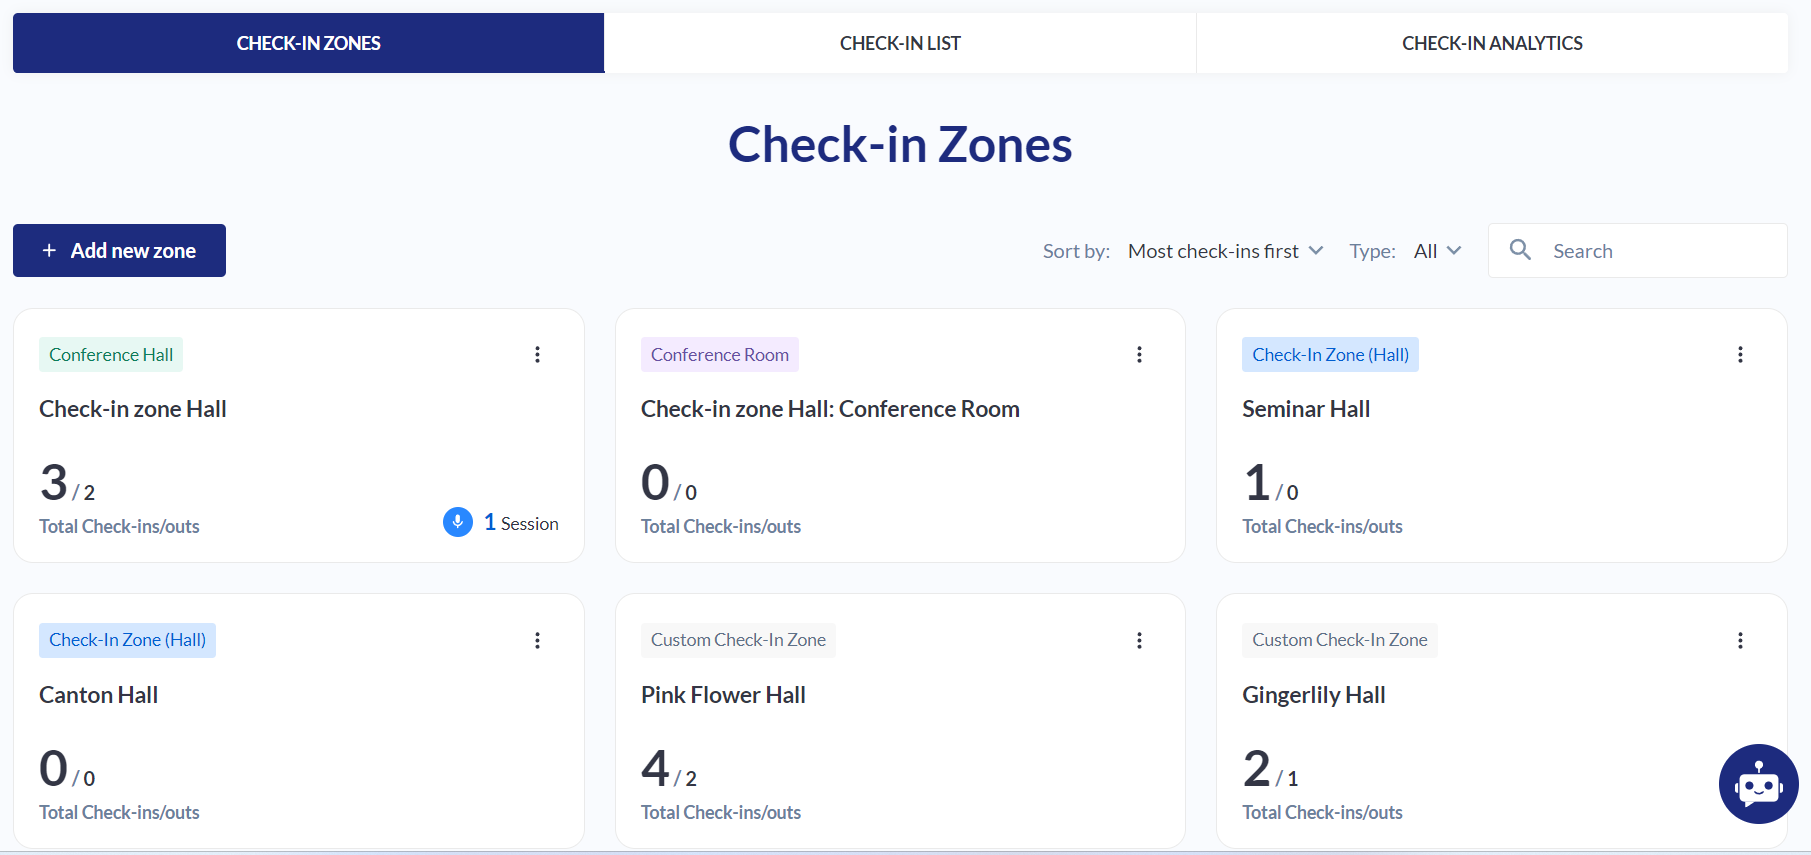
Zone Order: The zones are displayed in a specific order: conference halls, conference rooms, check-in zones in halls, check-in zones at stands, and custom zones. This order cannot be changed.
-
Adding New Zones: You can add new zones by clicking the "Add New Zone" button. You can create zones based on the floor plan or create custom zones.
-
Floor plan zones: You can select the areas available on your floorplan and add them as check in zones.
-
Custom zones: These zones are created manually and are not linked to the floor plan.
-
-
Searching for Zones: You can search for specific zones names using the search bar.
-
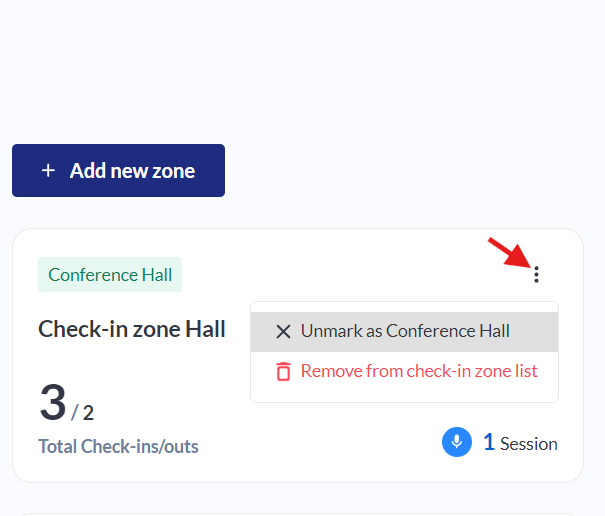
Managing Zones: You can make changes to existing zones, such as editing the name of a custom zone or removing a zone from the list.
-
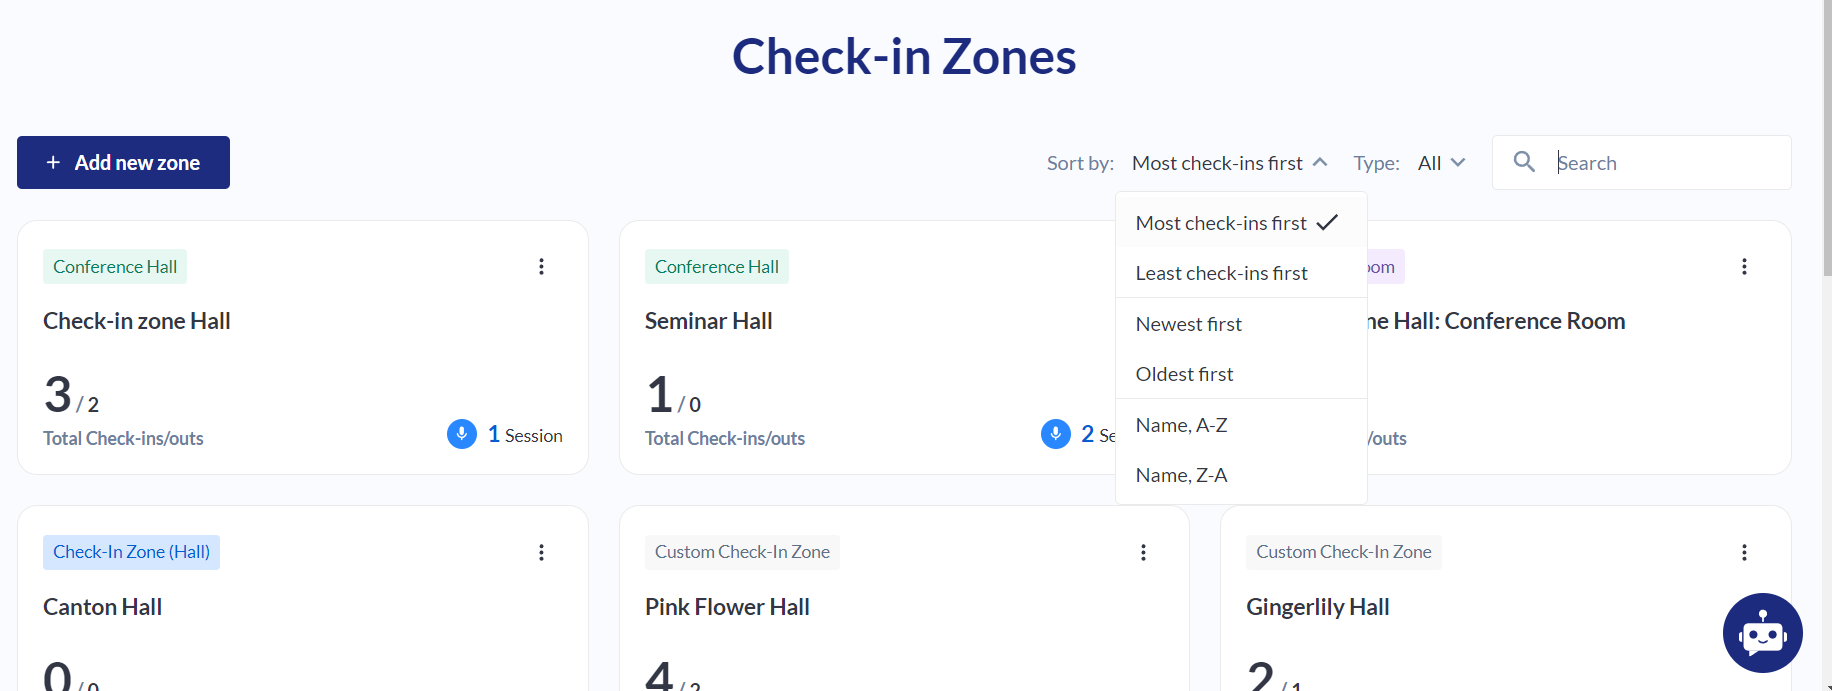
Filtering and Sorting: You can filter and sort the list of zones to find the information you need quickly.
-
Sort by:
-
Type
-
-
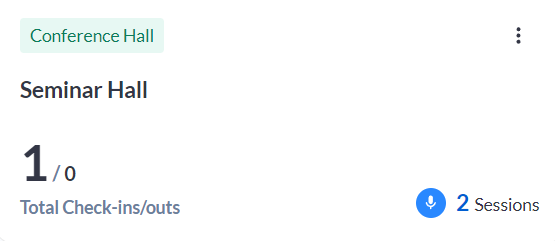
Zone Information: Each zone card displays information about the zone, such as the number of check-ins and how many session are happening in that area
-
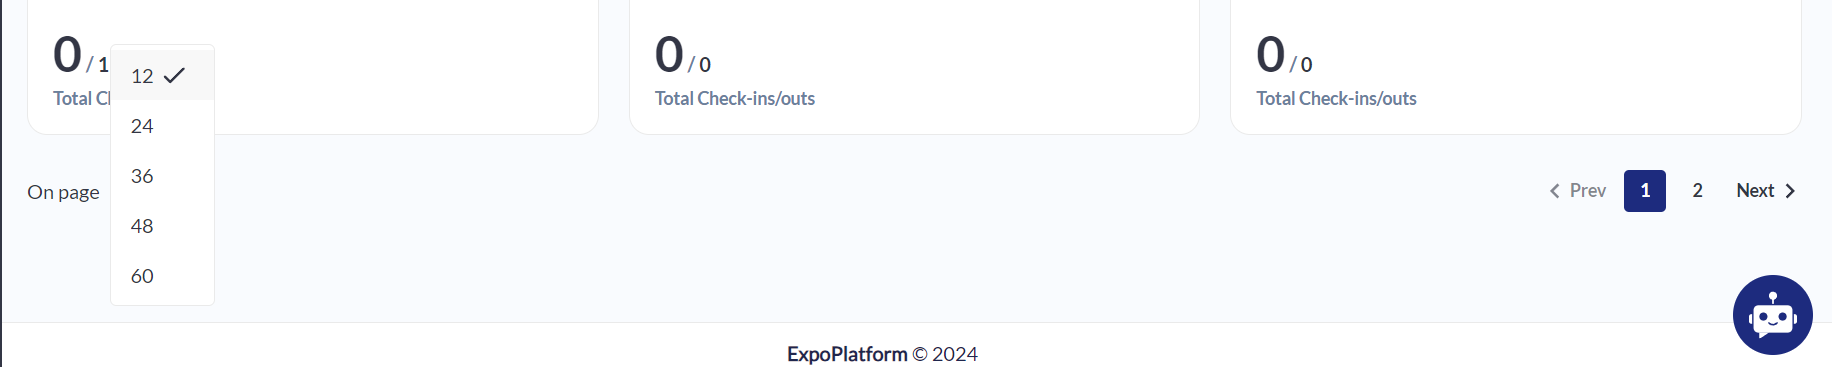
If you have more than 12 check in zones a page selector and a option to select number of results per page will appear on the bottom of the page:
Troubleshooting:
-
If you cannot add a new floor plan zone, check if the floor plan is empty or if the floor plan feature is enabled.
-
If you have trouble finding a zone, try using the search bar
-
If you accidentally delete a zone, you can restore it by contacting the system administrator.
Note: Changes made to check-in zones will be reflected on the floor plan and all related pages.