
Feature Purpose:
This feature allows participants to check in and check out at designated locations, such as halls or stands, which have been marked as "Check-in" zones on the Floor Plan.
Working with this Feature:
Be sure to update the app to the latest version before starting check-in
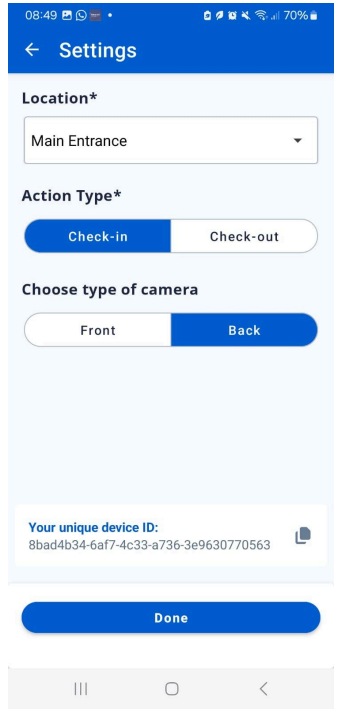
-
Select a location to check in
-
Admin users can choose between Check-in or Check-out mode.
-
The system recognizes participants using the following check-in options:
-
From a name list selection
-
From scanning a badge
-
Facial Recognition
-
-
If the "Scanned List" option is on the bottom is selected, the admin user can view all participants checked in at the current location.
-
If a participant is checked in multiple times at the same location, each check-in will be recorded separately. To check out a participant, the Check-out option must be selected.
-
The scanned list displays all users with relevant status icons, including:
-
Check-in status
-
Check-out status
-
Session check-in details
-
Date and time of the action
-
Troubleshooting:
-
Ensure the location is correctly marked as a "Check-in" zone on the Floor Plan or add it as a custom check in zone on “Onsite → Check In” on backend.
-
If a participant appears multiple times on report, confirm the correct action (Check-in vs. Check-out) is selected.
-
Verify that you have the latest version of check in app