Feature purpose:
The "Agents" feature allows administrators to add and manage agents within the system. Agents act as a primary source to bring buyers to the event, serving as a bridge between the event organizers and potential attendees. This feature is crucial for boosting event attendance by leveraging the networks and reach of these agents.
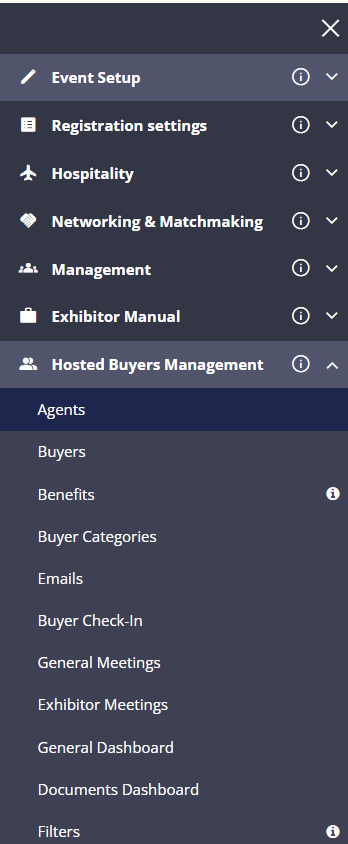
Accessing the Feature:
To access the "Agents" feature:
-
Navigate to the Admin Panel.
-
Go to the Hosted Buyer Management tab.
-
Click on the Agents page.
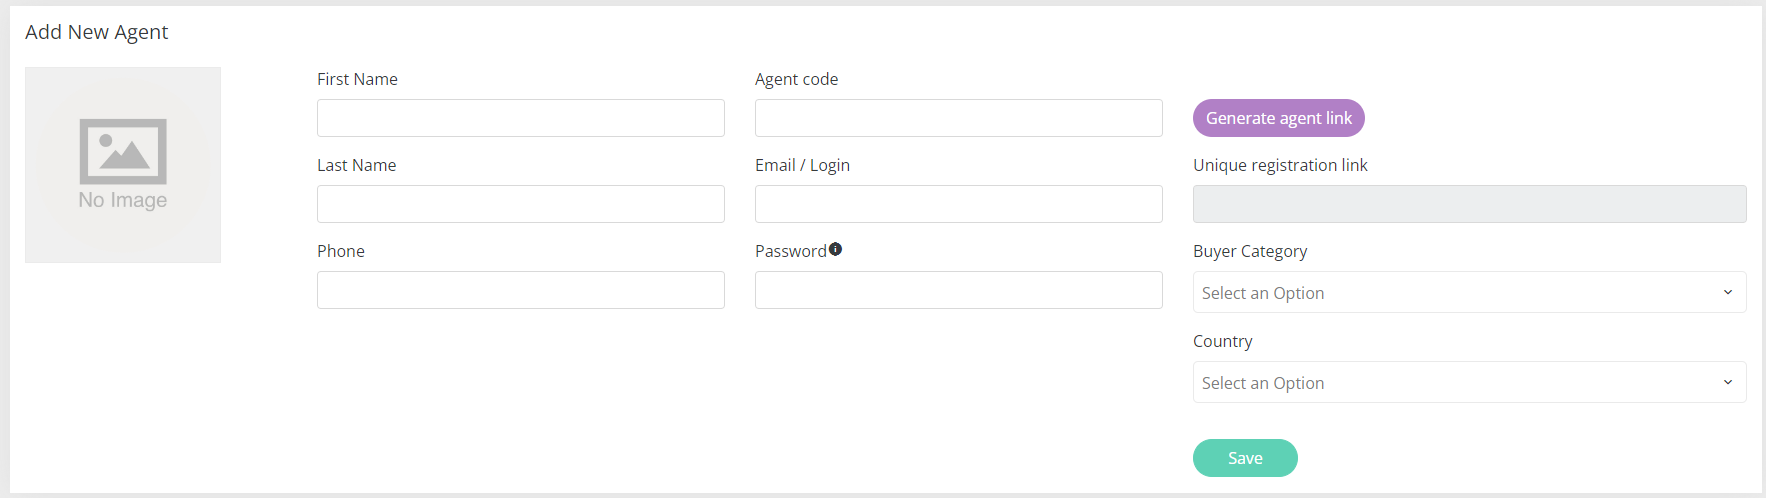
Working with this Feature:
-
Click on the "Add Agent" button located on the Agents page.
-
Fill in the agent's details, including:
-
Name
-
Contact Information (Email, Phone Number)
-
Agent Code
-
Password
-
-
Assign a Buyer type
-
Generate a unique agent link. This is the link that the Agent shares with his buyers, so it is visible in the admin panel which buyer was engaged by which Agent
-
Click Save to add the agent to the system
-
As soon as new Agent is added to the event, he receives an email. The email template can be configured under the Email templates.
Managing existing agents:
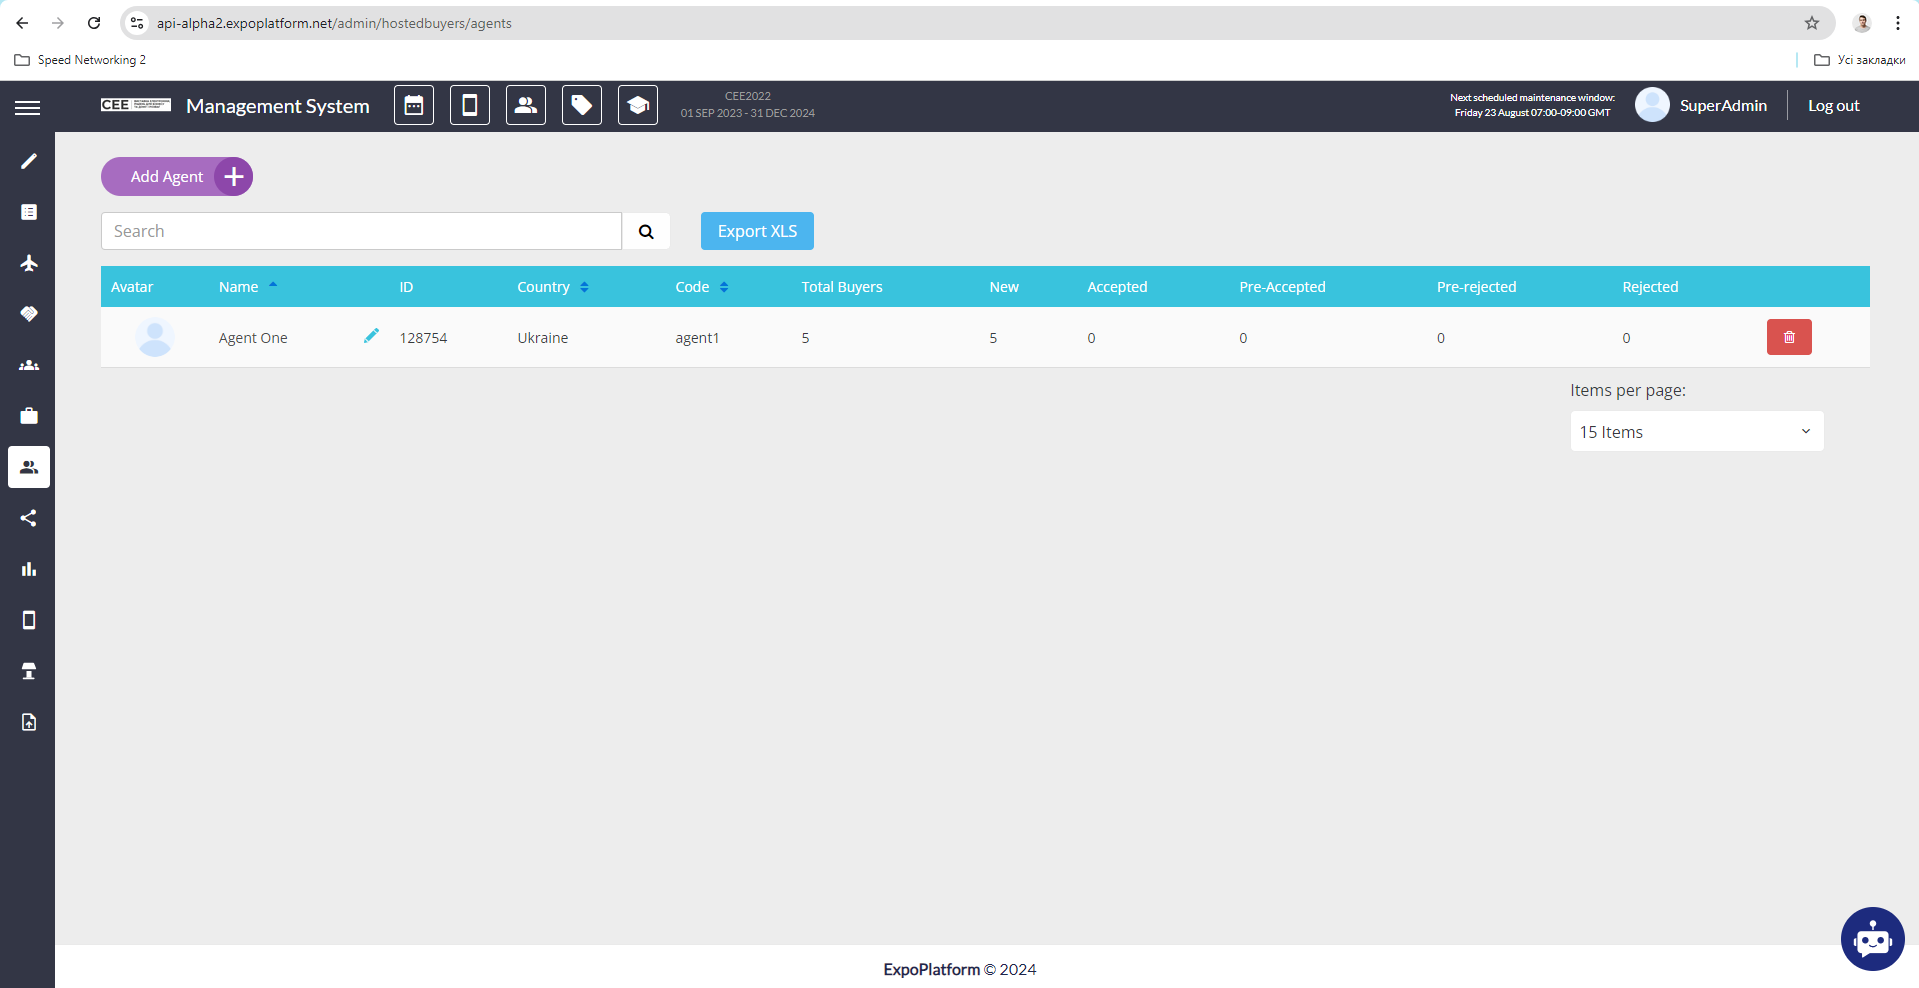
1. Exporting Agents to XLS:
-
To export the list of agents, click the “Export XLS” button on the Agents page.
-
Once the export file is ready, a text link will appear near the button, which contains the date, time, and timezone of the last generated file.
-
Click on this text link to download the file.
Exported File Details:
The exported file will contain the following agent information:
-
ID – Unique agent identifier
-
Email – Agent's email address
-
First Name – Agent's first name
-
Last Name – Agent's last name
-
Country – Country of operation
-
Phone – Agent's contact number
-
Agent Code – Unique agent code
-
Agent Reg Number – Unique number used in the buyer's registration link and agent login URL
-
Creation Date – Date the agent was added
-
Creation Time – Time the agent was added

2. Deleting an Agent:
-
To delete an agent, click the “Delete” button next to the respective agent in the Agents list.
-
A warning pop-up will appear to confirm the action.
-
Note: Deleting an agent does not remove buyers engaged by the deleted agent.
-
3. Editing an Agent:
-
To edit an agent, click the pencil icon next to the agent.
-
A form with pre-filled fields will appear for editing.
-
Fields that cannot be edited include:
-
Email / Login
-
Unique registration link
-
Agent Login URL
-
-
After making the necessary changes, click the “Save” button.
-
Changes may not appear instantly; the user may need to refresh the page.
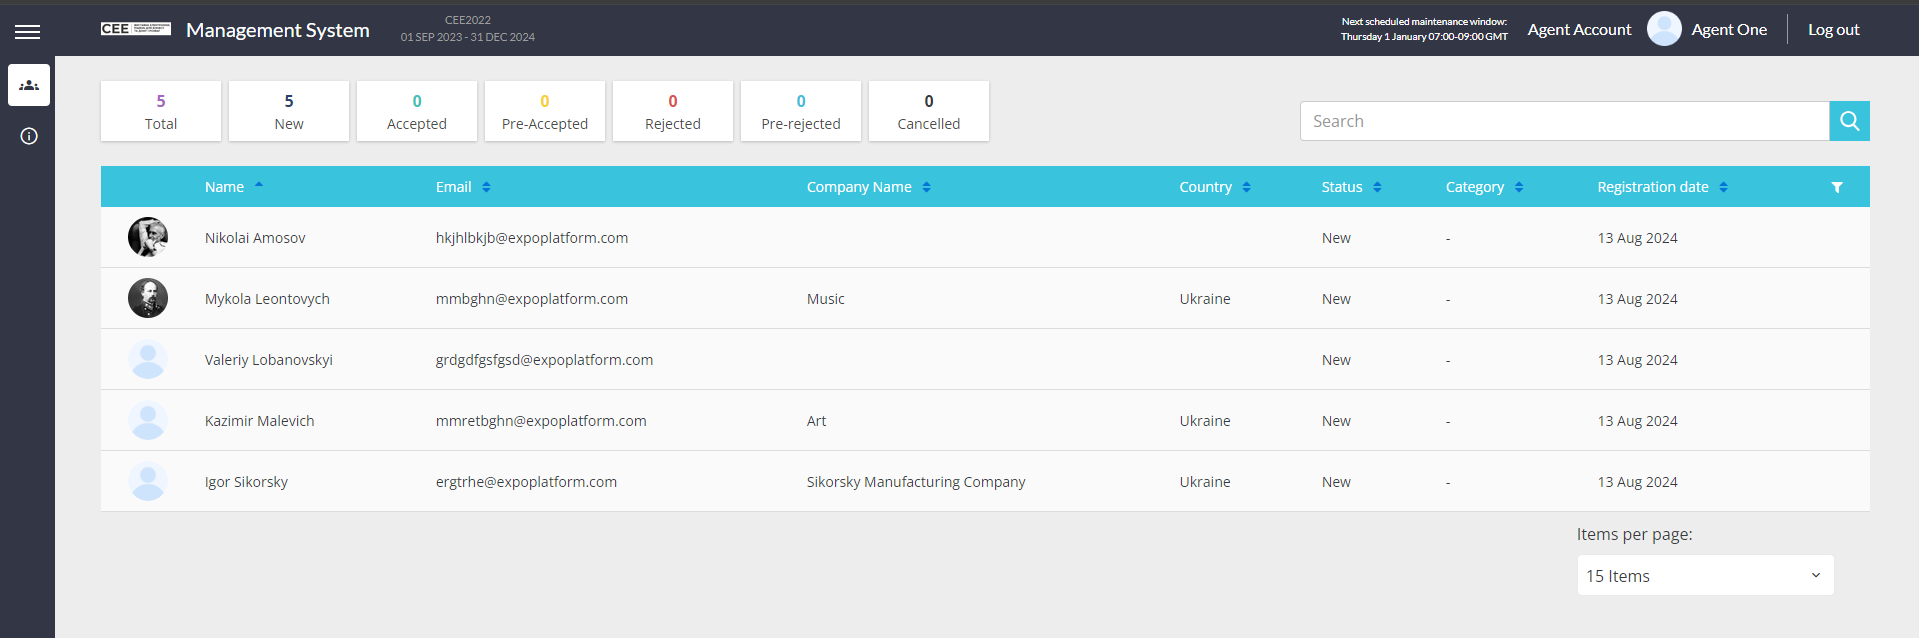
Agent Login URL
-
This is the link for the Agent to access his profile in the EP admin panel.
-
To login, Agent should user Email and Password that were set in the admin panel during Agent creation. Same login info Agent receives in the email as soon as his profile is created.
-
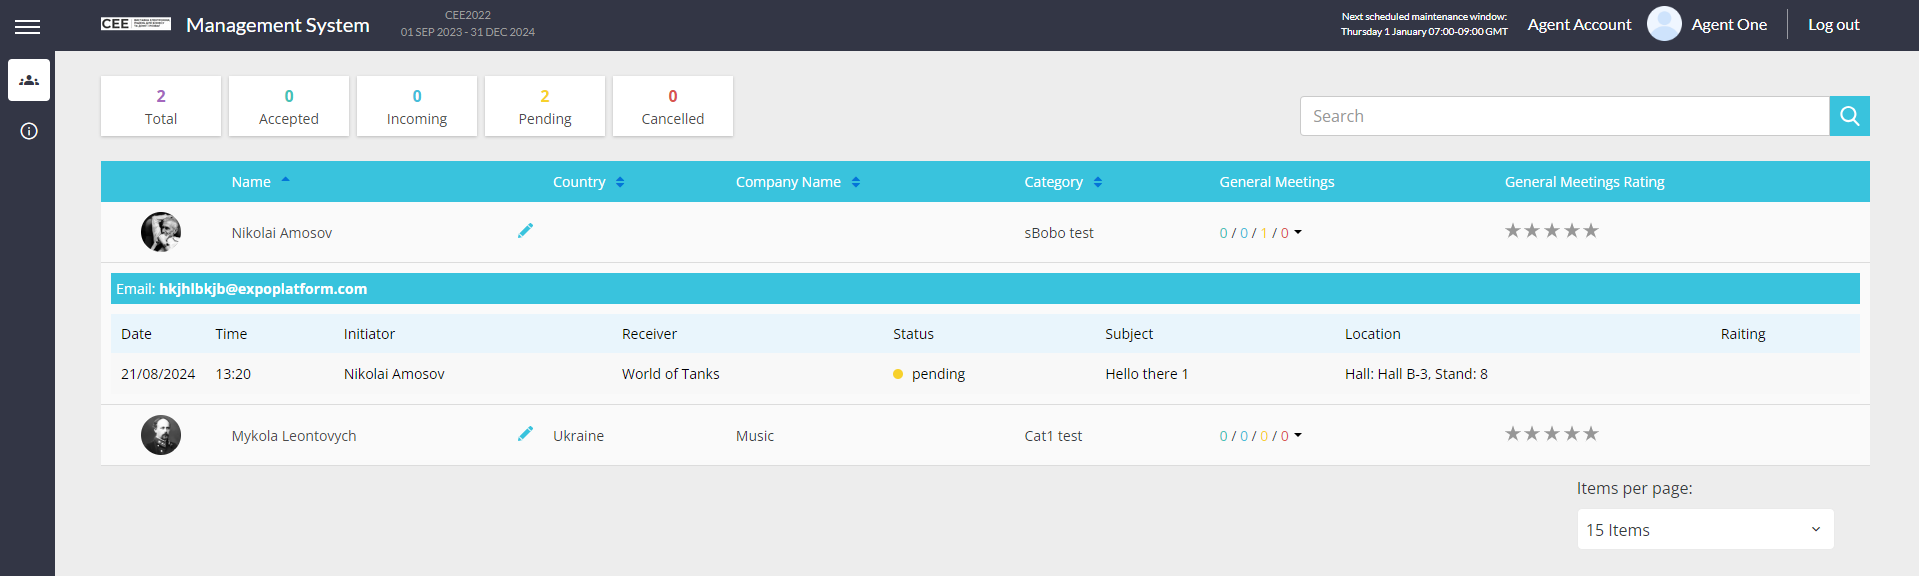
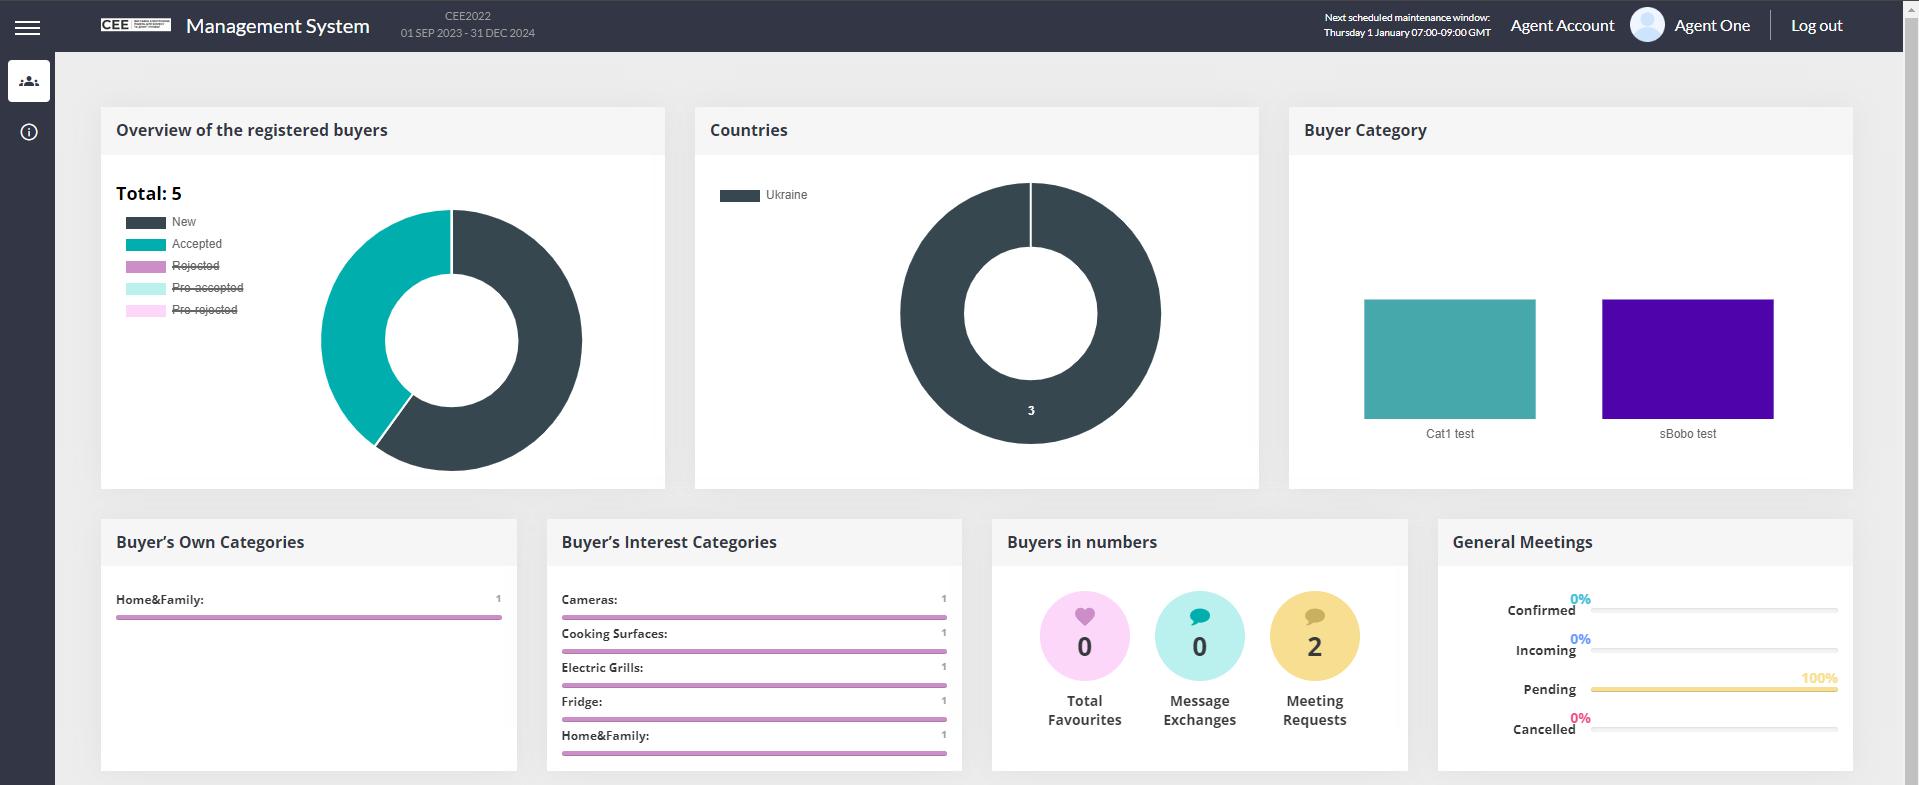
In the personal Agent profile in the EP admin panel, Agent can:
-
See all Buyers he engaged
-
See meetings of his Buyers
-
See Buyers info on the dashboard
-
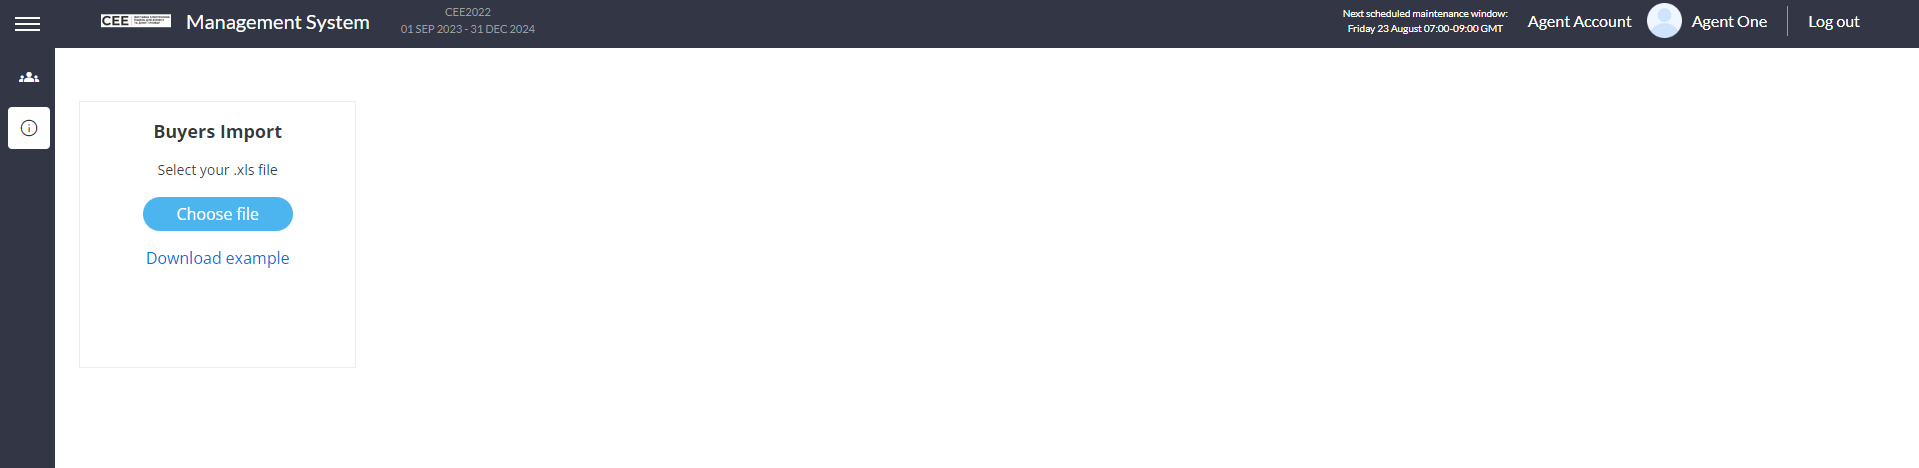
Import buyers from .xls file
-
3. Agent Performance Tracking:
-
Monitor the number of buyers each agent has brought to the event.
-
Access reports and analytics to assess agent performance over different periods.
-
Use performance data to identify top-performing agents and incentivize them appropriately.
Benefits of Using the Agents Feature:
-
Streamlined Management: Easily add, update, or remove agents, and keep track of all active agents in one centralized location.
-
Improved Buyer Acquisition: Leverage the reach of agents to increase buyer attendance at events.
-
Performance Analytics: Gain insights into agent effectiveness to optimize recruitment strategies and reward top performers.